
Bulk write API
What is Lexer’s Bulk Write API?
The Bulk Write API allows you to upload large quantities of data into the hub yourself. There is some work required from Lexer to get you set up, but the overall process is much quicker than any other method available.
Using the Bulk Write API requires some technical expertise so if you don't feel confident using these methods, please reach out to Success and discuss some alternatives. If you feel up to the task then let's dive in!
Some examples of use cases that are a perfect fit for the Bulk Write API:
- You might have just started your Lexer journey and want to onboard all of your data. You’re happy to use our public schema to format your data as part of the initial setup.
- You’re an existing Lexer user and want to add a new data source that matches our public schema.
- You want to create a custom attribute from a CSV upload.
This article covers the process of our Bulk Write API in comprehensive detail. The following sections are covered:
- Get your data ready for upload
- NDJSON formatting
- File zipping - Upload your data into the Hub
- Check your data integrity with Logs
- Delete, clear or load your records
Upload your data into the Hub
The following process outlines how you can use the Bulk Write API to upload your data into the Hub.
1. Create a new dataset
To learn more about Datasets, read the article on Learn here. You may not have the re-quired permissions to access datasets, if you don’t, please reach out to your Success Manager.
The first step of the process is to set up a new dataset that you can load your data into.
To do this:
a) Navigate to Manage > Datasets.
b) Click on New Dataset.

c) Fill in the Name, Description and Dataset Type (select API_ENABLED).
d) Click Save Dataset.

e) Now that you have created the dataset, open it up by clicking View.

f) Record the Dataset ID, you will need to use this when making the API call to create your upload.

2. Format your data to fit the relevant Lexer Schema
There are a few things you need to know about your data before you jump into conversion. The most important being the type of data you want to upload. To identify the correct record type, have a look through the following list, if you need more detail about any of the record types, click the link to take you to the schema.
Choose the correct schema based on the data you would like to upload. Please reach out to your Success manager if you are having any trouble with this process, we are happy to help. Once chosen, convert your data into the appropriate format using the instructions. The schema details depend on the data you want to upload. Choose between the following: [.code]commerce_api[.code], [.code]marketing_api[.code], or [.code]customer_api[.code].
For a detailed description of all of our schemas, read through our documentation here, or find them in our Github repository here. You can clone the repository and install the required dependencies if you want to utilise local validation and have the ability. You don’t need a clone of the repository but it can be helpful.
3. Upload the file to your dataset
You’ve created a dataset, formatted your data and converted it to an NDJSON file. You’re nearly there! Next up, upload your data to the dataset.
Before you are able to do this, you'll need an “Activity” API token. Our Authentication and API token creation article runs through the steps to create one.
To send your data, you will need to use our [.code]file_upload_api[.code]. We have a number of resources that can help you through the process of using our File Upload API.
- For a comprehensive overview of the process, the File Upload API article on Learn.
- For a granular overview of the API, the record types and sample payloads check out the API reference page.
- The Github repository has a great example script that validates your data prior to upload.
4. Check on the import using Logs and Datasets
Let’s start by checking that the job has successfully started in Logs. If you want to learn more about Logs, check out our Learn article here.
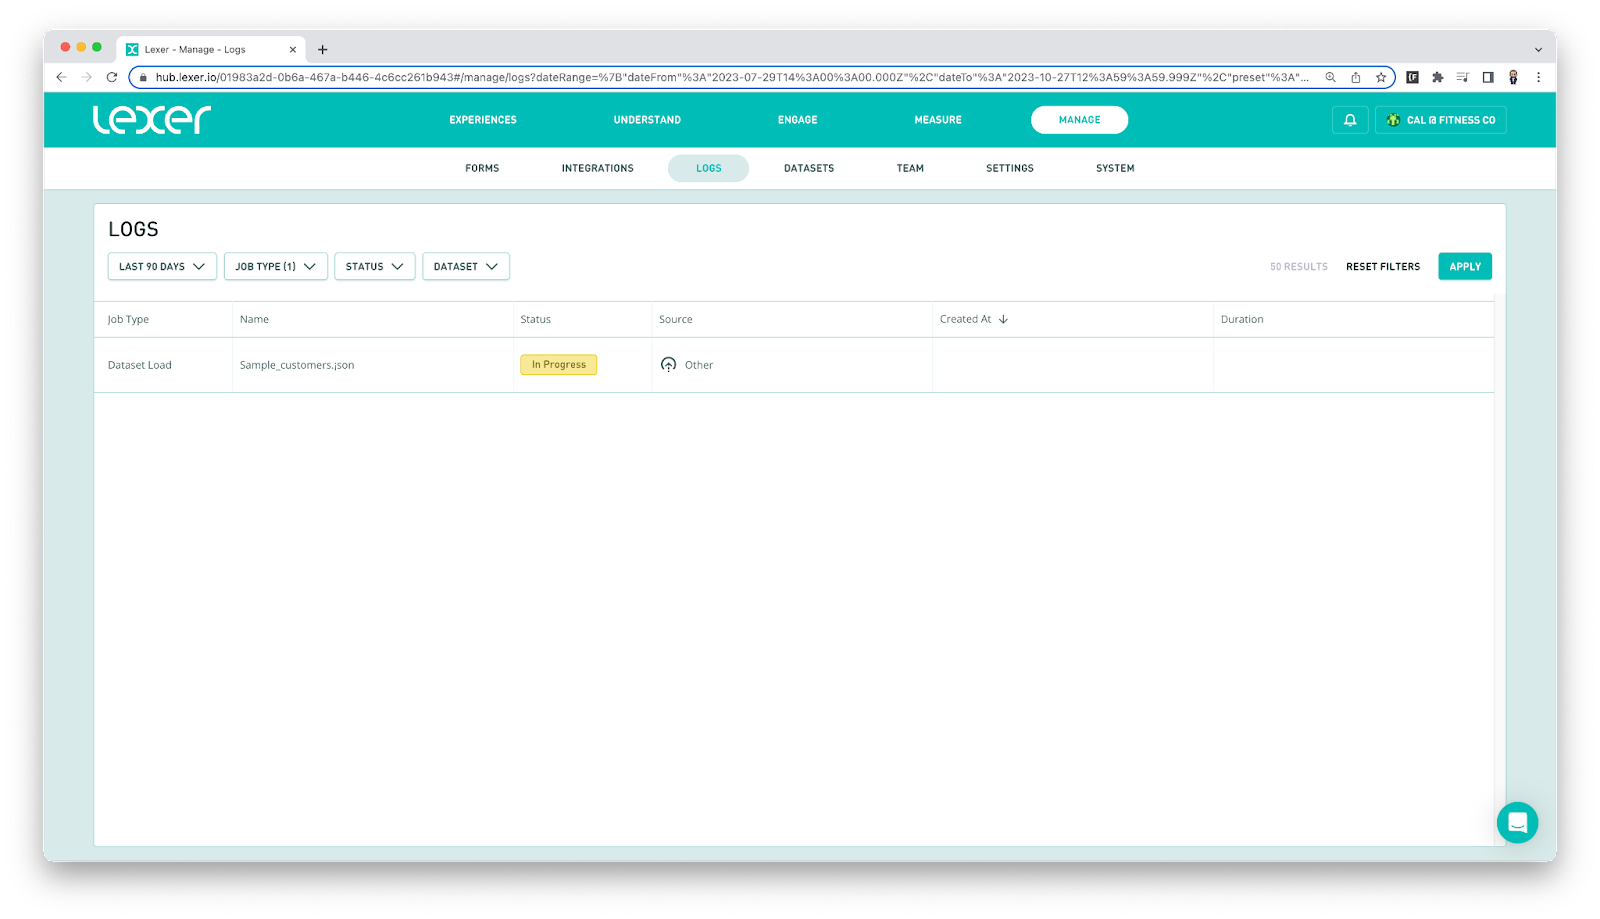
a) Navigate to Manage > Logs.
b) Check to see if your File Upload job has started. To find your job, click on the Job Type dropdown filter, select File Upload then click Apply on the right side of the page. Your File Upload job should be near the top of the list. If you can find your job, it will have an In Progress pill shown under the status column.

Now that we have confirmed the job has started we can monitor its progress. Once this job has finished it will trigger the creation of a Dataset Load job.
In Logs, click on Reset Filters. You can then select Dataset Load under the Job Type filter.
Once the Dataset Load job has started and is showing an “In Progress” status, you know the destination was correct and your data has begun uploading to datasets. Congratulations, you’re nearly there!
At this stage you will need to wait until the Dataset Load job has been completed.
5. Check your data integrity with Logs
The next step is some basic quality assurance. To verify the successful upload of your data, ensure that the expected volume of data has been correctly uploaded.
To do this, open up the Dataset Load job by clicking on the job. This will open the Log View which provides some detail about the job. At the bottom of this tab you will see the Stats table. Compare these record counts to the number of records you intended to upload.
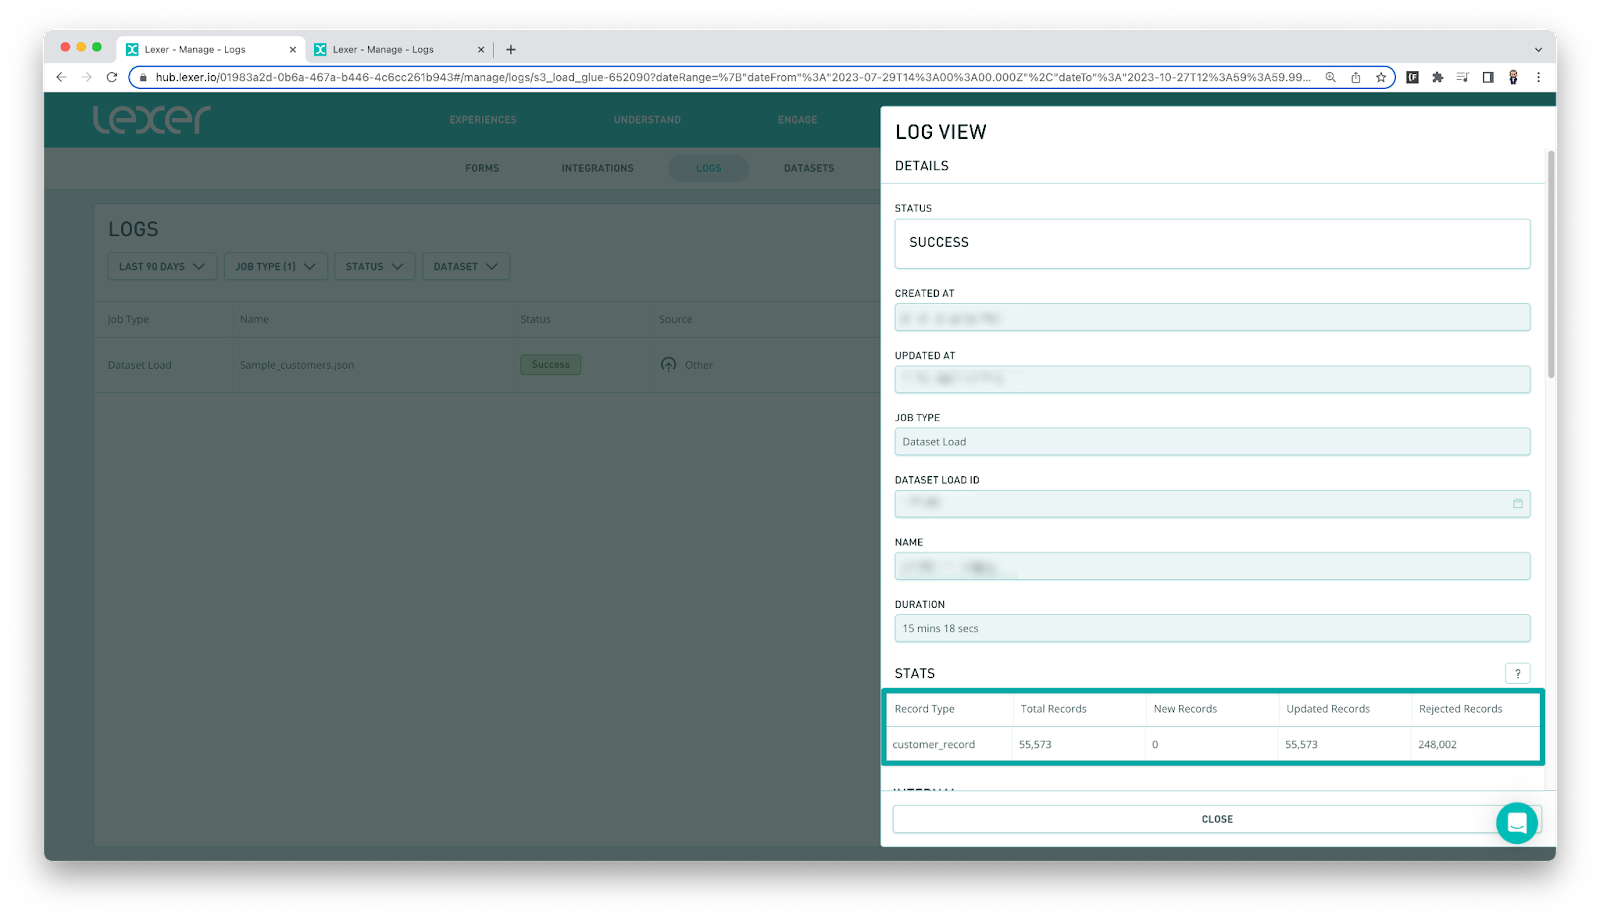
In this stats section pay particular attention to the Rejected records column. These will identify any potential problem areas that need to be addressed.
Clear your records
We all make mistakes, if you have uploaded the wrong data you can remove it in Datasets. If you want more detail about datasets, check out our Learn article here.
For a brief rundown of clearing your records follow these steps:
a) Navigate to Manage > Datasets.
b) Click on the target dataset.
c) Click on the View button.
d) Click on the Jobs tab.
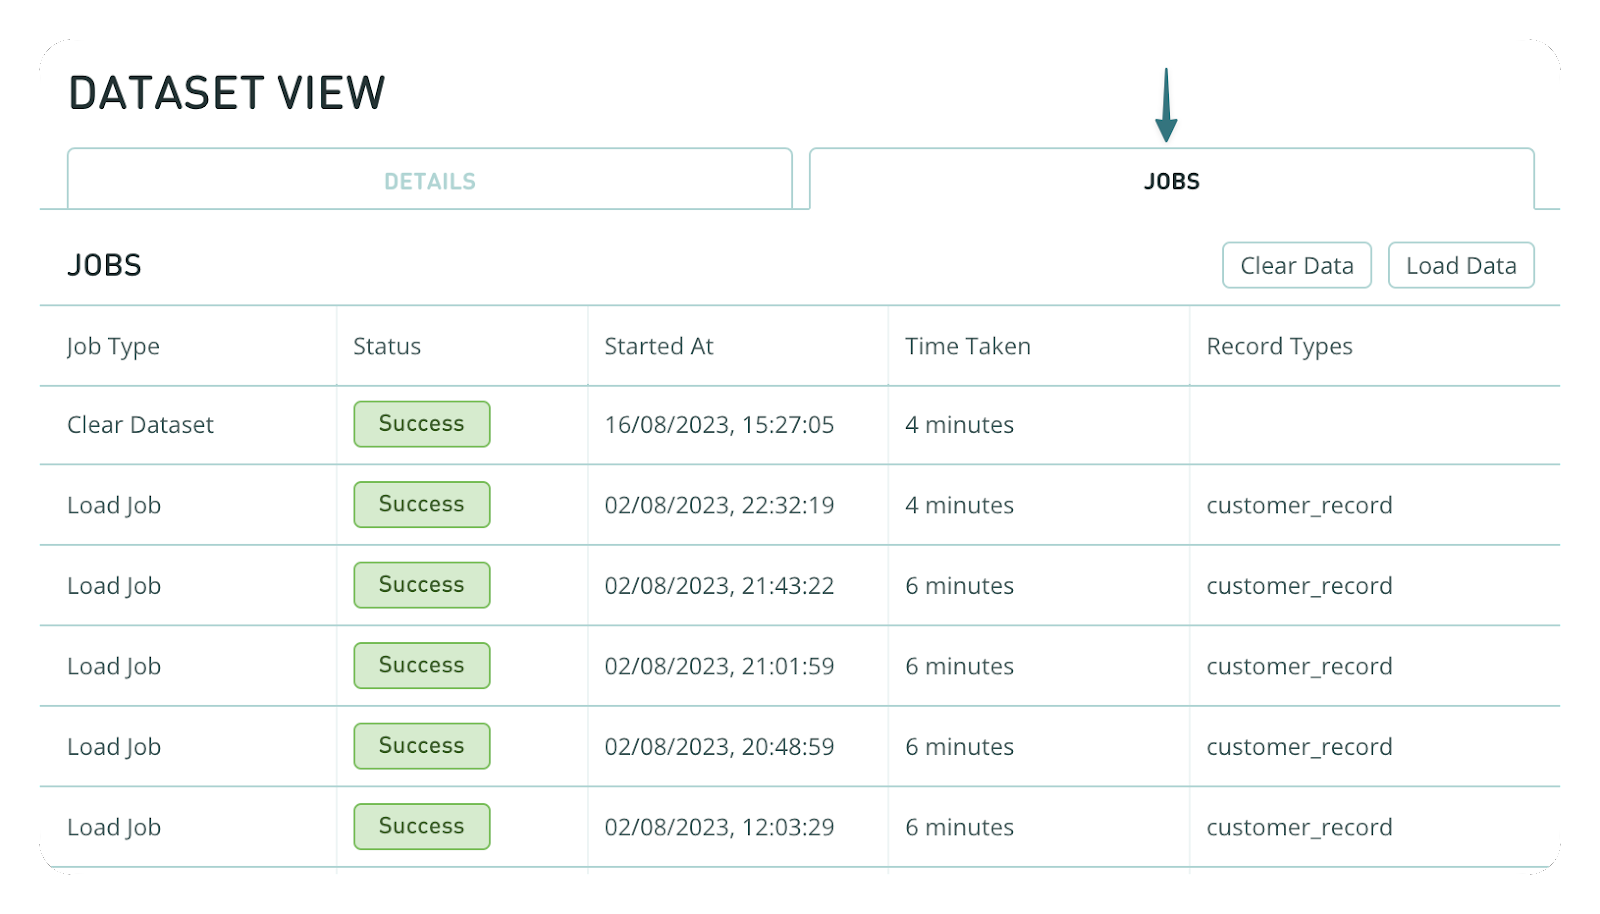
You will be able to see two buttons in the top right of the Jobs tab, Clear Data and Load Data.
- Clear Data: Starts a job that will remove data from the dataset, the dataset itself won't be deleted. This may take up an hour and can't be undone.
Where to from here?
Bulk data uploads could be the perfect solution to help you upload large volumes of data with a bit of autonomy and some validation along the way. If you are unsure about the best option, make sure you have a chat with your Success Manager so they can help you find the best solution for your business. This process helps you get the most out of your data as quickly as possible. Good luck and don’t hesitate to reach out for help if you have any questions.
