Maximizing customer communications in Respond
What is Respond?
Lexer's Respond tool collates and unifies all your customer communications in one place. Respond allows you to "respond" to customer inquiries that come in through your social channels all in one place - like a unified inbox. Within Respond you can prioritize, classify, and respond to customers at speed using custom queues, filters, approval workflows, and branded forms. In this article, we’ll explain the Profile, Context, History, and Template tabs and how these can help you improve the effectiveness of Respond.
To learn more about Respond feel free to read our Guide to respond.
How can these tools help me get the most out of Respond?
Handling customer queries is a rewarding and important job that when done right can have a positive impact on your brand. Fundamentally, the goal is to respond quickly and personalize these responses where practical. If you are able to personalize your responses to customers they are more likely to respond, engage with the brand, and spend more money going forward.
The following tools allow you to implement these strategies without having to leave Respond, making it a huge time saver!
Finding the information to effectively personalize responses can be particularly difficult when under time constraints. The Context, Profile, History and Templates tabs make this a whole lot quicker and easier.
Context focuses on the conversation. It will allow you to see all interactions in this conversation. This could include comments from other people in the thread. It is particularly useful for public posts, for example, looking at and replying to Facebook comments on a post.
Profile provides all sorts of specific details about the customer. Once open, click on the attributes tab, you should find some helpful info about the customer. You can then use this information to further personalize your response.
History focuses on the single customer profile. It outlines your back and forth with that profile, including notes or actions you have taken and any closed messages.
Templates are a great way to speed up replies to common queries with well-crafted responses written by your team. If you’re managing a team, using saved replies in Lexer will give you a consistent, on-brand message.
Let's have a look at some examples of these tools and how they can be used to help you get the most out of Respond.
Where do I start?
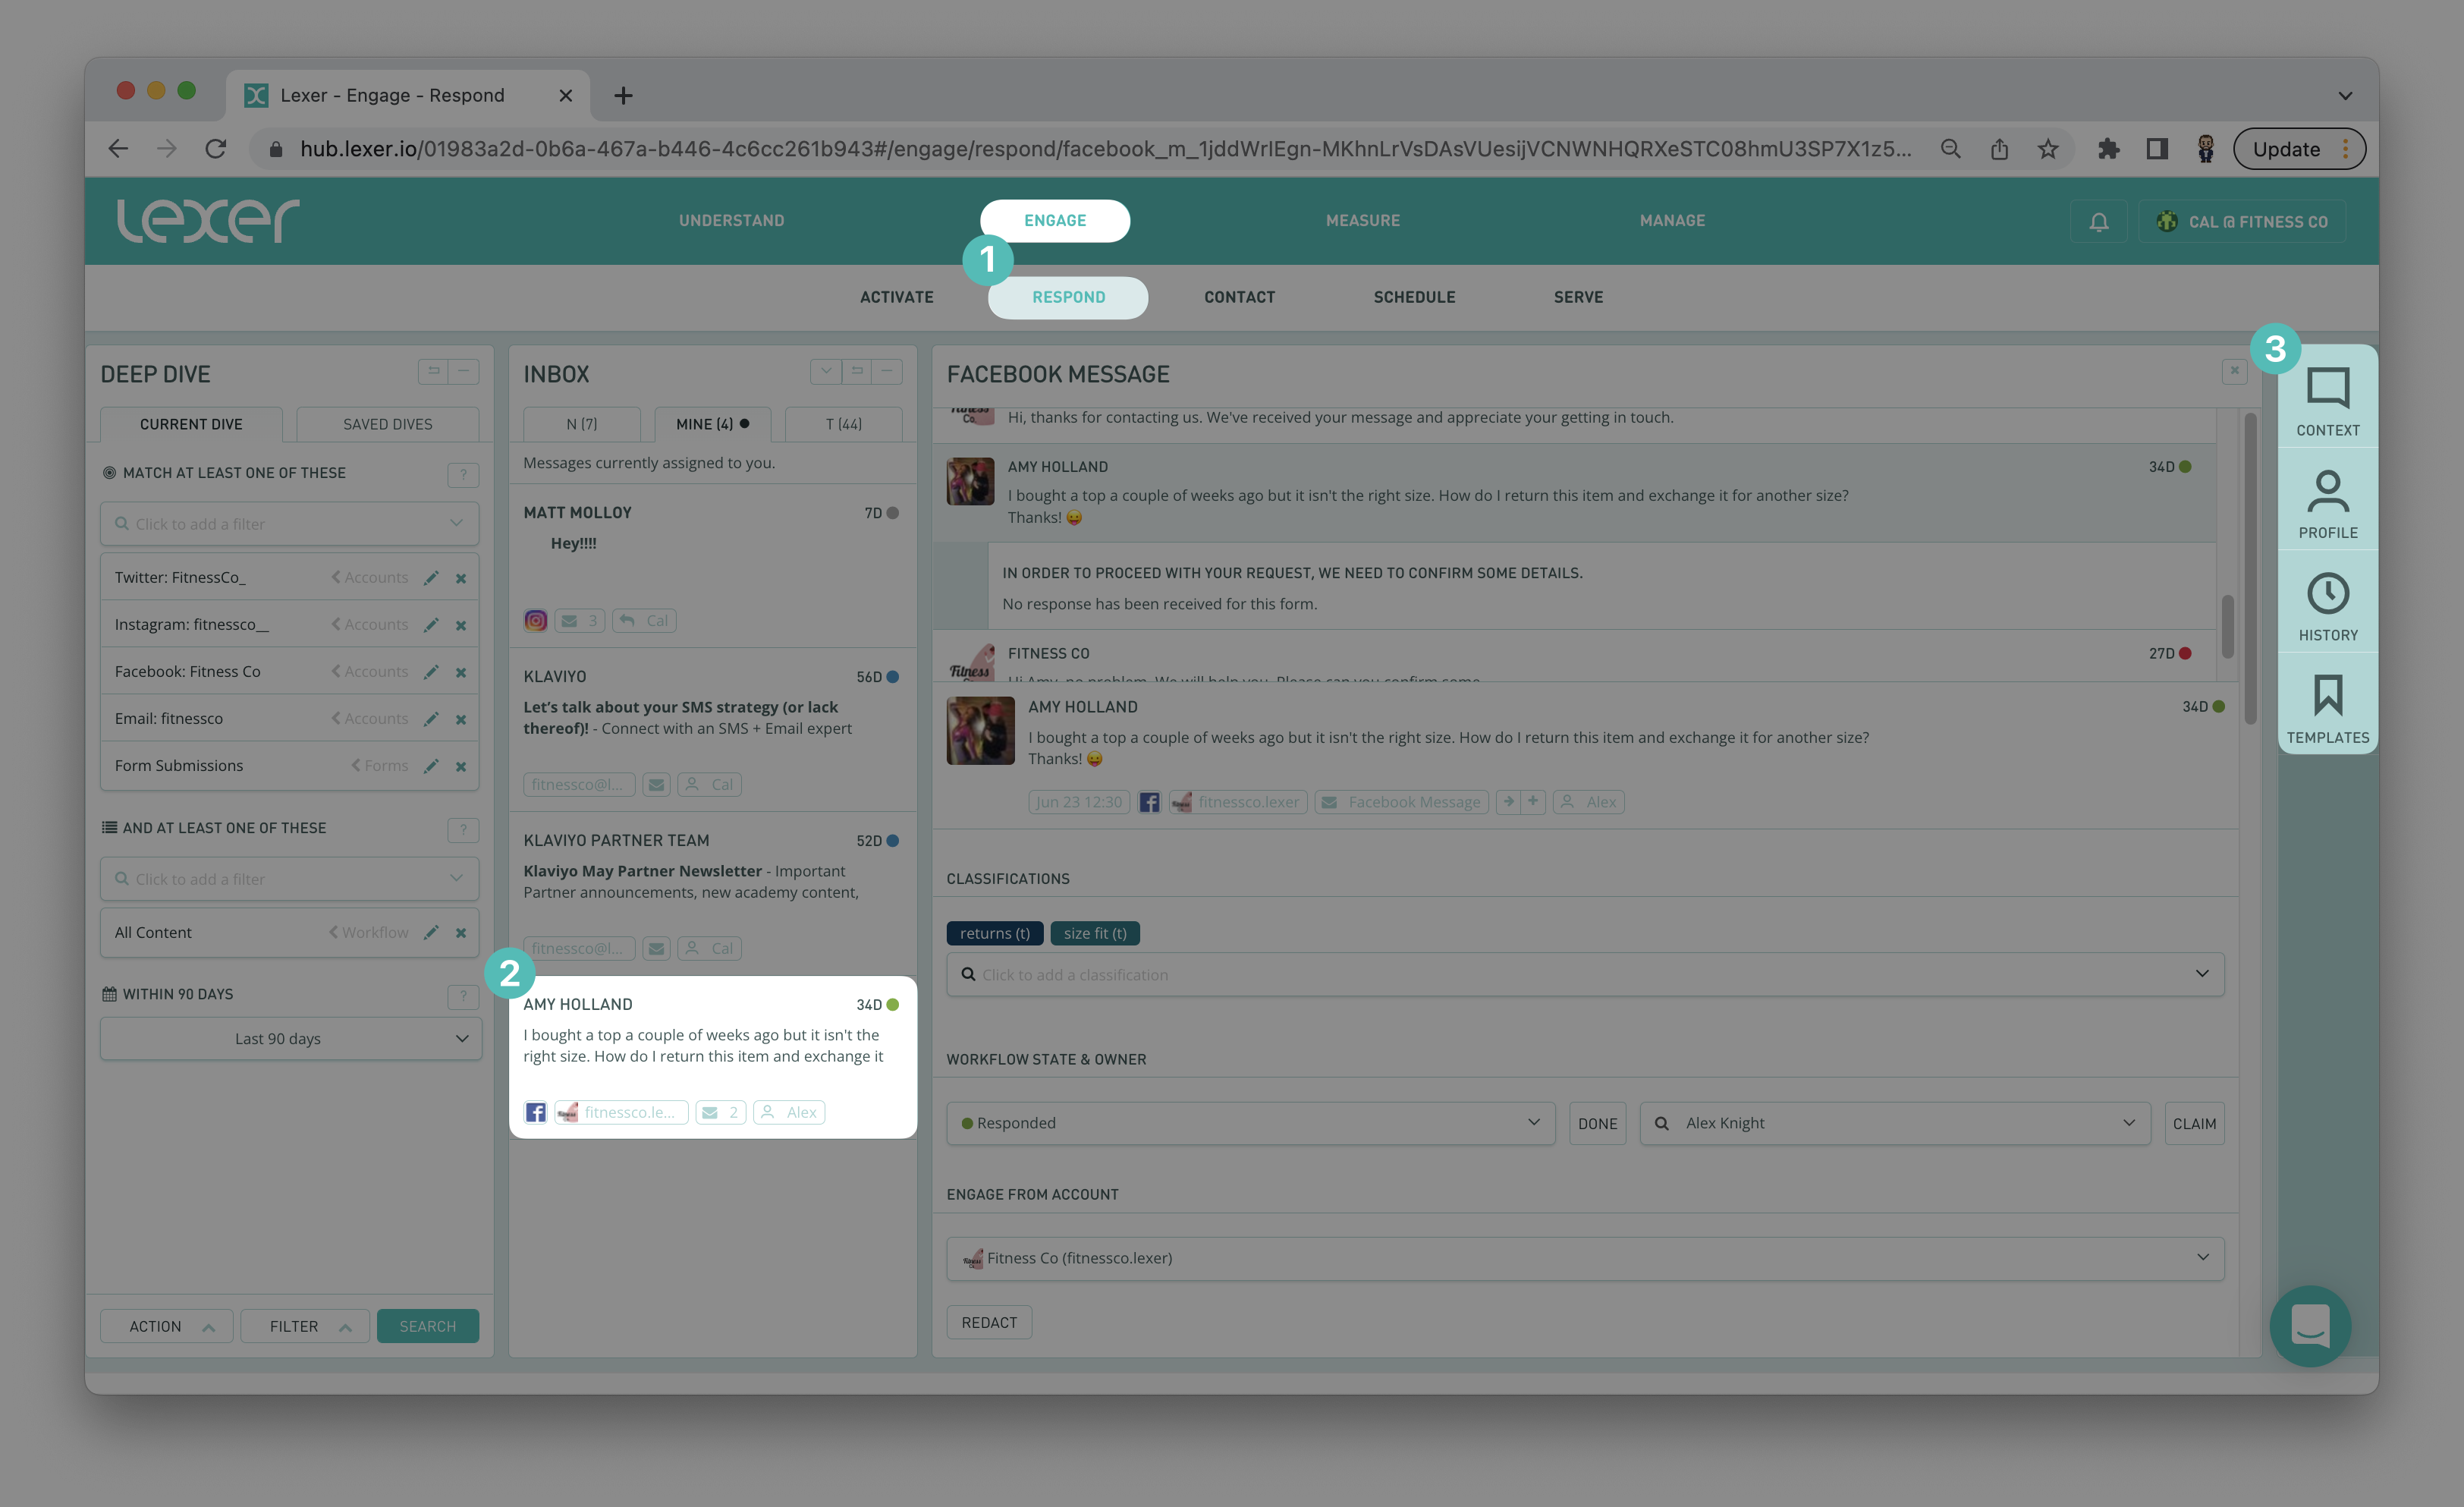
In this article, we’ll be showing you how to leverage four tools within Respond: Context, Profile, History, and Template. So first, let’s start by walking through where to find them in the hub.
- Navigate to Engage > Respond in the top navigation bar of the Hub.
- Open up a Message from your Inbox.
- On the right side of the page you will see four tools: Context, Profile, History and Template.
Using Context
Responding to a customer involves more than just writing a message. First you need to understand their query, the context of the conversation, who the customer is in relation to your brand, and any previous engagements made.
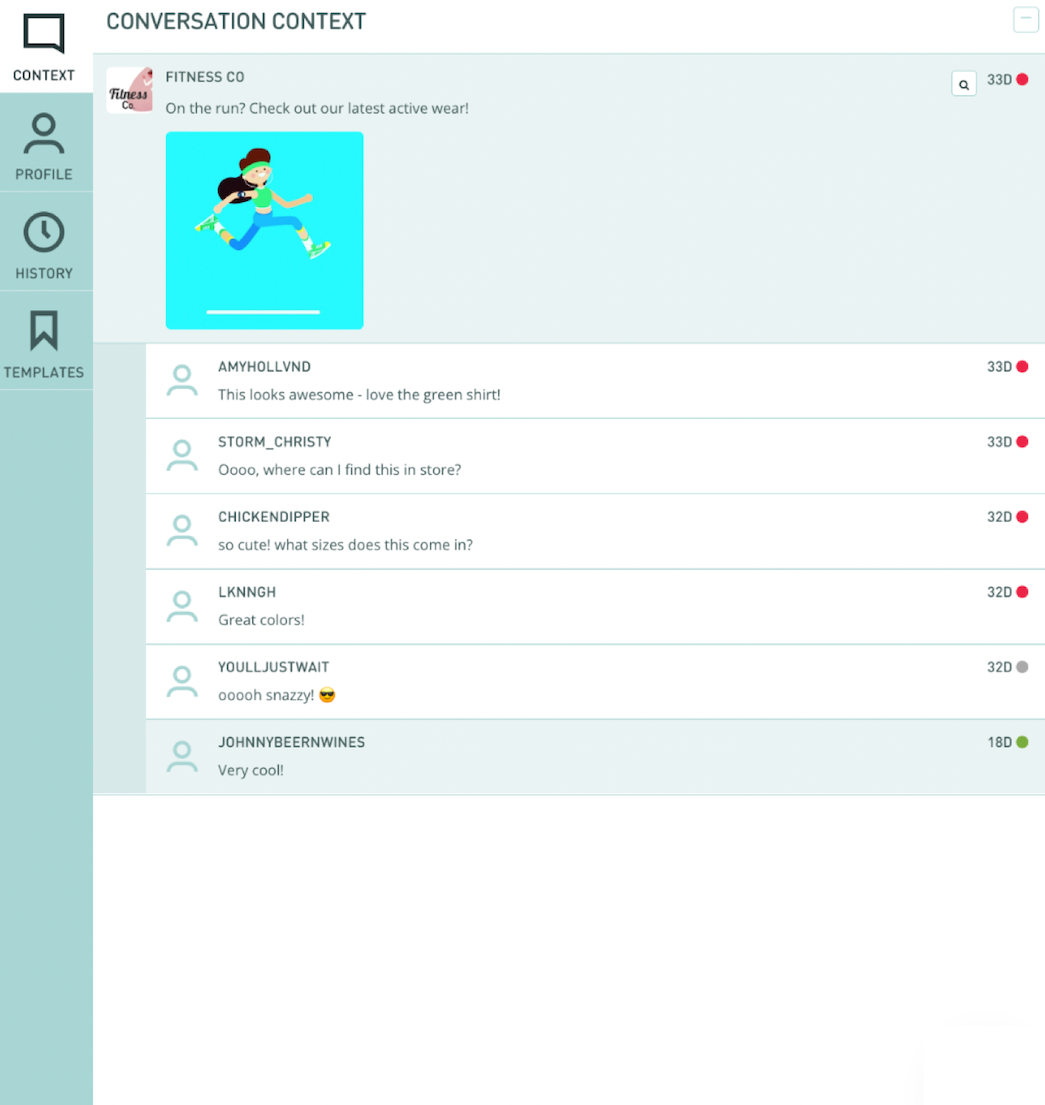
The above example shows a comment on an Instagram post. Here we can see the context tool in action. This shows the post itself and any comments from other profiles that have engaged with the Instagram post. From here you may be able to better understand the context of some people’s comments on the post, and respond appropriately without having to log into the platform itself, saving you valuable time.
Using Profile
The profile tab provides you with an overview of the information about a customer available in the hub. It can include a number of helpful pieces of information that you can use to personalize your responses. There are three areas of a profile. Summary provides a list of the segments the profile is a part of and actions that you can take for the profile. Attributes provides an expanded list of every attribute assigned to the profile. And lastly, the History tab which will work in the same way as the history section to follow.
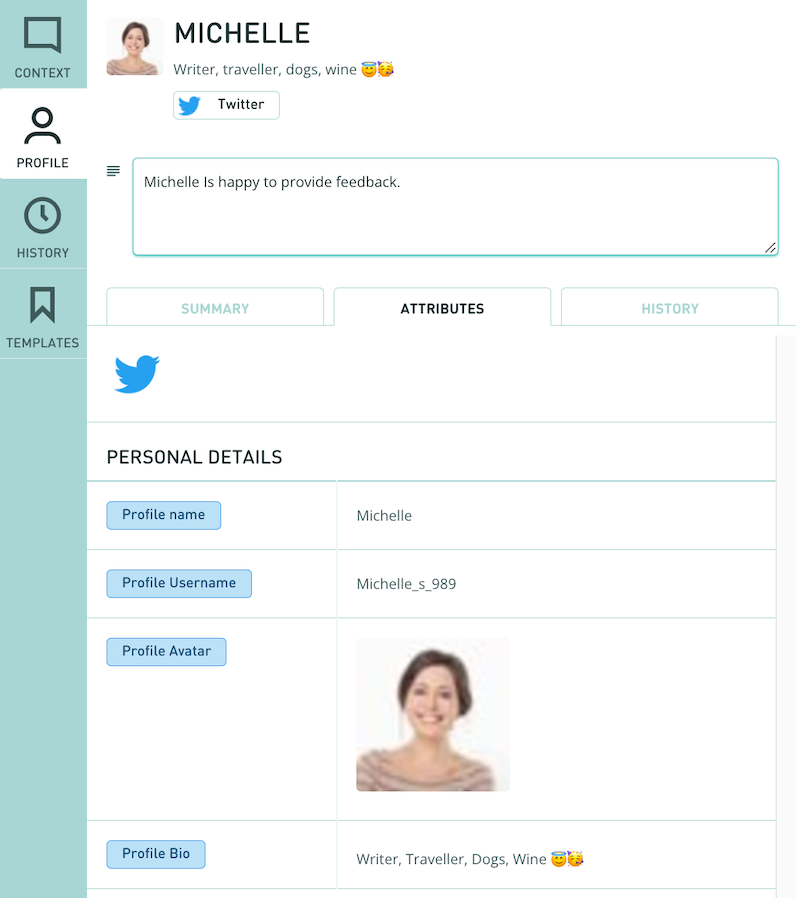
The above example shows Michelle’s profile, specifically looking at the attributes tab. Beneath Michelle’s name you can see her personal bio which indicates some things Michelle is fond of. Below this, in the text box, is a note written by someone else on the team who has interacted with Michelle, “Michelle is happy to provide feedback”. Under personal details you can see her name, username, profile picture, and profile bio. The profiles in your hub will likely be far more detailed, this is just an example from our demo hub.
Using History
The History tab shows you a timeline of a customer’s interactions with all of your integrated accounts. The timeline provides products purchased, email engagements with your customers, images of the products, and engagement from various social channels all in one place. It can be used to understand previous conversations with your brand, including your closed messages. You can do this by selecting any of the messages in the engagement history.
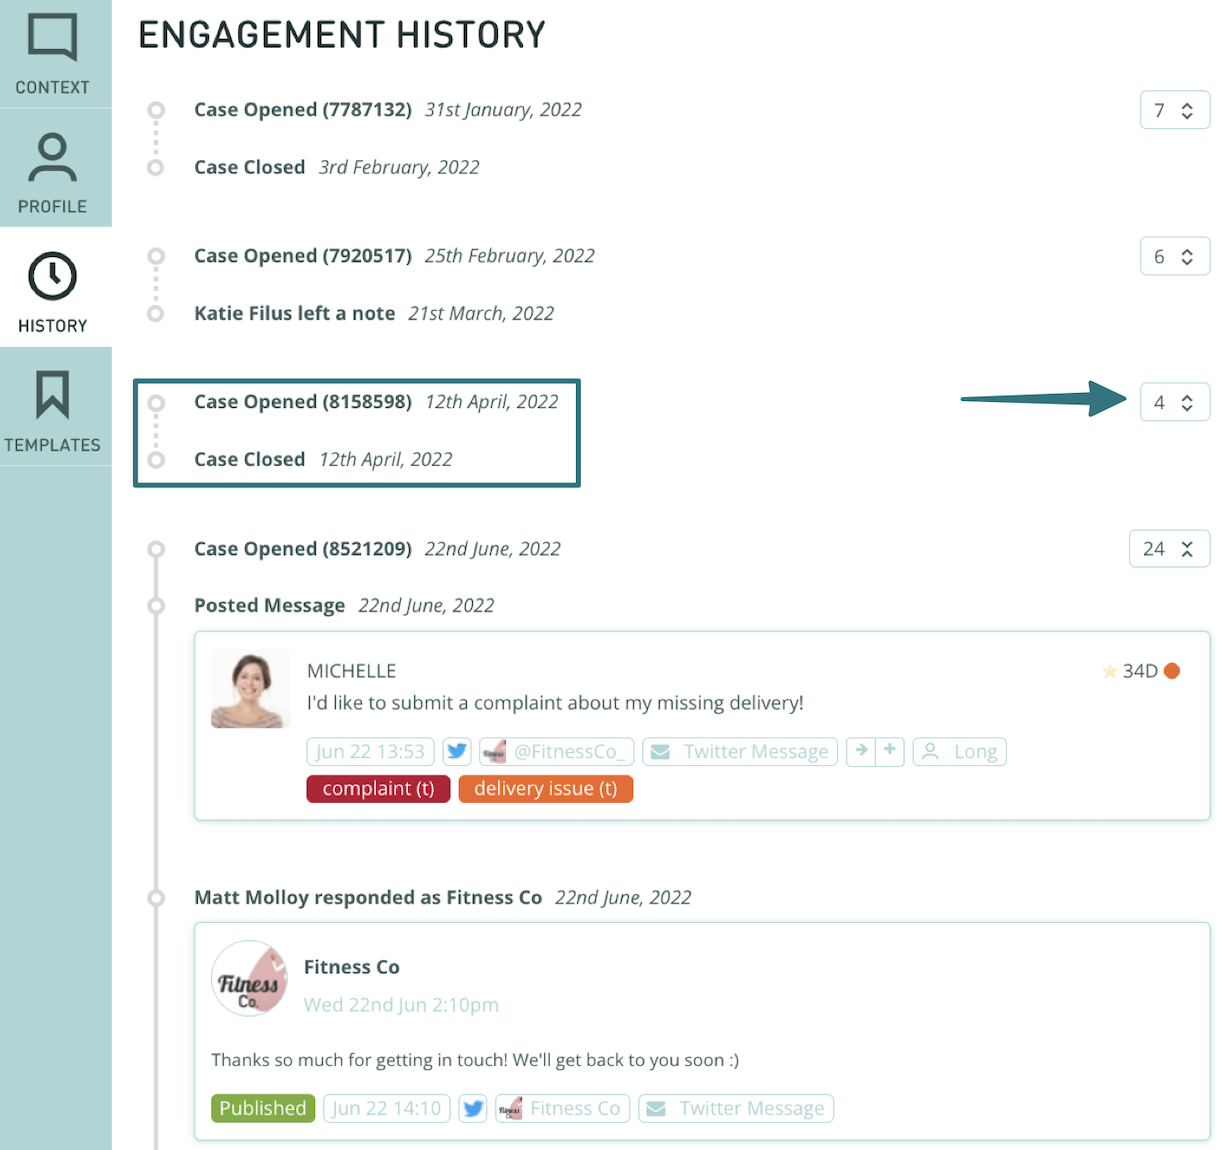
In the above example we can see an open case at the bottom of the History tab on the right, Michelle has queried her missing delivery and Fitness Co has responded to her complaint. This is helpful to figure out actions that have been taken for the current query and what is left outstanding in the case. Above this you can see the closed cases that this profile has been involved with, a case number, and the open and closed dates for the case. On the right you can see a small box with a number in it. This is the number of messages within the previous closed case. You can click on this number and look over the closed case.
Using Template
Templates are a fantastic way to reduce double handling and the frustration of constantly answering the same questions, while at the same time improving the responses! The team can collectively work on improving these templates over time or you can use your own templates.
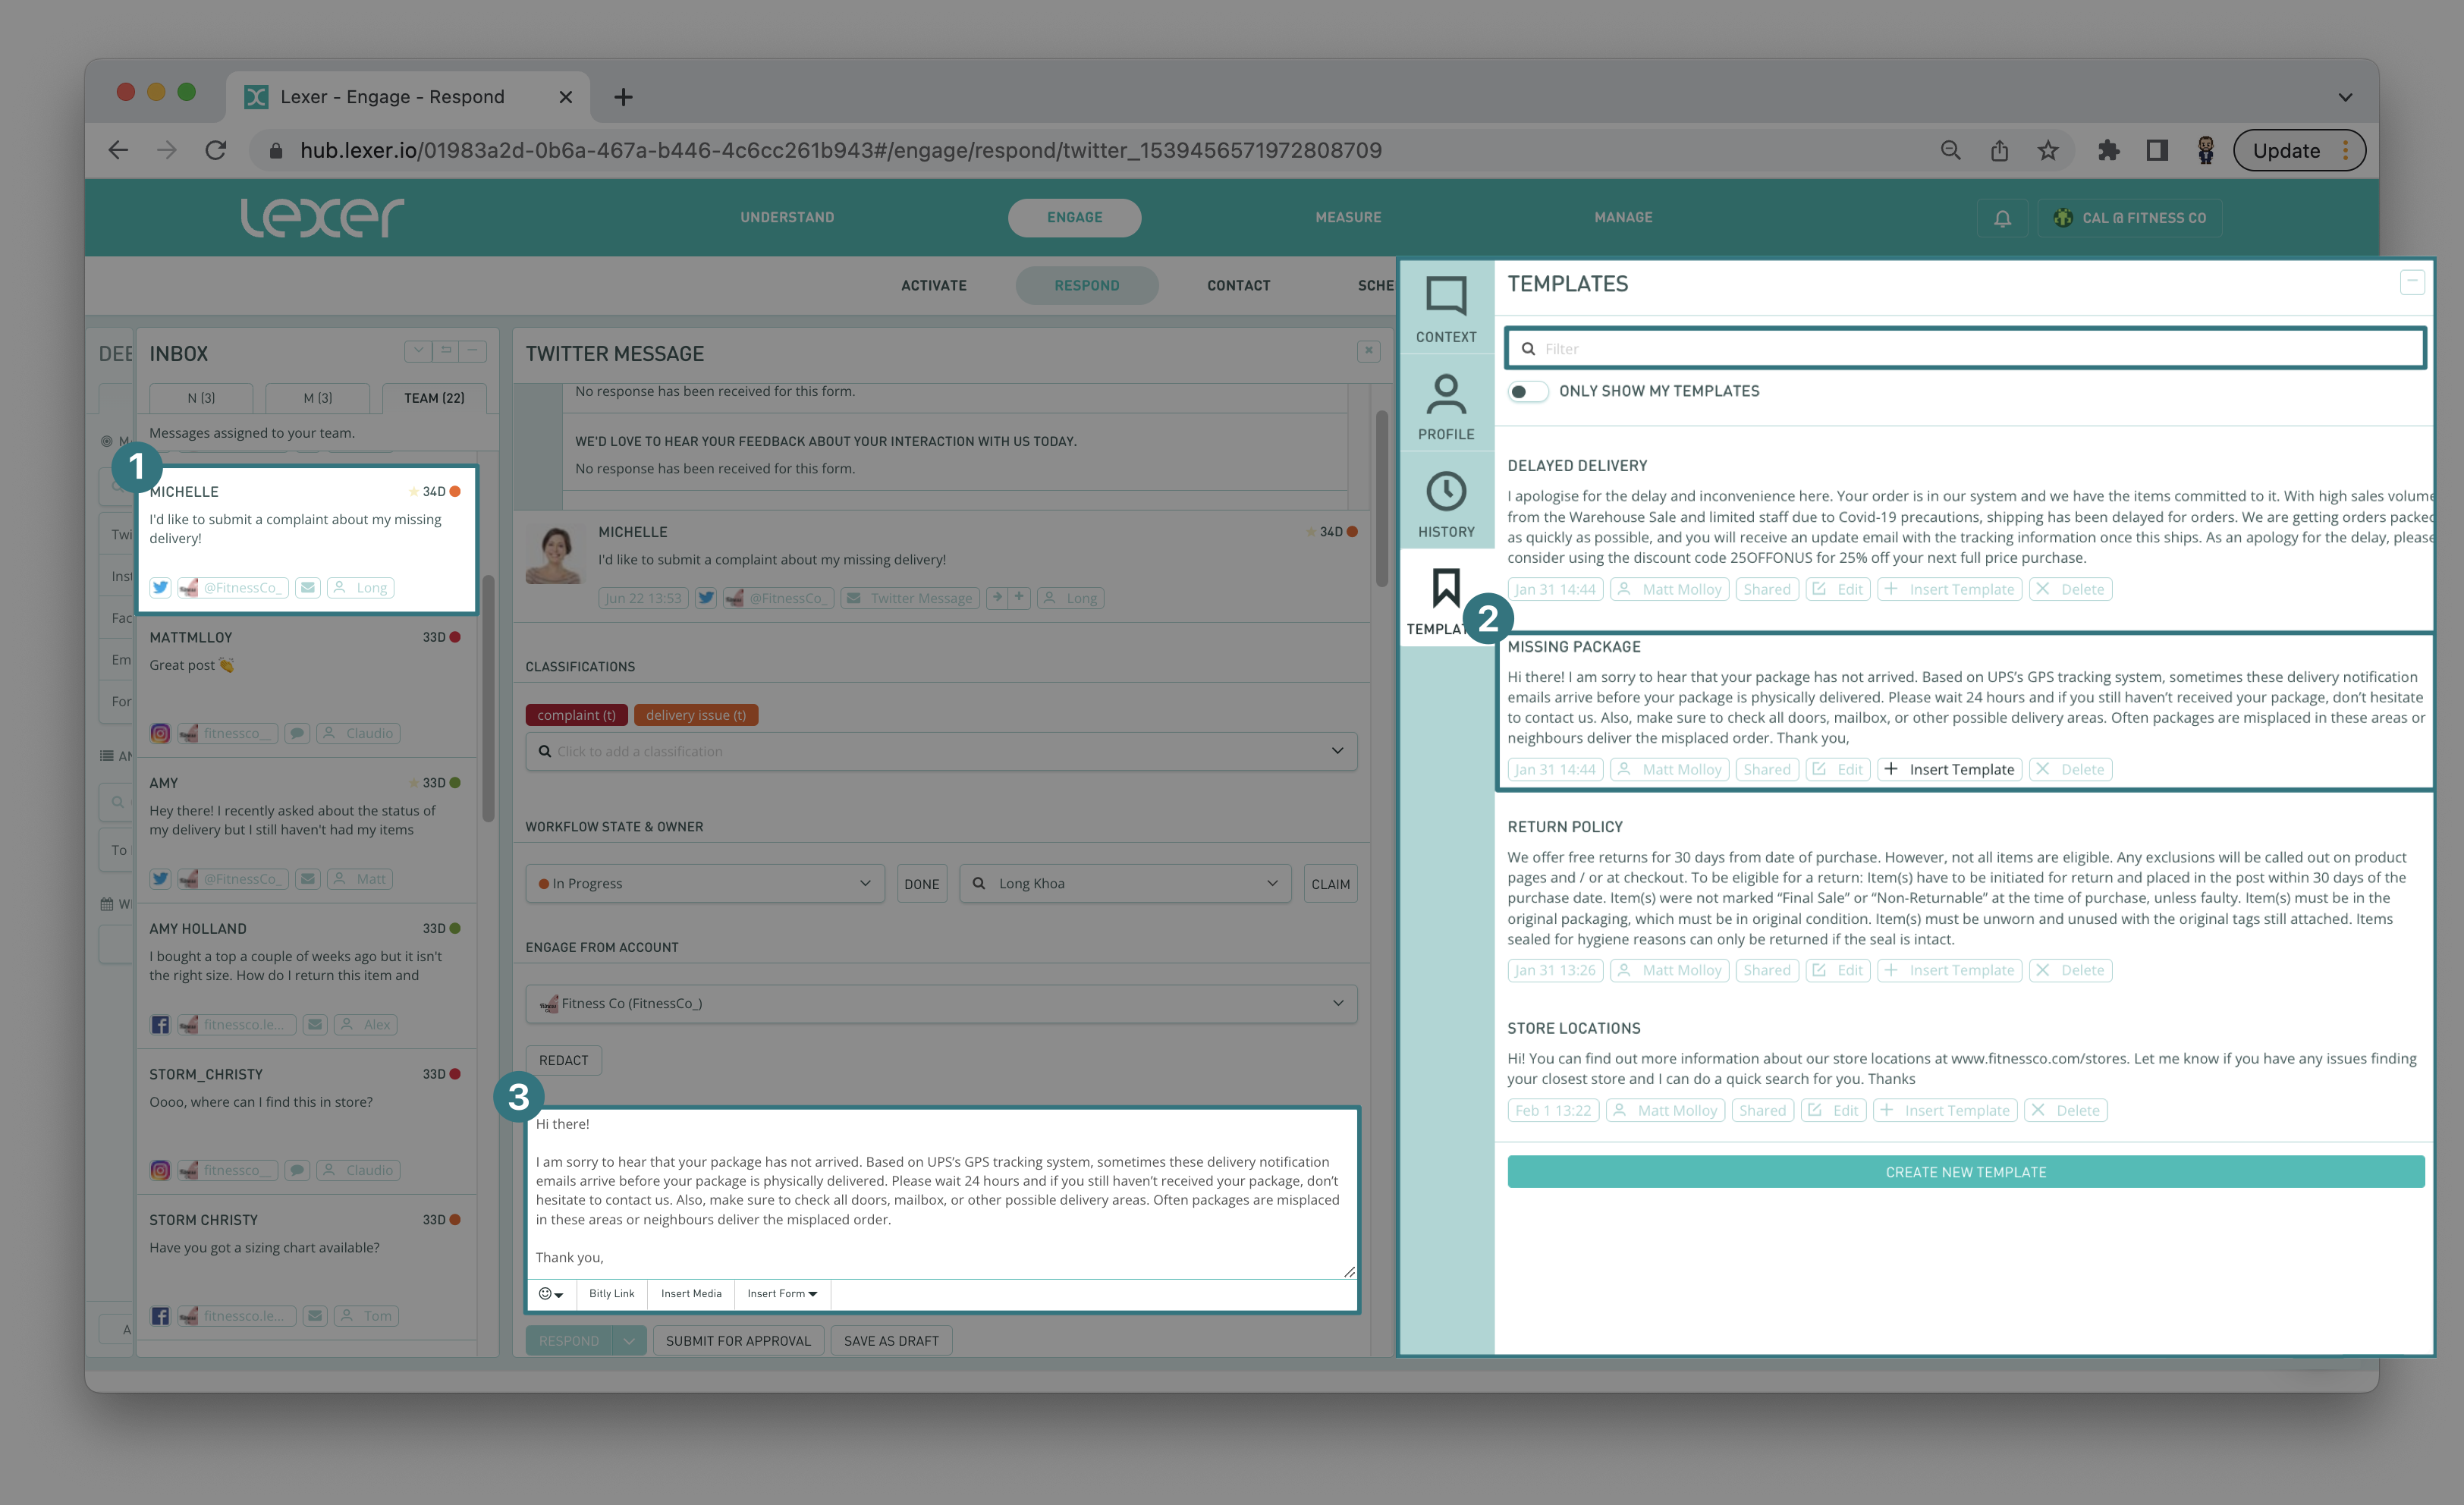
At the top of the page you can see there is an option to search templates. Lexer tip, make sure you are naming them appropriately so you can easily find them when needed. Once you have lots of templates saved it can become quite difficult to search through them all if not named logically. You also have the option just beneath the search bar to “Only show my templates”. This will reduce search results to templates that you have created, which can drastically improve your searches.
The above example shows how you could use a template to respond to a customer that hasn’t received their package (1). You can see in the common templates section an appropriate template response labeled “Missing Package”. If you intend to use this template click on the + Insert template hotlink (2). This will add the template into the message field (3) so you can send it to the profile without the need for any copy and pasting.
We have some more detail in the following learn article about Templates if you would like to learn more.
Wrap up
That’s it for maximizing customer communications with respond! In this article we looked at Respond, how to use Profile, Context, History, and Template tabs to get the most out of Respond, and how to use each of them in turn. If you have any questions please reach out to Support at support@lexer.io.

