
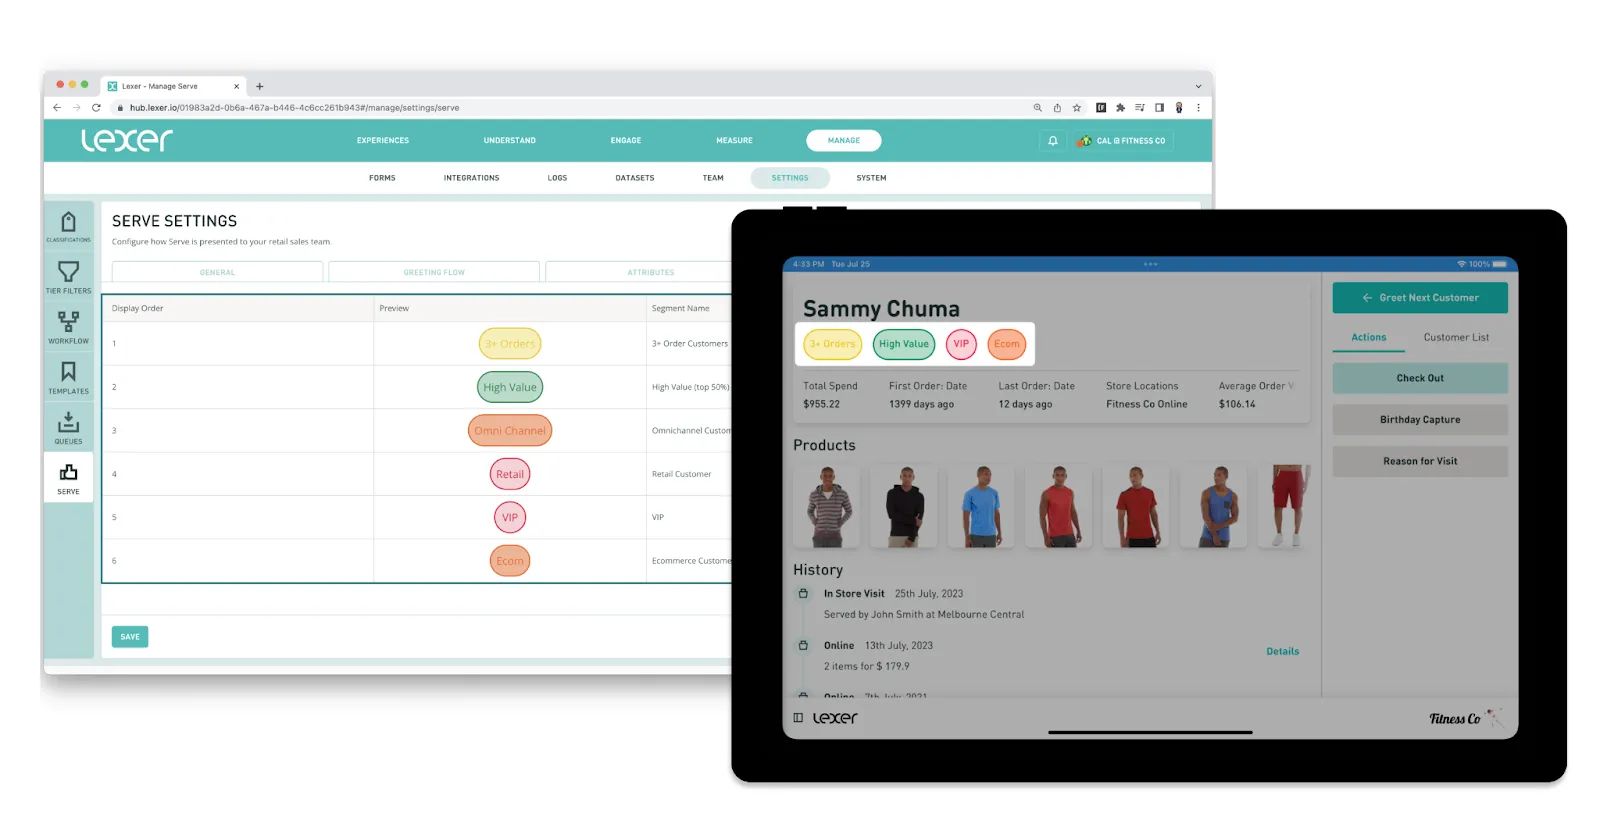
Serve settings: Segments
The Segments tab lets you customize the Segments on display in a customer profile. You can add new segments, adjust the way these segments are displayed in Serve, the descriptions shown to your Sales Associates, and the order that they appear on a profile. Make sure you get the most out of Serve by showcasing your most valuable customer data right at your fingertips, perfectly aligned with your store goals.
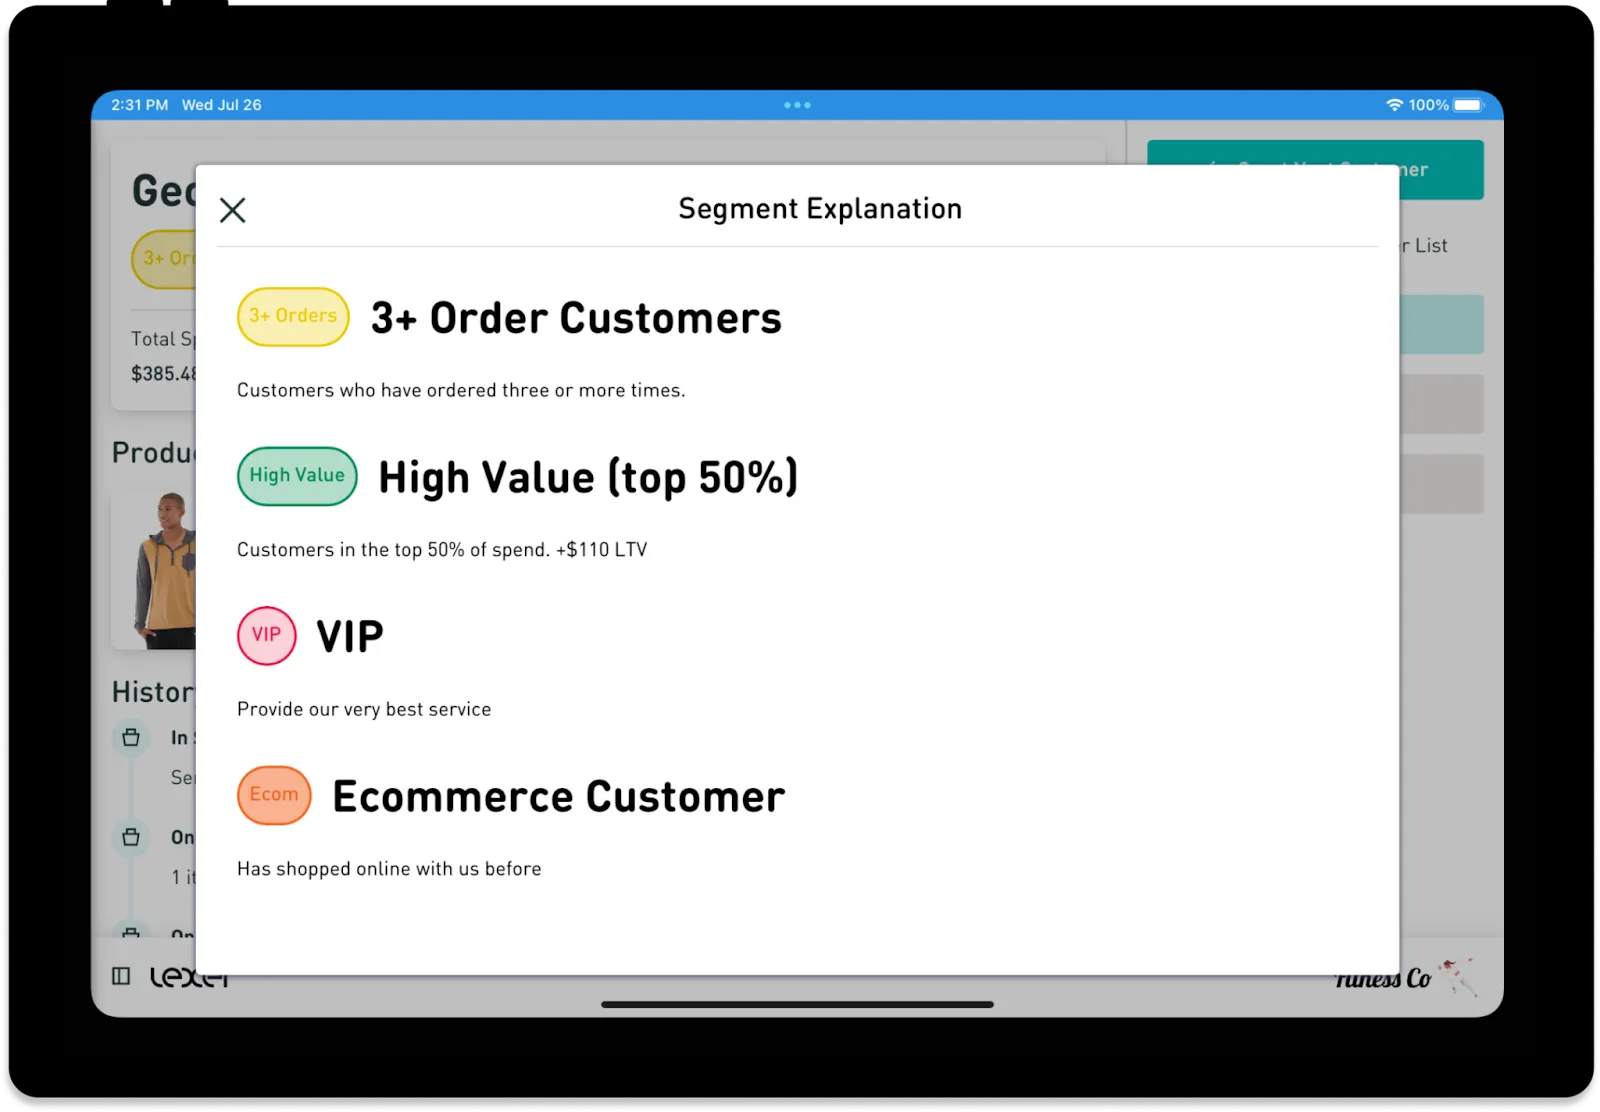
To view Segment descriptions, click on Segments underneath your customers name in Serve.
Adding new segments
Firstly, make sure the segments you’d like to use on Serve have already been created in the CDP. You can find details about how to create a segment in the Hub here. Once you've created the segment you can enable it in Serve.
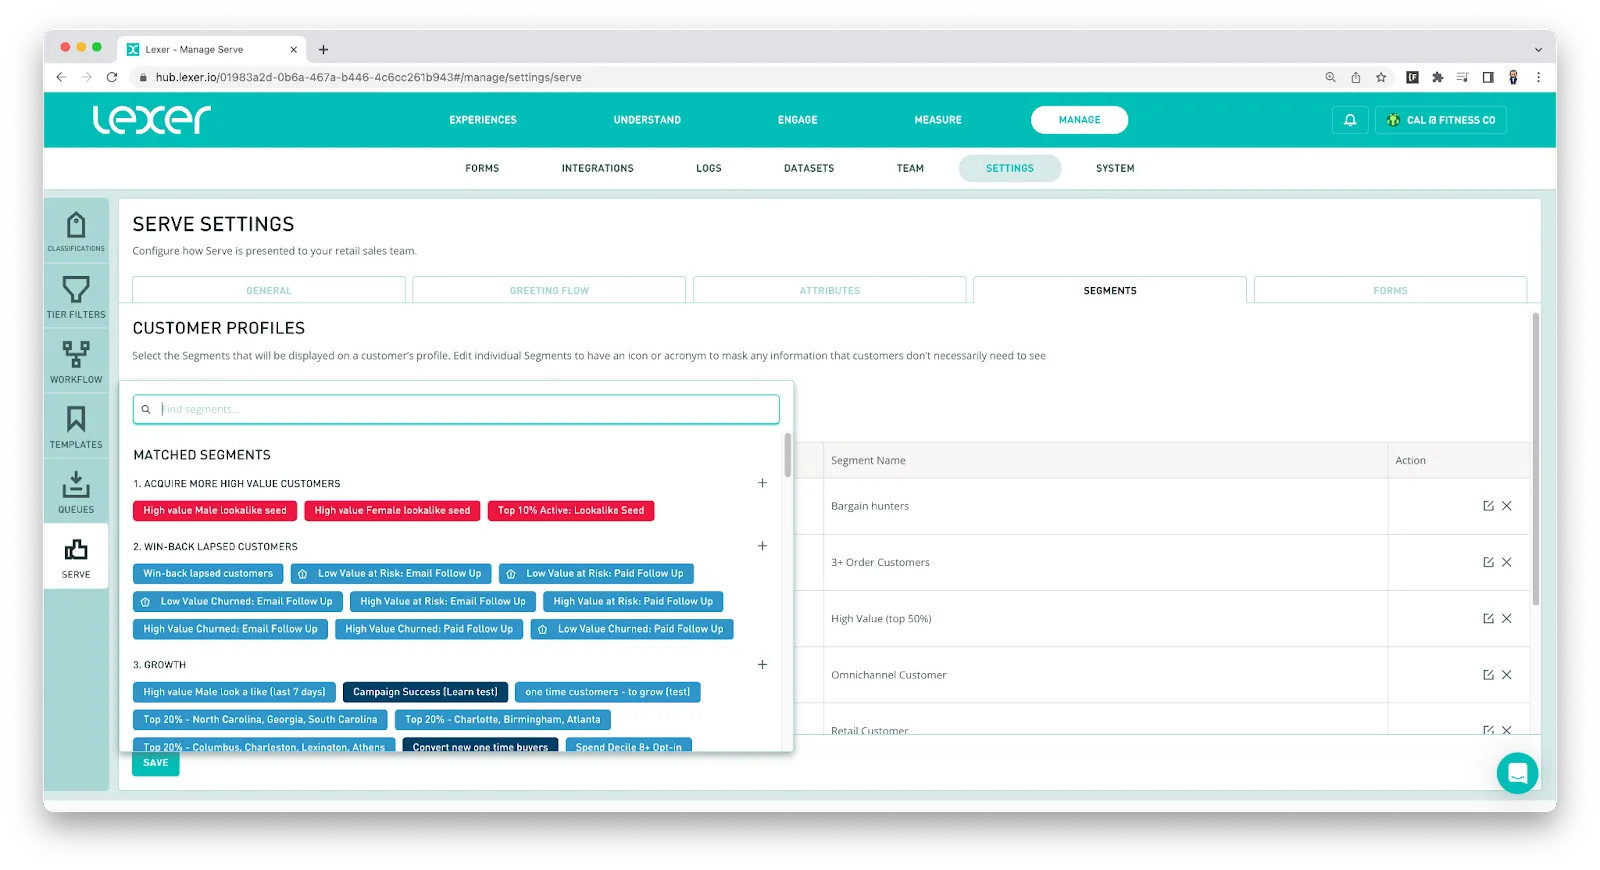
To add new Segments, log into the Hub and navigate to Manage > Settings.
- Click on Serve on the left navigation bar.
- Open the Segments tab.
- Search for the Segment you would like to add to Serve and click on the pill within the search.
Editing Segments
To edit Segments, log into the Hub and navigate to Manage > Settings.
- Click on Serve on the left navigation bar.
- Open the Segments tab.
- Click on the Edit icon on the right side of the Segment you would like to edit.

- Within the Segment details page you can edit anything you might need to regarding how this attribute is displayed in Serve. The Details section adjusts the way this Segment displays in the Hub and Serve details adjusts the display in Serve.

What’s next?
That’s it for Segment settings in Serve. Want to keep learning how to customize Serve? take a look at our Quick links article. If you are having any trouble with Serve, please reach out to your Success Manager or Lexer support using the chatbot in the bottom right corner of the page.
