
Contact in Serve
Contact allows you to quickly, and easily send truly personalized messages to customers using Lexi AI! Now, with Contact added to Serve, your Sales Associates can send personalized messages in no time at all. For more information about Contact in the Hub, check out our article Getting started with Contact.
Your Sales Associates often have downtime when there are no customers in store. Why not make the most of this by encouraging them to proactively send personalized messages to customers based on their in store experience. For example, send all VIP customers that have purchased in store in the last 7 days a message thanking them for coming into the store, and recommend them another complimentary product based on their purchase.
The best bit, Contact writes the first draft for your Sales associates making it super quick and easy for them to review the messages, add some personal touches and click send.
Proactive outreach to your customers with Contact can:
- Utilize otherwise wasted staff downtime to send personalized marketing messages to audiences .
- Increase sales.
- Improve/foster positive customer relationships with personalized messaging.
Examples of great use cases for Contact in Serve
- New very high value customers - Customers who have made a large purchase are more likely to re-purchase again soon.
- Product follow up - Reach out to a customer that you have served in store to ask them how they are finding their product.
- New product drop recommendation - Have a cool new product you think buyers of a previous product will love, send them a message suggesting it!
- High value customer offer - Your favorite customers deserve some love, send them an exclusive offer.
- Lost property - A customer left something in the store, you want to send a message to all customers that were in the store during a particular window of time.
- Event invitation - Having a promotional event? Invite your customers.
Setup
Before your team can start sending off messages, you need to get everything set up. Check out the steps required here. The setup needs to be carried out in the Hub. Once you have everything set up you’ll need to create queues that you’d like your Sales associates to use.
Managing queues
To adjust the queues that are seen in Serve, you need to make changes to the queues in the Hub. If you would like to set up store specific queues, make sure you include the specific store name in the name of the queue.
For detailed instructions on how to manage queues in the Hub, check out our instructions here.
Navigating to Contact in Serve
Navigating Contact from within Serve is pretty straightforward.
- Open Serve, Login and select your store.
- Once on the homepage, click the hamburger in the bottom left corner.

- Click on Contact.

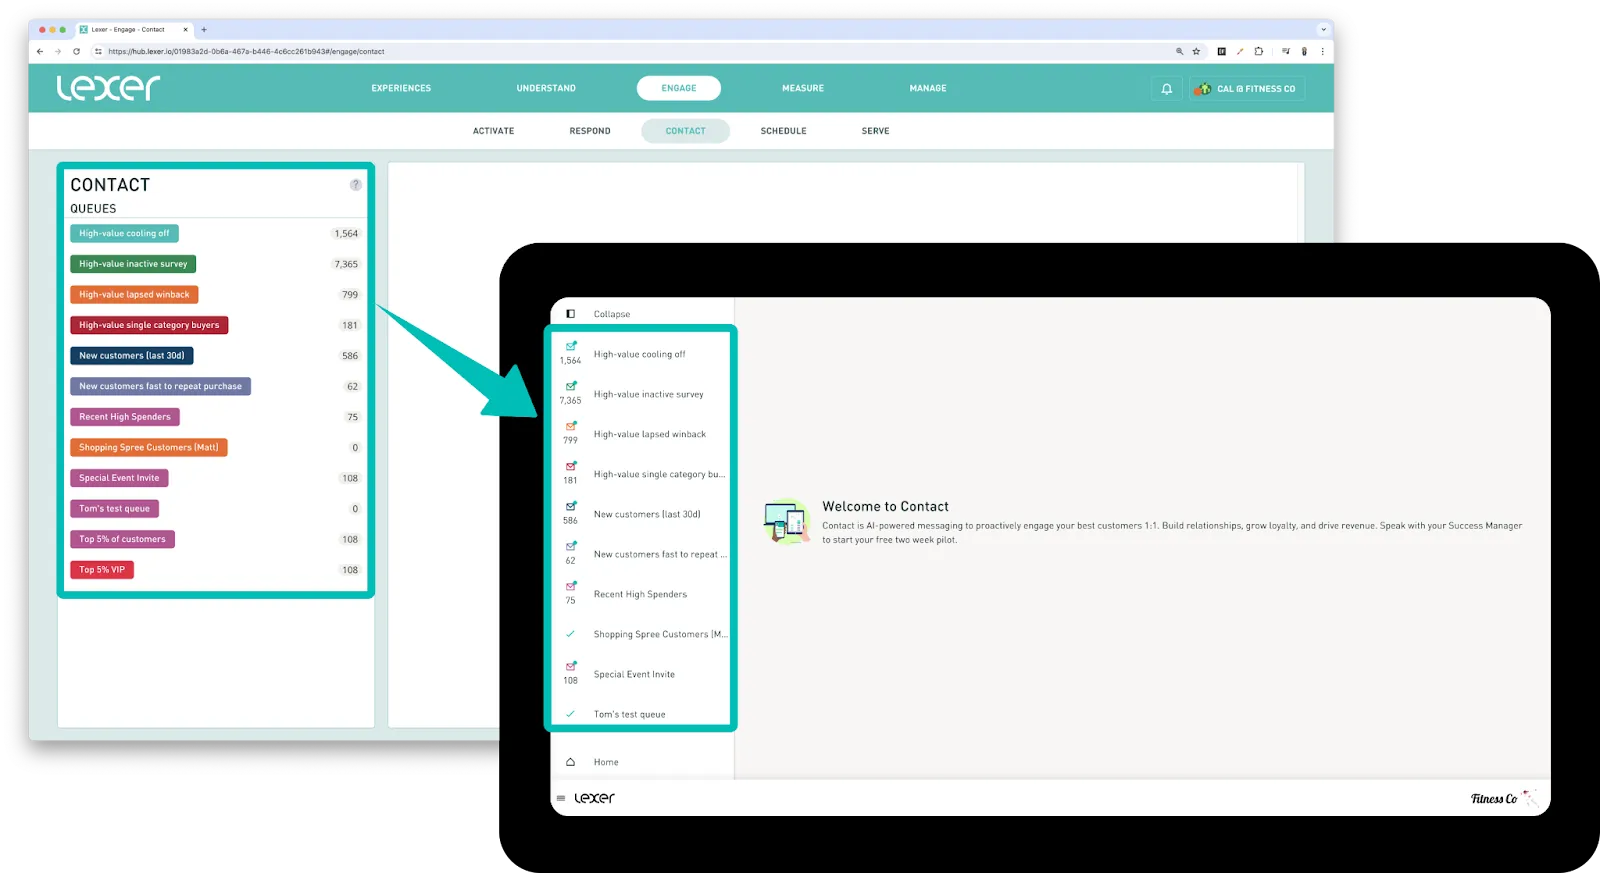
- You can now check out the Contact layout in Serve:
- Collapse - Allows you to collapse the queue panel to make more room for your messages.
- Queues - Here you can see the list of queues that have been set up for Contact. If you can’t find the queue you need, jump into the Hub and create a new queue. You can see the unsent messages next to the name of the queue.
- Home - Sends you back to the Serve home screen.

Sending a message with Contact in Serve
Once you have your queues set up, you’re ready to start sending messages.
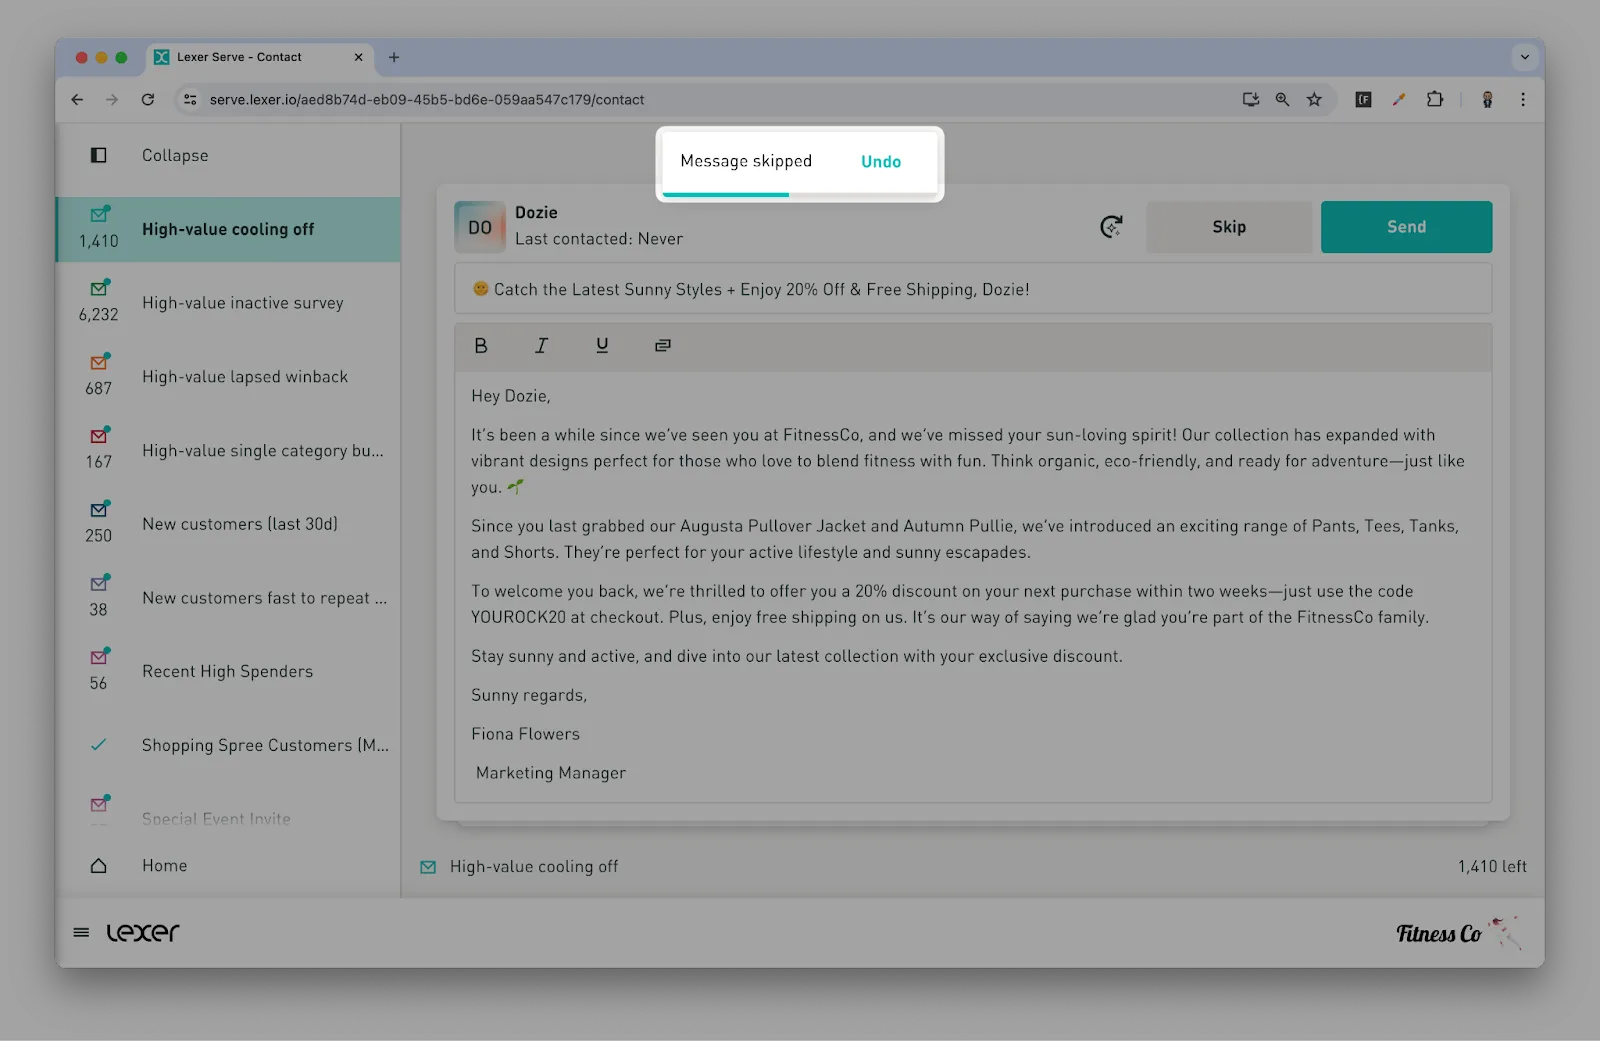
Open up a queue. The number next to the name indicates how many messages are ready to send in the queue. Once the queue is open, you’ll see your stack of draft messages.
There are 3 buttons available next to the profile details:
- Regenerate message - This tells Lexi to try again.
- Skip - Lets you skip this profile, it will not send them a message.
- Send - Send your message and move on to the next in the queue.
Beneath these buttons, you’ll find a pretty standard layout for your message. You can see a Subject line and below this a rich text editor that allows you to customize the message.

When you send or skip a message, you will be prompted with the option to undo the action if you made a mistake.
Managing the conversation after a message has been sent
Once sent, you can head over to Messages where you can pick up the conversation history, receive replies and send follow up messages. And you’ll also receive replies in the inbox that was used during the setup integration steps at the beginning of the article.
That’s a wrap!
In this article we covered all things Contact in Serve. We covered the benefits, how to get yourself setup in the Hub, how to send messages and how to manage the conversation. If you have any questions or need any assistance, please reach out to Support in the bottom right hand corner of the page.
