
Form builder workflow
In this article, we'll guide you through the essential steps to create a form, customize the structure, and add questions.
Create a form
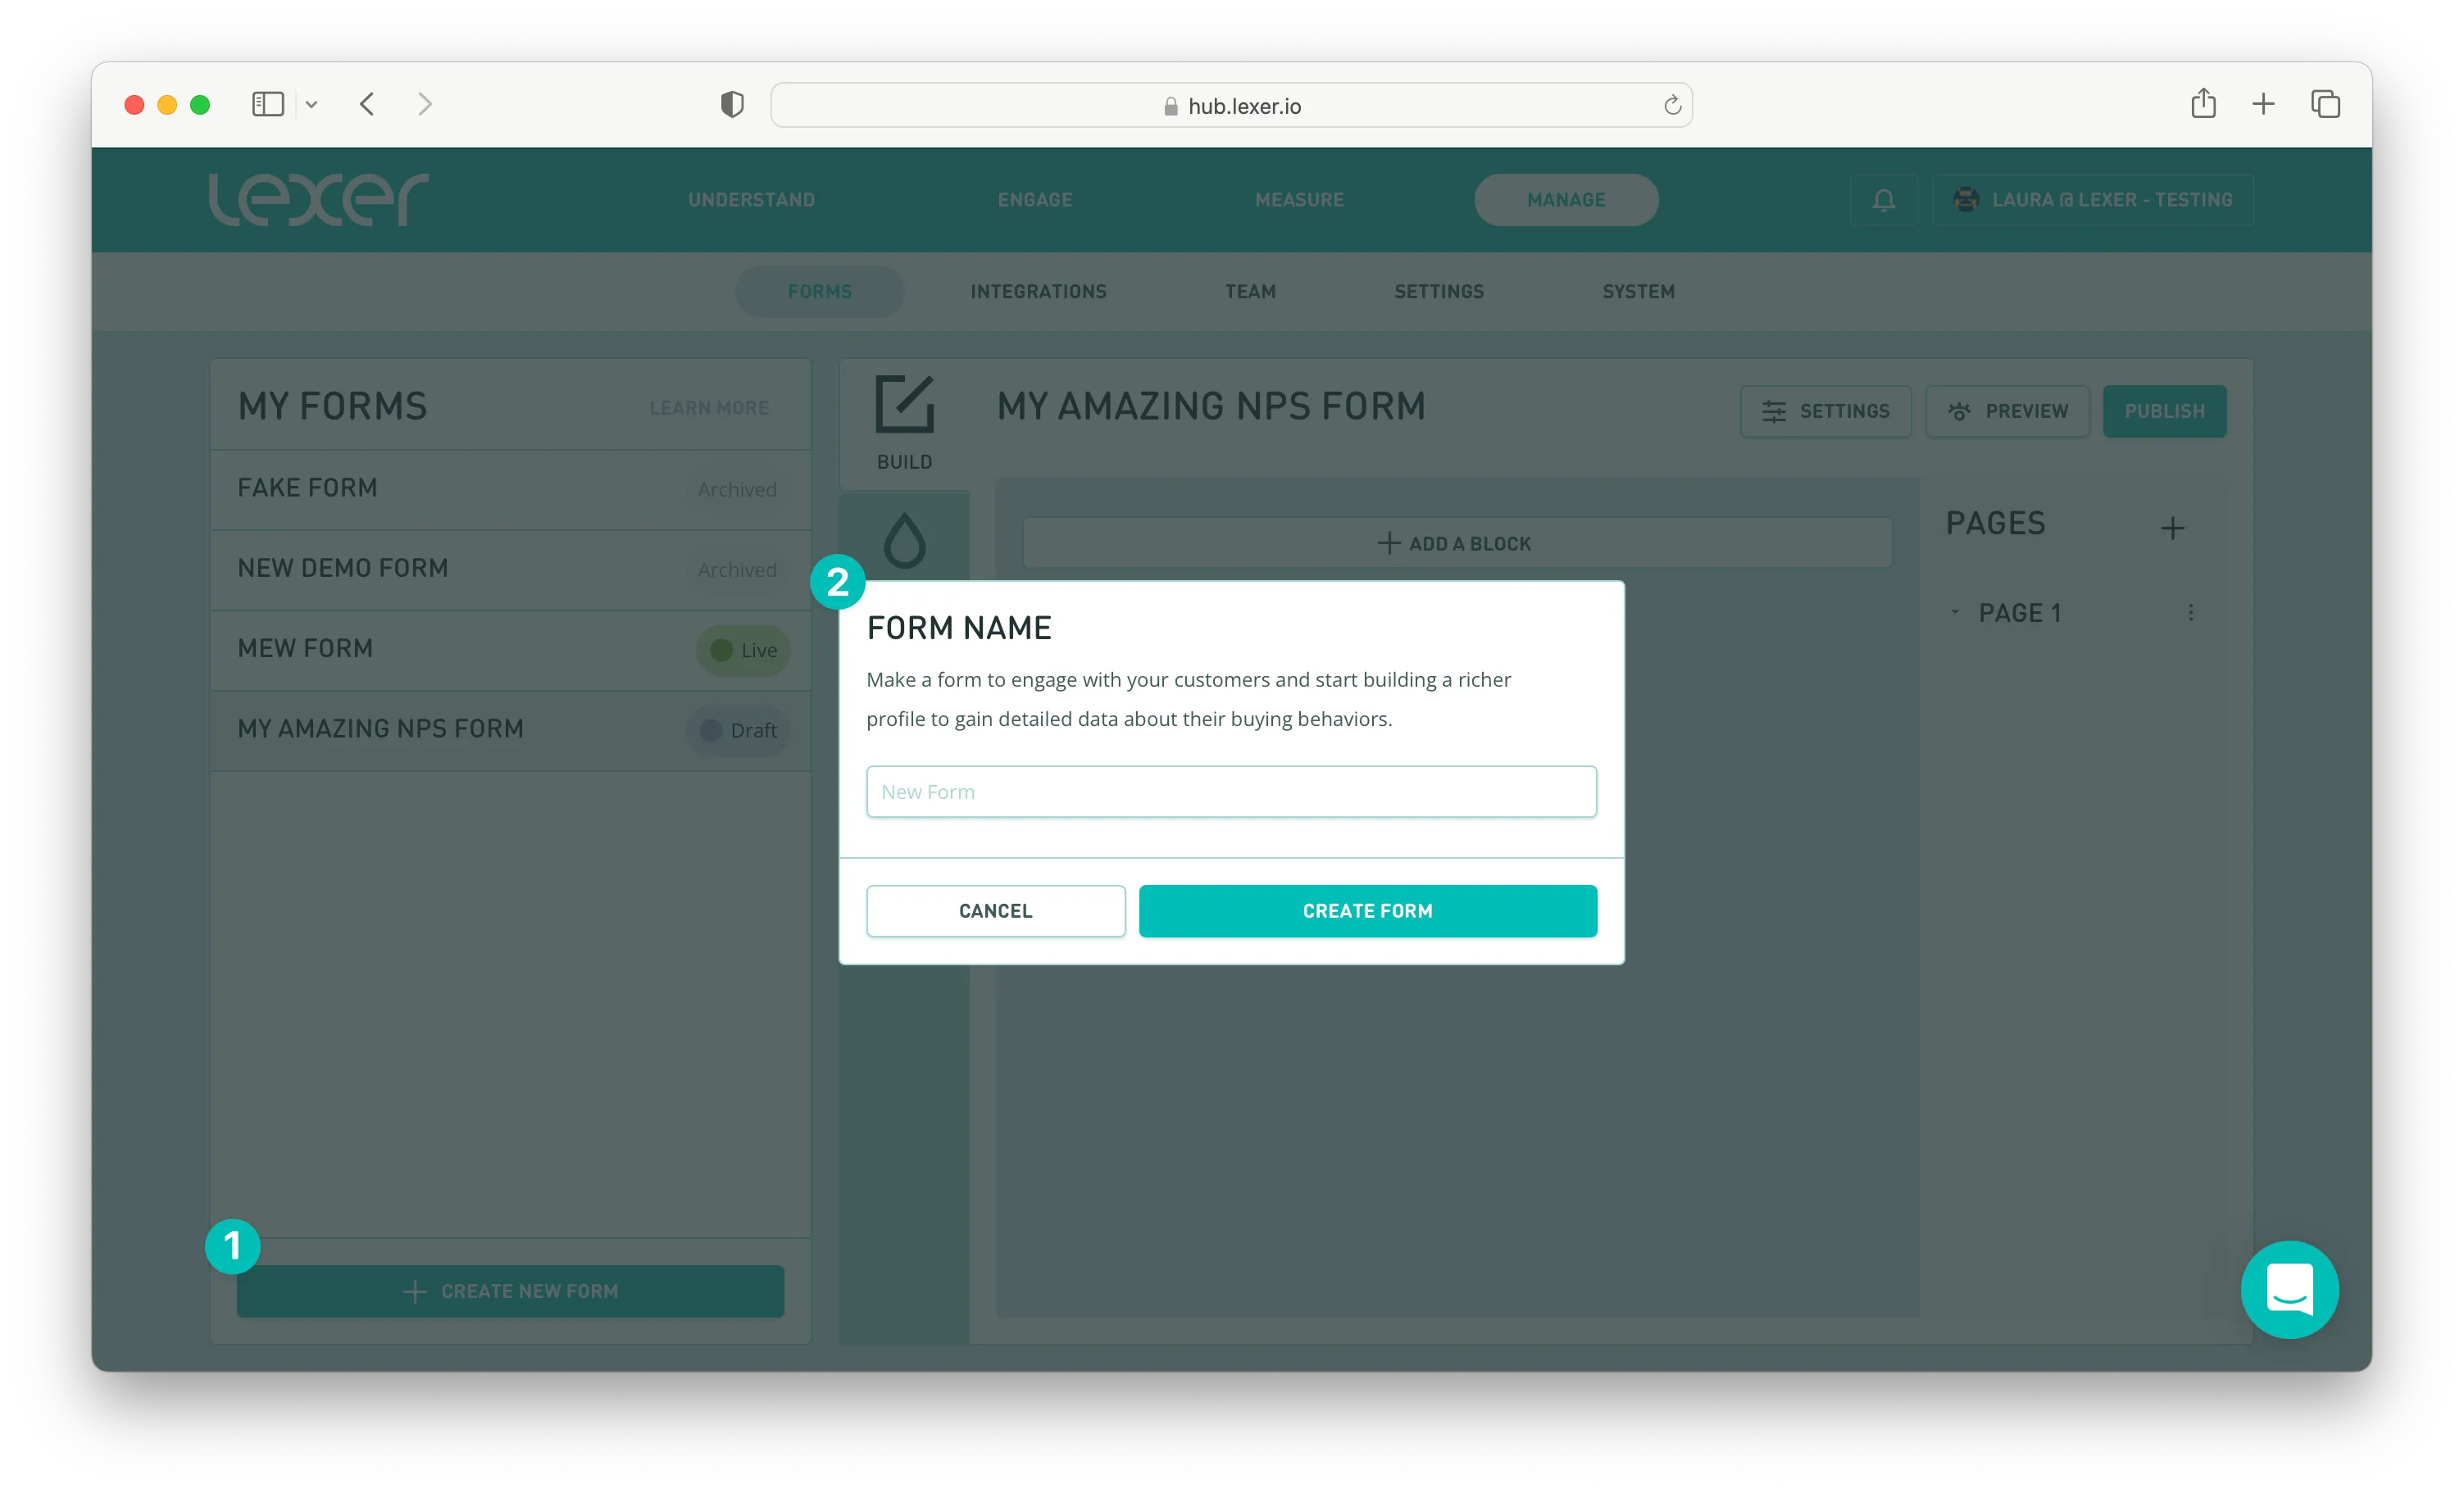
Click Create New Form and name your form. You can adjust this name if you would like to change it in form settings, for more about form settings click here. Once you have entered a name you can click Create Form, and you’re ready to start building
Now you can start to build out and customize you form. You may want to include a customer-facing title and description at the start of your form before adding your question blocks.

Your new form will also have a templated “thank you” page, which is placed at the end of your form. You can customize this as needed. And now you’re ready to start adding some questions!
Adding questions
Click Add Block to view the list of question and formatting options available.

Select your block or question type to add it to your form.
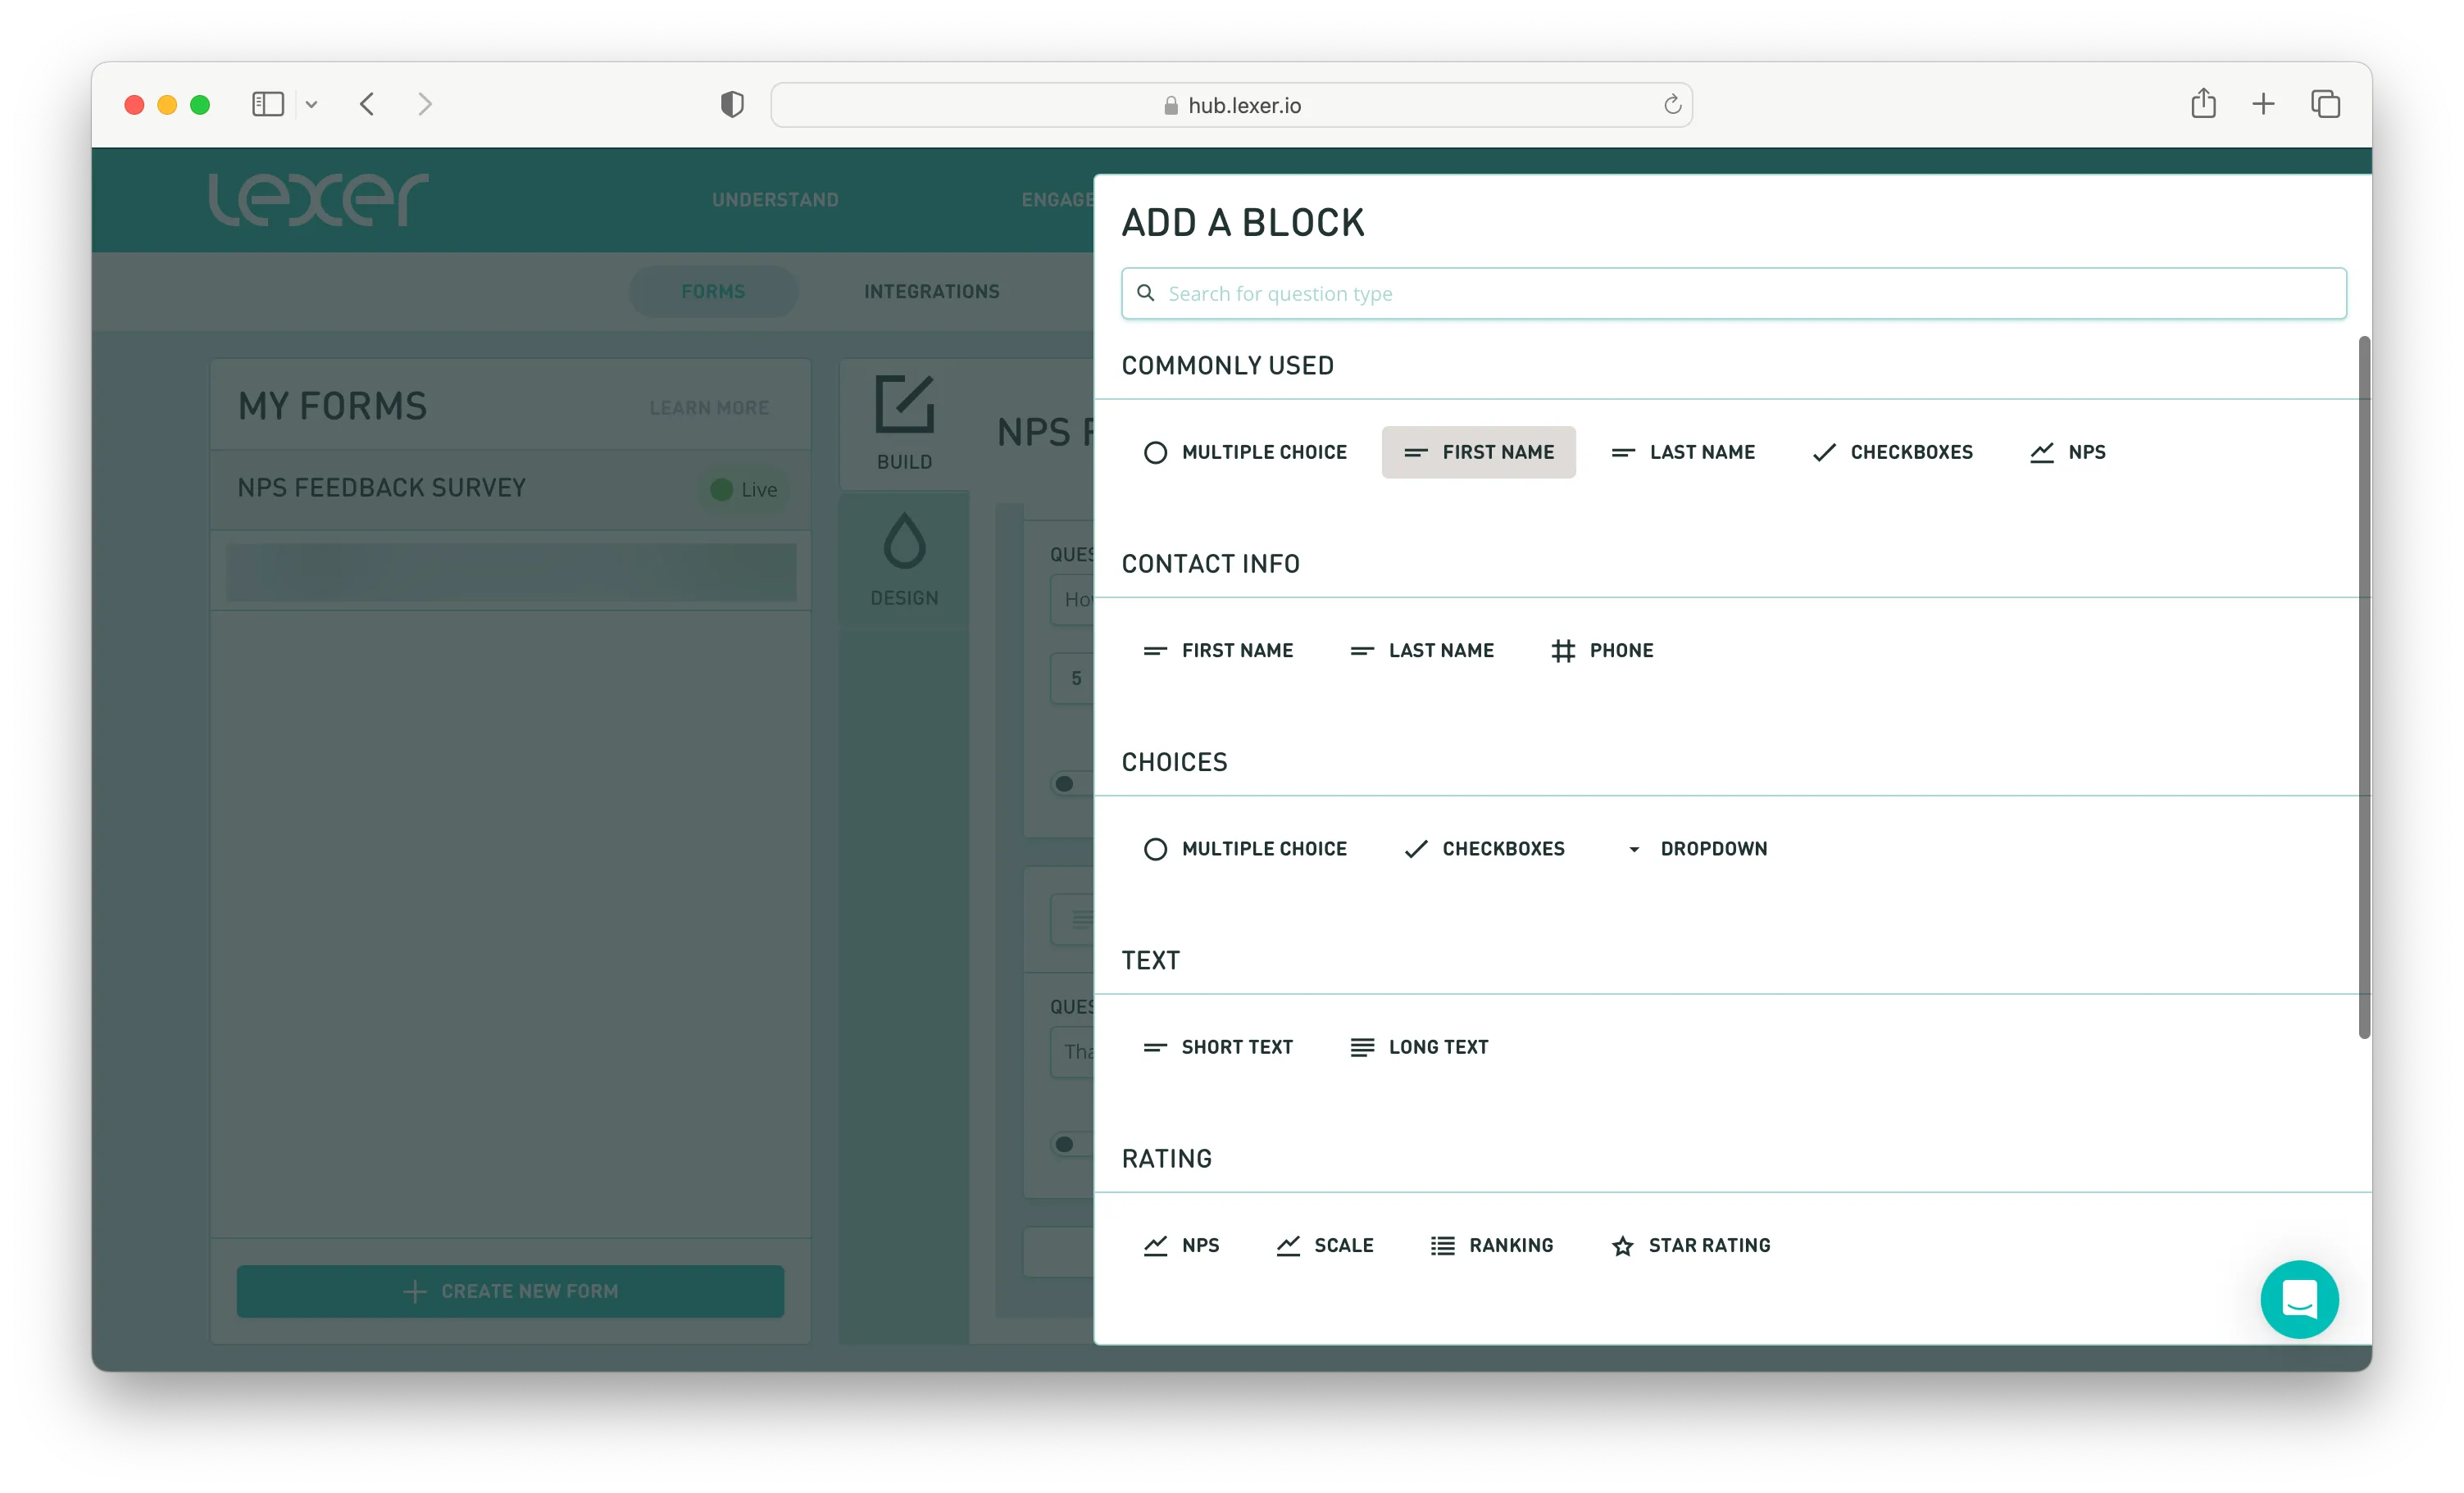
Here's a quick cheat sheet to describe each of the question types.
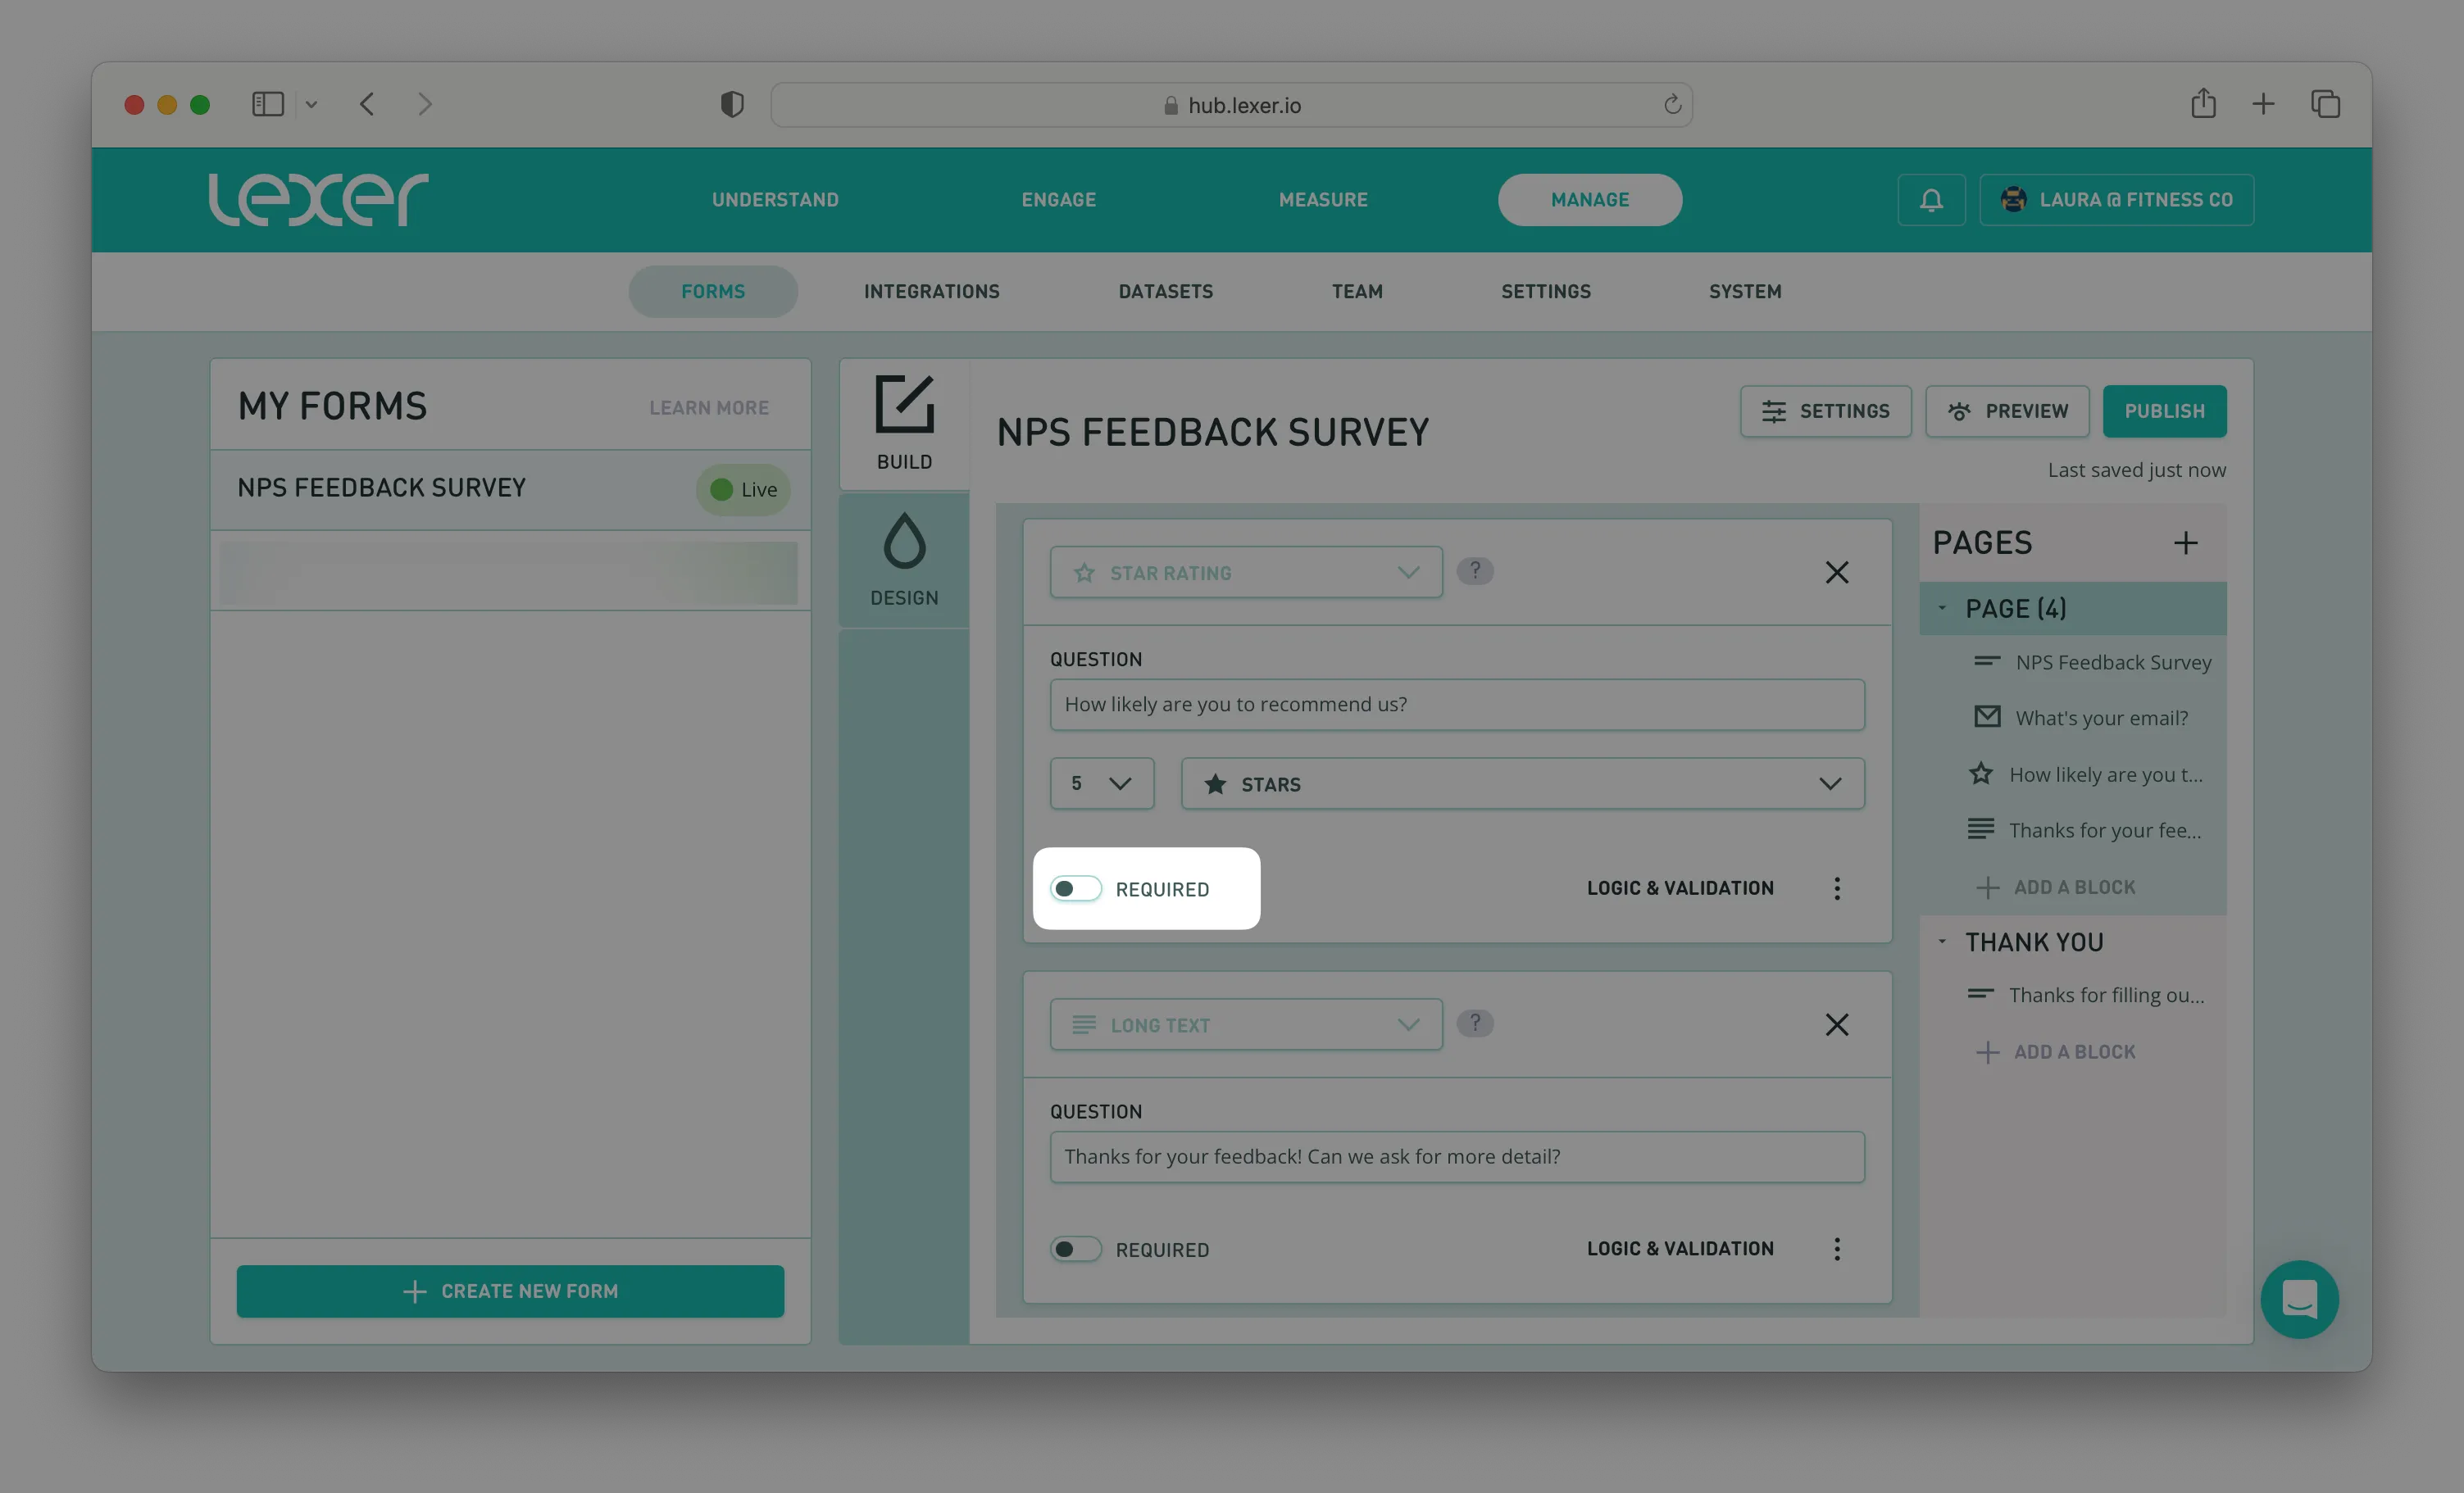
Select the block you’d like to add to your form and then fill in the required details.

You can move your question blocks around if you decide to change the order of the blocks buy dragging the questions in the Pages layout on the right side of the Form builder.
Mark your block as required (or not) by moving the toggle left or right. This can't be done to conditional blocks, read more about conditional logic and validation here.
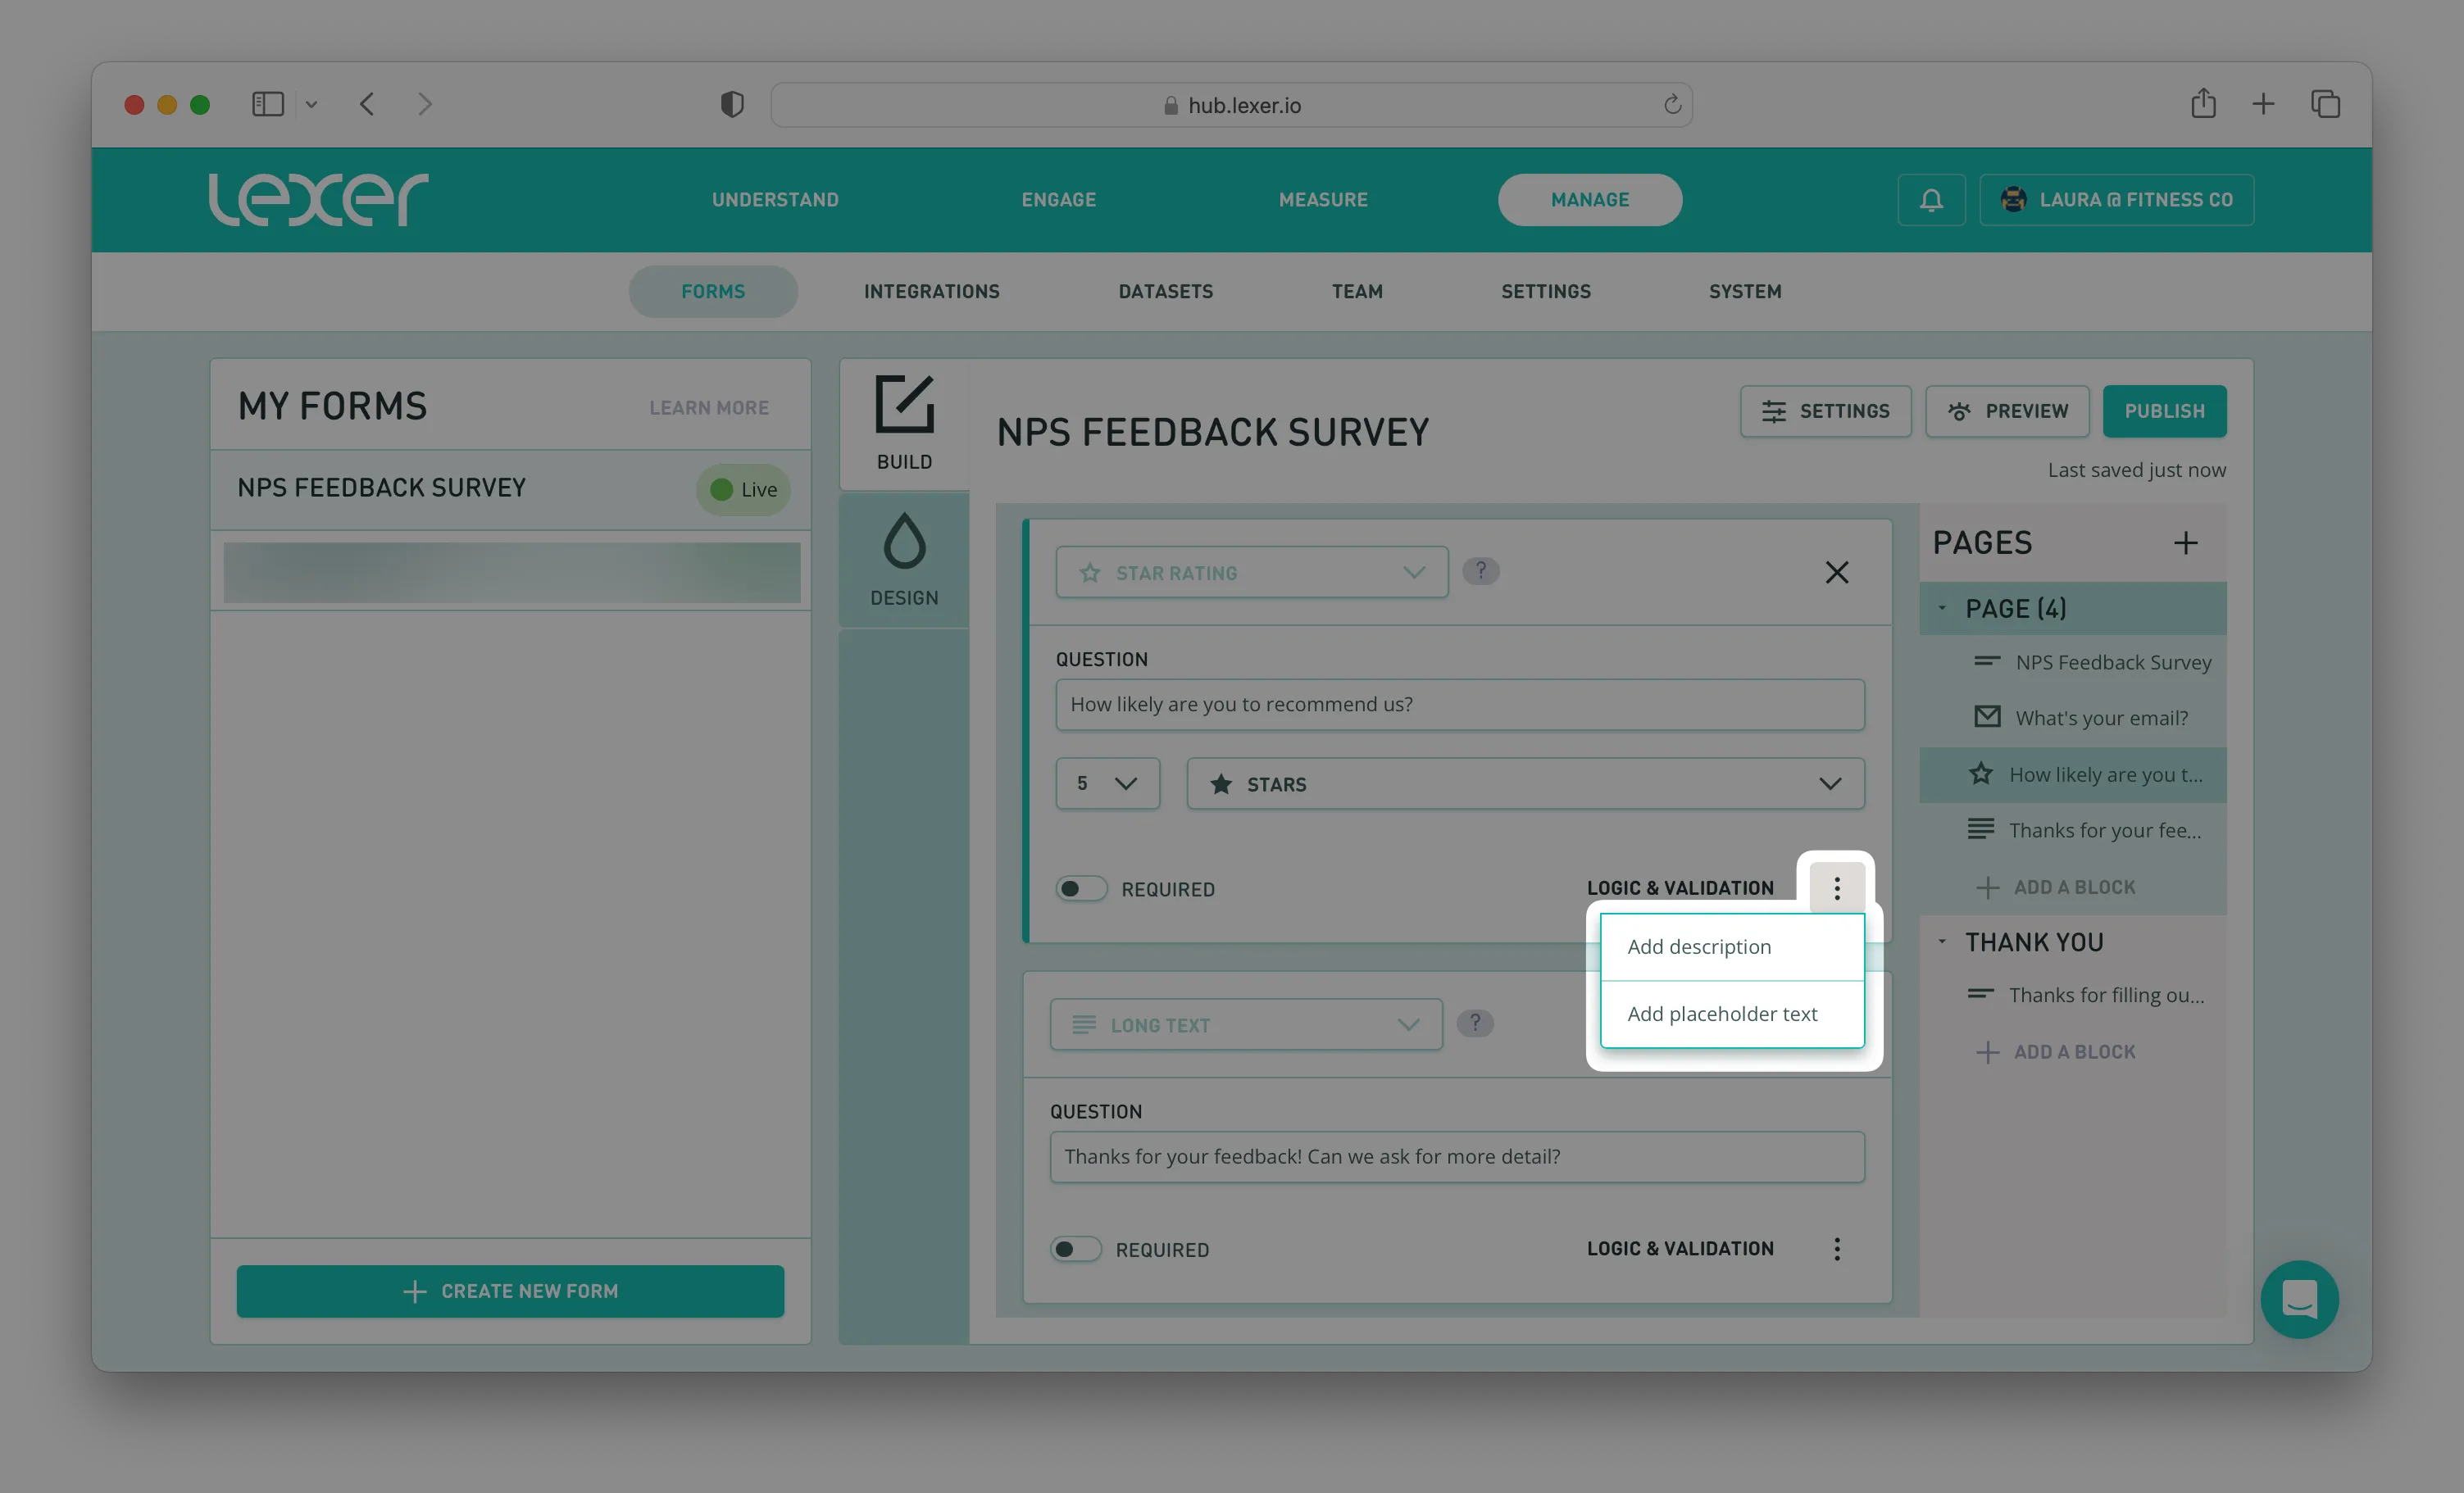
To add a description to your block, or placeholder text, select the three ellipses in the bottom right-corner of the question block.
Once you’ve filled in the block's details, you’re ready to move on!
Creating a new page
You might like to group questions that cover similar themes or topics onto the same page. To add a new page to your form select the + icon next to the PAGES heading in the right, side panel.

You can rearrange pages by dragging and dropping them as needed, and any changes made in the Form Builder, will be reflected in the side panel as well.
Designing your new form
Once you’ve finished building out your new form you can move onto the design and choose your fonts, logos, colors, and more. You can even add custom CSS if you want something personalized to your brand.
To start designing your form, select the DESIGN tile.

In the right-hand panel you can choose the following design elements:
- Font
- Title and text alignment
- Colors
- Background image
- Logo

If your brand guidelines require further customization than fonts and colors, you can navigate to the Advanced tab to add custom CSS where instructed.
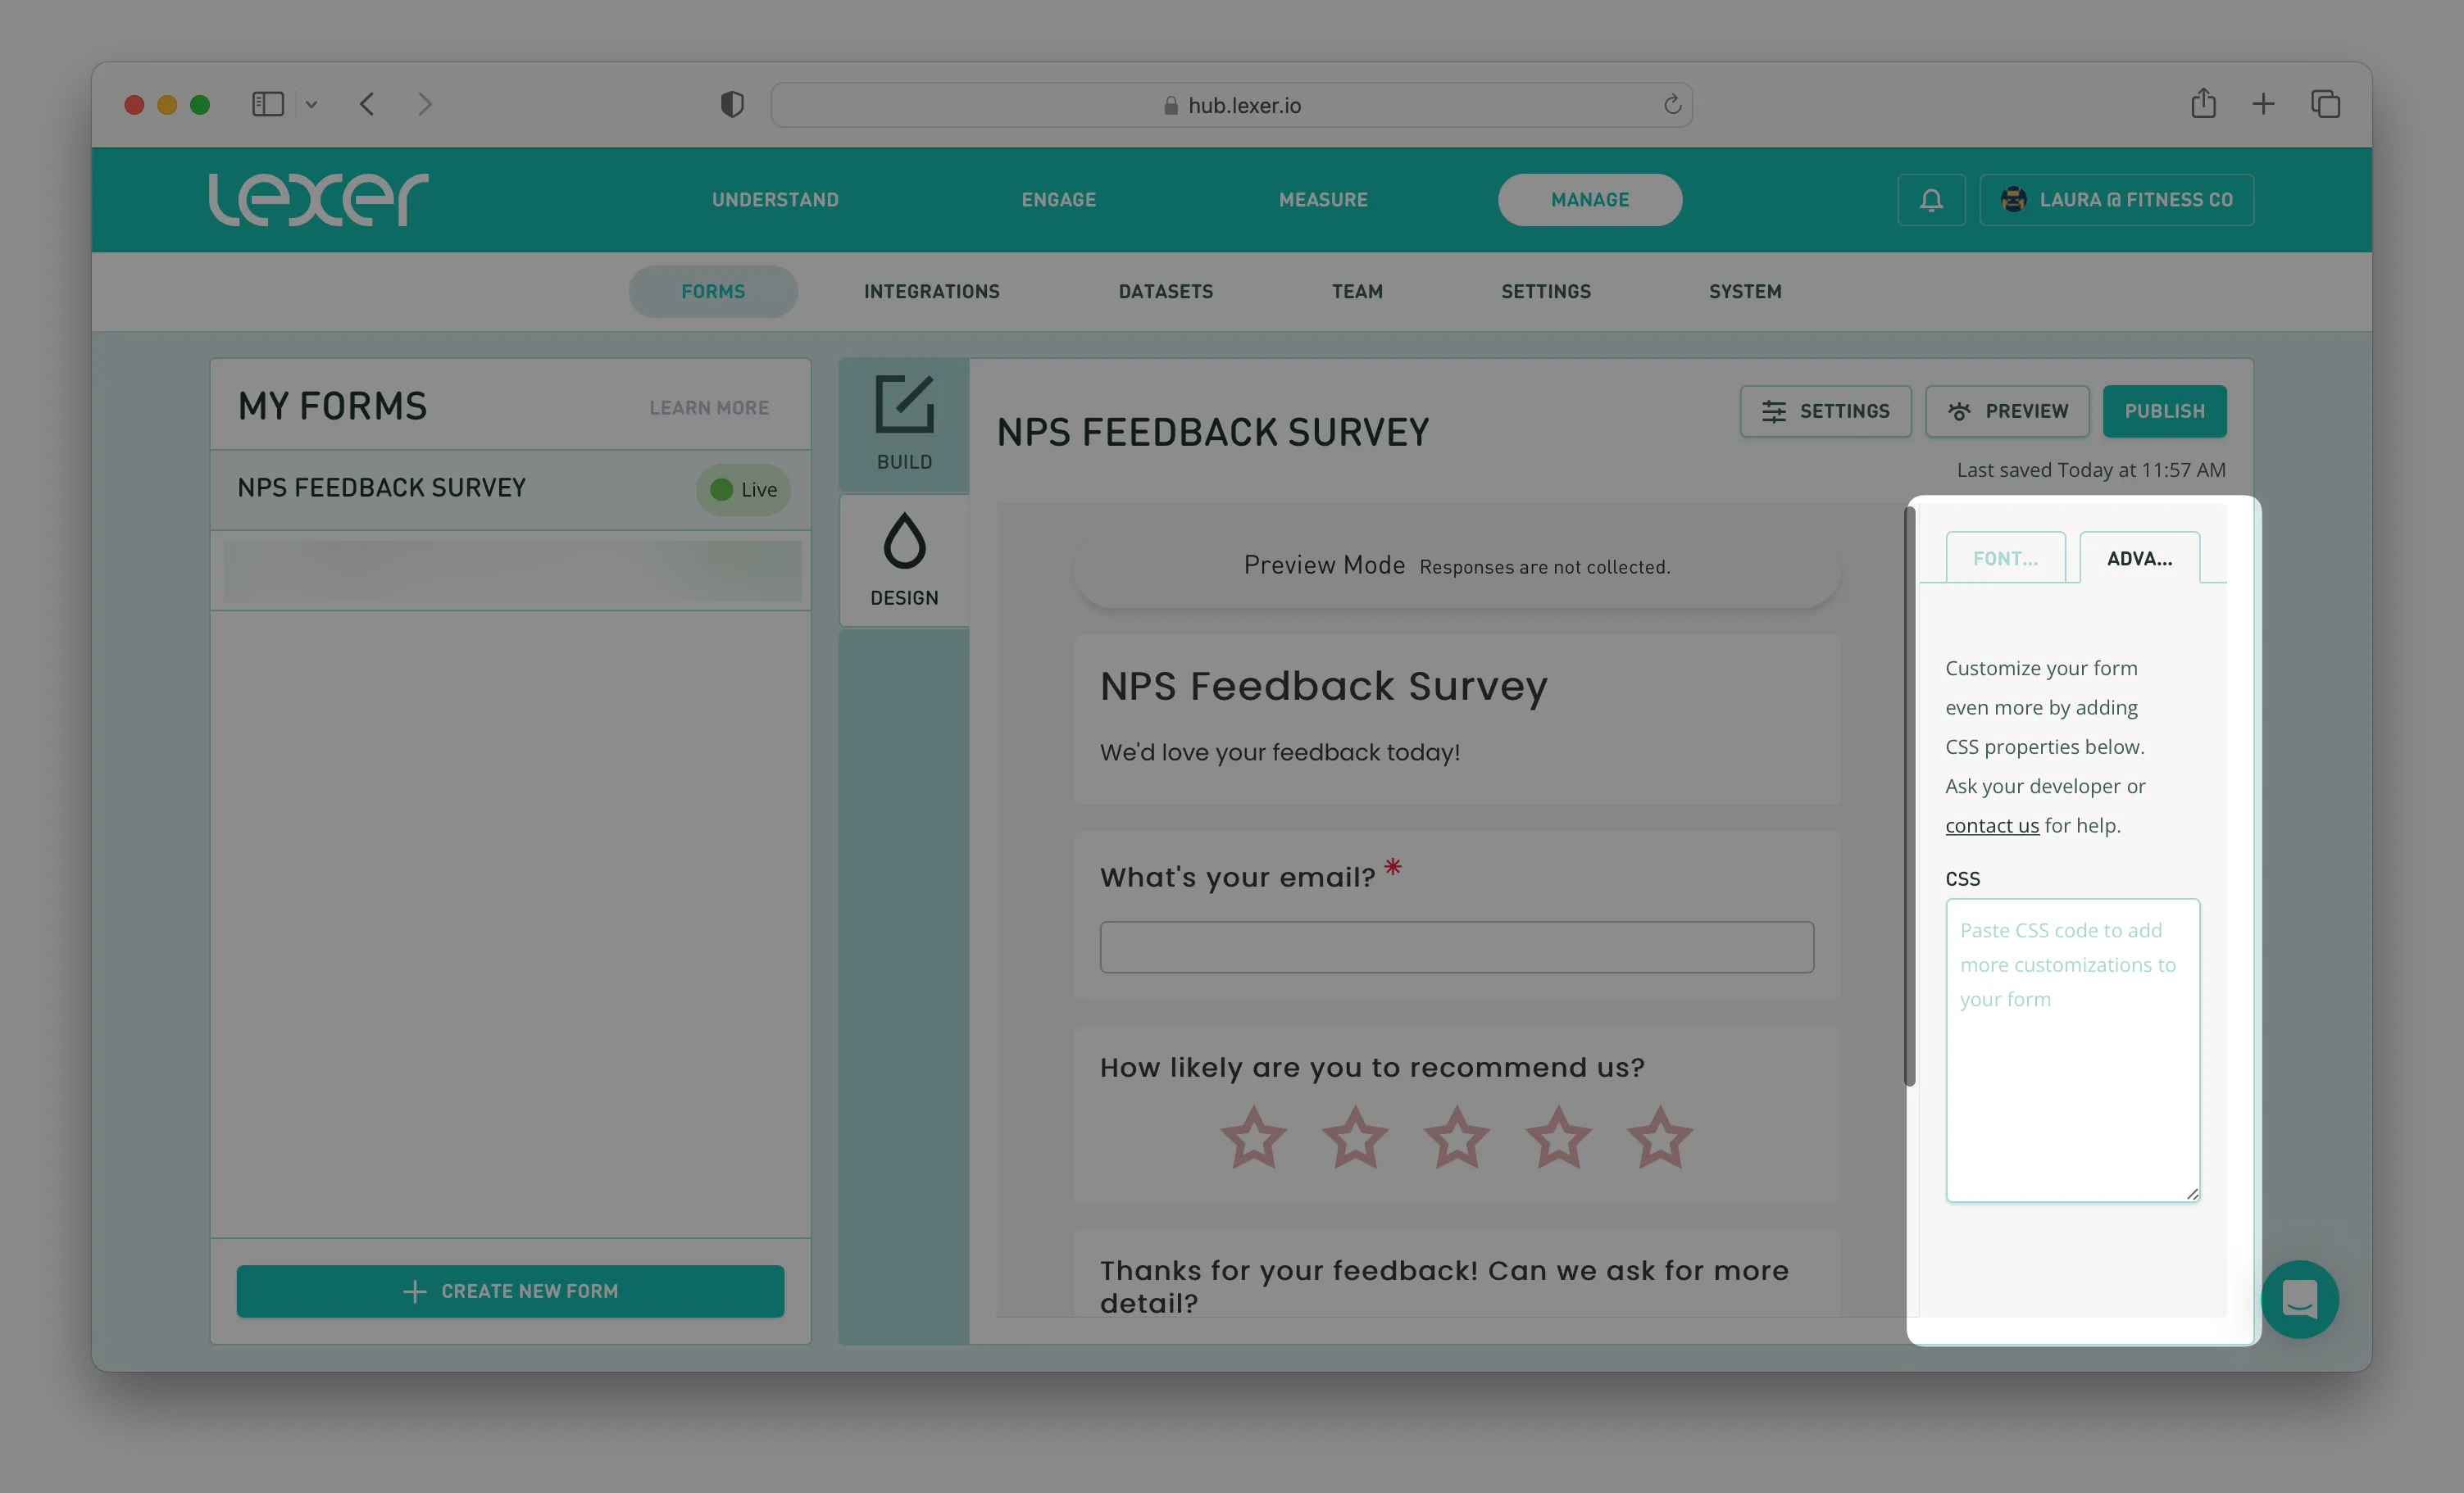
To make it easier to add custom CSS, you can use the class names below for each question. These class names will be applied to the top level card, elements inside can be targeted using CSS.
Each question/content block will have the following class names:
- [.code]lx-override--id_<unique id>[.code] to target a specific question.
- [.code]lx-override--type_<block type>[.code] to target all questions of a type.
- [.code]lx-override--question[.code] for all question blocks.
- [.code]lx-override--content[.code] for all content blocks.
- [.code]lx-override--finish[.code] for the finish page message
Once you’re done you can move onto your settings. Read more about forms settings here.
What's next?
Lexer’s Form Builder is the ultimate way to create forms and surveys to capture zero-party data directly from your customers. To learn more about access and pricing, you can find more detail here. If you would like any help, reach out via live chat in the bottom right hand side of the page. We have heaps more content that showcases Lexer's Form Builder. You can see the full list of Forms content here.
