
Getting started with Contact
Showing your customers some love is a critical step for any retailer that wants to nurture, grow or retain their market share. Companies with impactful personalization have on average 40% higher revenue. With Contact, you can quickly personalize and shoot off loads of messages in no time!
How does it work?
Contact allows you to quickly, and easily send truly personalized messages to customers using Lexi AI! Each message is crafted for the customer, with the knowledge of the whole CDXP to personalize the message. Lexi will also incorporate your brand values, tone, and your role in the business. These messages are not only tailored for the customer but also customized to align with your role, ensuring they are sent from the right team member during those critical windows of opportunity that lead to conversions. It's truly a game changer for one-to-one customer outreach allowing you to drastically improve engagement in a way that was extremely challenging and costly to scale before now.
A few things need to be done before you can start sending messages with Contact:
- Integrate your email
- Review the default queues
- Optional: Create a new queue if none of the default queues suit your needs
- Send a message
First step: Integrate your email platform
Before we get started using Contact, you will need to ensure you have integrated your email platform. Follow the instructions in this article to configure your email server to Contact.
Need help building queues?
To help speed things up we can provide suggestions for some common audiences to target, have a chat with your Success Manager about the queues that would help you kick things off. We can create these queues for you and your team so you have a starting point, feel free to edit these if you have improvements in mind.
Some of our suggested queues:
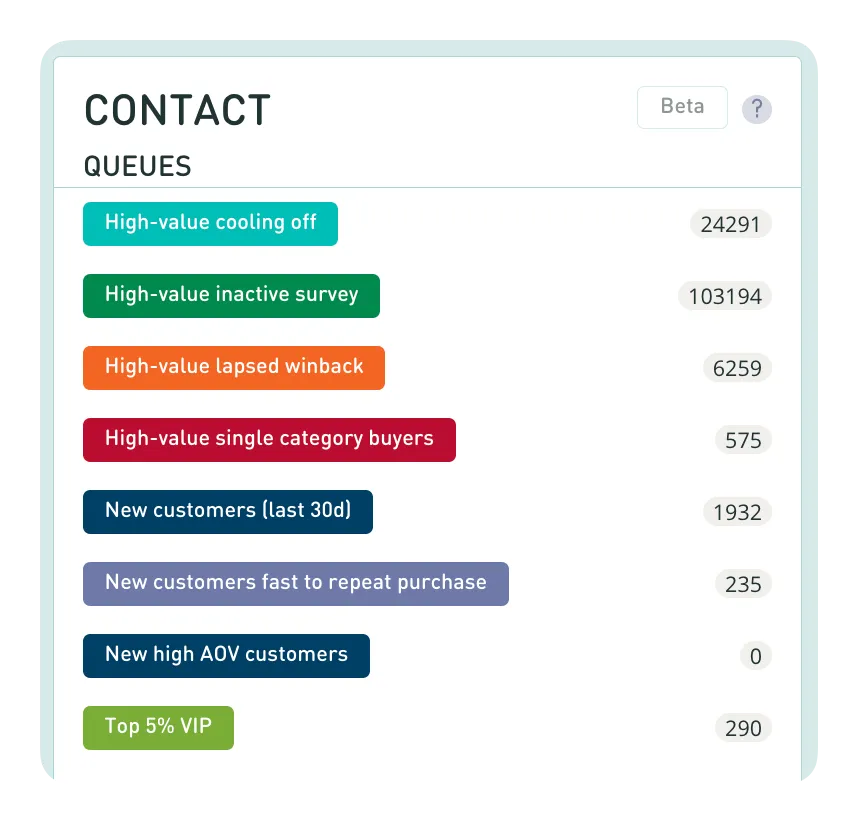
Some pre-built segments your Success manager may have set up for you are:
Sending messages to queues
Once integrated, you can set everything up and get sending!
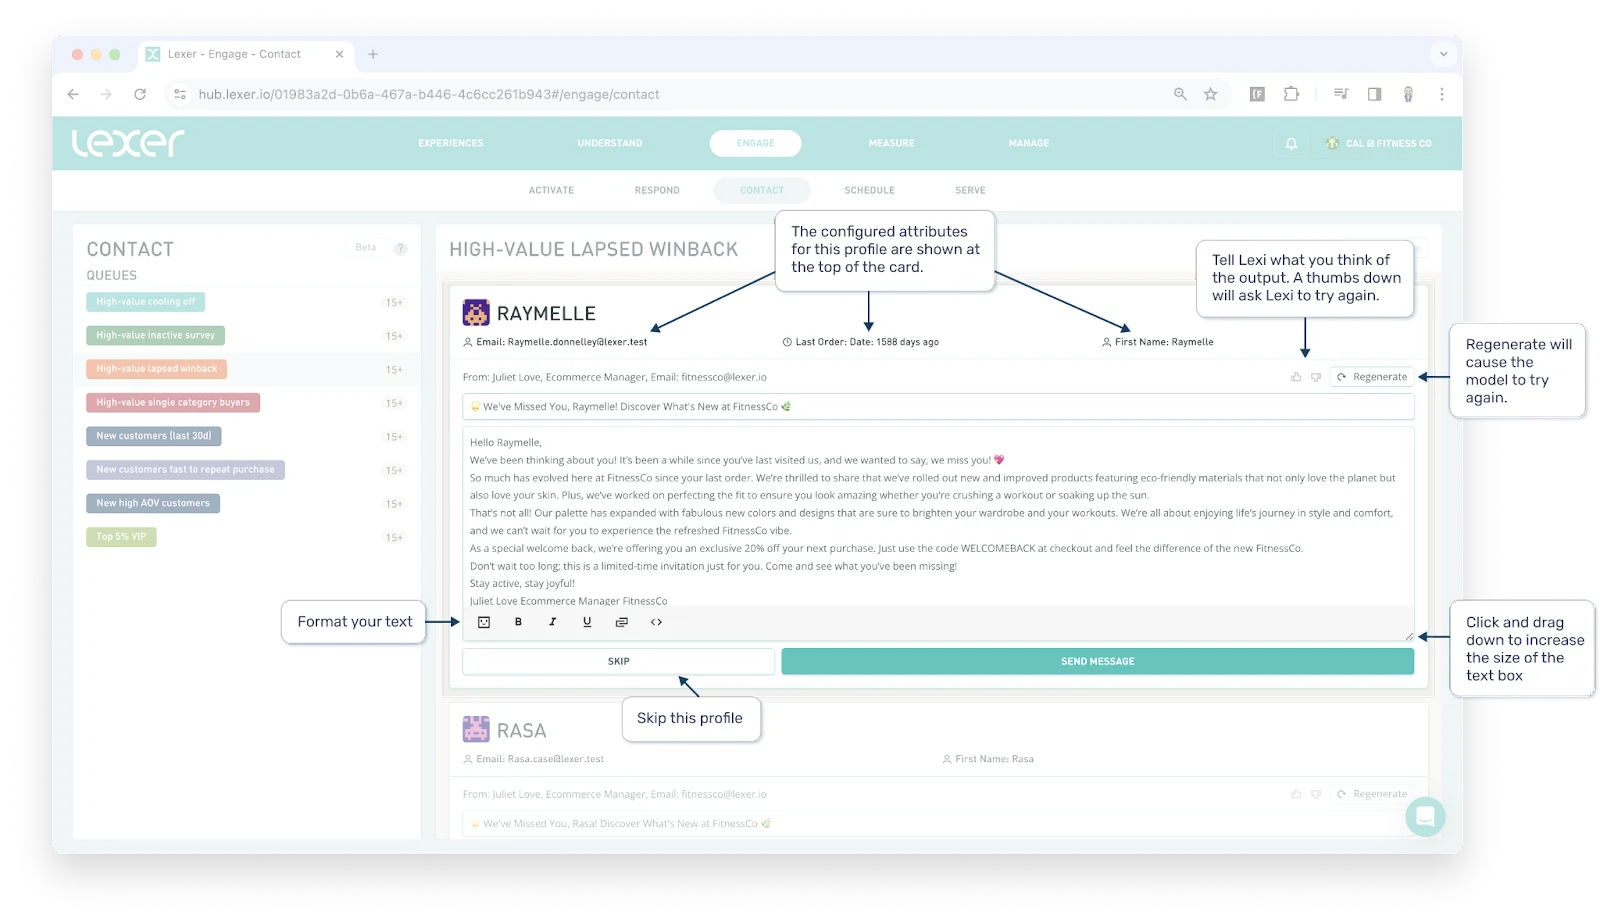
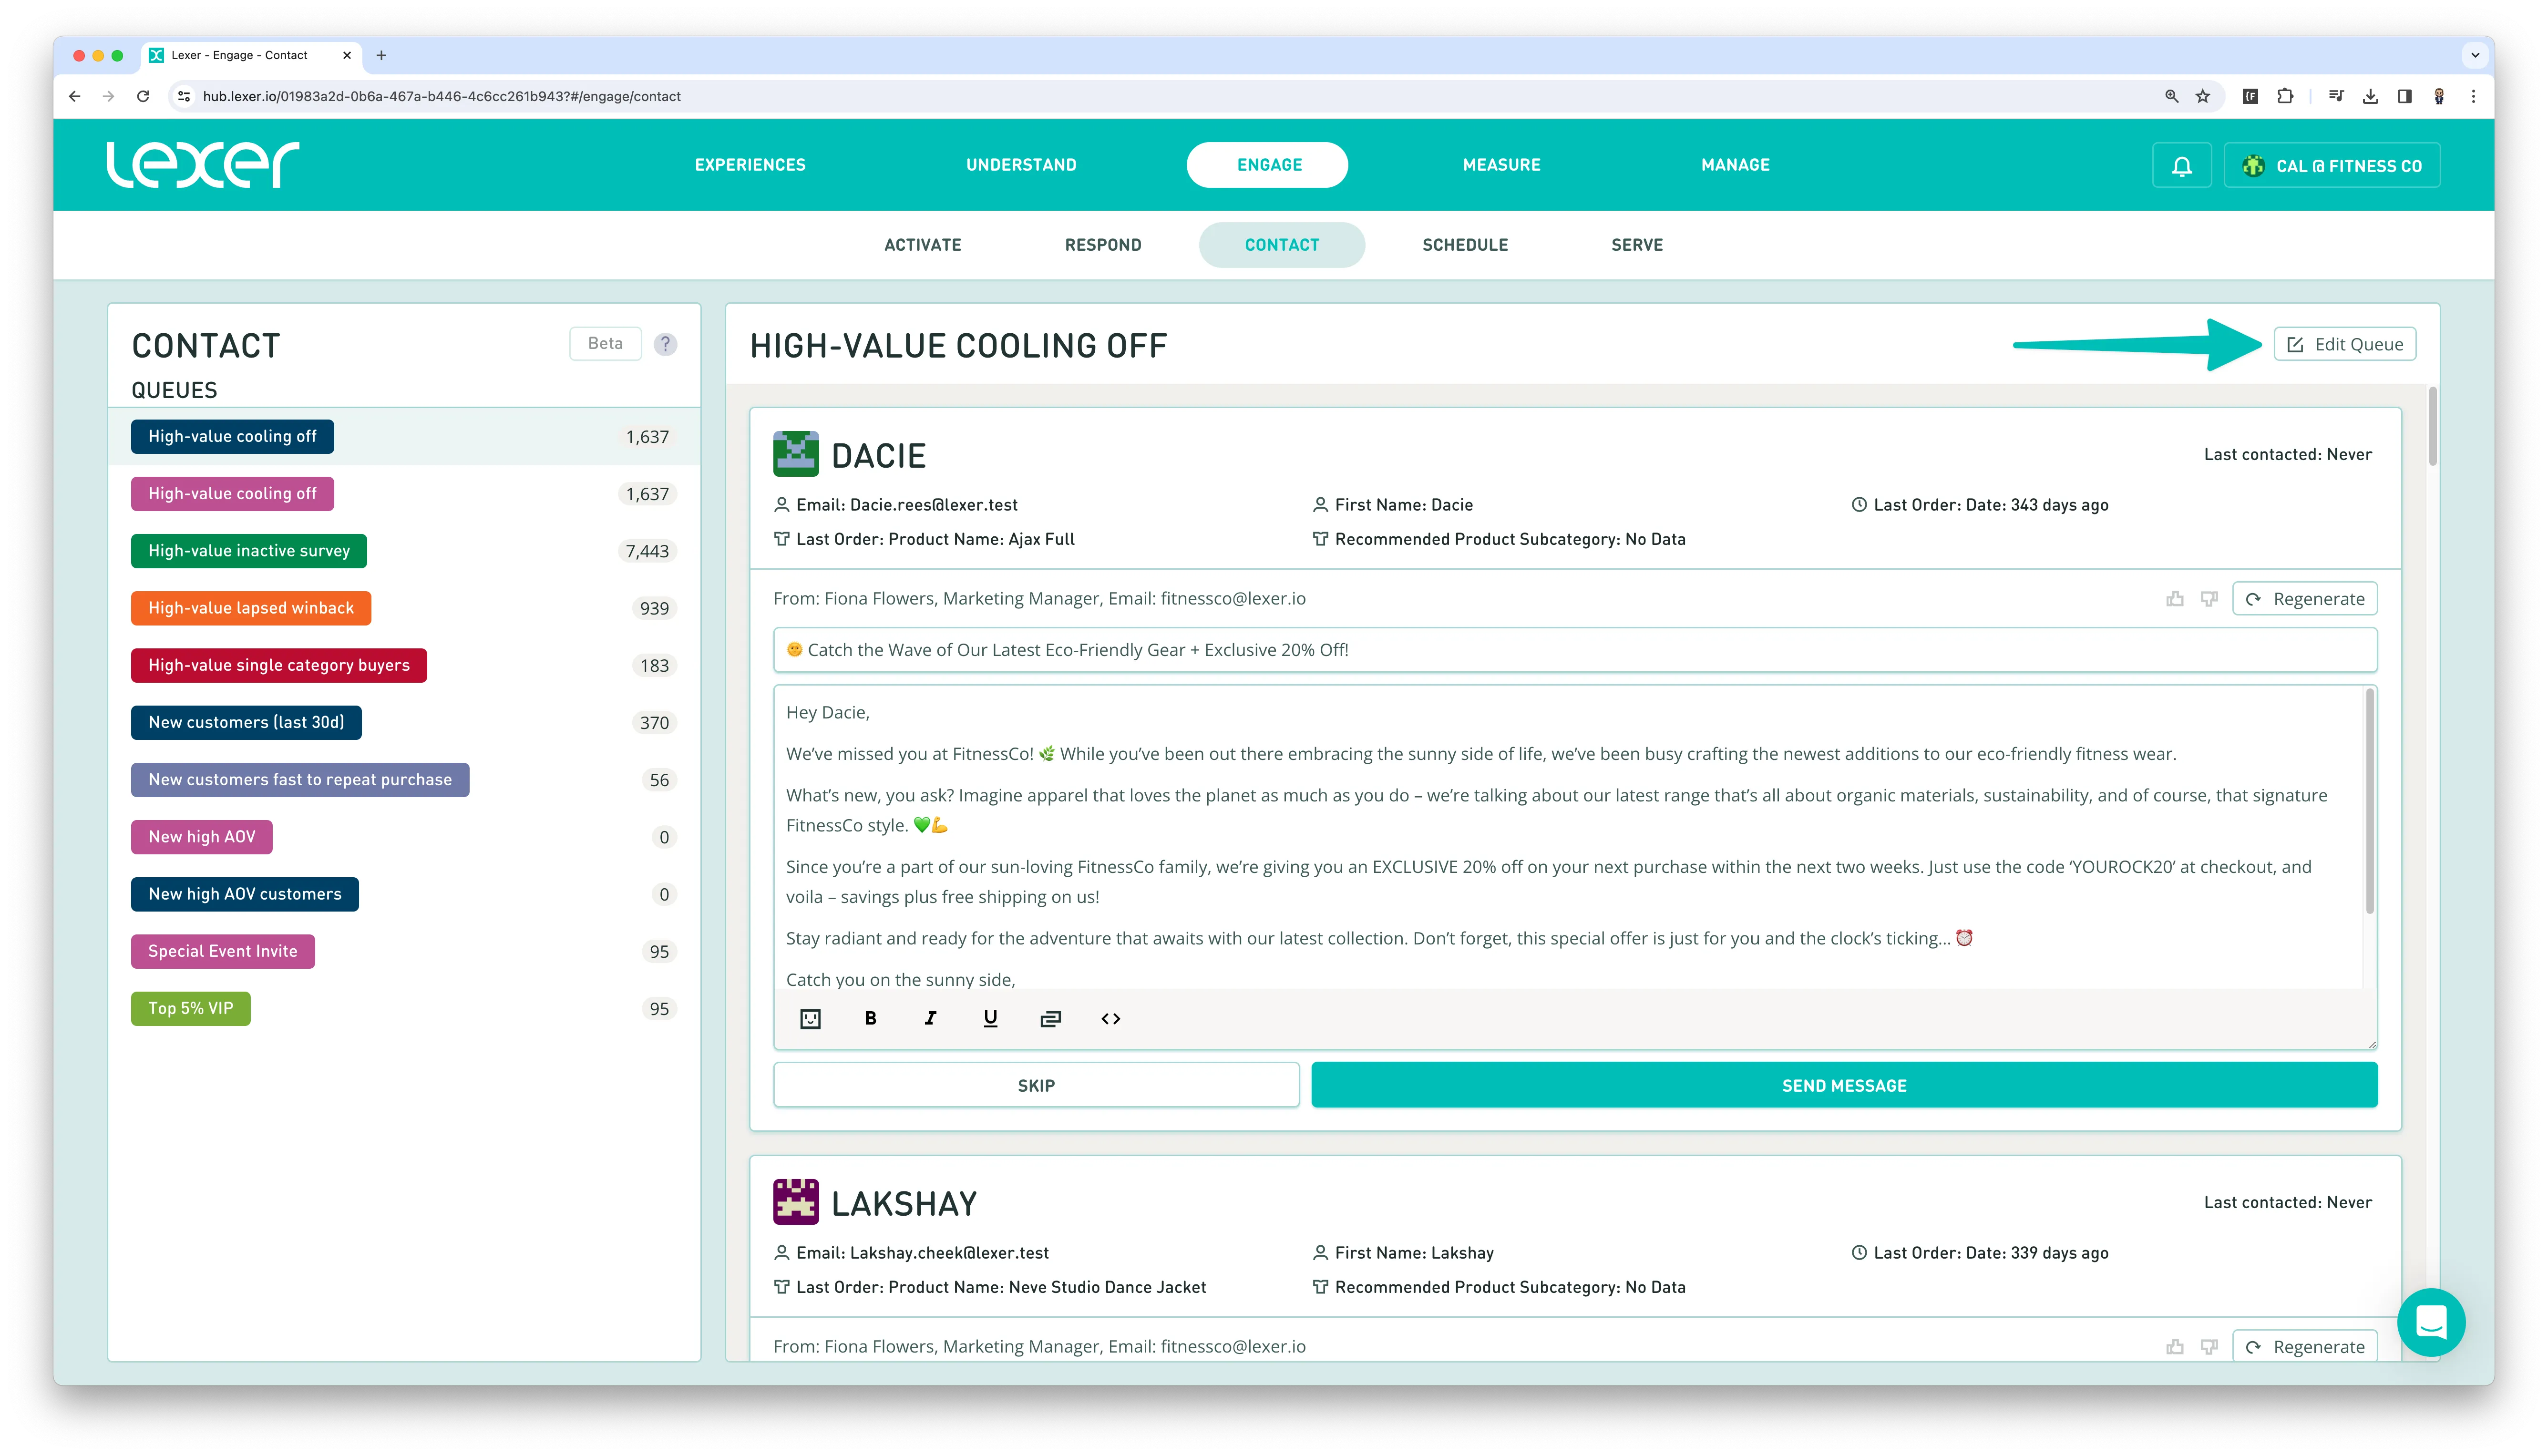
- Navigate to Engage > Contact.
- Select the queue you would like to review and send messages from.
- Review each message making edits where needed.
- Click Send message when you’re happy with the final message.
Editing a message before sending
Editing messages is a breeze with Contact’s rich text editor. You can add in emoji’s for a pop of color, format the text, and add in hyperlinks. Together these tools can help you to further customize your message for the customer and suggest actions for them to take. Follow these steps to modify your message.
Format your text

Formatting the text is pretty straight forward. Just highlight the text you want to format and click the relevant button. You can use bold, italics, underline, add [.code]code snippet formatting[.code] for things like promo codes and even combine any number of these so they really stand out.
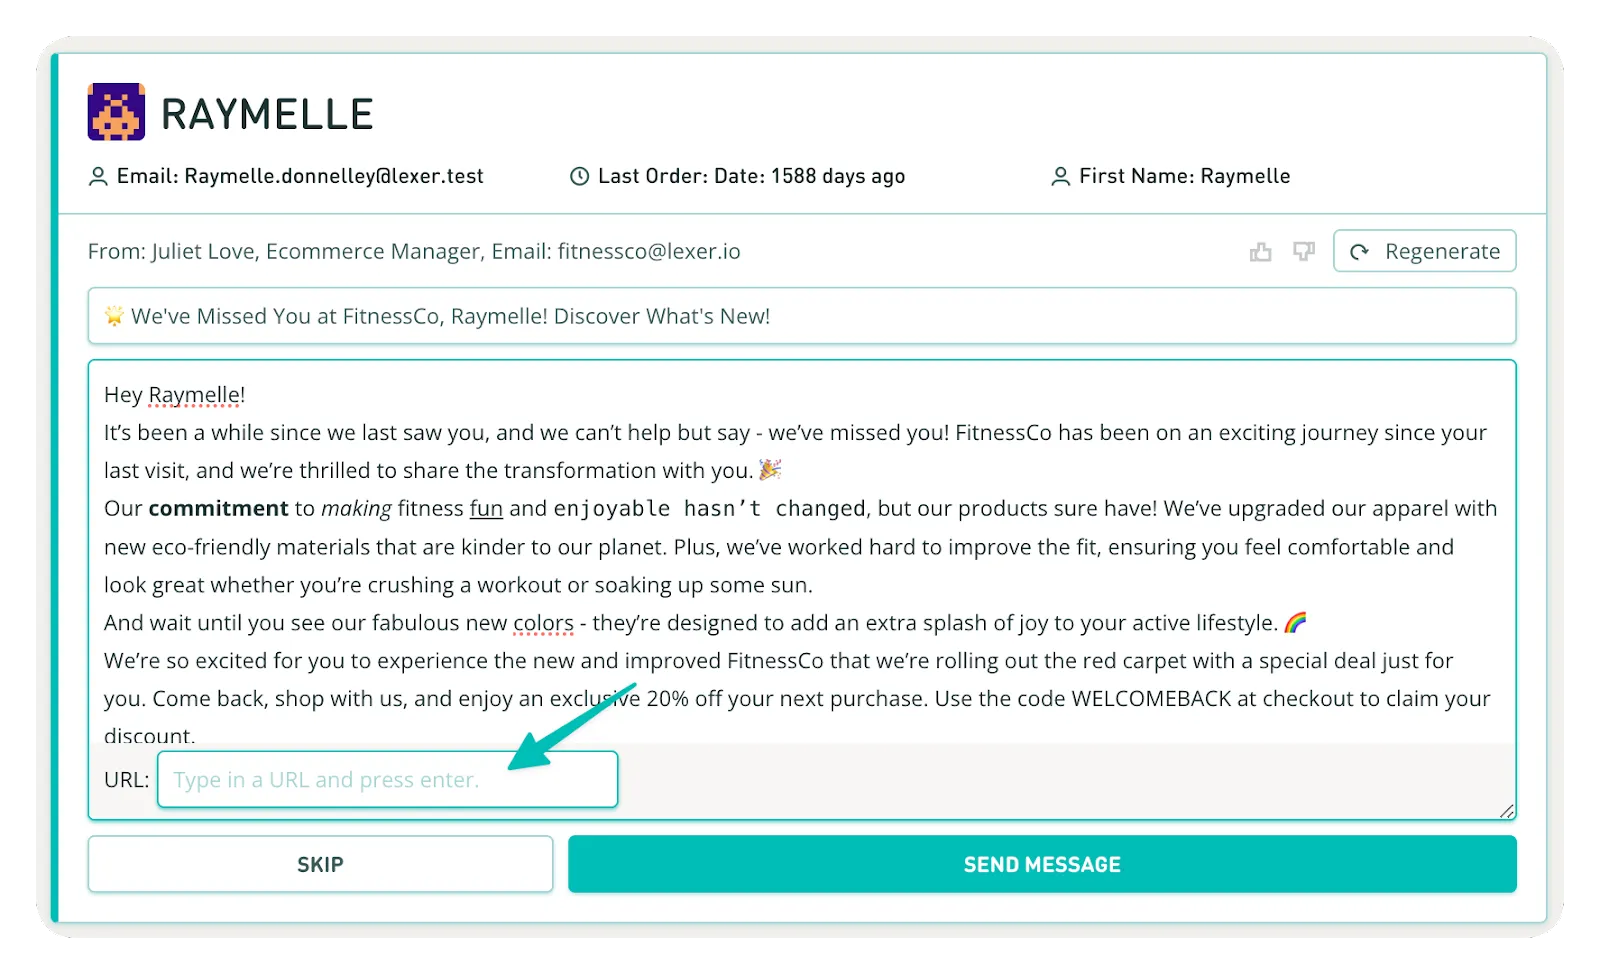
Add a hyperlink
- Highlight the text you want to turn into a hyperlink.
- Click on the hyperlink icon below the text.

- Add the URL you want to link to and hit enter.
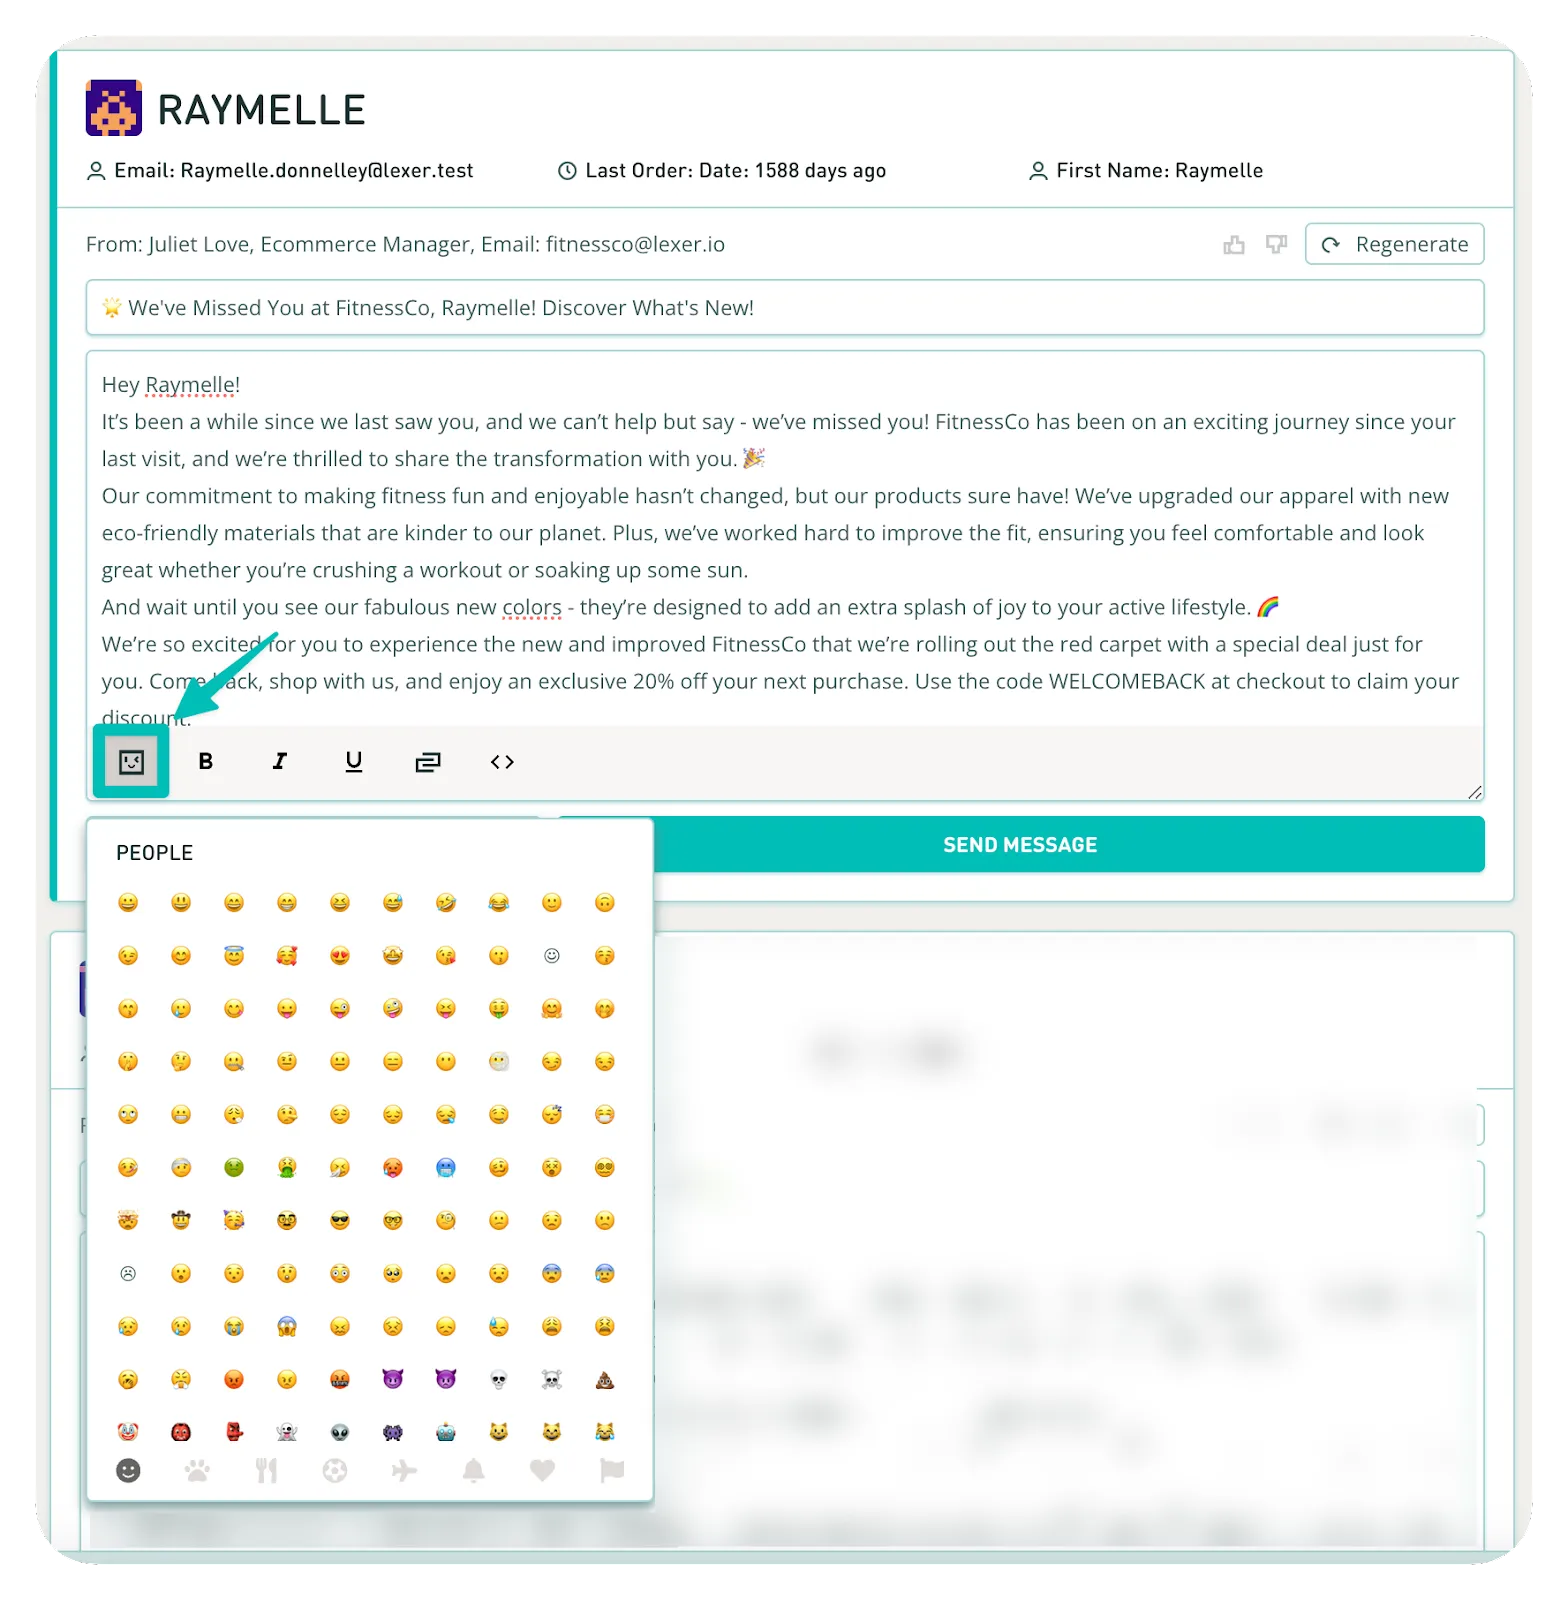
Add an emoji
You can add emojis using your standard emoji keyboard or click on the emoji icon at the bottom of the text box.
Create a new queue
Once you have the hang of the pre-build queues, or if they aren’t suited to your needs, create your own using and segment in the hub. For a refresher on how to build segments, read our Learn article here.
Before we create a queue, make sure you’ve built a segment that you would like to target. For this example, we will keep it simple and use a simple segment “New customers (30 days)”.
To create a new queue to send messages to a specific segment, follow these steps:
- Navigate to Understand > Segment.
- Add the Segment you would like to target to the Segment Builder.
- Click arrow, icon to open the segment settings.
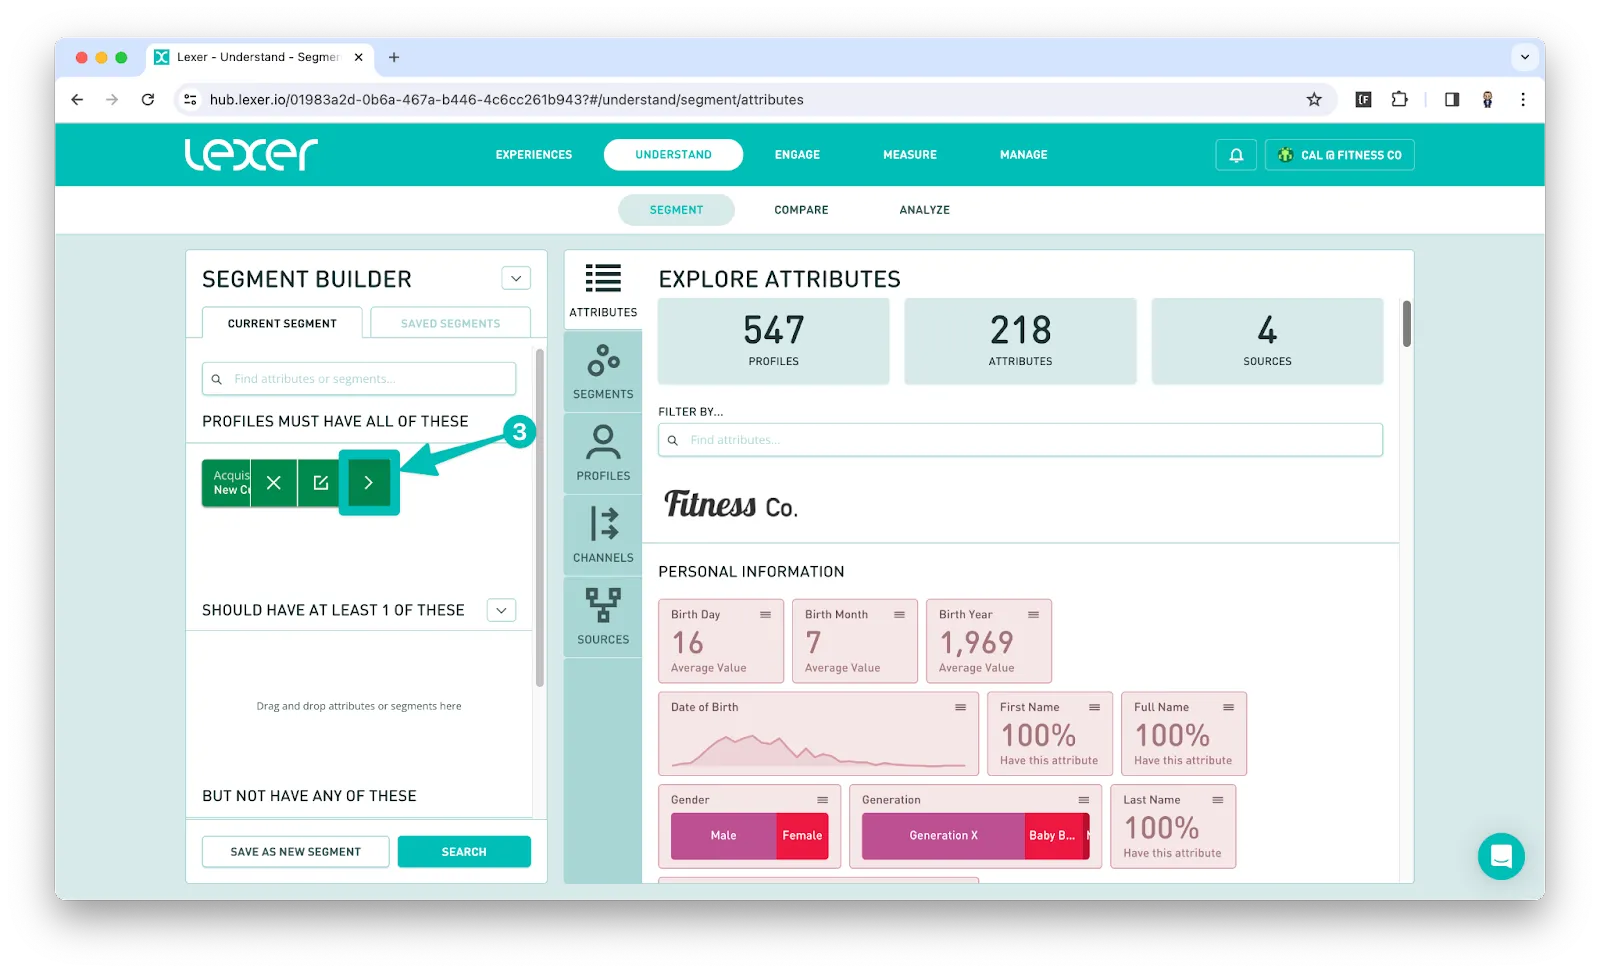
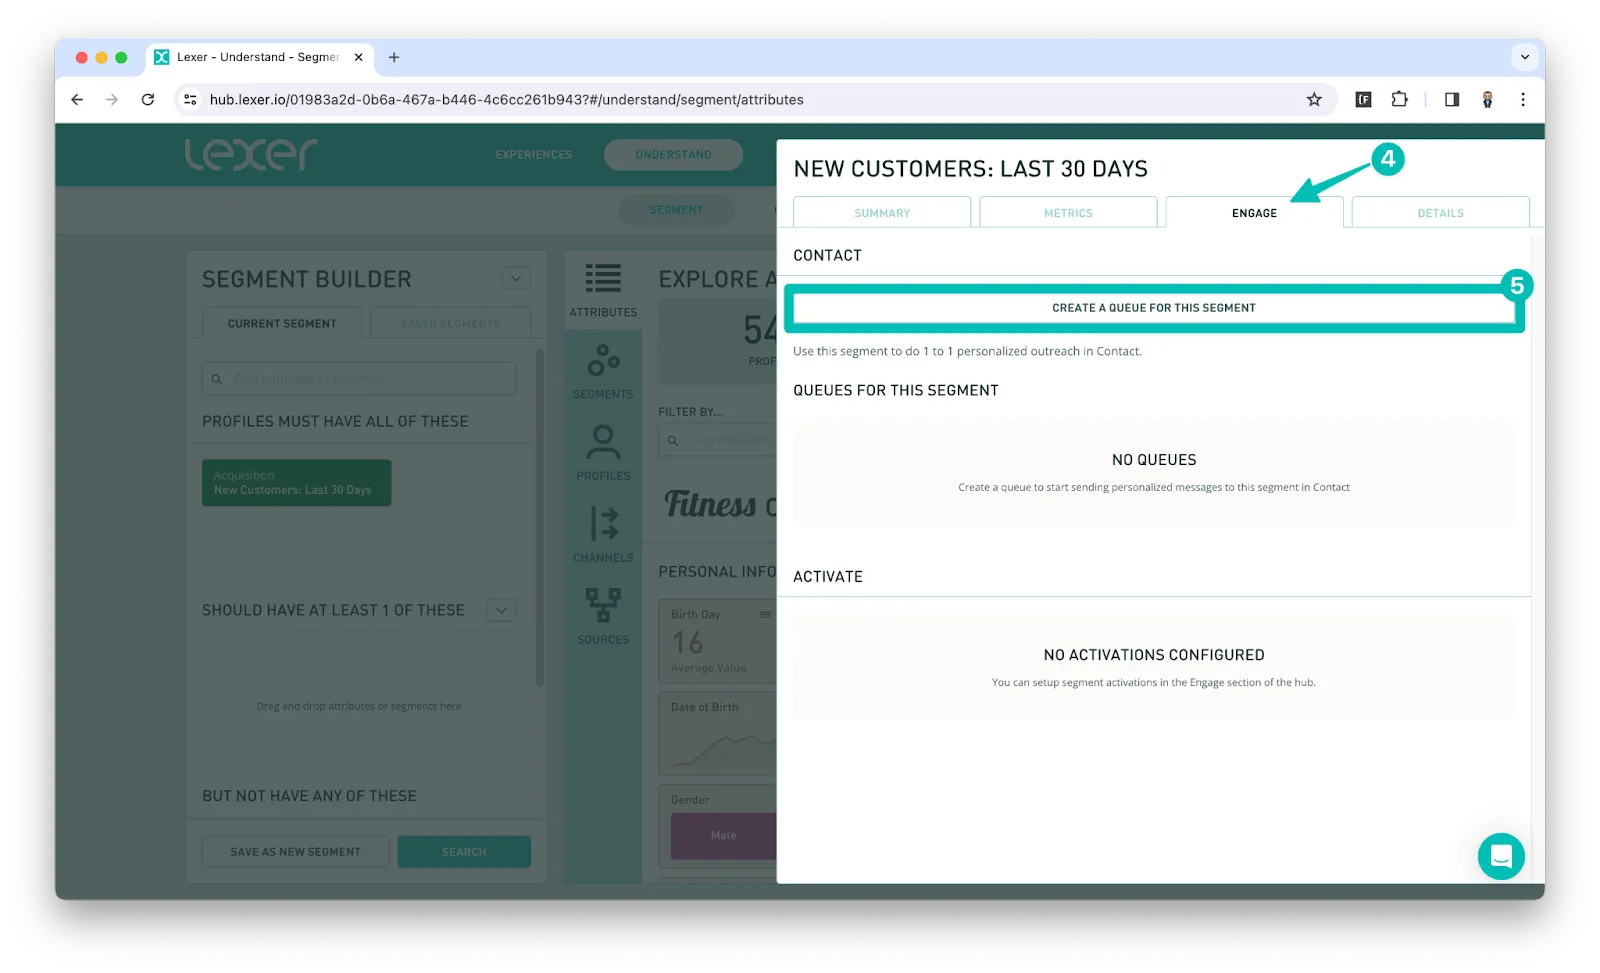
- Click on the Engage tab.
- Click the Create a queue for this segment button.
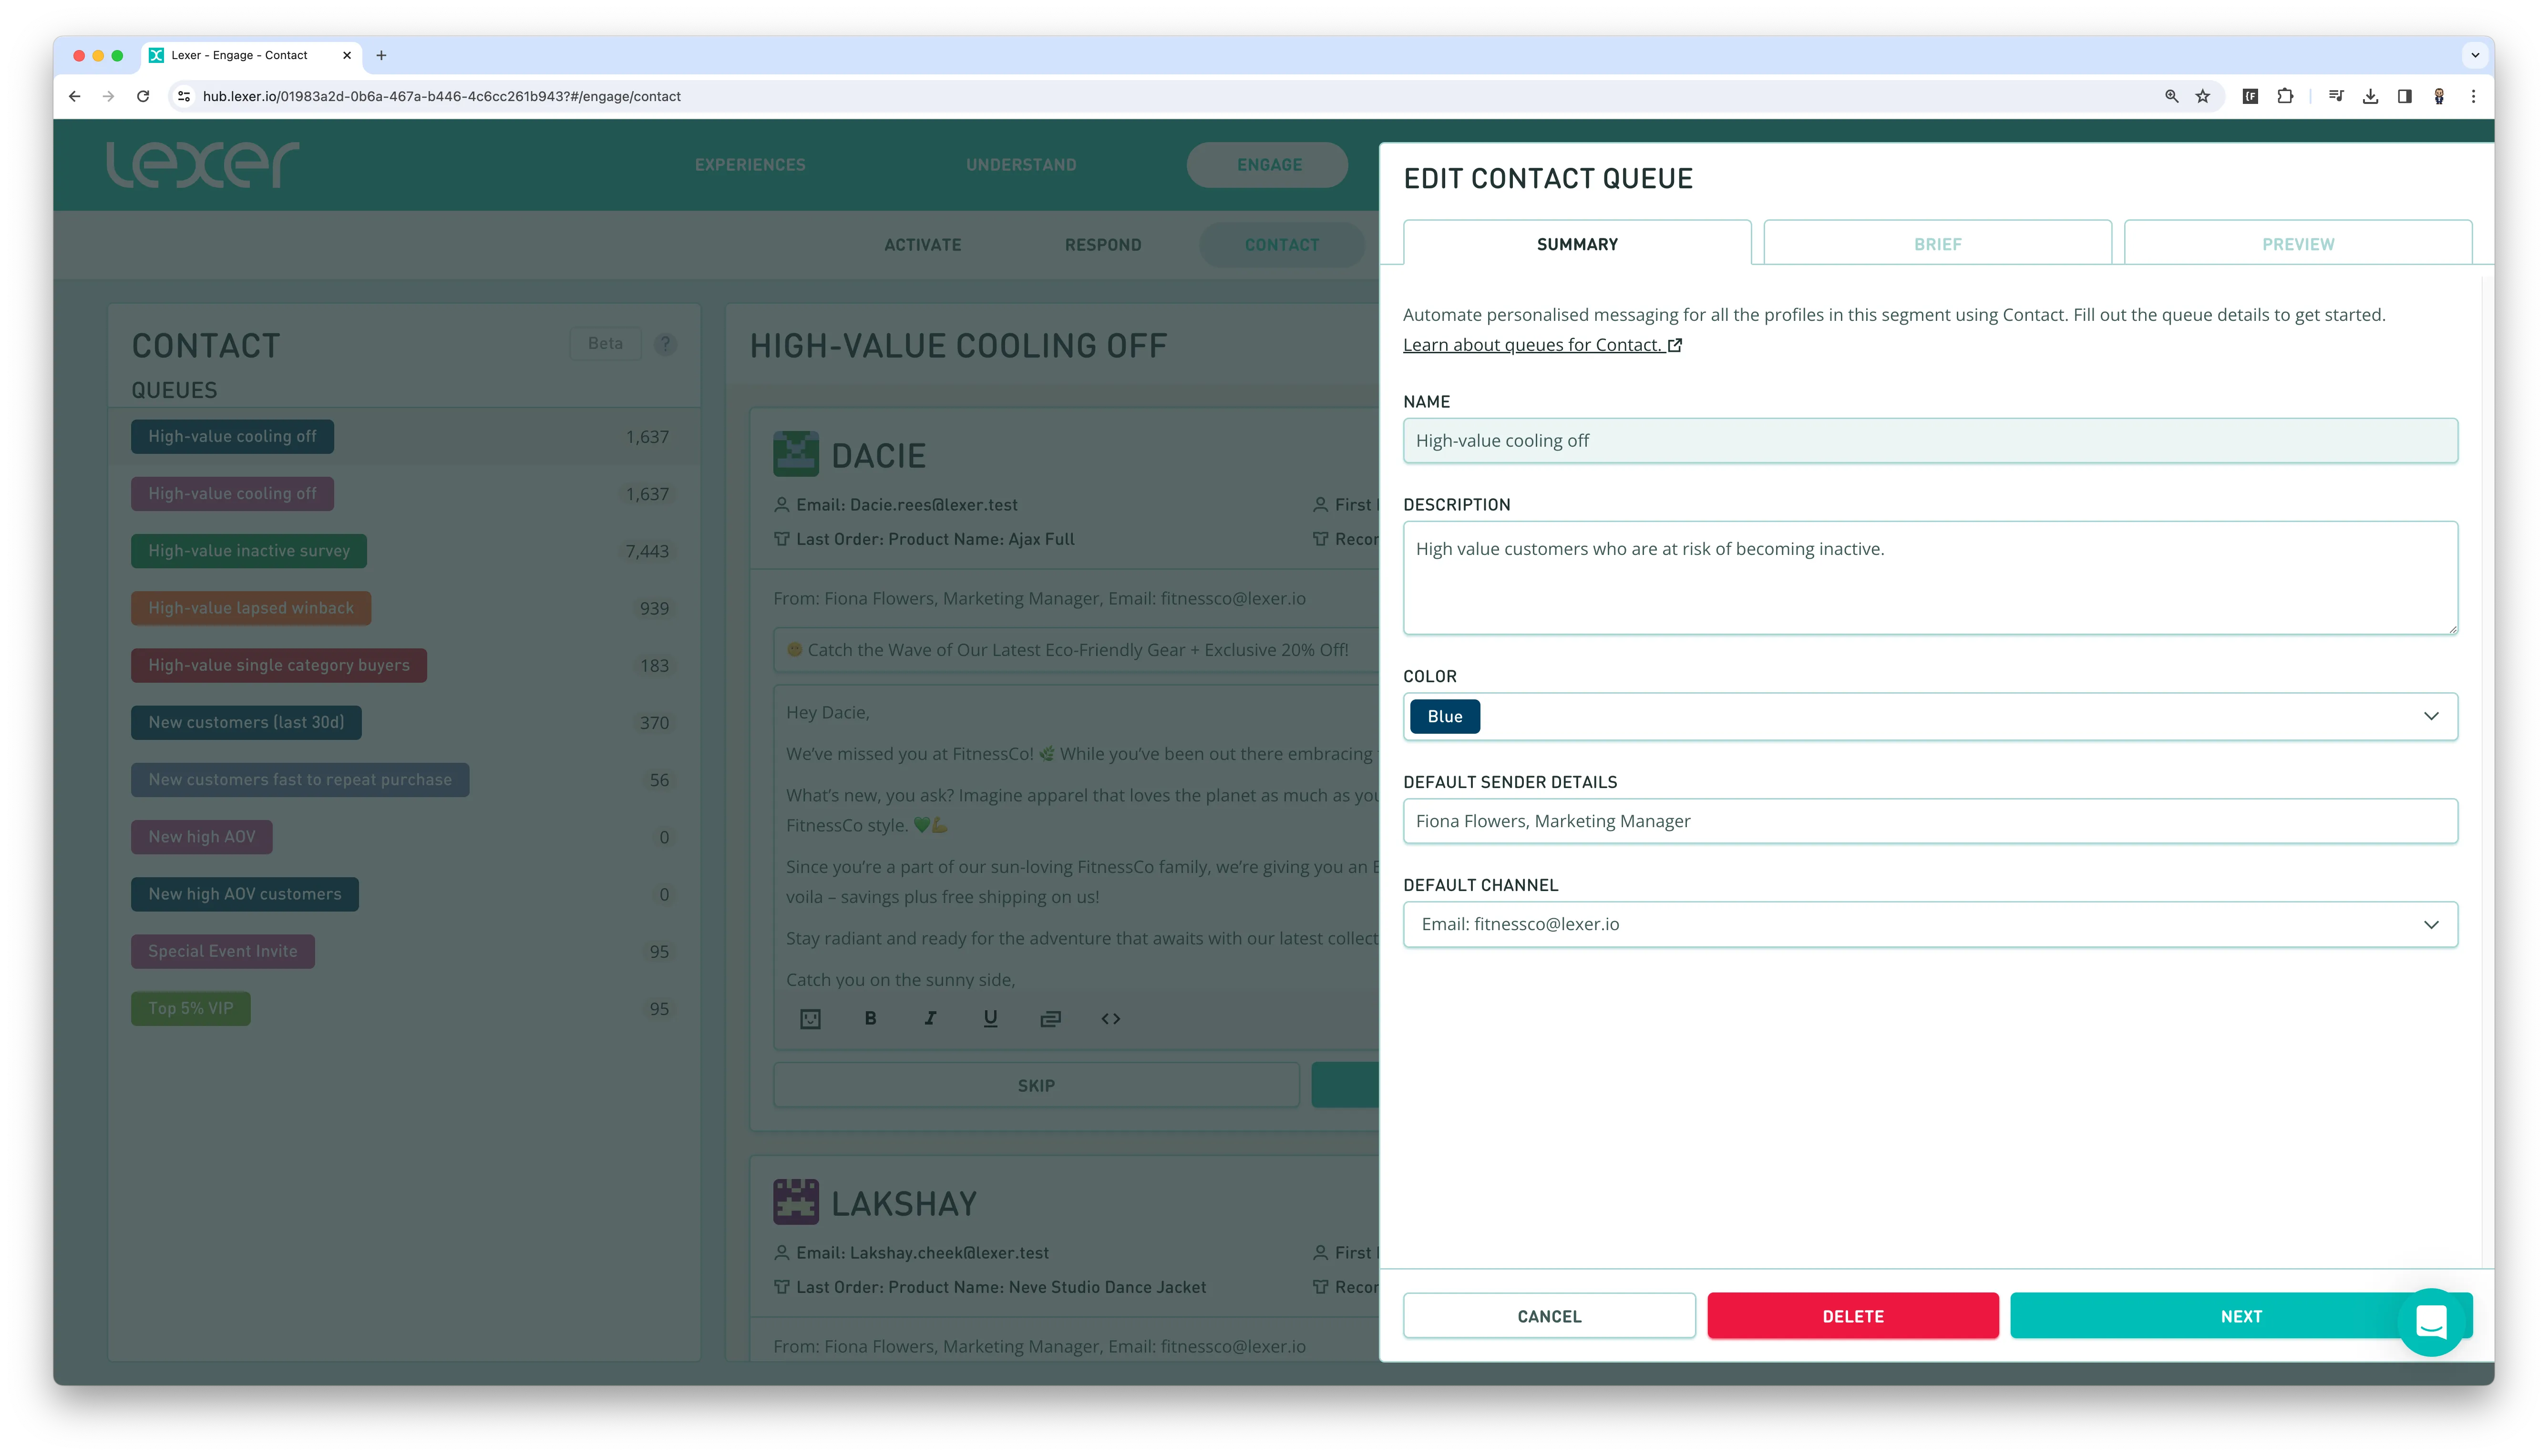
- This will open up the detailed settings for this queue with 3 tabs: Summary, Brief and Preview.
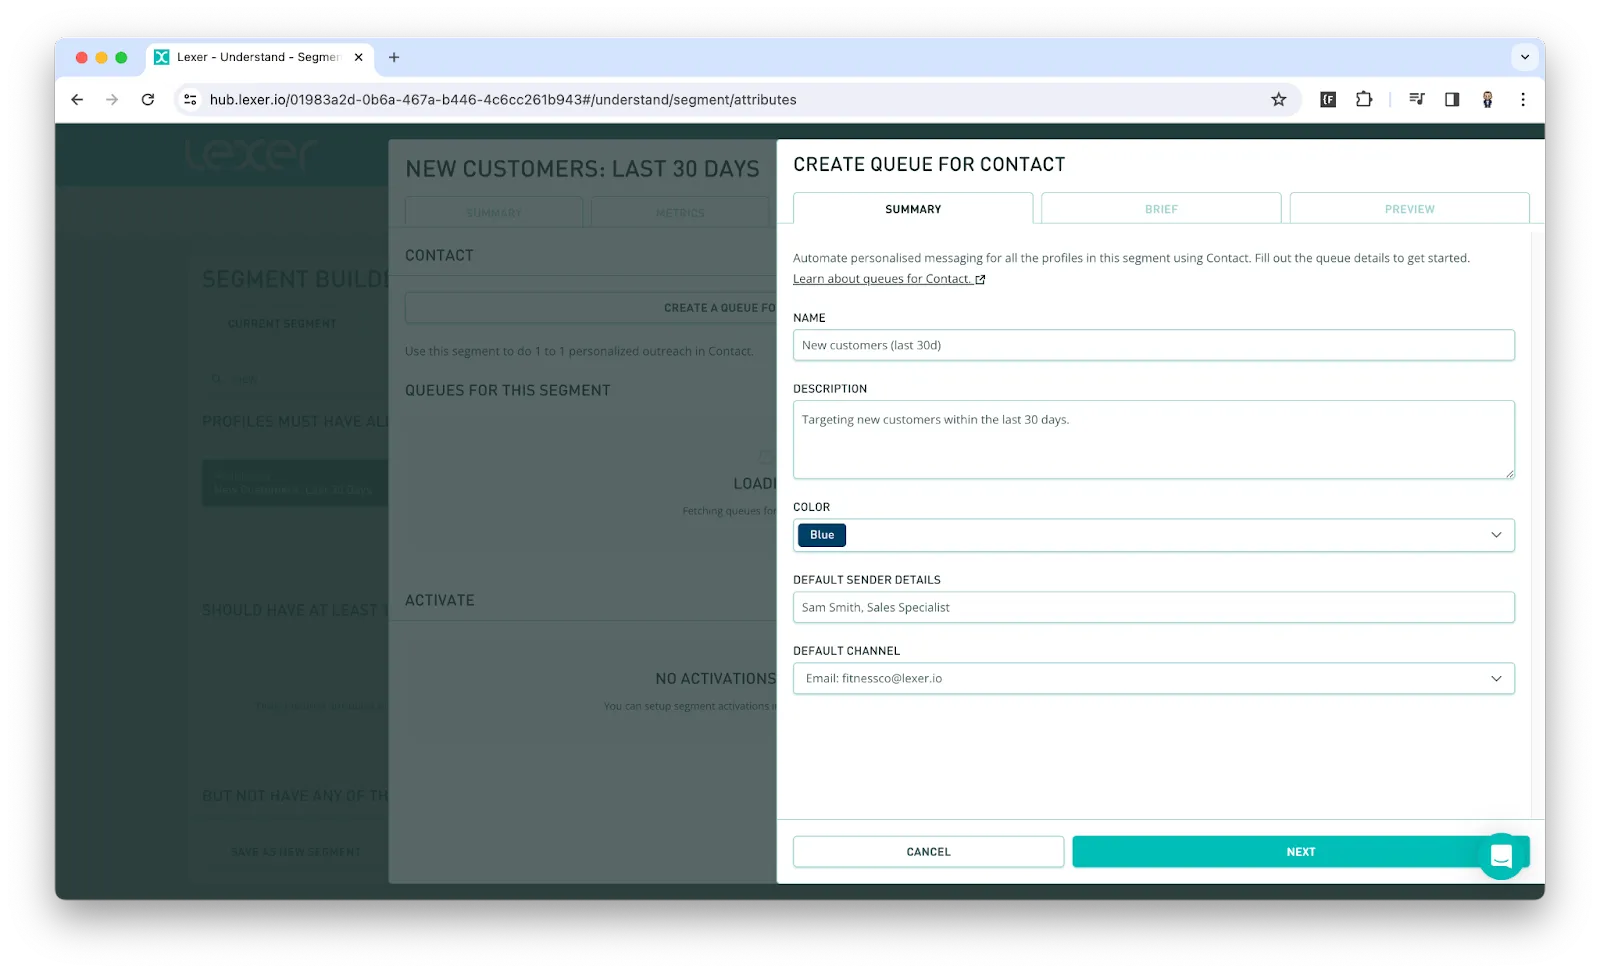
- The Summary tab requires you to provide the following:
- Name the queue
- Provide a description.
- Choose a color.
- Type the sender's details.
- Choose the default channel that the communication will be sent from.

In the example below I have specified that I would like to “Refer to the product they have purchased and suggest another product”. In order for the AI model to effectively use this information I have added the Product Name attribute.

You can regenerate messages a few times to get a good feel for the messages that will be created. If you want to adjust the prompts, just head back to the Brief tab and make some changes, then head to the Preview tab to see if you like the new output.
The better the preview messages, the less work you will have to do to tidy up the messages later in the process.
Add URLs to your brief
If you would like to add a hyperlink to your Contact messages, you can add a bullet point to include the whole URL for example:
- Remind the customer of our informative Blog directing them to: https://www.lexer.io/the-library
Alternatively if you would like to include the URL as a hyperlink rather than a potentially long URL you can include some more instruction. For example:
- Remind the customer of our informative Blog directing them to the following URL (https://www.lexer.io/the-library), but make sure to include it as a hyperlink that reads "check out our blog".
Editing or deleting queues
There are two ways to edit a queue, within contact or within Segment.
Edit queues in contact
- Navigate to Engage > Contact.
- Click Edit Queue in the top right.
3. Make your edits to the queue, navigating between all 3 tabs, and click save on the "review" tab.
Edit queues in Segment
To edit a queue, find the segment in the Segment Builder.
- Navigate to Understand > Segment.
- Add the Segment you would like to target to the Segment Builder.
- Click on the chevron, or “greater than”, icon to open the segment settings.
- Click on the Engage tab.
- Under the Queues for this segment section, you will see the queues that have been set up related to this segment. To edit, click on the edit icon on the right.
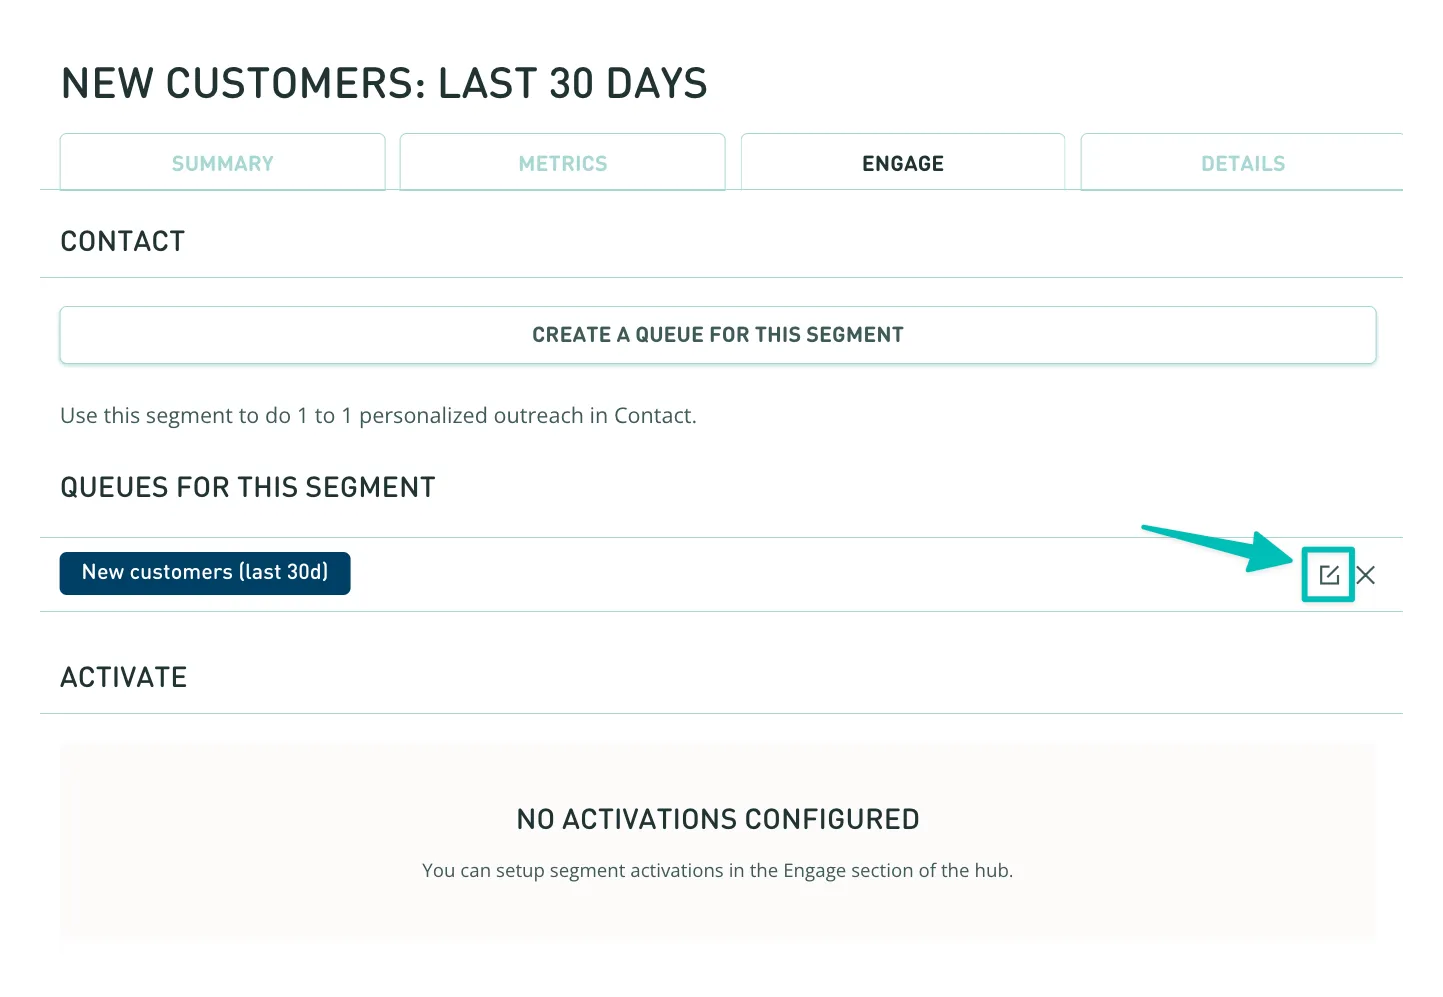
6. If you want to delete the queue, click on the delete icon to the right of the edit icon.
FAQs
That’s a wrap!
In this article we introduced Contact, our Lexi powered customer outreach feature. We discussed the benefits and how to use Contact to create more personalized messaging with your customers. If you have any questions or need some help, please reach out to Support using the chatbot in the bottom right.
