
Javascript Tag: Shopify Custom Pixel
Installing the Lexer Javascript Tag in Shopify
The Lexer Javascript Tag enables customer tracking and analytics integration between your Shopify store and the Lexer Customer Data & Experience Platform (CDXP). This guide walks through the installation process using Shopify's Custom Pixel feature.
Prerequisites
- Access to your Shopify Admin account with permissions to manage Custom Pixels
- Your unique Lexer attributes and initiation code (provided by the Lexer team)
Installation Steps
Step 1: Create a Custom Pixel
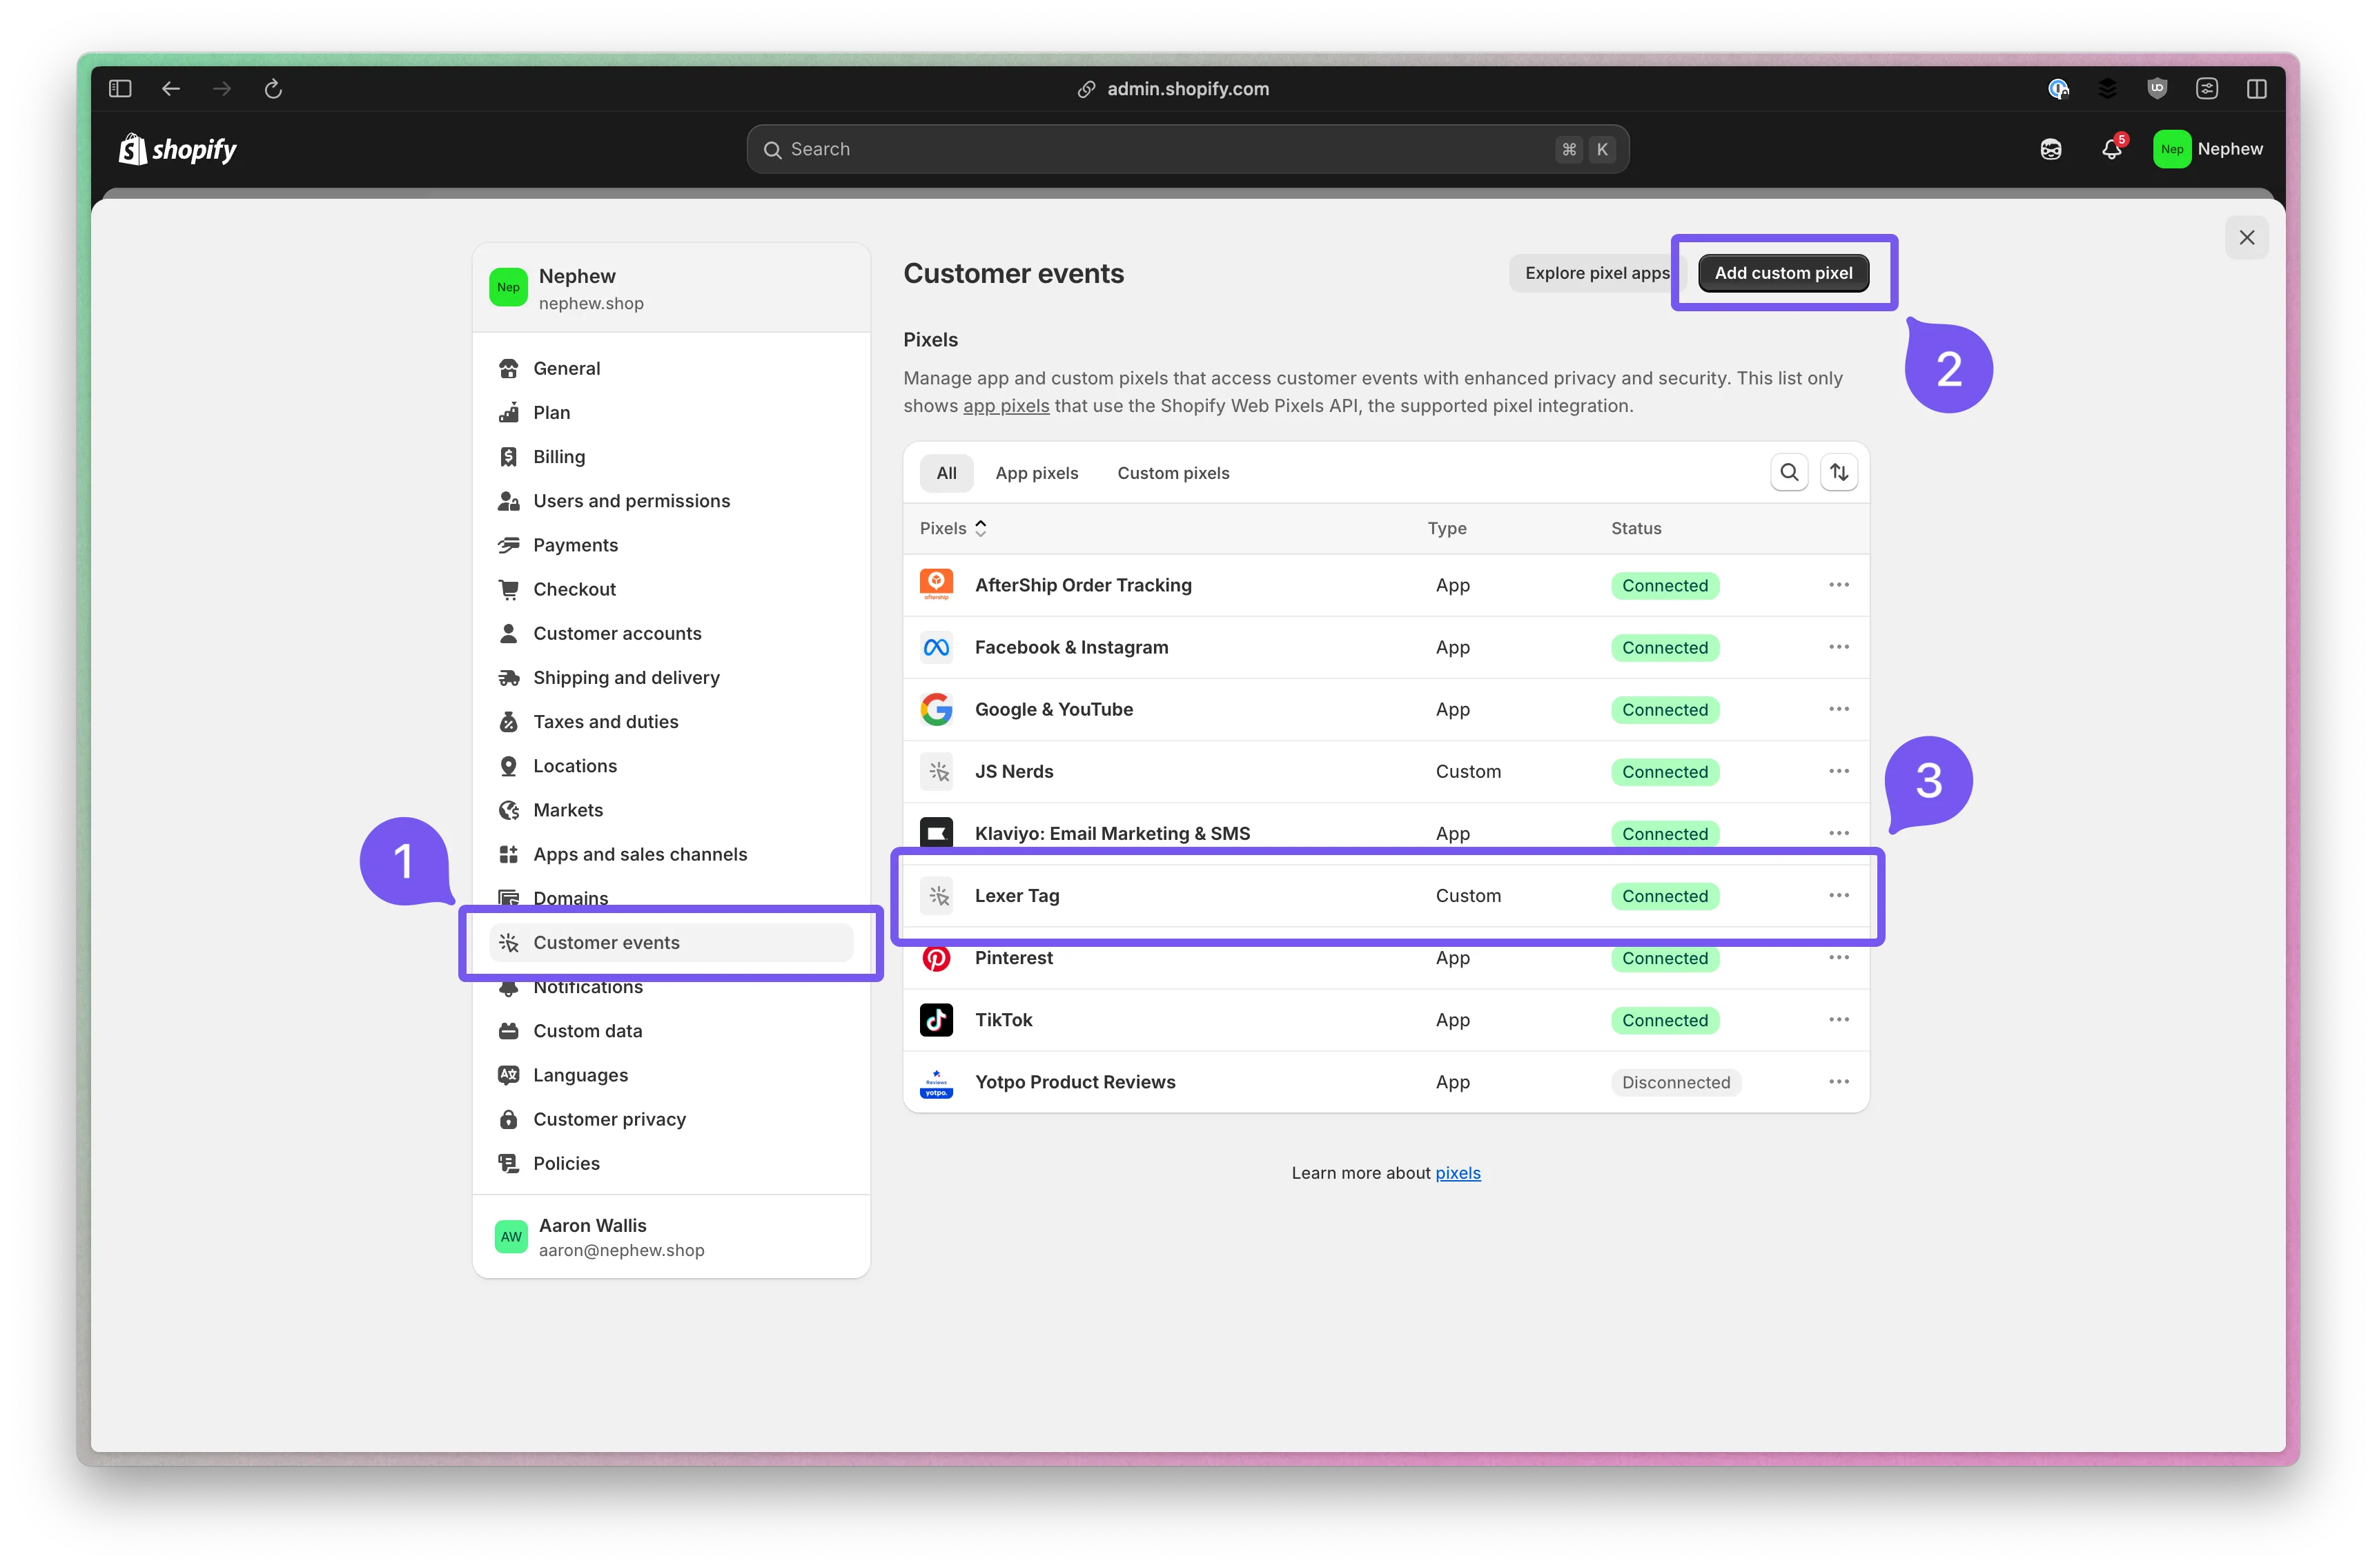
- Log in to your Shopify Admin, navigate to settings, then Customer Events
- Click Add Custom Pixel and name it something memorable, like Lexer Tag.
- Click into the tag to submit the details
Step 2: Privacy and Tag Code

Discuss with your team on the correct privacy configuration for the tag.
If you are unsure, you should select the most extreme data protection settings.
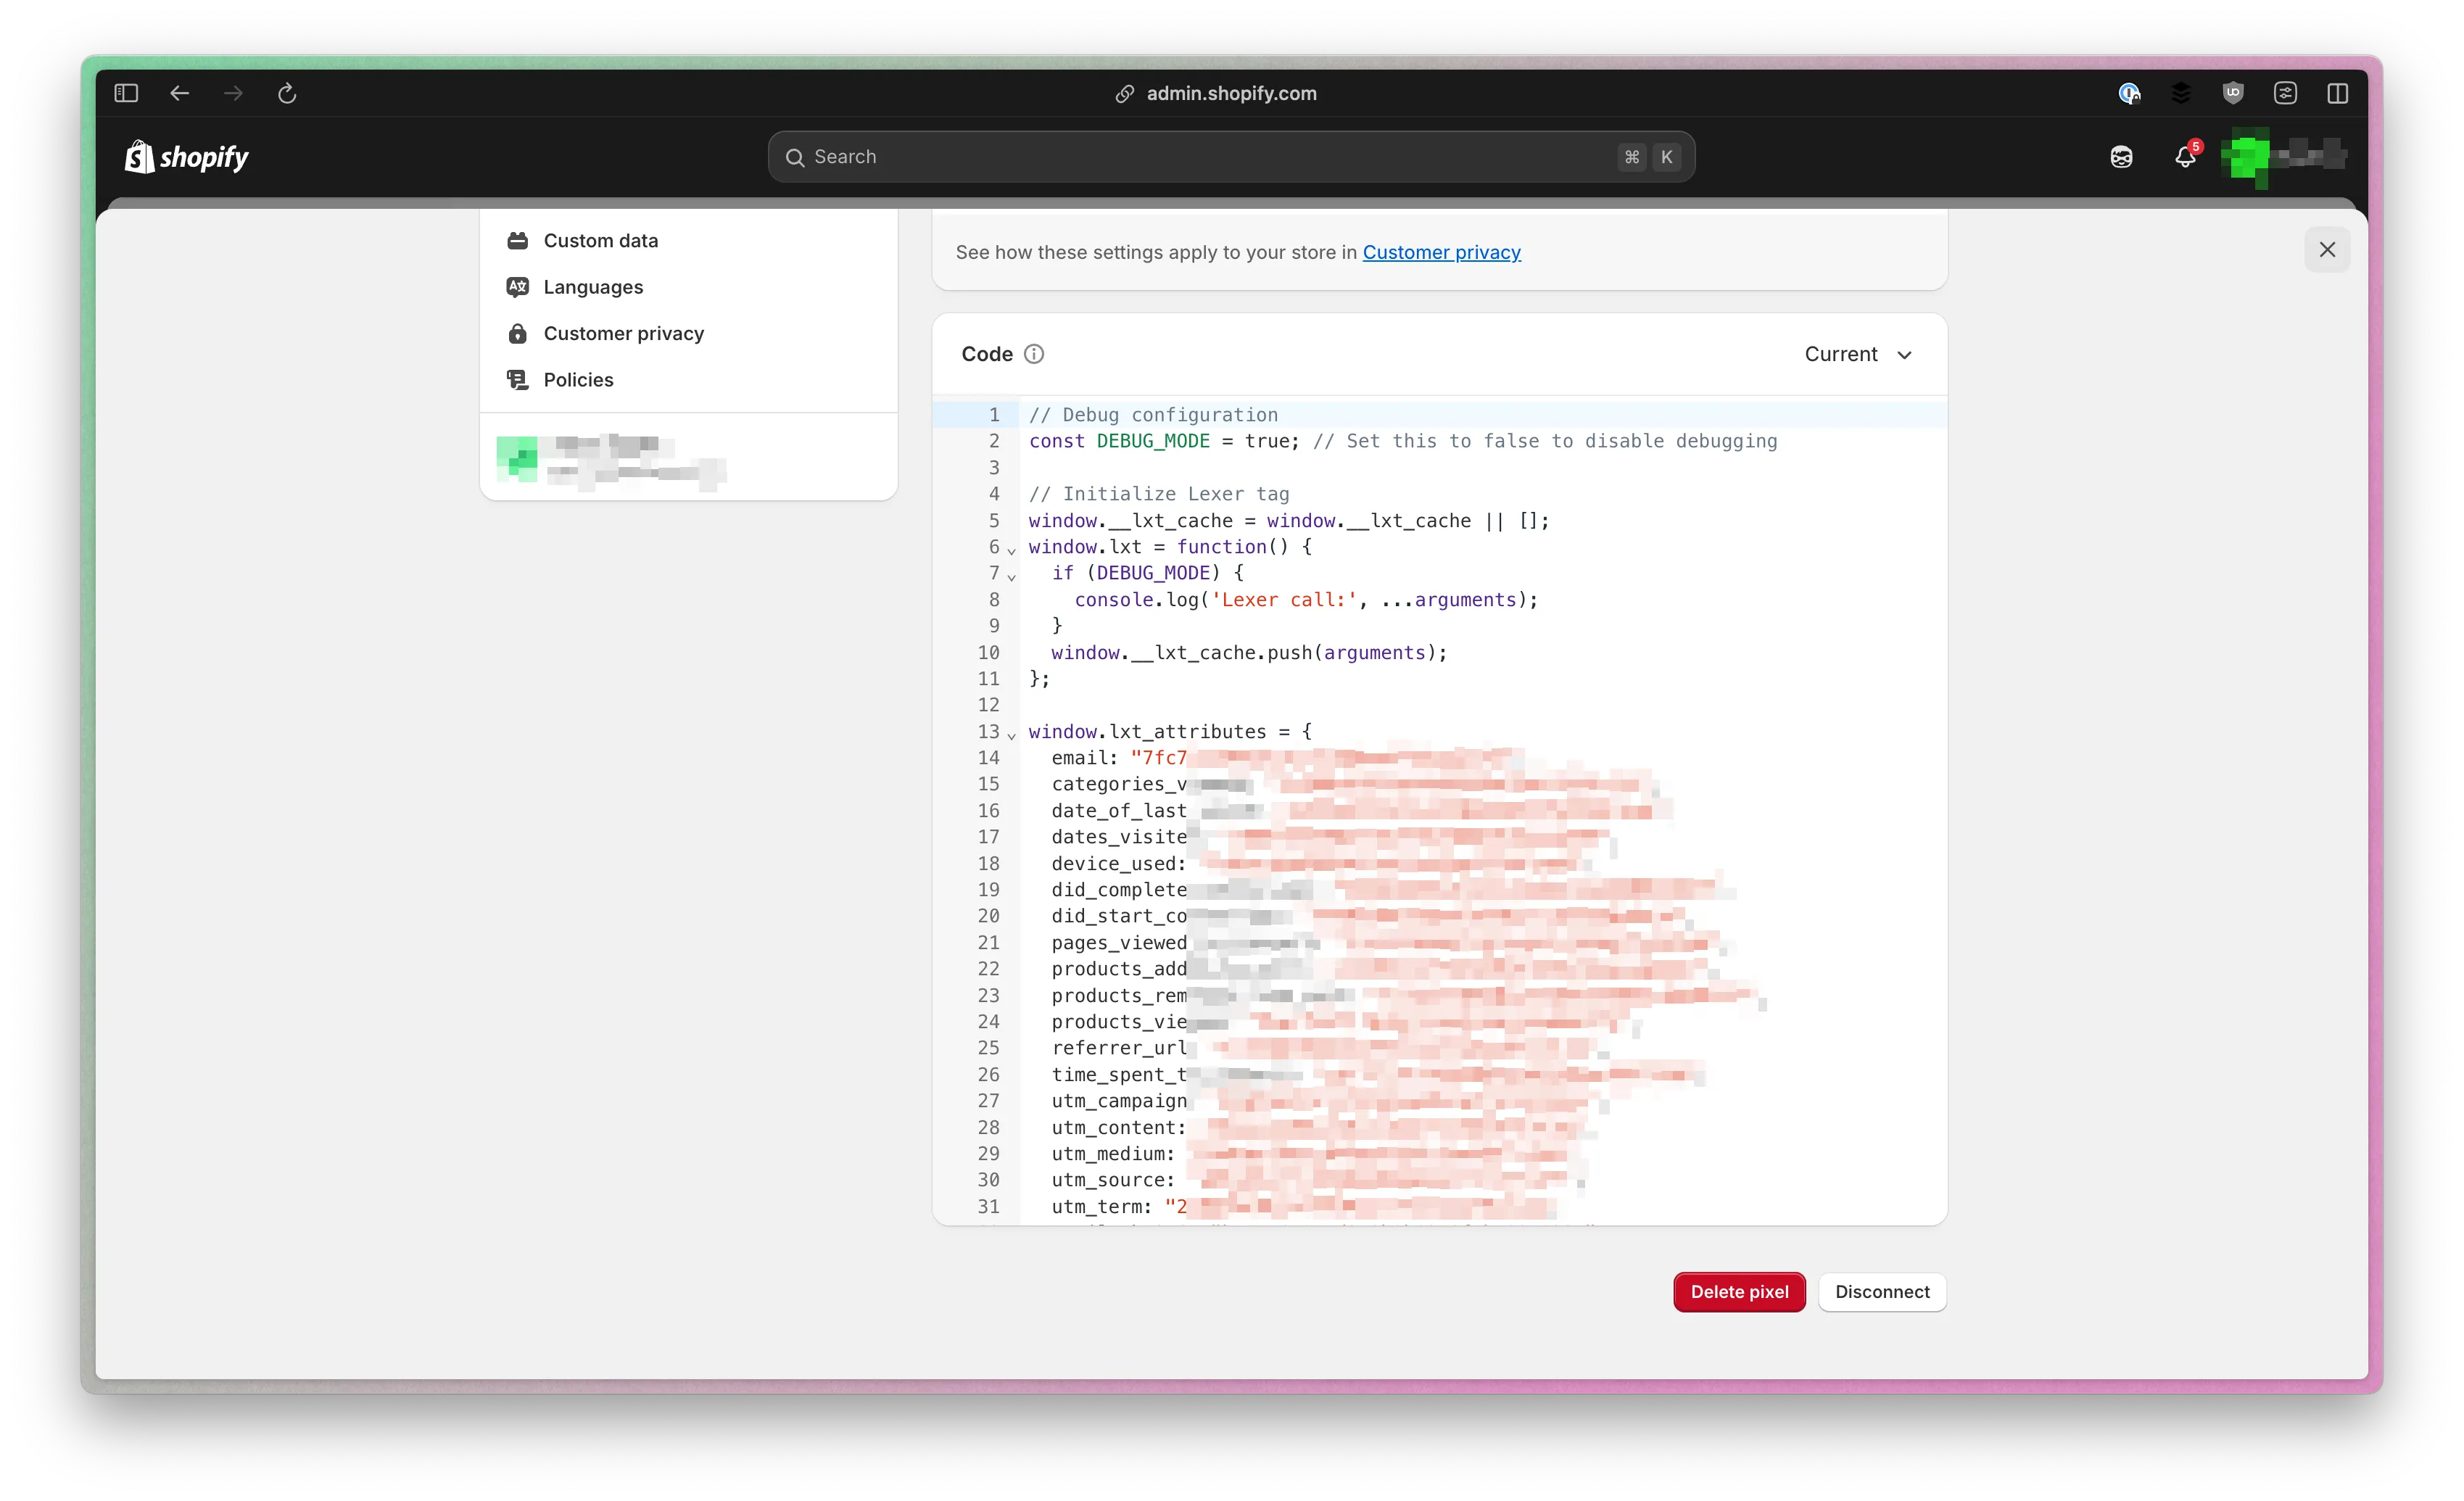
Now you can paste in the code provided by Lexer. This code is specific to your CDXP configuration.
If you run multiple Shopify sites, consult your Lexer team first, as there may be different codes per site.
Step 3: Save and Test
Once you hit save, your tag will be immediately live.
Note that by default the tag code has some debugging enabled.
When you navigate your site, and open your Javascript Console, you should see logging information for all customer engagement.

We recommend testing the entire sites user journey, including a purchase, to test the implementation of the tag.
Note that data may take up to 24 hours to appear in the Lexer CDXP.
Step 4: Disable Debugging
Navigate back to the Custom Data settings screen and change the first line of code to read:
const DEBUG_MODE = false;
Event Tracking
The Lexer Javascript Tag automatically tracks the following Shopify events:
- Product Views
- Collection Views
- Cart Updates (Add/Remove)
- Checkout Progress
- Purchase Completion
- Customer Account Actions
Additional Resources
For more information about the Lexer Javascript Tag and its capabilities, visit the Lexer Learning Hub.
Support
For implementation support or questions:
- Review browser console logs when DEBUG_MODE is enabled
- Check the Lexer Learn Hub for additional documentation
- Contact your Lexer team
