Scheduled replies
Schedule a message to send at the right time
You now have the ability to schedule replies to messages in your Inbox. You can send these at a later time, to better manage your workflow, and your customers’ expectations. In this article, we'll look at how to schedule a reply.
How to send a scheduled reply
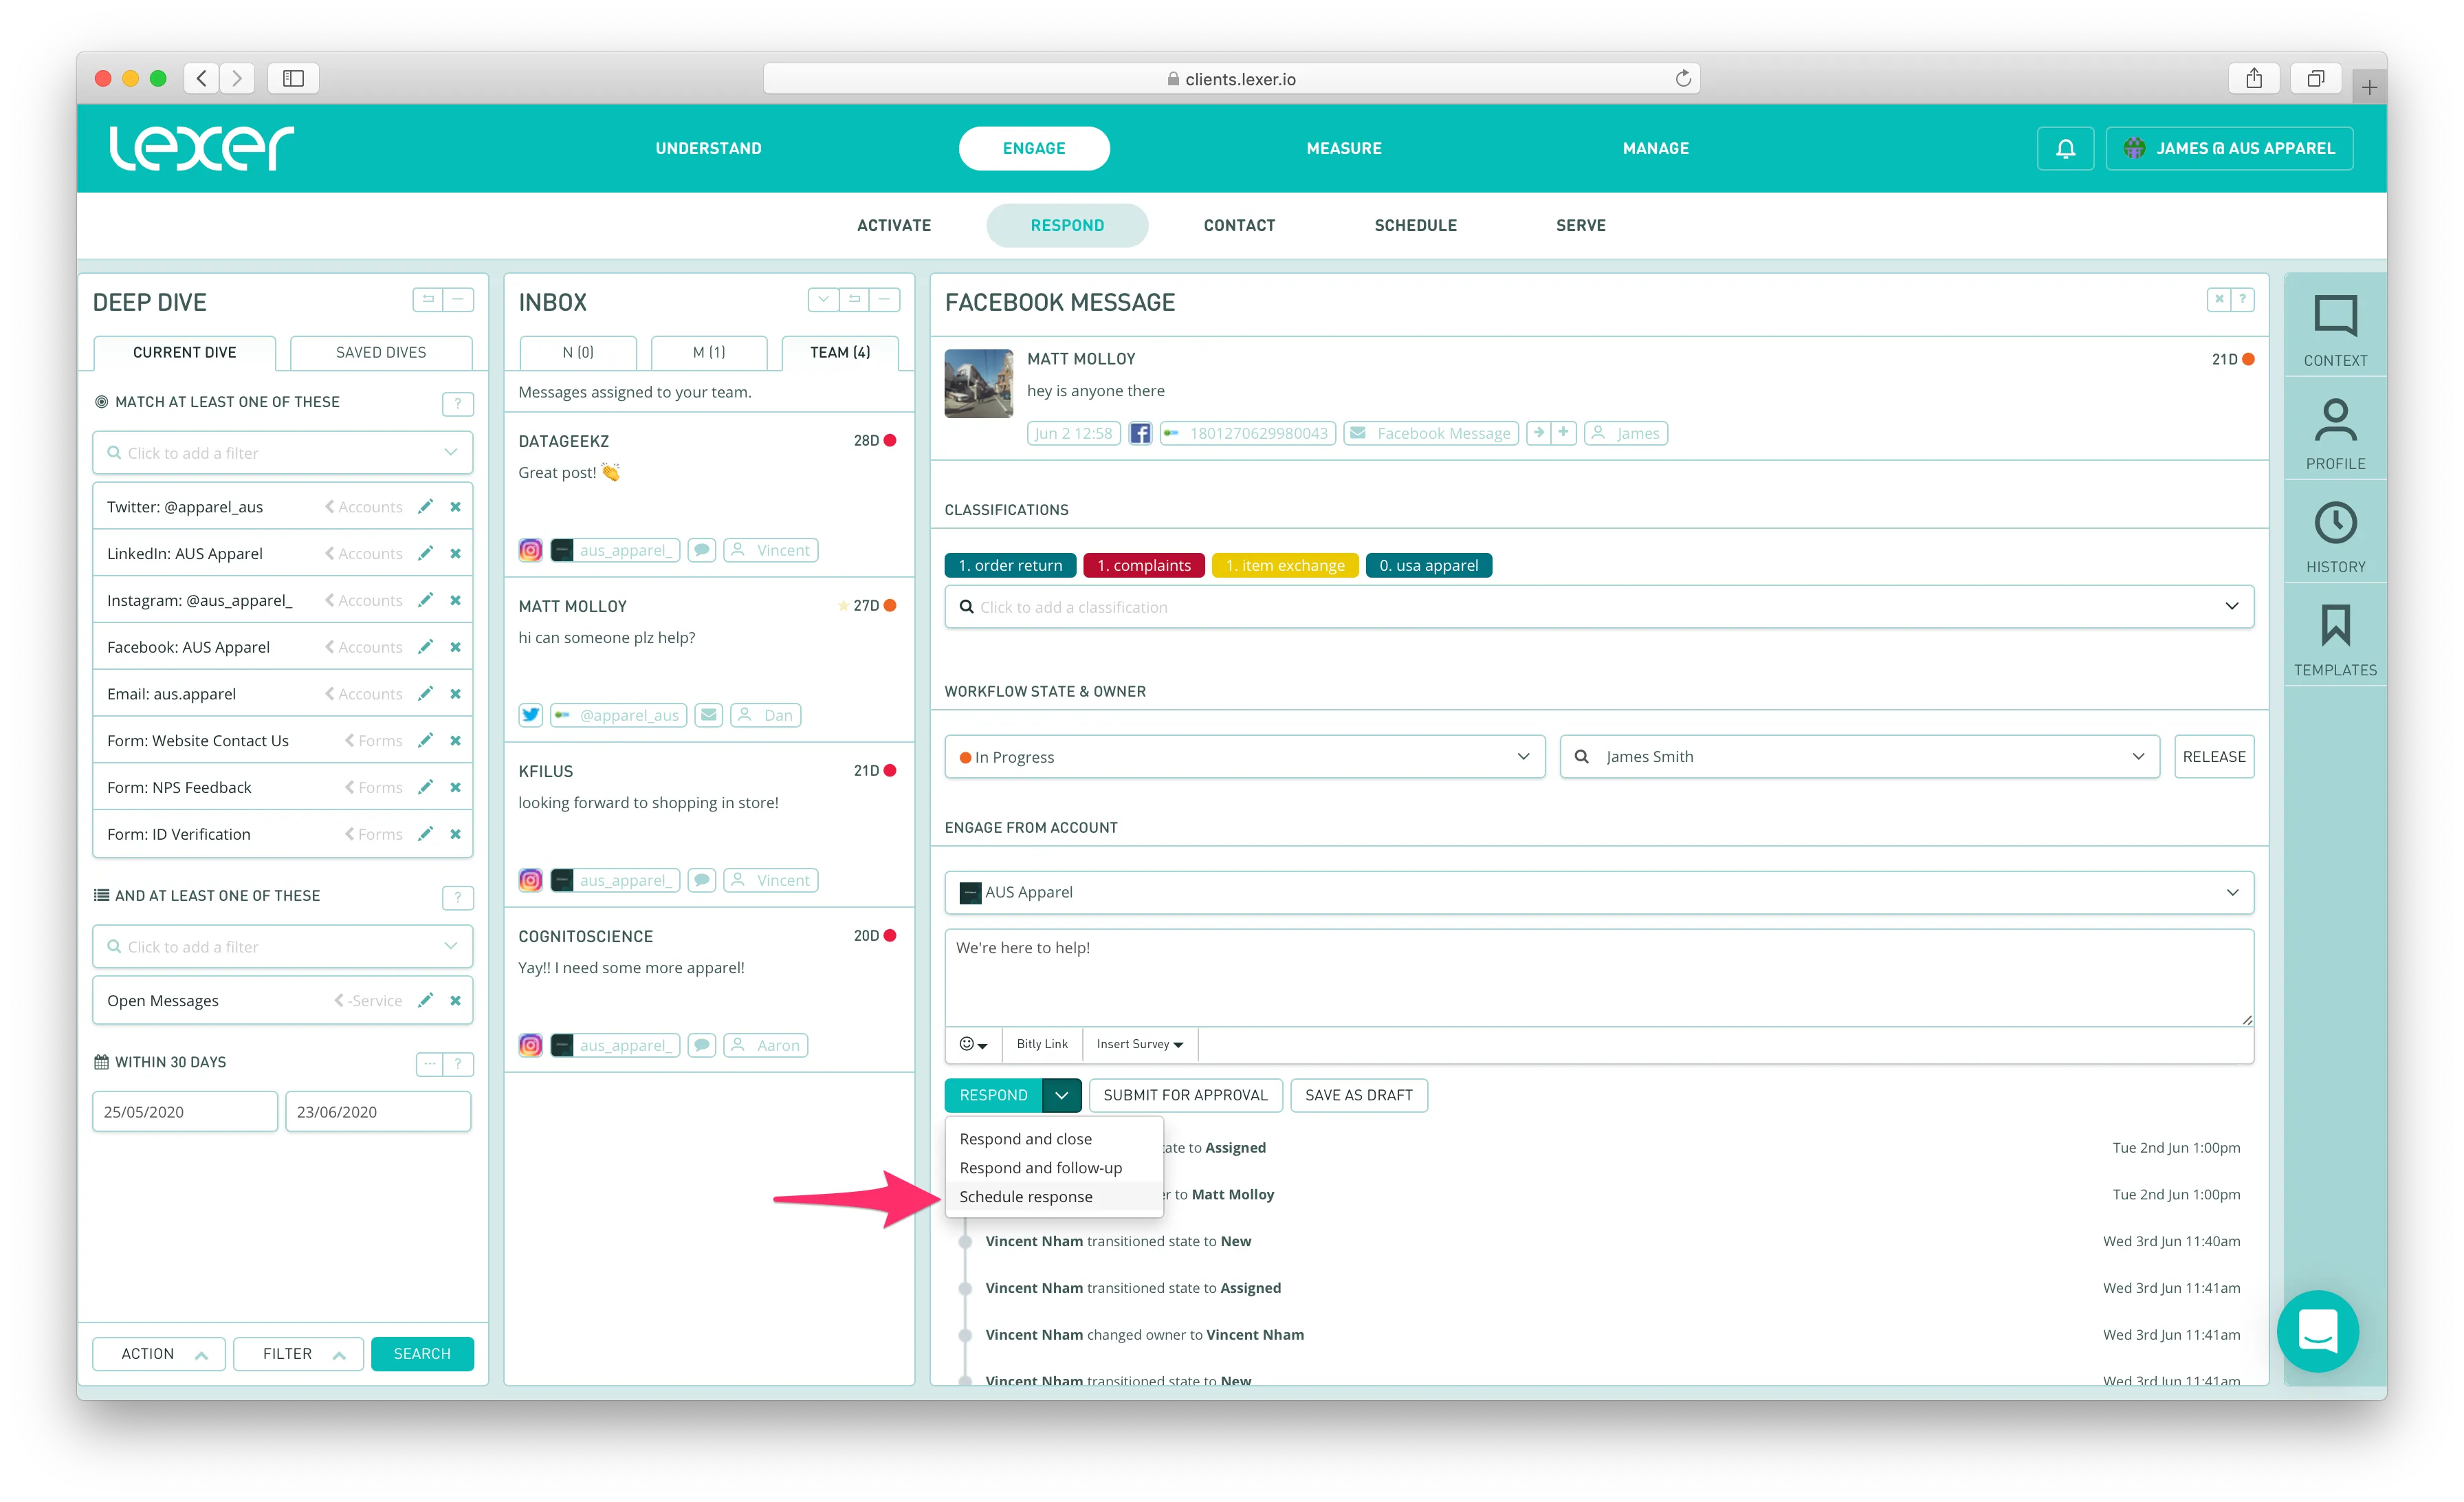
Write your reply, then click the dropdown menu next to ‘Respond’, and select ‘Scheduled response’.

A window will appear, allowing you to configure the time to schedule your reply. You can also opt to receive a notification 10 minutes before it is published — toggle this on or off to determine whether or not you’d like to be notified before your message is sent.

What happens next
Scheduled replies will update the message to the ‘Responded’ State and remain in your Inbox under the ‘Mine’ section. If you’ve opted to do so, you’ll receive a notification 10 minutes before the reply is sent, allowing you enough time to review an update if necessary. Once it’s been published, the State of the object will change to ‘Closed’, and it will be removed from your workflow.
Notifications
10 minutes before your scheduled reply is published, a notification will appear in the top right corner of the Hub. Opening this notification will allow you to click on ‘Show message’, and navigate to the message in Lexer Engage.
Review your scheduled replies
Navigate to Schedule to see all scheduled replies due to send, and those that have been previously sent over the current month.
- Under the filter ‘Content Types’, select ‘Scheduled Replies’.
- The second column will display all published and scheduled replies for this day.
- Clicking on any of these scheduled replies will open a column to show you the message it is replying to.
Scheduled replies
That's it for scheduled replies! You'll be able to write a message now in advance with no problems. If you have any further questions, please don’t hesitate to contact Lexer Support at support@lexer.io.

