Redact messages

Redact messages that contain sensitive customer information

Customers occasionally share sensitive information, such as credit card numbers, email addresses, phone numbers, or other personally identifiable information (PII), in messages when they shouldn't. Your team can manually redact messages that contain sensitive information as well as configure rules to automatically redact these fields as they enter your queue.

About message redaction in Lexer

Redacting a message will permanently delete its contents and/or attachments from all areas of Lexer and cannot be undone. Messages can be redacted in two ways:

  • Automatically by configuring a rule in your queue
  • Manually by clicking Redact on a message in Respond

How to setup a redaction rule for your queue

You can setup an automation rule to remove specific types of sensitive information in messages as they enter your queue. We recommend reading about Automation Rules before proceeding.

Navigate to Manage > Settings > Queues and open your queue. Click on the Rules tab and Add New Rule. We recommend naming the rule something like 'Remove Sensitive Information' so your team understands what this rule is doing.

To ensure no sensitive information is exposed, we recommend leaving the 'When' conditions blank to have this rule run across all messages in your queue, instead of providing specific filters for matching terms and sourcing types of authors. In the 'Then' section you simply add values to the 'Remove Sensitive Information' section to redact specific types of information. When done, click Save, ensure your rule is enabled, and click Save Rules.

768

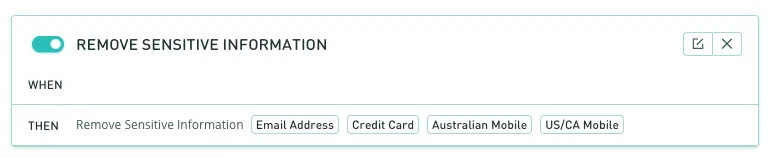
Your rule should look something like this. Now, if any messages appear in your queue they will be automatically redacted if any of the specified text formats are matched. Once a message has been redacted, the matching field (i.e. a credit card number) will be replaced with [CREDIT CARD REMOVED].

895

How to redact a single message

Since our automation rules will not pick up every format of sensitive information shared by customers, you can manually redact an entire message as part of your workflow. If you're using the automation rule for your queue consider this your backup.

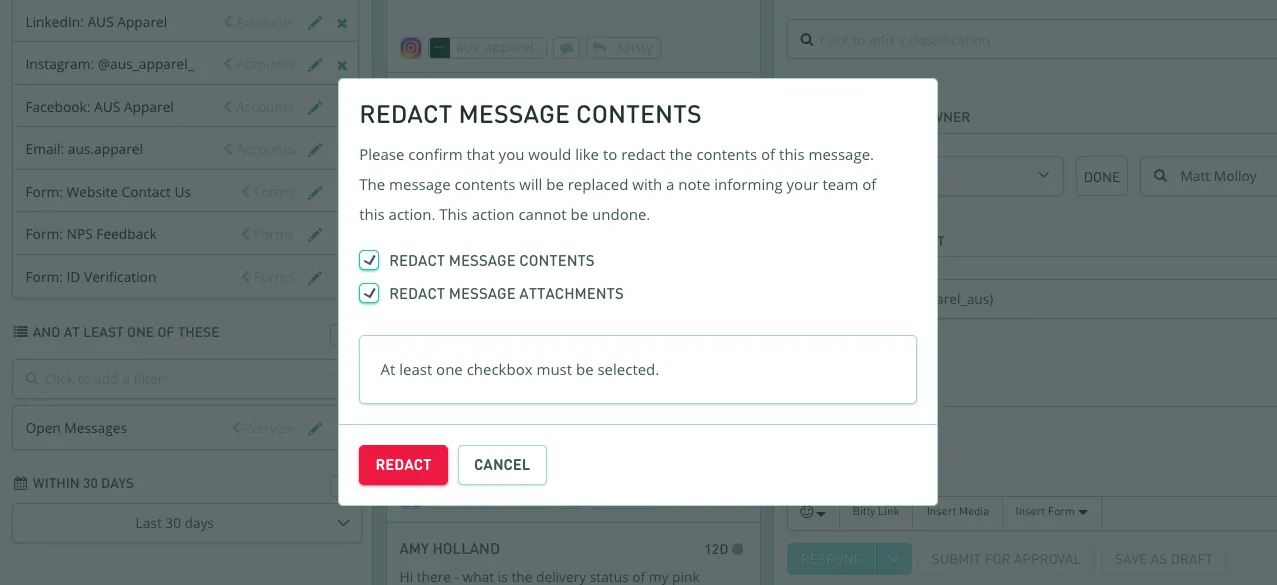
Users who have permission to reply to customers can also click the 'Redact' button on messages to completely remove the message or attachment contents from Lexer. Once clicked, a confirmation window will appear and ask if you want to redact the message contents, the attachments, or both. Once redacted, the contents of a message cannot be restored.

1277

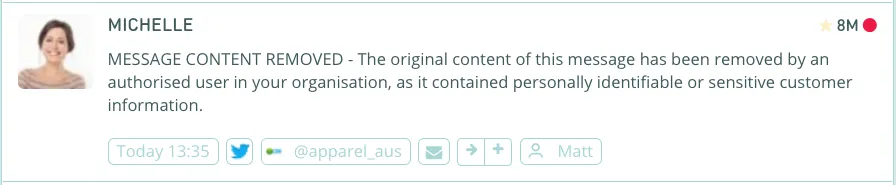
A record of this message will still exist in Lexer; however, the contents will be replaced with a message "MESSAGE CONTENT REMOVED - The original content of this message has been removed...".

896
Lexer tip!
Search for redacted messages using a Matching Terms filter with "MESSAGE CONTENT REMOVED".
Updated:
September 23, 2022
Did this page help you?
Thank you! Your feedback has been received!
Oops! Something went wrong while submitting the form, for assistance please contact support@lexer.io
Welcome to Lexer!
Fundamentals
Getting started
Our glossary
Fundamentals
Getting started
Integrations
Fundamentals
Setup
My account
Fundamentals
Setup
Manage team
Fundamentals
Setup
Group permissions
Fundamentals
Setup
Classifications
Fundamentals
Setup
Out of the box segments
Fundamentals
Setup
Browser guide
Fundamentals
Security
Corporate networks
Fundamentals
Security
Emergency contact
Fundamentals
Security
Multi-factor authentication
Fundamentals
Security
Single sign-on
Fundamentals
Security
Trust and compliance
Fundamentals
Security
Lexer's Identity Resolution
Fundamentals
Identity Resolution
Troubleshooting tech issues
Fundamentals
Troubleshooting
Error code: 503 Service Unavailable
Fundamentals
Troubleshooting
Error code: 401 Unauthorized
Fundamentals
Troubleshooting
Error code: 403 Forbidden
Fundamentals
Troubleshooting
Troubleshooting Activate
Fundamentals
Troubleshooting
Troubleshooting Respond
Fundamentals
Troubleshooting
Help! My data is missing from the Hub
Fundamentals
Troubleshooting
Understanding APIs at Lexer
Data
Data Onboarding
Providing JSON data to Lexer
Data
Data Onboarding
Providing CSV data to Lexer
Data
Data Onboarding
Upload using SFTP
Data
Data Onboarding
Upload using S3
Data
Data Onboarding
Lexer data specification
Data
Lexer Data Specification
Customer data specification
Data
Lexer Data Specification
Commerce data specification
Data
Lexer Data Specification
Marketing data specification
Data
Lexer Data Specification
Compliance data specification
Data
Lexer Data Specification
Data Formatting and Validation
Data
Getting Started with APIs
Authentication and API token creation
Data
Getting Started with APIs
Rate Limits
Data
Getting Started with APIs
Response codes and common errors
Data
Getting Started with APIs
Product imagery
Data
Getting Started with APIs
Currency conversion
Data
Getting Started with APIs
Lexer’s APIs overview
Data
Lexer’s APIs
Dataset management in the Hub
Data
Dataset management
Chatbox user API
Data
Lexer’s APIs
Activity API
Data
Lexer’s APIs
Visualize API
Hidden from nav
Profile Read API
Data
Lexer’s APIs
Lexer Javascript Tag basics
Data
Lexer Javascript Tag
Lexer Javascript Tag technical guide
Data
Lexer Javascript Tag
Lexer Javascript Tag use cases
Data
Lexer Javascript Tag
dataLayer configuration: Shopify
Data
Lexer Javascript Tag
Customer segment CSV export
Data
Data off-boarding
Export to CSV
Data
Data off-boarding
Data in Lexer's CDXP
Understand
Customer Data
Lexer's attributes
Understand
Customer Data
Attribute value types
Understand
Customer Data
Data source - CRM
Understand
Customer Data
Data source - Transactions
Understand
Customer Data
Data source - Email
Understand
Customer Data
Partner data - Experian
Understand
Customer Data
Partner data - Mastercard
Understand
Customer Data
Partner data - Roy Morgan
Understand
Customer Data
GDPR and CCPA requests
Understand
Customer Data
Upload data files
Understand
Customer Data
File upload API
Understand
Customer Data
Data provision and schemas
Understand
Customer Data
Segment overview
Understand
Segment
Creating segments
Understand
Segment
Smart Search
Understand
Segment
Export attribute results
Understand
Segment
Contact a customer
Understand
Segment
Fixing a disabled segment
Understand
Segment
Profile tab
Understand
Segment
Compare segments
Understand
Compare
Compare attributes
Understand
Compare
Activate overview
Engage
Activate
Ongoing activations
Engage
Activate
Audience splits
Engage
Activate
A/B splits
Engage
Activate
Control group splits
Engage
Activate
Inbox filtering
Engage
Respond
Ignored Senders
Engage
Respond
Forms for service
Engage
Respond
Workflow states
Engage
Respond
Bulk changes
Engage
Respond
Scheduled replies
Engage
Respond
Message templates
Engage
Respond
Customer profiles
Engage
Respond
Grouped messages
Engage
Respond
Automation rules
Engage
Respond
Redact messages
Engage
Respond
Track overview
Measure
Track
Activity overview
Measure
Activity
Team report
Measure
Activity
Cases report
Measure
Activity
Listen overview
Measure
Listen
Searching in Listen
Measure
Listen
Tier filters
Measure
Listen
Boolean search
Measure
Listen
Saved dives
Measure
Listen
Email notifications
Measure
Listen
Twitter data
Measure
Listen
Facebook data
Measure
Listen
Instagram data
Measure
Listen
Visualize overview
Measure
Visualize
Curate feed
Measure
Visualize
Report overview
Measure
Report