
File upload API
Sending us your customer data via our File Upload API can be easier and more flexible than SFTP or manual file upload. Here we’ll guide you to creating your API token, requesting permission to deliver a file, and sending that file.
File types
You can use Lexer’s File Upload API for CSV or NDJSON file types. The steps for each file type vary quite significantly. If you have a CSV, you can convert a CSV to an NDJSON file using our [.code]csv_to_ndjson[.code] schema.
Uploading CSV files
If you're unable to convert your CSV file to NDJSON, you can still upload your CSV file by following these steps.
- Create an Activity API token.
- Authenticate and request permission to send your file. This will generate a URL that will be used to upload your file.
- Use this URL to send us your data file.
API Tokens
You can find detailed instructions about how to set up an API Token in our Authentication and API token creation article. Make sure you select the Activity API Type when generating a token.
Authenticate and request permission to send your file
To successfully authenticate and run your file transfer you will need to use the following command, replacing the API token and File name.
Run the following command after replacing the [.code]API_token[.code] with your API code (created in step 1). Replace the [.code]File_Name[.code] section with the name of your .csv or .json file (make sure to include the appropriate suffix eg. .json).
For example, when using a JSON file you would use the following command:
A successful request will return a response that looks like this:
The URL field created is where you will be sending your file. Copy the URL for use in the next step.
Send your data file
To send your file, run the command below with the [.code]URL[.code] inserted from the response above and your [.code]File_name[.code].
For example, when using a JSON file you would use the following:
Done! Our team will receive a notification that your file has been received, and we will reach out with any questions or issues. We advise getting in touch to let us know you have sent the file.
Troubleshooting
Please note that the URL received from first request contains [.code]\u0026[.code] in place of [.code]&[.code]. Having the ampersand represented as hexadecimal can cause the second request to return an error similar to that below.
This can be avoided by saving the URL in a variable as demonstrated in the workflow below.
Uploading NDJSON or JSON files
Uploading NDJSON files via the File Upload API using the following steps, allows for automatic loading of your data. To enable automatic loading it is critical to include the dataset ID and record type in the file upload request.
Have an NDJSON file ready to upload? Follow these steps:
- Ensure the data you'd like to upload matches one of Lexer’s predefined schemas Lexer schema's.
- Find the Dataset ID for the dataset you'd like to upload your files to. You can find instructions on how to use Datasets here. If you need to create a new dataset, you can find the instructions here.

- Requesting and uploading files can be done using the script found in our [.code]file_upload_api schema[.code]. Alternatively, you can use your own code to produce a URL that you can use to upload a file. You can find instructions on how to do this here.
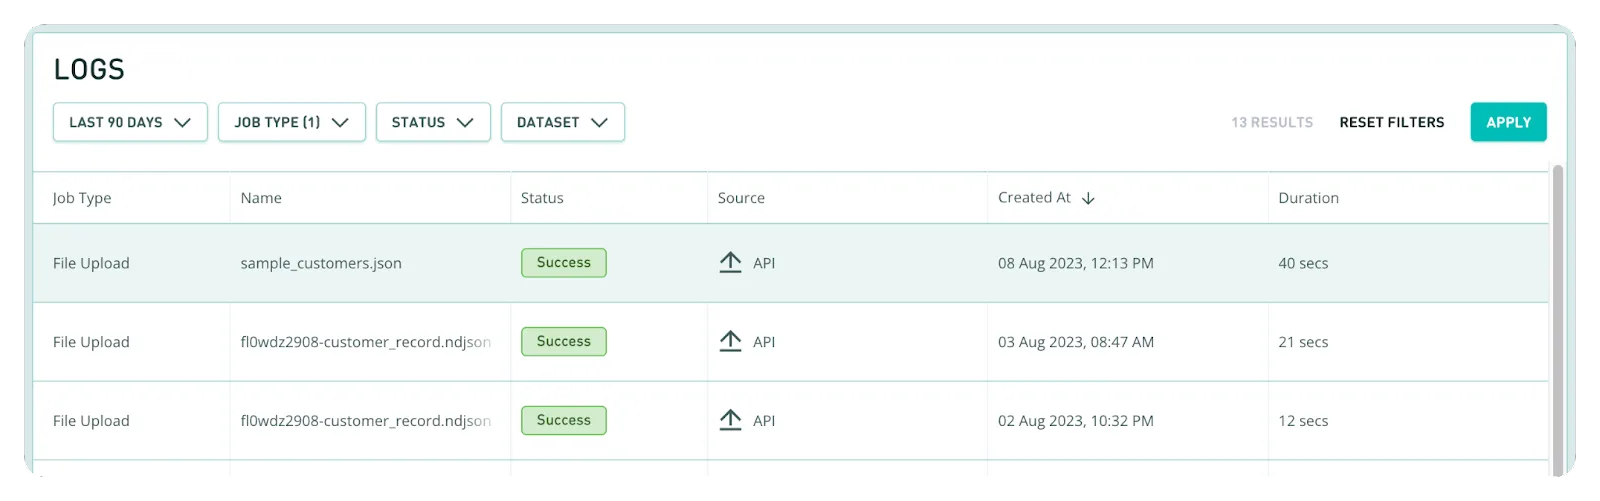
- To check how the data ingestion is progressing you can view your file upload in Logs. This will allow you to see the status of the job, the potential statuses are: Success, Pending, In Progress or Failed.
- You can then check to see whether the upload was successful in Datasets.
a) Open Manage > Datasets.
b) Open the target dataset.
c) Click “View” in the top right of the page.
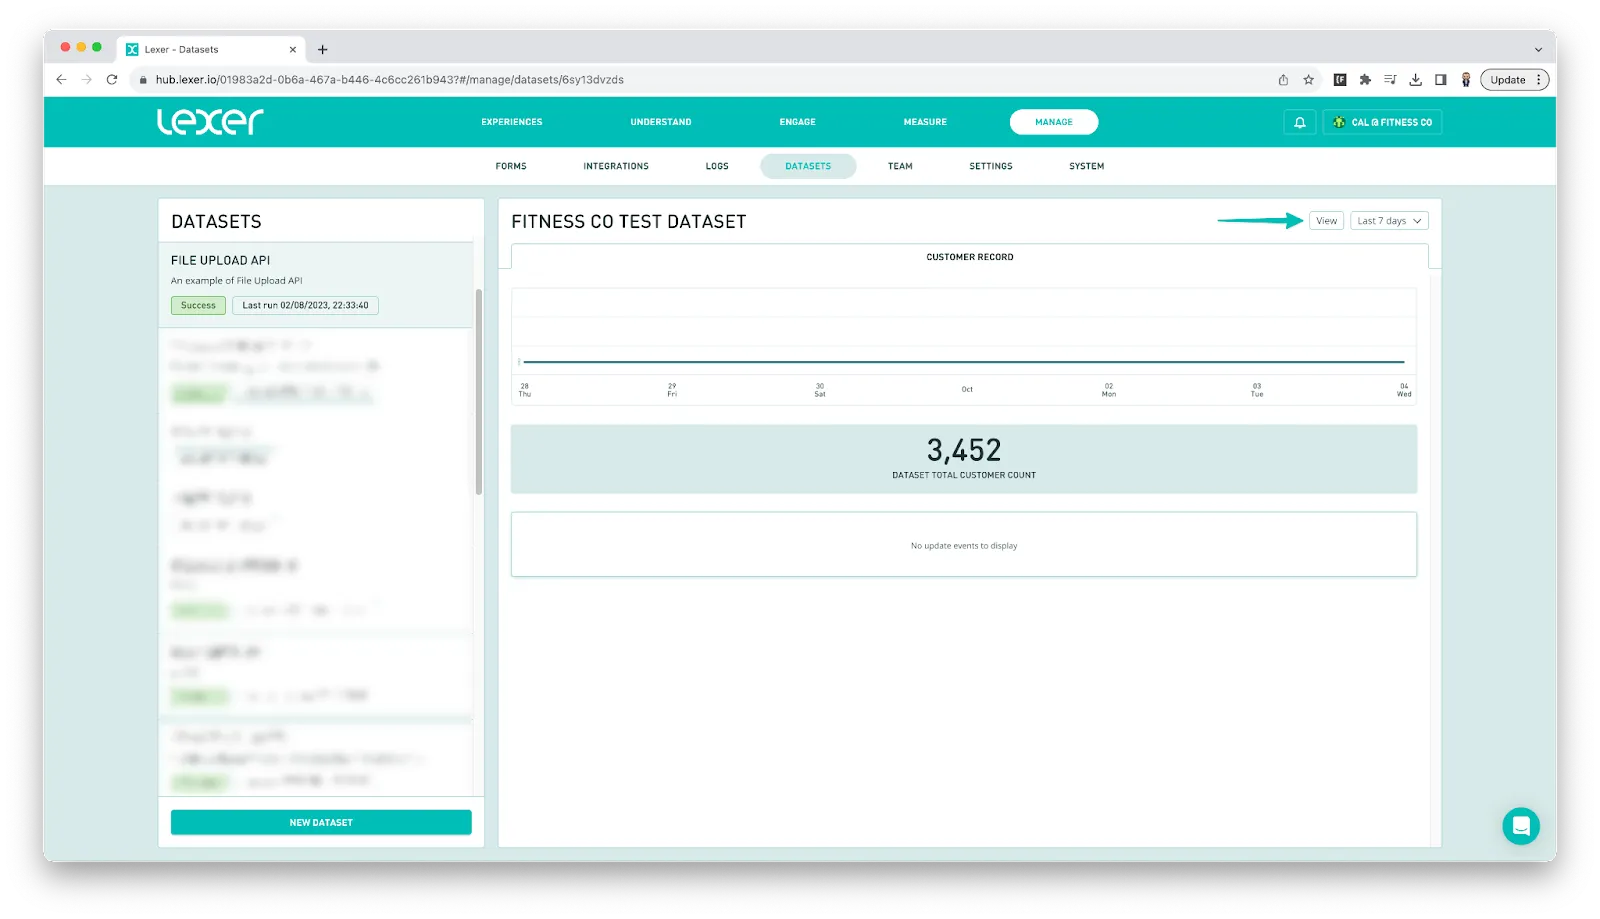
d) Open the Jobs tab to see the status of the most recent job.
e) Click on the job to open up the Job View.

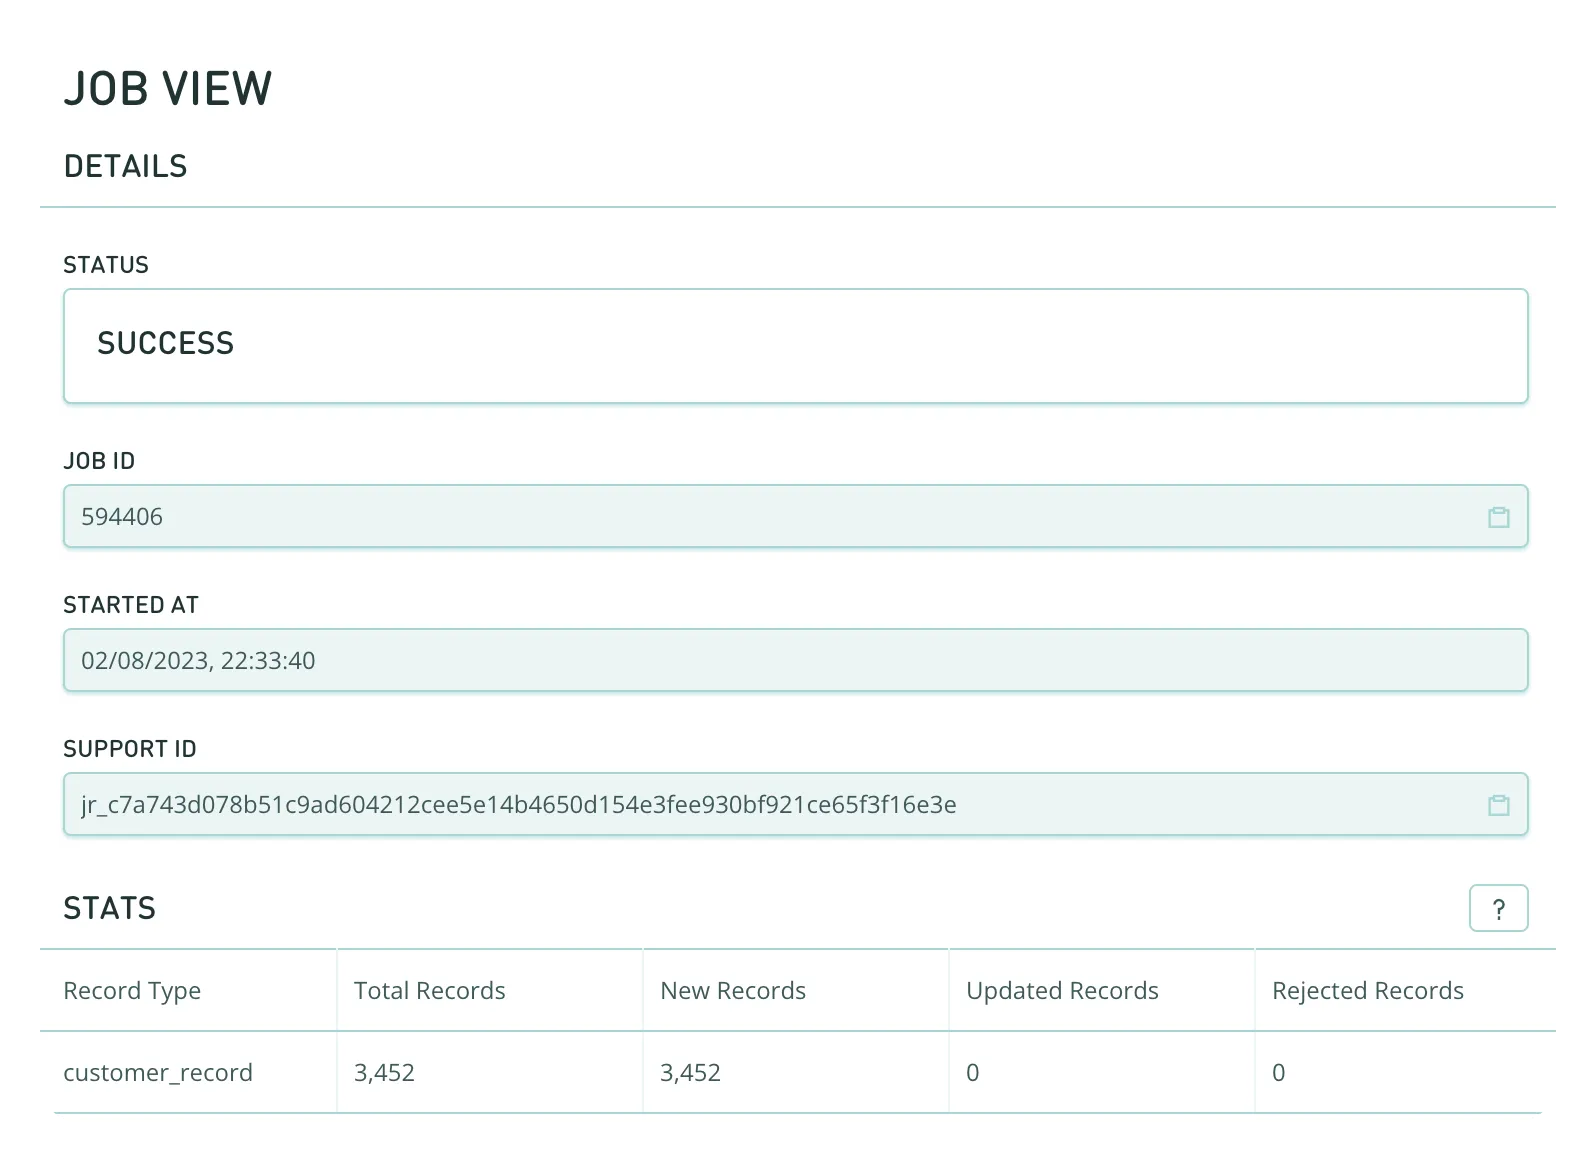
- The Job View provides you with additional information about the job that can help you confirm a successful upload.
If everything looks correct you should be able to utilize this data in the Hub.
Python Implementation
Below is a python implementation of the approach to uploading files with the File Upload API.
#!/usr/bin/env python3
import requests
TOKEN = "<TOKEN>"
FILE_PATH = "<FILE_NAME>"

def request_presigned_url(token, file_path):
    url = "https://api.lexer.io/v1/uploads"
    payload = {"filename": file_path}
    headers = {"Auth-Api-Token": token}
    response = requests.request("POST", url, json=payload, headers=headers)
    return response.json()

def upload_file(url, file_path):
    response = requests.put(url, data=open(file_path, "r").read())
    return response.status_code

presigned_url = request_presigned_url(TOKEN, FILE_PATH)
upload_status = upload_file(presigned_url["url"], FILE_PATH)
print(upload_status)
This is the simplest example. For more detail, you can look at our repository here.
Other options?
There are other options for file transfer that might be worth considering:
Its always a good idea to discuss with your Success manager if you are unsure which method would work best.
That's a wrap
That's it for File Upload API. If you get stuck, try following the steps above and please don't hesitate to reach out to Lexer Support at support@lexer.io if you have any questions.
