
API authentication
Getting Started with Authentication. Before diving into the specifics of creating Activity and Read tokens, it's essential to understand the basics of how Lexer handles authentication. Authentication ensures that the right people have access to the right data, maintaining security and integrity across your interactions with our platform.
Authentication and API Token Creation
Lexer APIs leverage bearer tokens as a primary form of authentication. Tokens can be generated from within the Lexer Hub, allowing you to securely access various functionalities. This article will guide you through the process of creating an Activity Token and a Read Token.
Choosing the Right API Type
Selecting the correct API type is crucial when developing a token. Ensure you choose the appropriate type based on the functionalities you need. Here's a brief overview of the tokens available:
- Activity Token: A versatile token focused on Respond and Reporting. This multi-purpose API token allows you to perform a variety of actions. You can learn more about our Activity API here.
- Profile Read Token: This token is dedicated to reading profile data from the CDP and utilizing it externally. It serves a specific purpose, and you can find more details about the Profile Read API here.
With this foundational understanding of authentication and API tokens, you're ready to start creating and managing your tokens within the Lexer Hub.
Create an Activity API token
This versatile token is your key to a range of functionalities, with a special emphasis on Respond and Reporting. If you'd like to explore the specifics of our Activity API, you can find detailed information right here.
To create an API token within the Hub, navigate to Manage > Integrations.
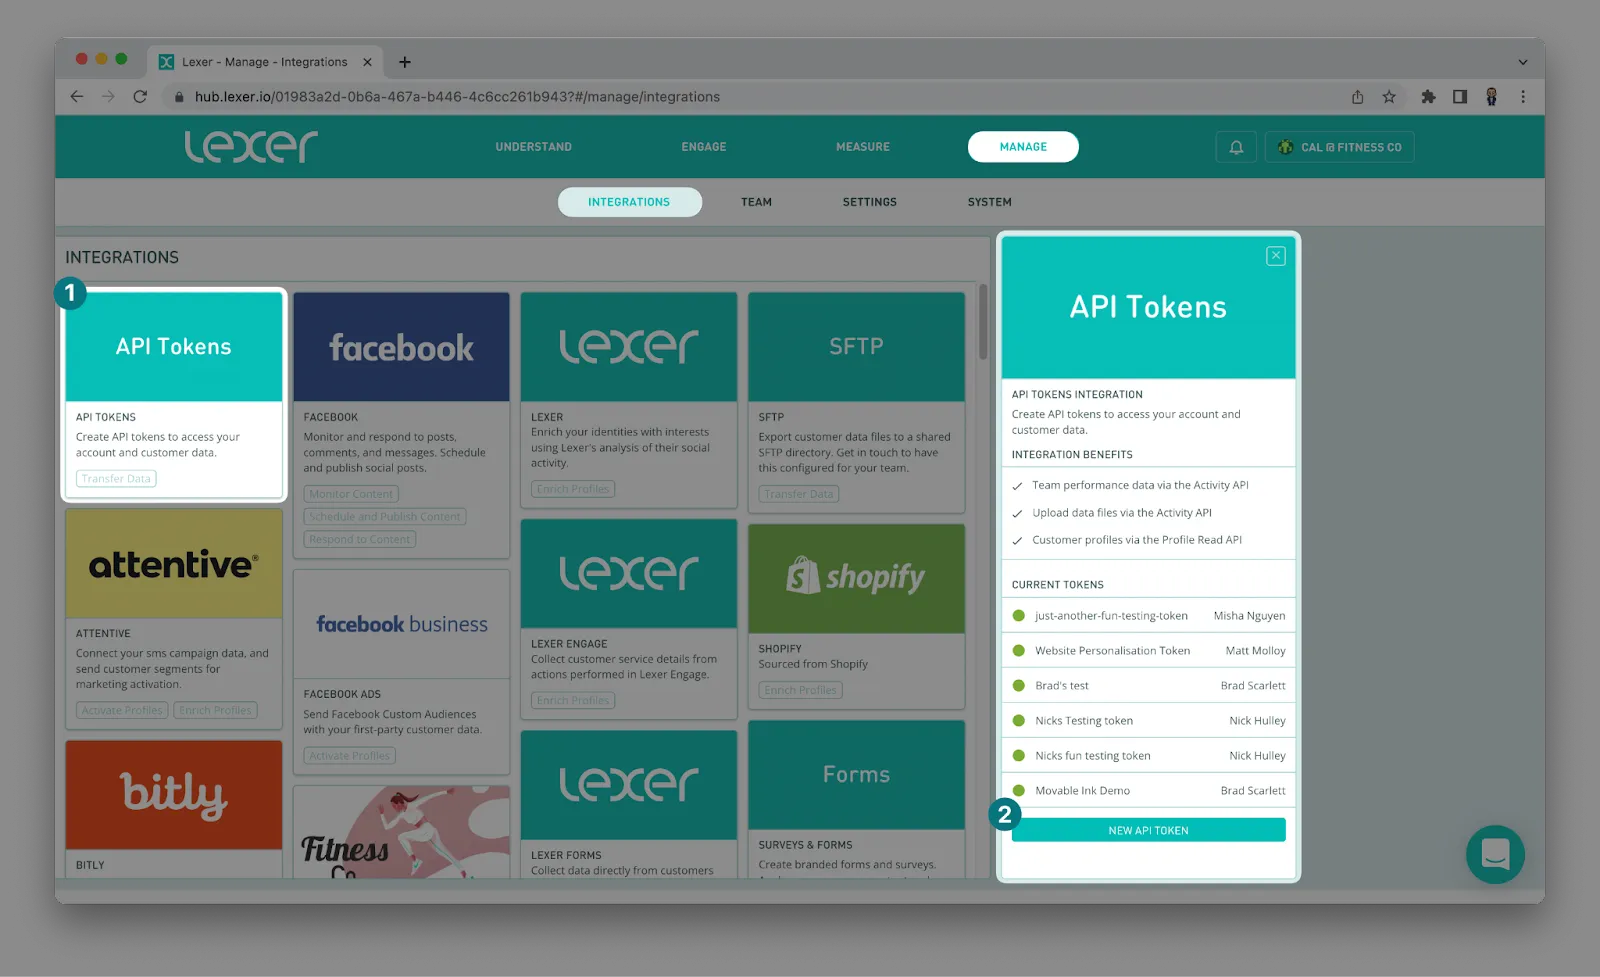
1. Click on the API Tokens tile.
2. Once open, click on New API Token.

3. Fill out the details in the API Token Settings selecting Activity.
4. Agree to the terms and conditions, and Save.
Once you provide a description and click Save, the token will be made visible to you. Save the token by copy and pasting it somewhere secure.
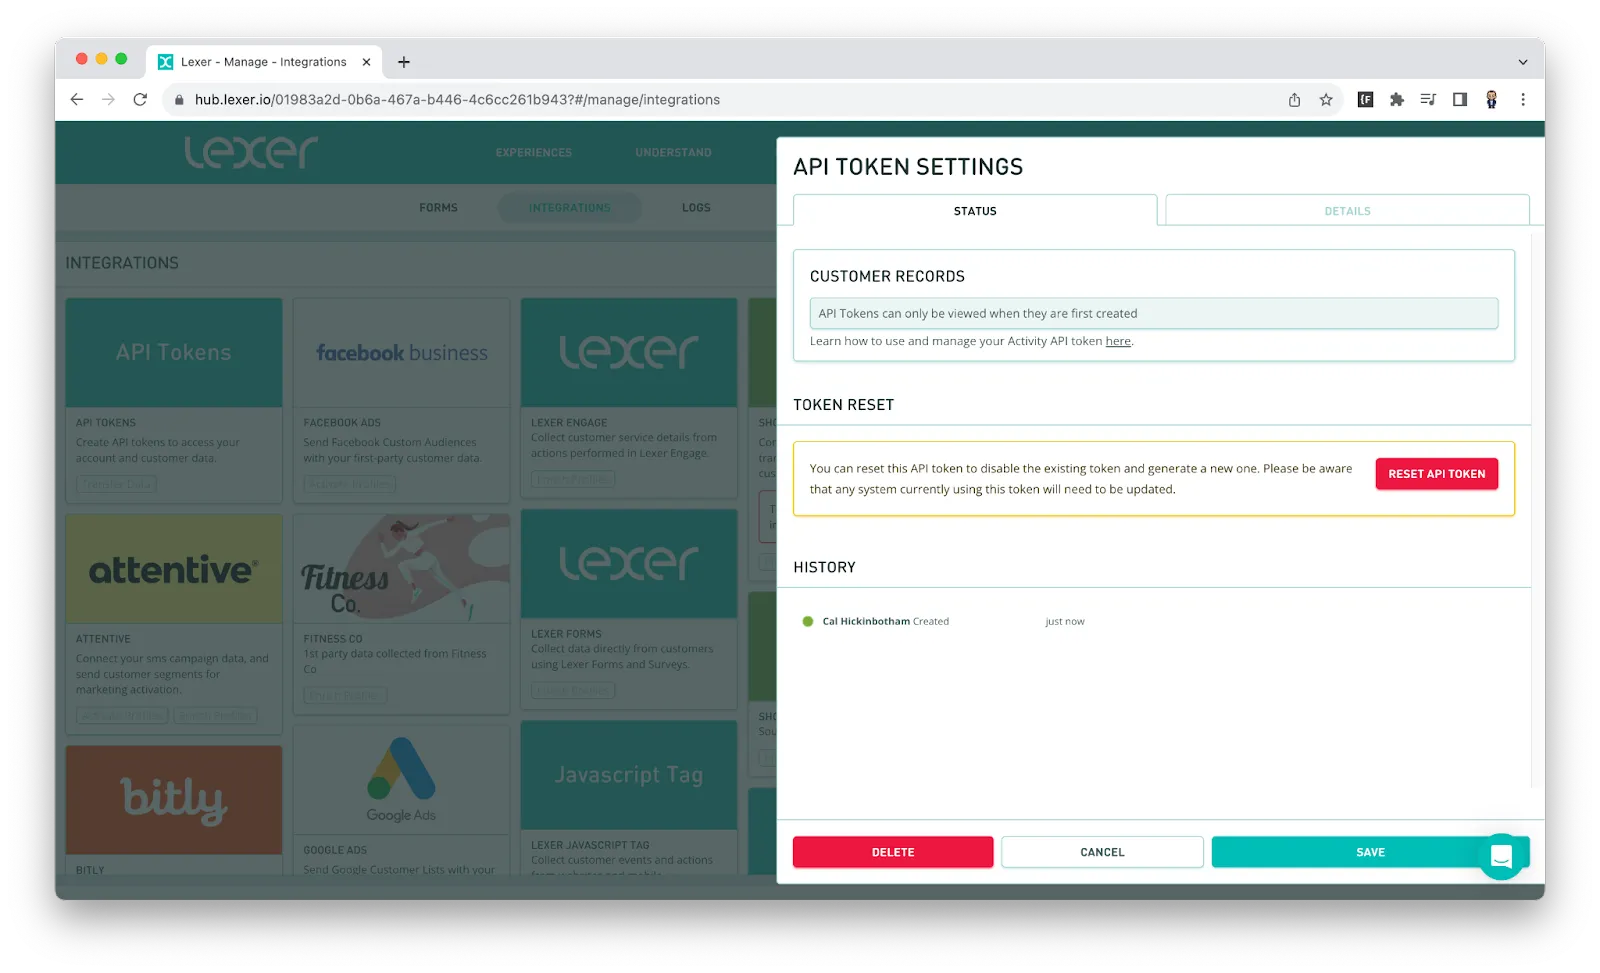
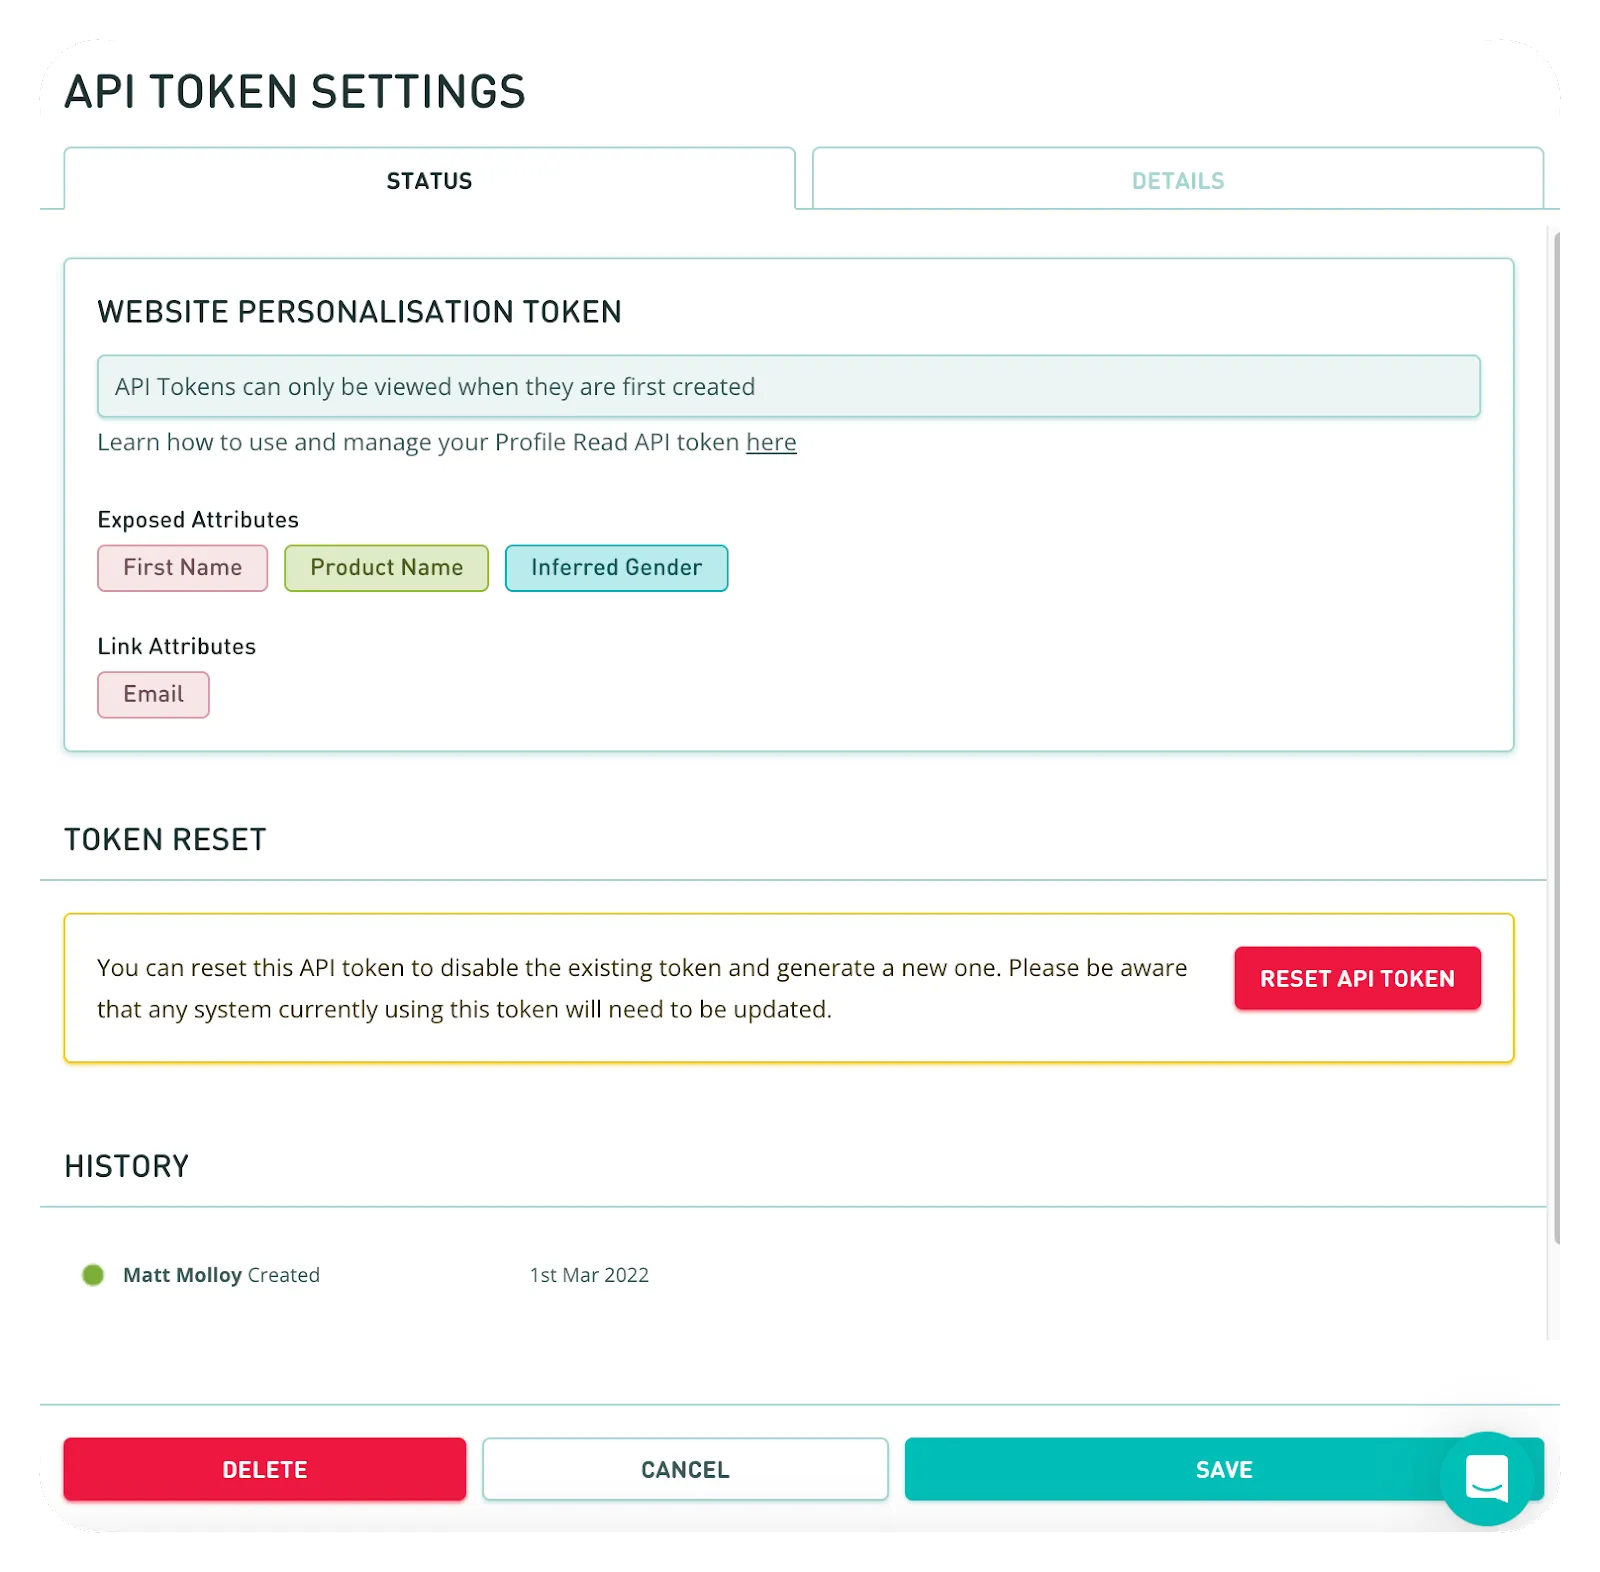
Once you have completed these steps you can open the token settings again to find some additional details and some customisation options. You will notice the key itself is no longer visible, it is replaced with “API Tokens can only be viewed when they are first created” shown in the screenshot below.
Create a Profile Read API token
These specialized tokens have one clear mission: enabling users to access and utilize profile data within our CDP externally. If you want to explore the finer details of the profile Read API, check out the dedicated information here.
This process is pretty similar to the Activity token. To get started navigate to Manage > Integrations.
1. Click on the API Tokens tile.
2. Once open, click on New API Token.
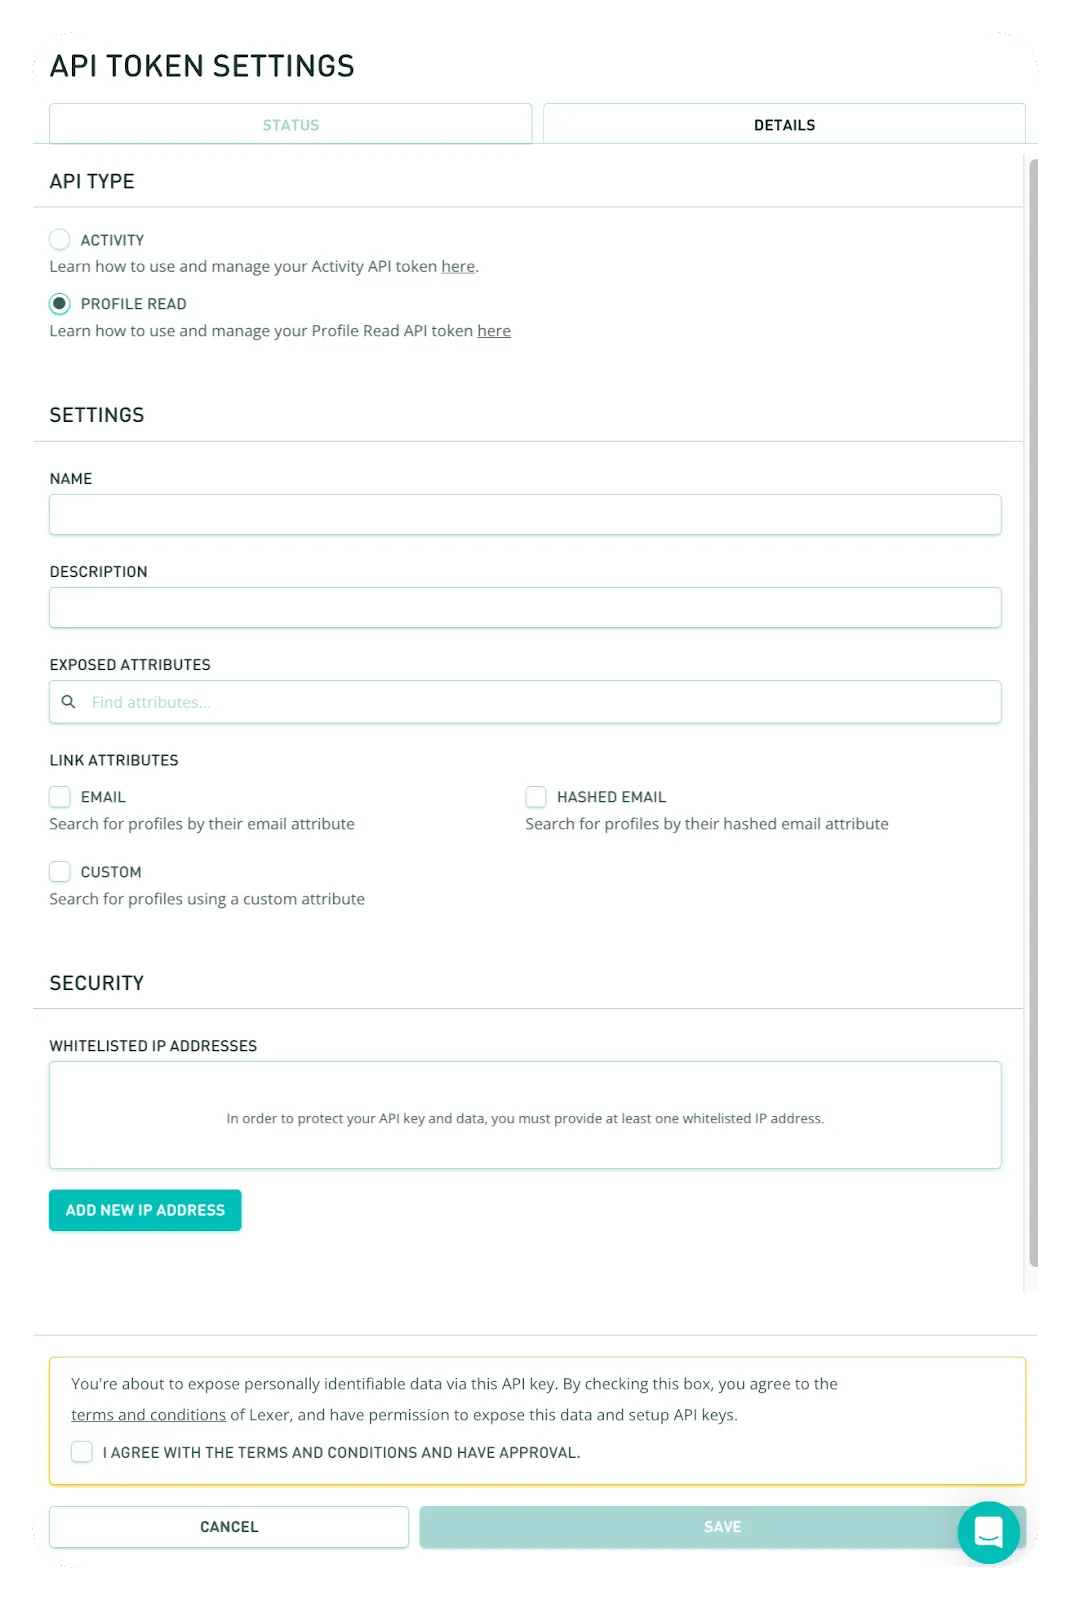
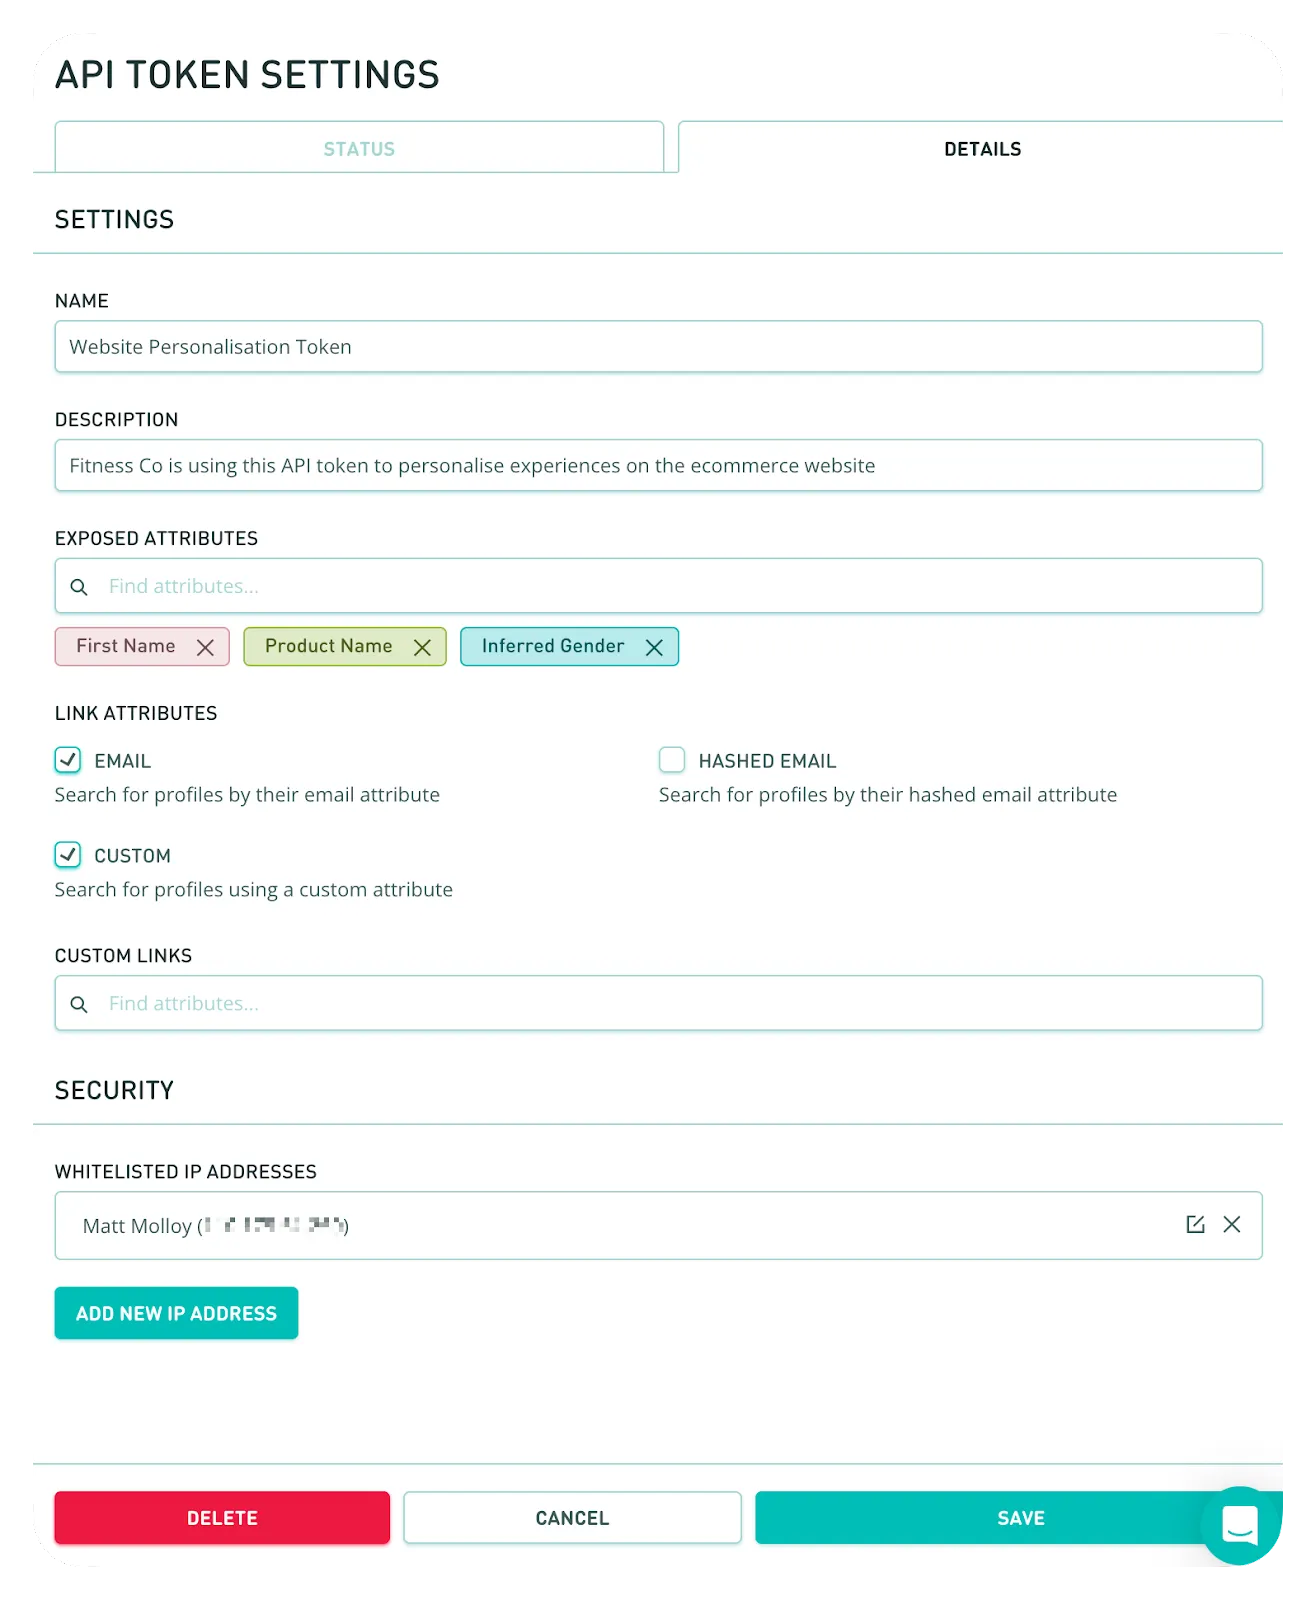
3. Fill out the details in the API Token Settings selecting Profile Read. The Profile Read API token requires a bit more set up.
- Select the attributes you would like to expose through the API.
- Select which attributes you want to link. Clicking on “Custom” will allow you to search for the attribute you would like to use as your linking attribute.
- Lastly, select which IP’s to whitelist, you will need to select at least one IP to whitelist.
4. Agree to the terms and conditions, and Save.
Once you provide a description and click Save, the token will be made visible to you. Save the token by copy and pasting it somewhere secure.
Once you have completed these steps you can open the token again to find some additional details and some customisation options. You will notice the key itself is no longer visible, it is replaced with “API Tokens can only be viewed when they are first created”.
Editing API token settings
Made a mistake or want to update some details? not to worry, follow these steps:
- Click on the API you want to edit.
- Select the “Details” tab.
- Once you've updated the details, hit the "Save" button.
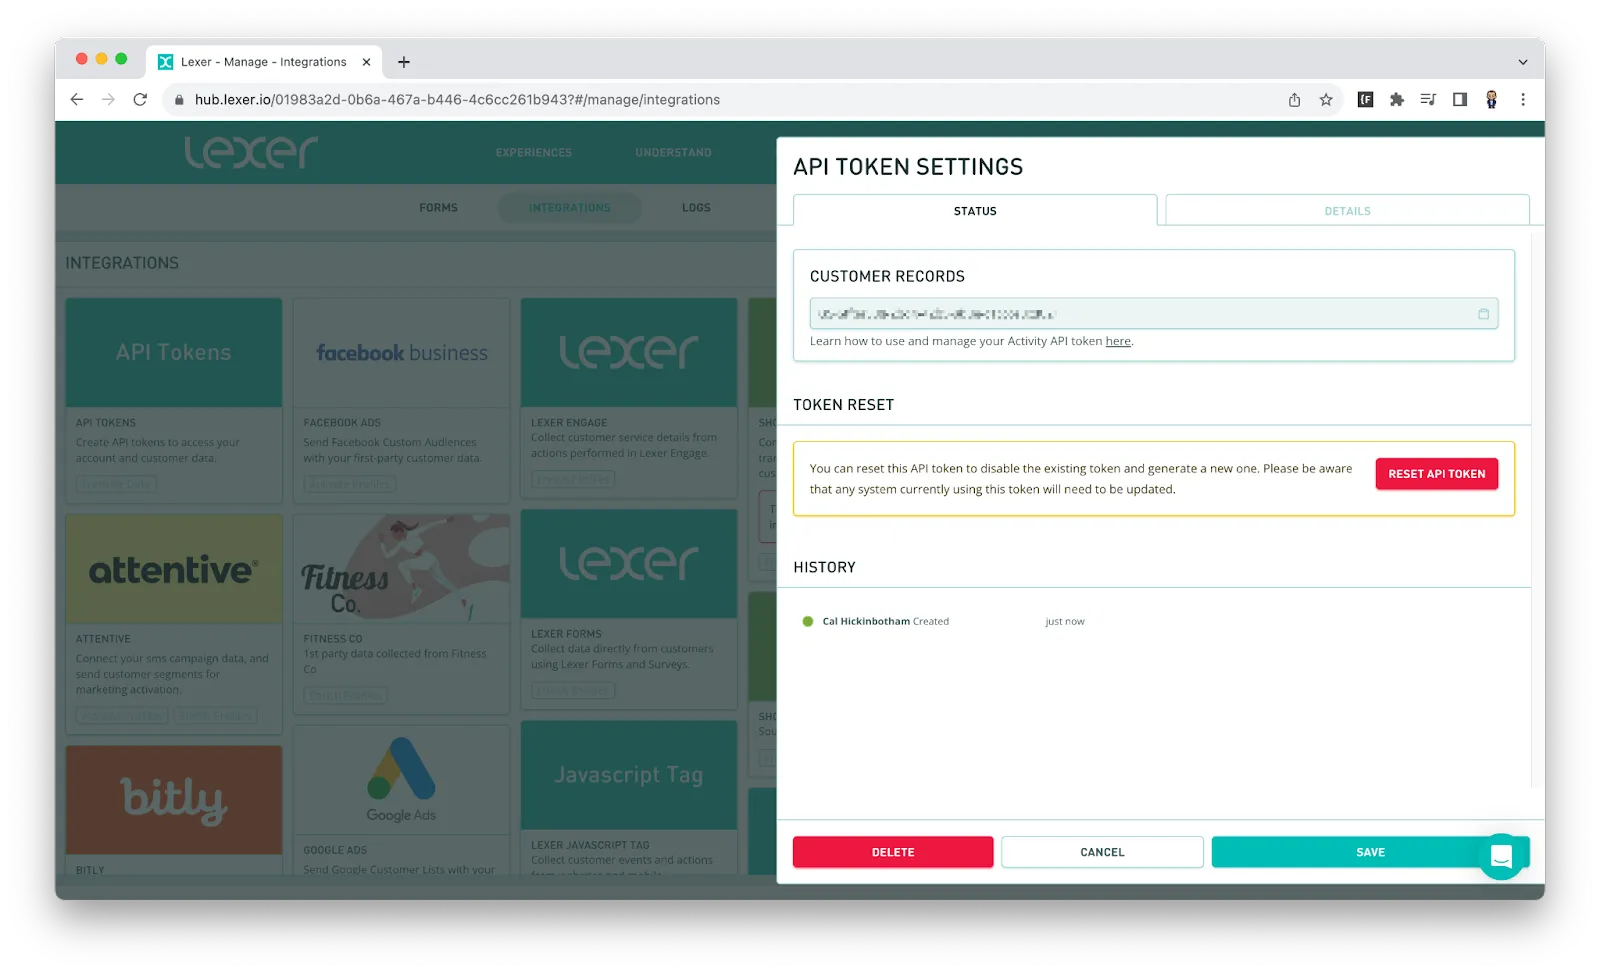
Token reset
You can reset your API within the API Token settings. Directly beneath the Key itself, once saved, there will be a button to “Reset API Token”. Be careful with this, as soon as you reset the token, anything using it will require the new token.

Please note:
- Your account can have up to 5 active API tokens.
- Certain rate limits are applied to API keys to manage traffic efficiently. It may be increased depending on your use cases. Please your Success Manager to discuss it further. Error 429 will indicate an exceeded rate limit.
We recommend creating API tokens for each unique use. Each token can be scoped for specific types of activity and revoked at any time to limit access to the APIs and underlying data in the Lexer CDXP.
All APIs have the option for IP Whitelisting as a secondary layer of security, some APIs, like Profile Read API, have a mandatory requirement for an IP Whitelist.
That’s a wrap on Authentication
In this article we discussed the types of token, the use for each token and the process of setting these tokens up for use. For more information about where you might require these tokens you can read through our API documentation here.
