Creating segments
Segments are your way to search for customers and cluster them into meaningful groups for insights and targeting. Let's explore the process of building meaningful customer segments using the Segment Builder.
What is a segment?
A segment is a group of customers defined by some search criteria. Customers can exist in multiple segments depending on their current attribute values. A customer can enter or leave a segment if their attribute values change. This means that your segments are dynamic and live. Segments are defined in the Segment Builder and use attributes as the building blocks. Attributes in your segments can be derived from CRM, ecommerce, email engagement sources, and more.
An example of a segment could be Recent, High-Value Customers. The attributes that make up this customer segment could include anyone who has made an online purchase in the last 6 months and has spent over $100.
What types of attributes can I use?
Lexer attribute types vary and are used differently depending on your use case. In some instances, you’ll want to find all profiles within a certain range of values; others you might want to choose from a specific category. Whatever you’re searching for, there’s an attribute tailored to your needs. To find out more about your attributes, and how to use them, check out our guide on Attributes.

How to build a segment
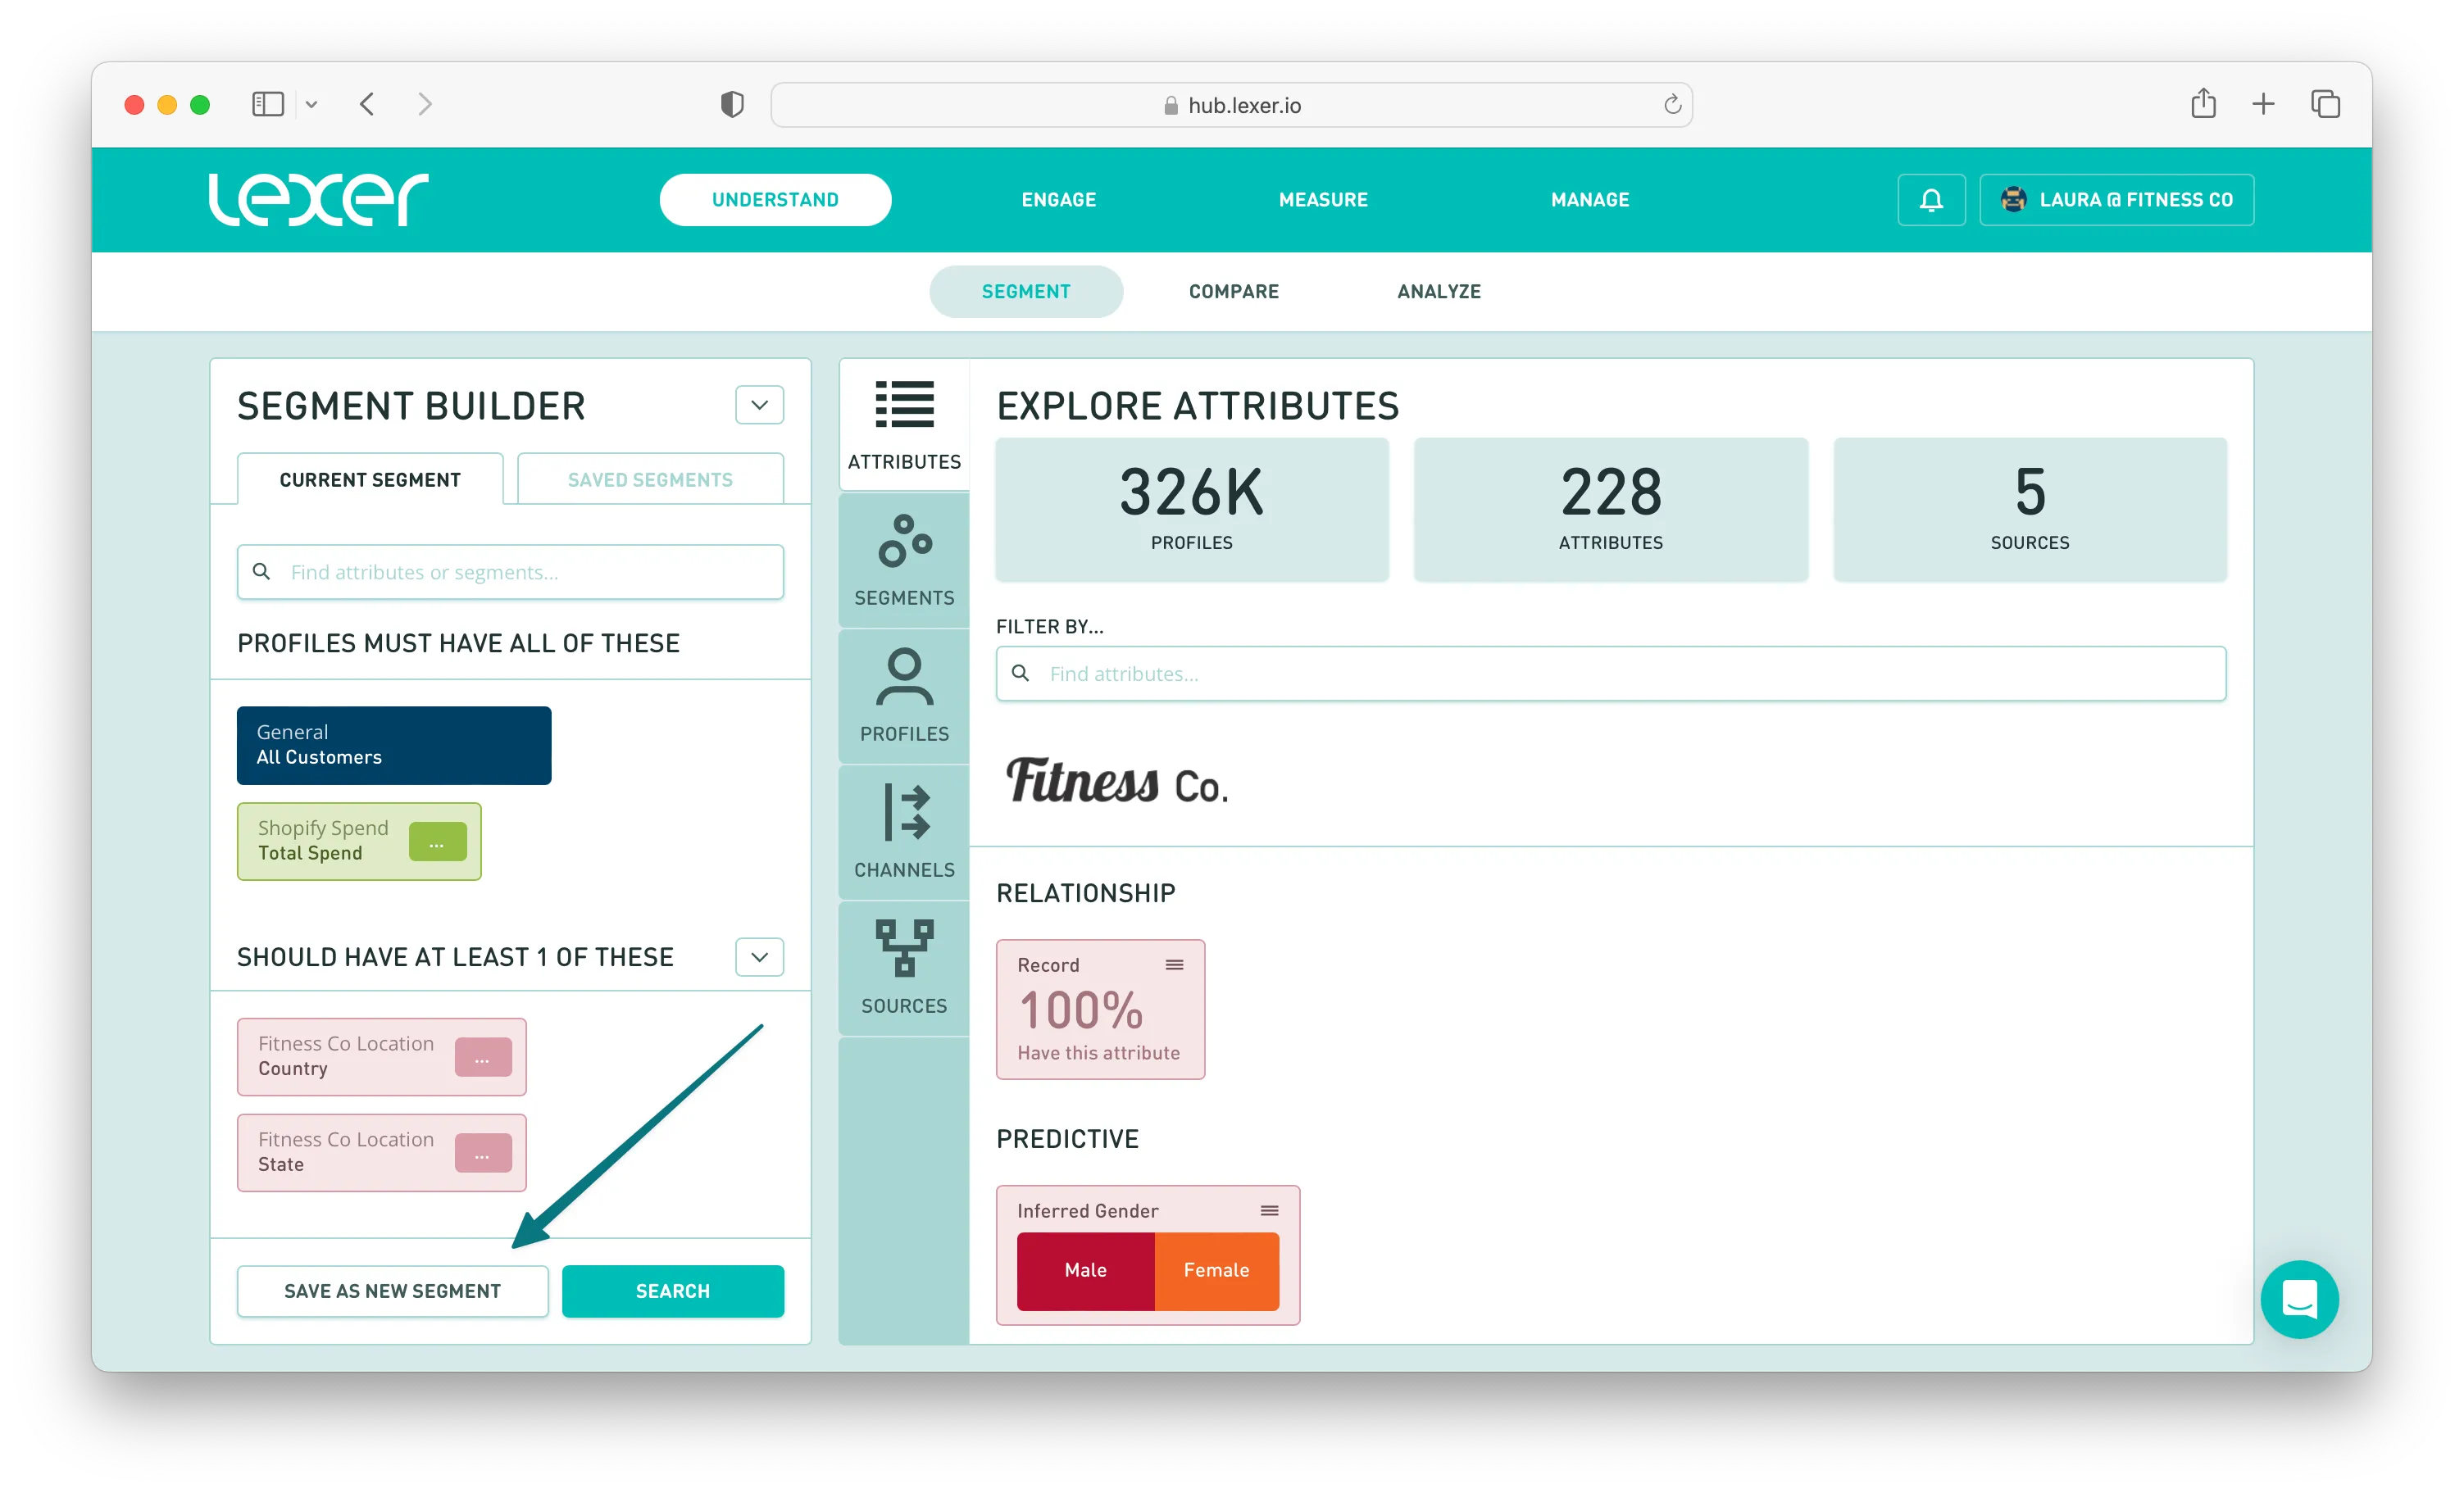
Building a segment begins in the Attribute Picker, which is your tool for searching the hundreds of attributes you have loaded in your CDP. Once you have found your attribute, click it to add it to your Segment Builder. You can modify your query by placing the attribute into one of three areas:
Once you’ve compiled your segment, hit the Search button and review the attribute aggregations and profiles that have returned. Once you’re happy with your results, click Save as New Segment.
You'll need to provide the following information for your segment before you can save it:
- Name: The display name for your segment in Lexer. We recommend naming your segments after the marketing strategy you're trying to target.
- Category: Keep your segments organized into categories.
- Description: Add a brief description for your colleagues. Make sure the description is meaningful so anyone looking at it will understand what the segment is.
- Color: Visually coordinate your segments with color.
- Groups: Choose who in your team can access this segment.
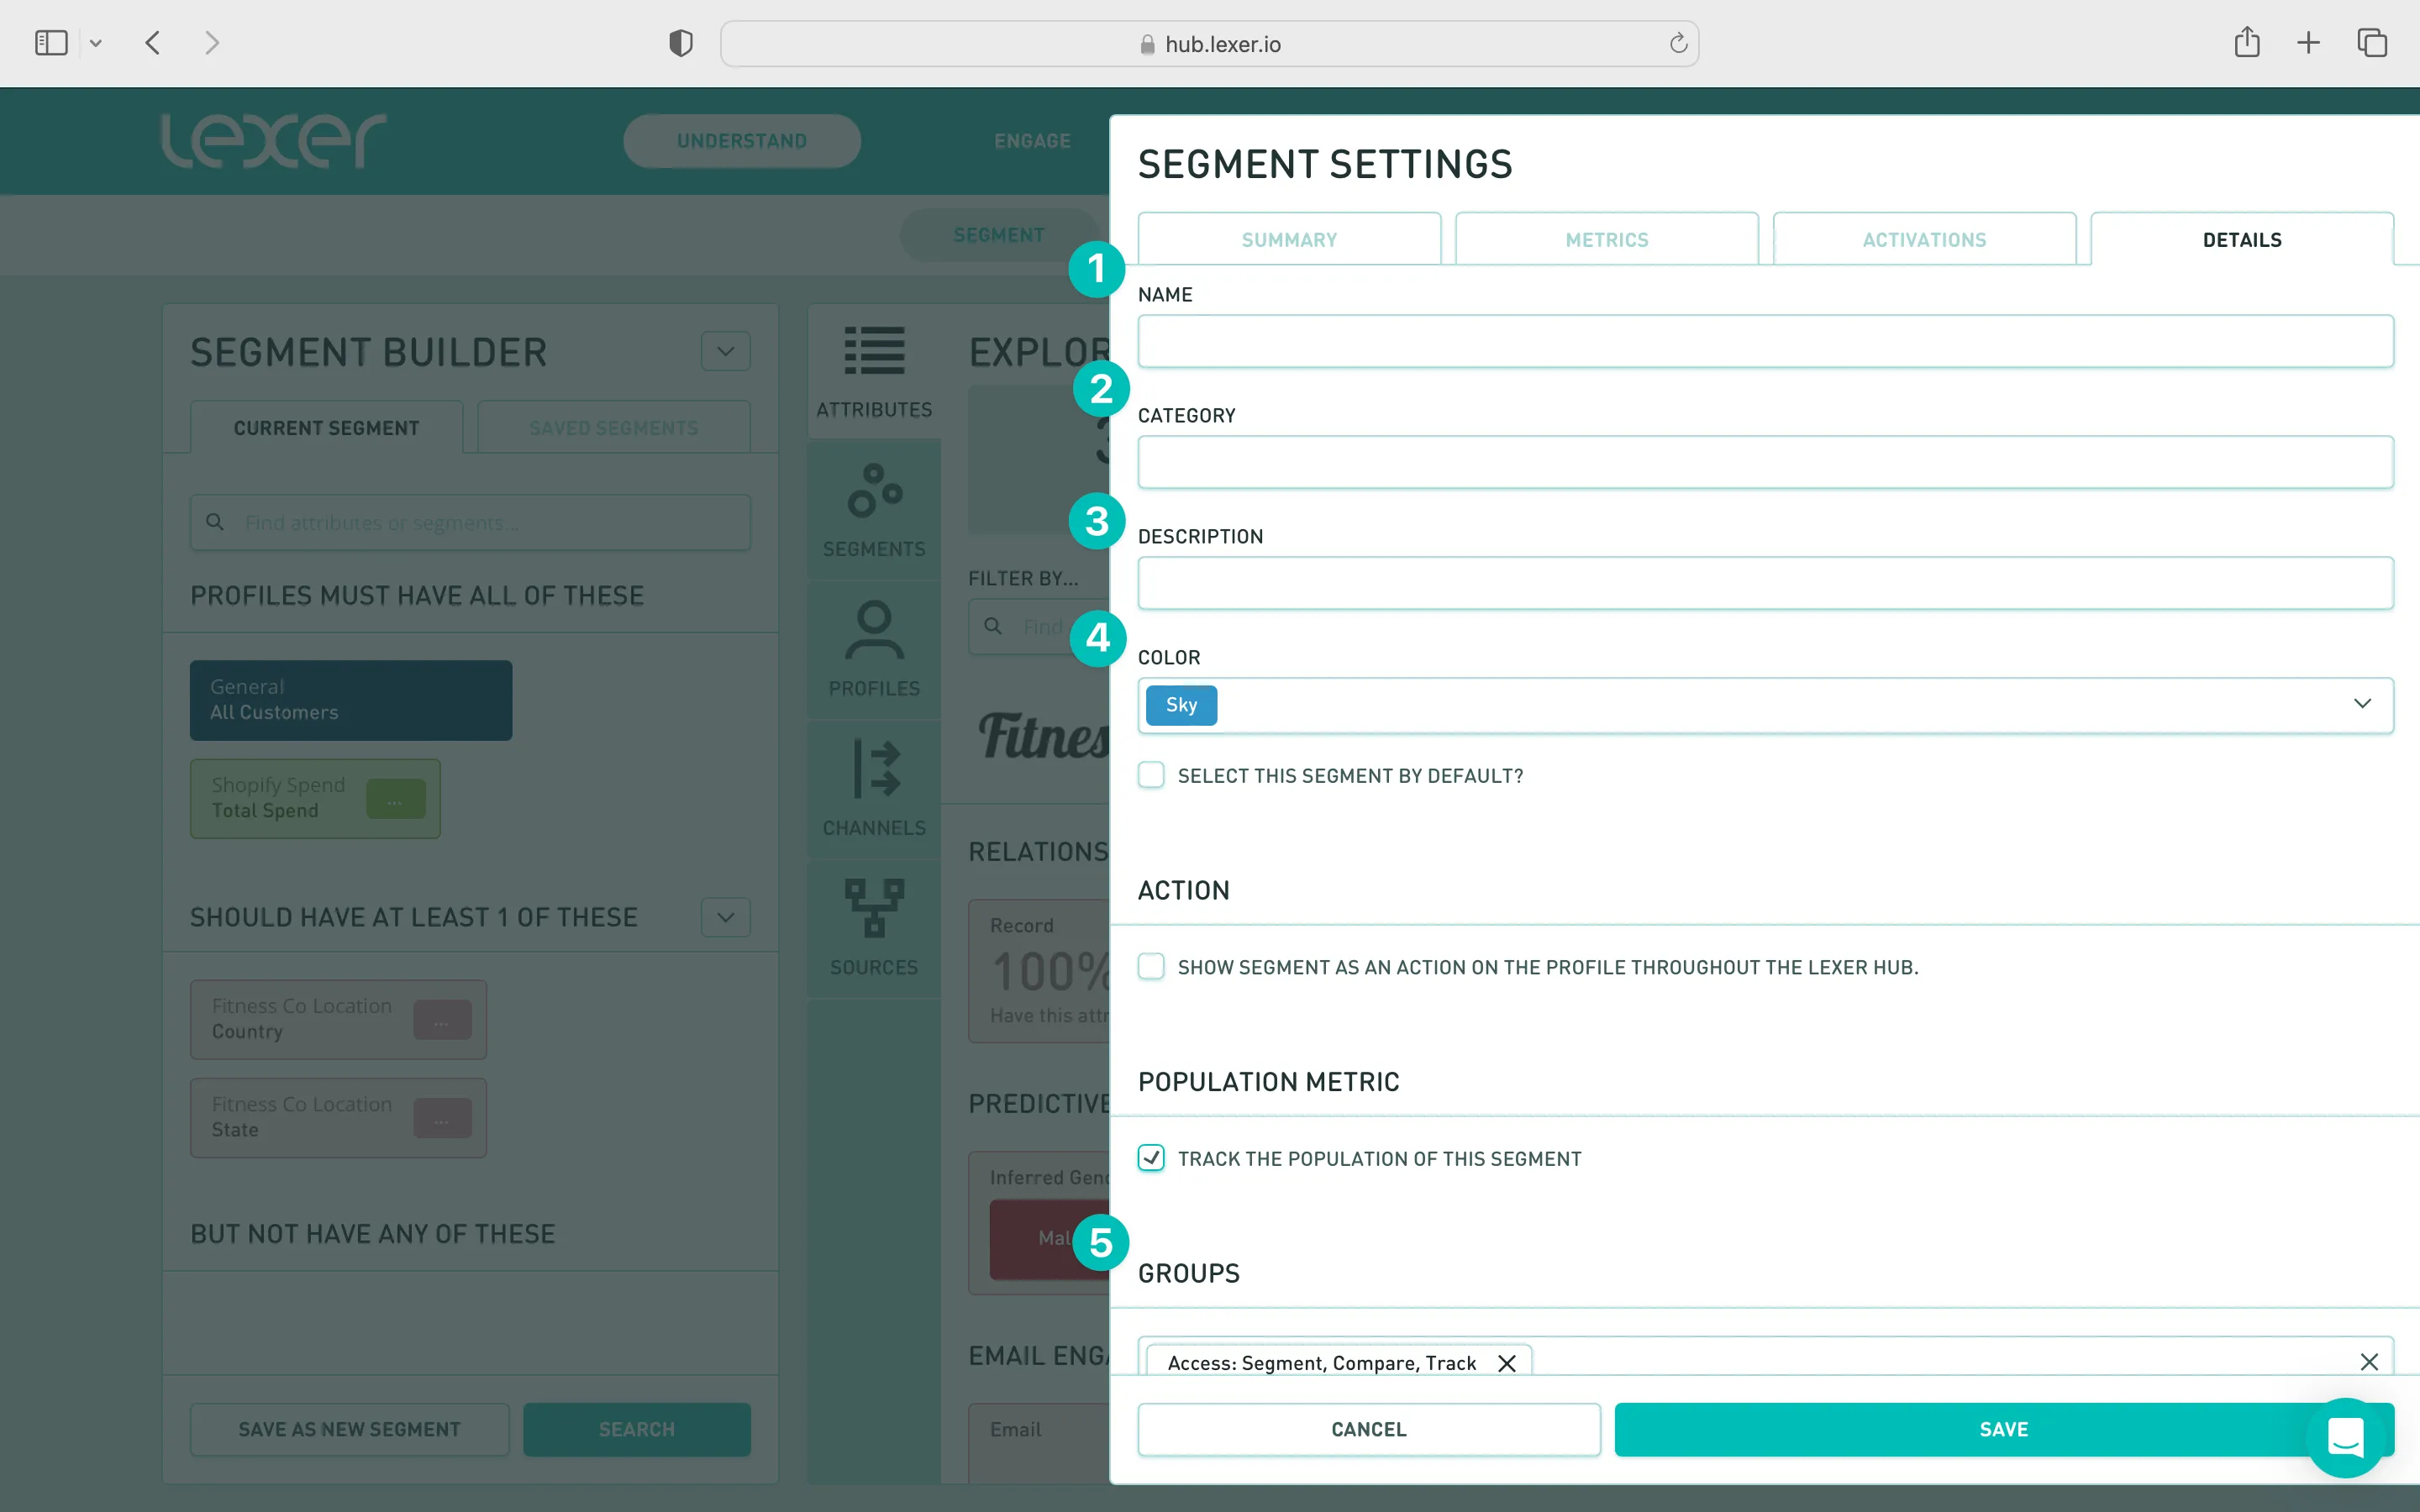
Selecting a segment as default will mean its the default starting segment you see every time you open the Segment Builder, which is applied for everyone in your team.
Segments must also belong to at least one Group. This allows you to control access across your team.
Once you save your segment, you can now search for it in the Attribute picker, and it will appear in the Saved Segments tab list.
Organizing segments
Both Category groups and Segments are automatically organized alphanumerically. You can create as many grouping categories as needed. To optimize organization, here are a few tried-and-tested best practice tips.
- Drafting zone: Before finalizing a segment, create a temporary drafting zone by using the team member’s name or a general “Draft” category. Once the segment is finalized, update the category name to move it into its permanent location for better organization and accessibility.
- Archiving and reporting: For segments that are seasonal or used exclusively for reporting, categorize them under “Z Archive” to ensure they are placed at the bottom of the category list. This helps keep the active segments easily accessible and the workspace uncluttered.
- Standardized abbreviations: Establish consistent abbreviations for dates in segment titles (e.g., L = Last, M = Month, Y = Year, D = Day) to ensure clarity across the team.
Naming conventions
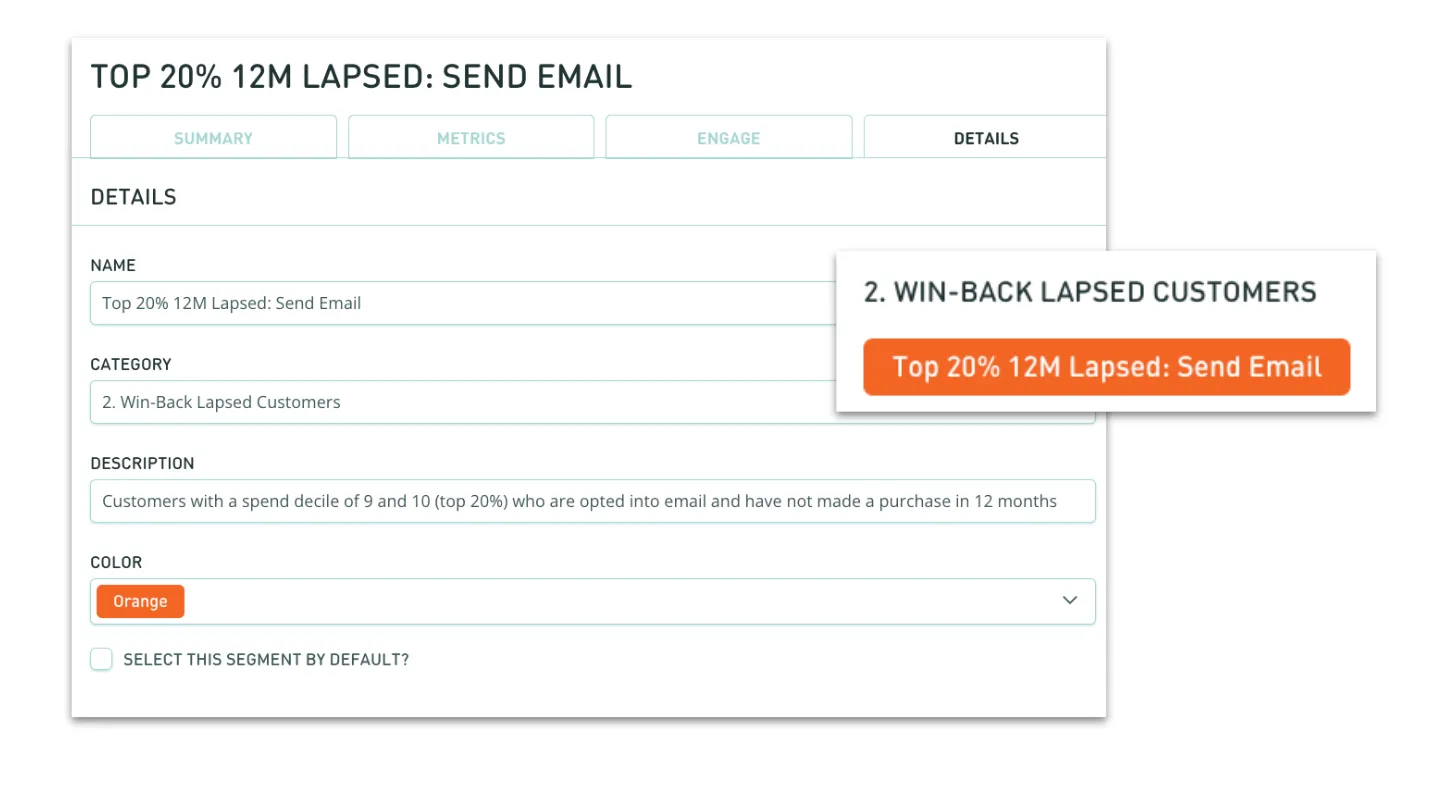
Clearly naming segments, and using a consistent naming convention, is key to good segment management. In this example:
- Name: Identifies who is included in the segment (top 20% of customers who are also 12 months lapsed), and the desired action for the segment too (send email marketing).
- Category: It's part of the win-back lapsed customers strategy.
- Description: Clearly details the attributes and filters used, so anyone can quickly understand.
- Color: All win-back and retention segments have been grouped in orange.
Updating a segment
If you need to update a segment, the process is simple.
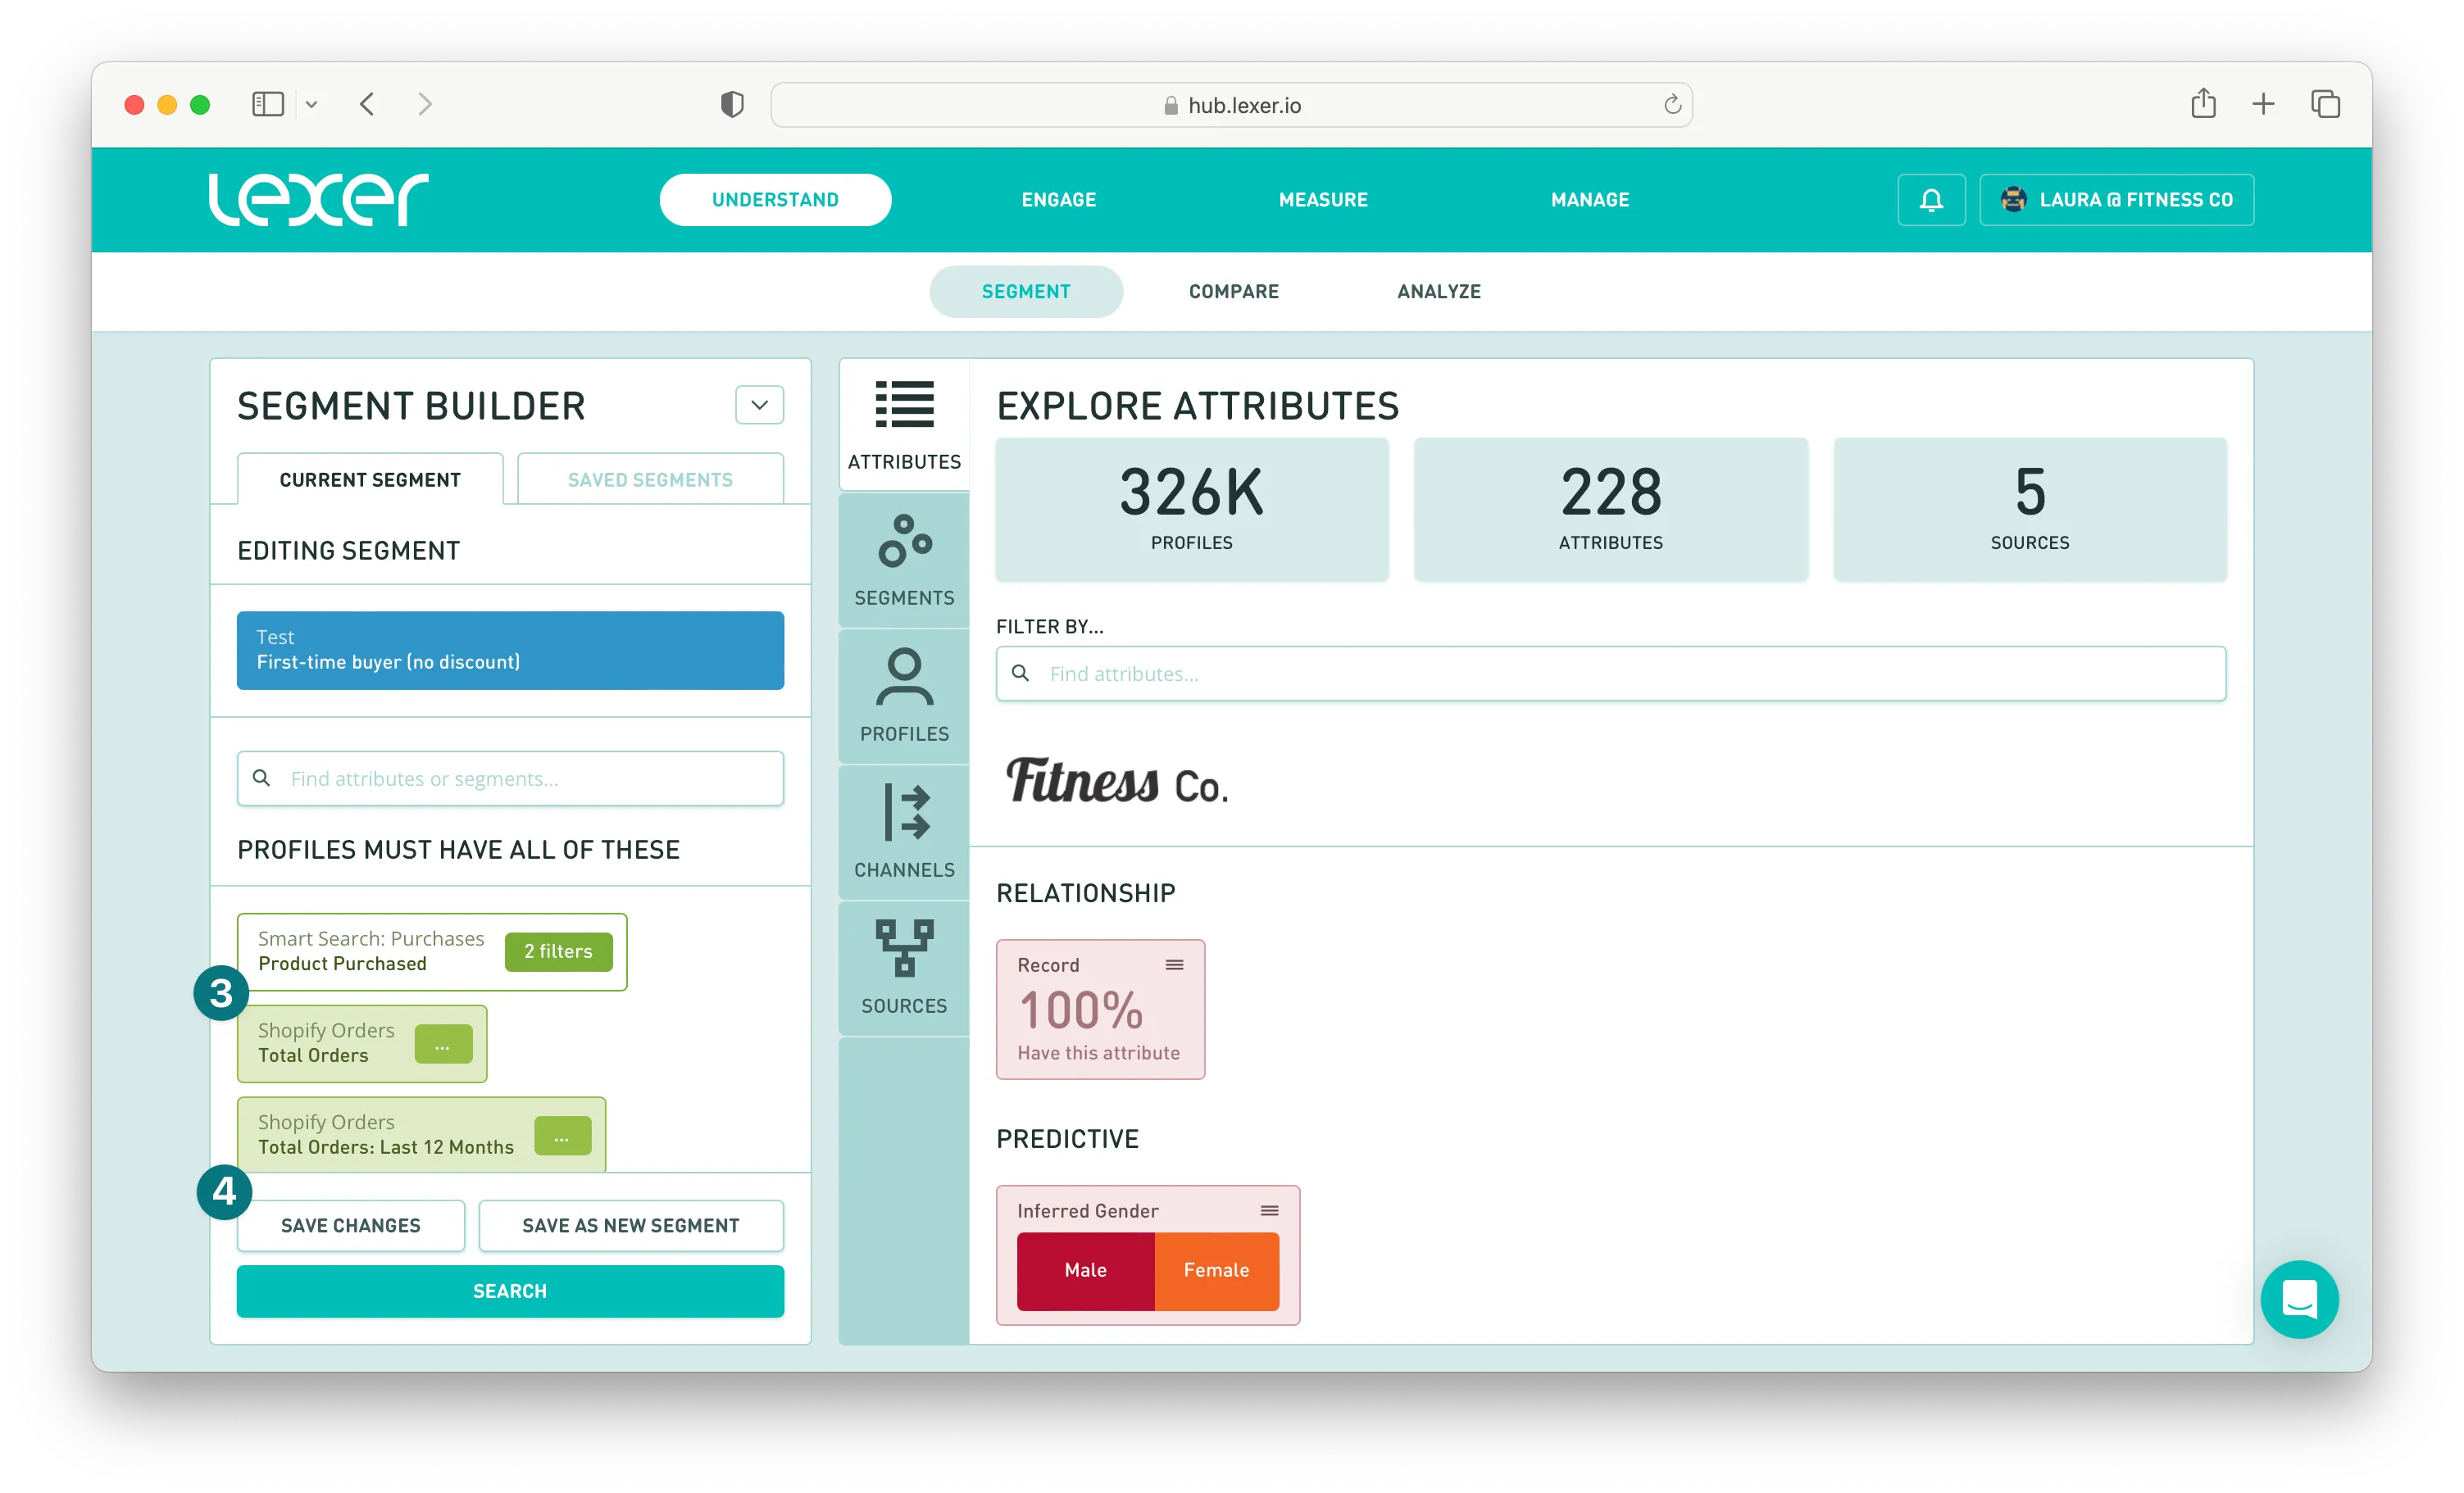
- Select the segment you wish to update from the Saved Segments tab and add it to the Segment Builder.
- Then hover over the segment and click the Edit Segment icon.
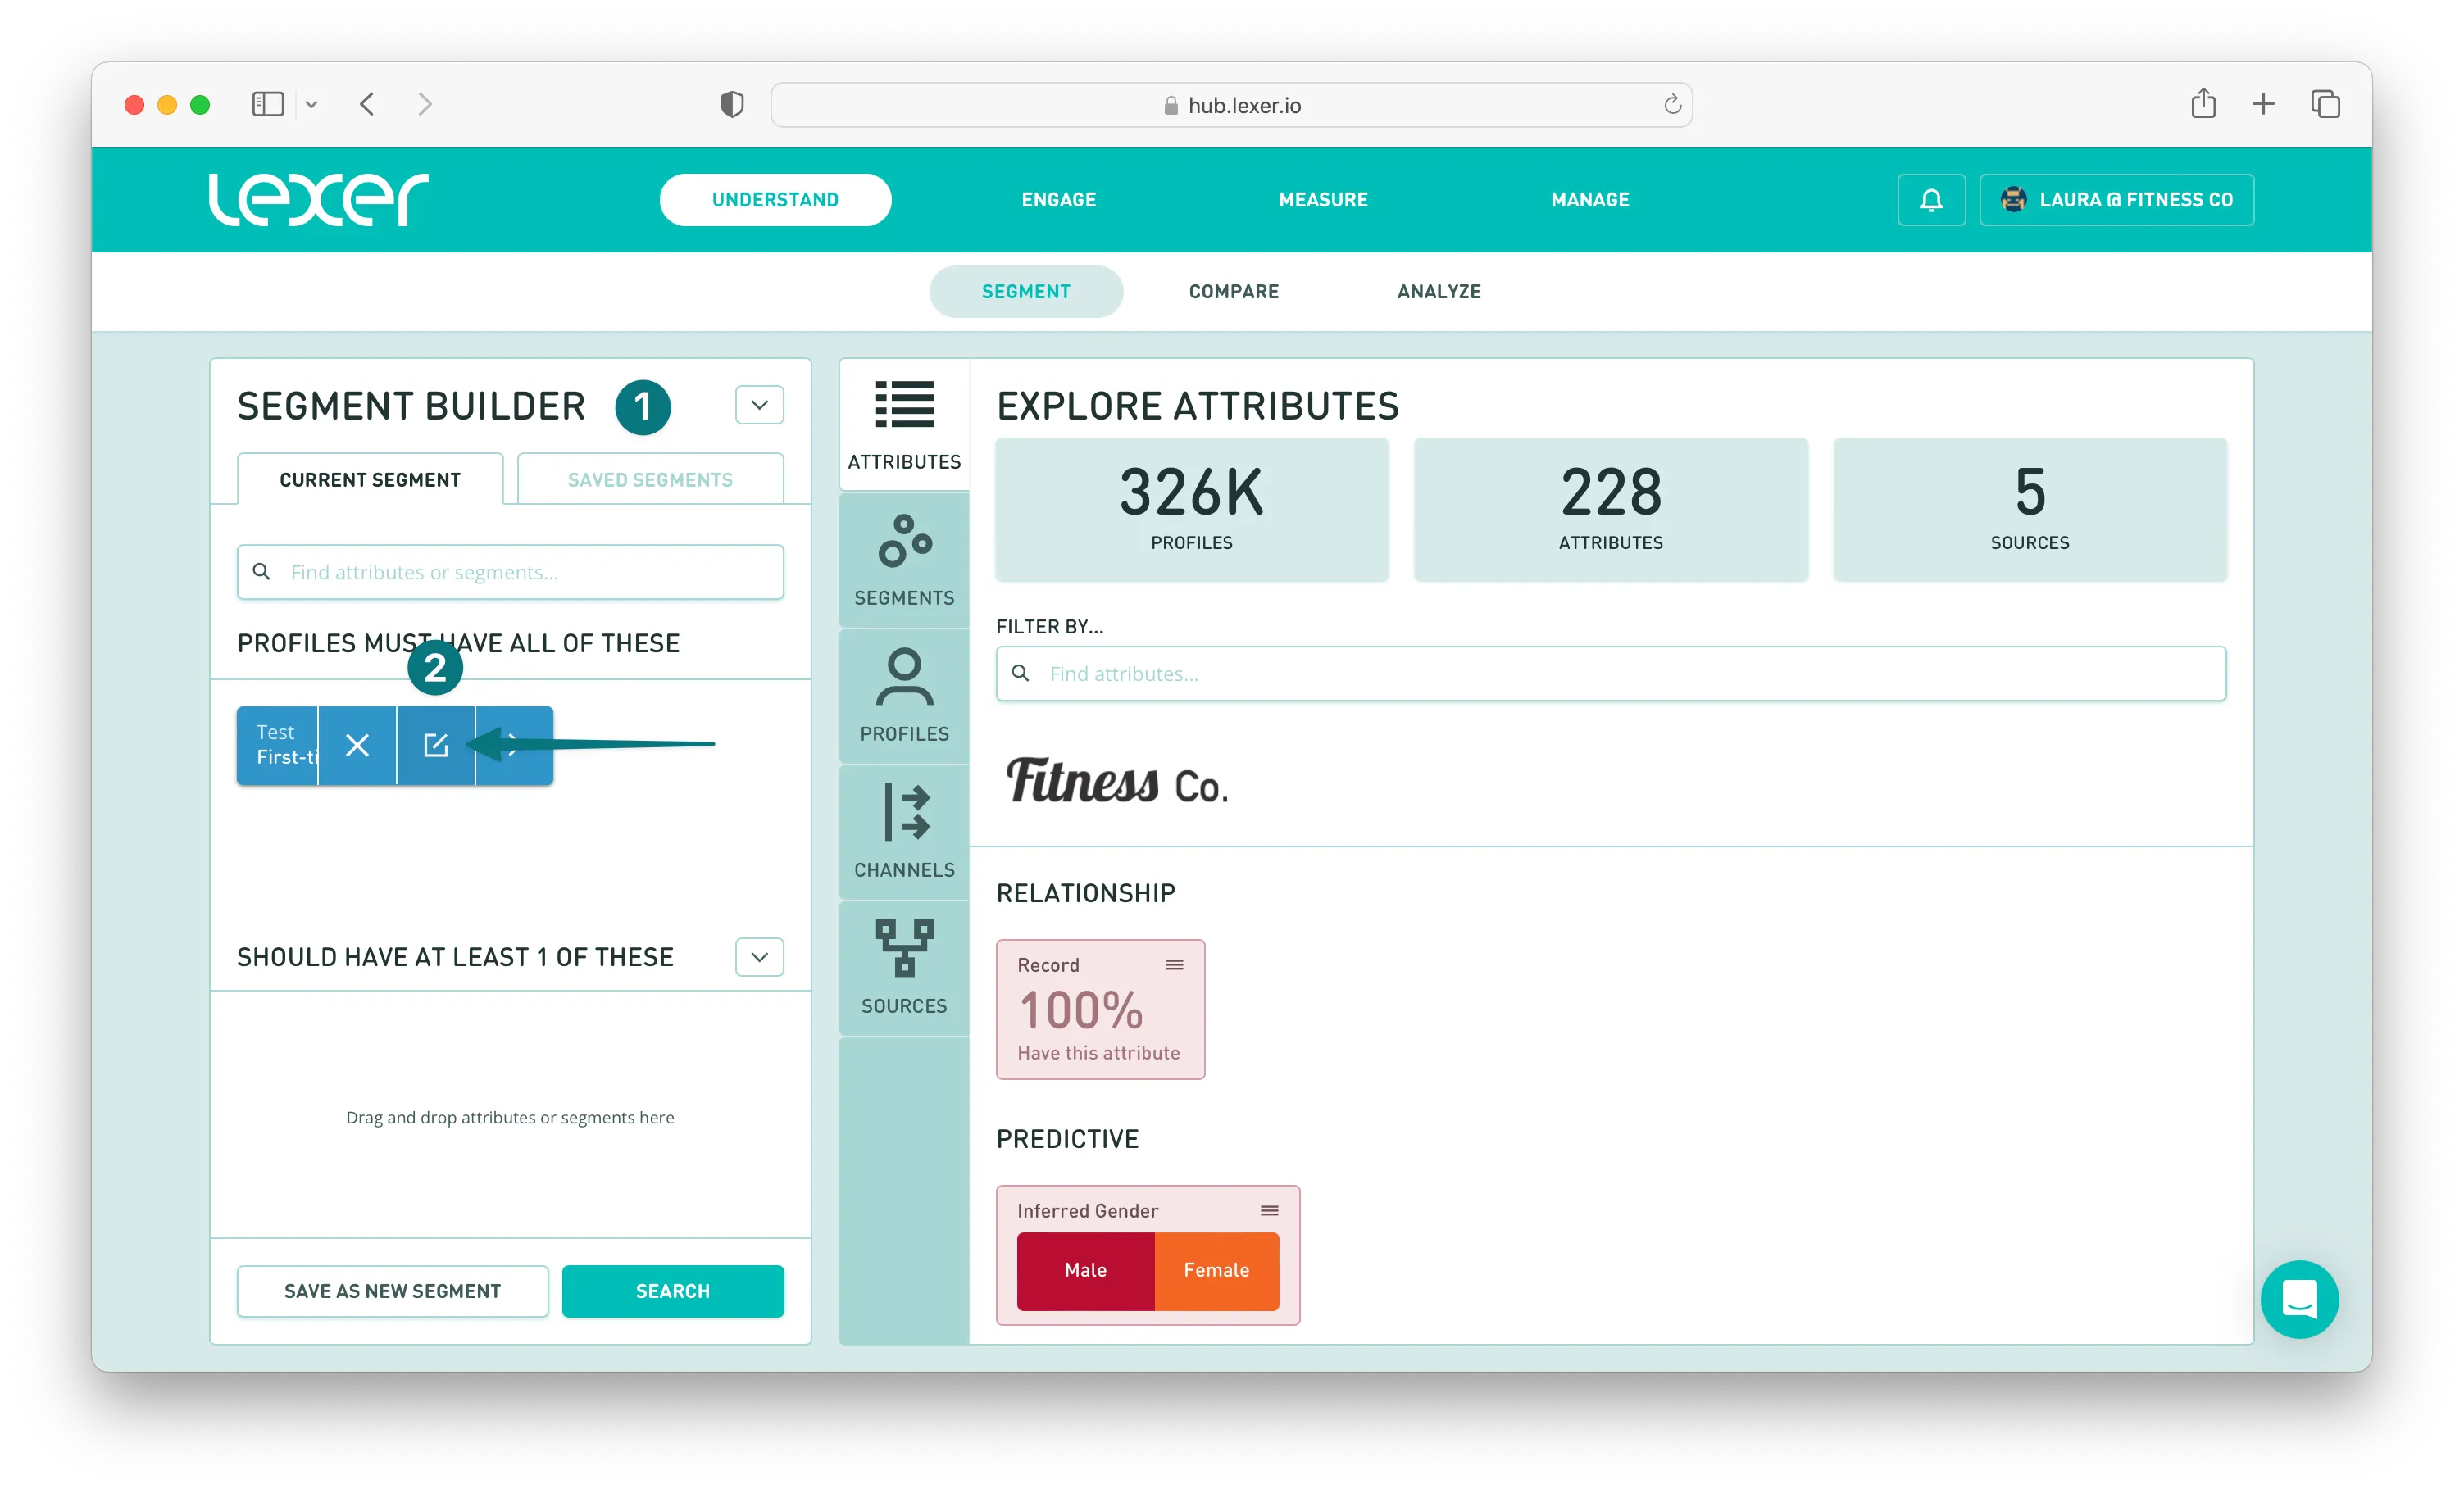
- Add your updates to the existing segment.
- Then click Save Changes, and you're done!
Deleting a segment
If you wish to delete a segment, the process is as follows:
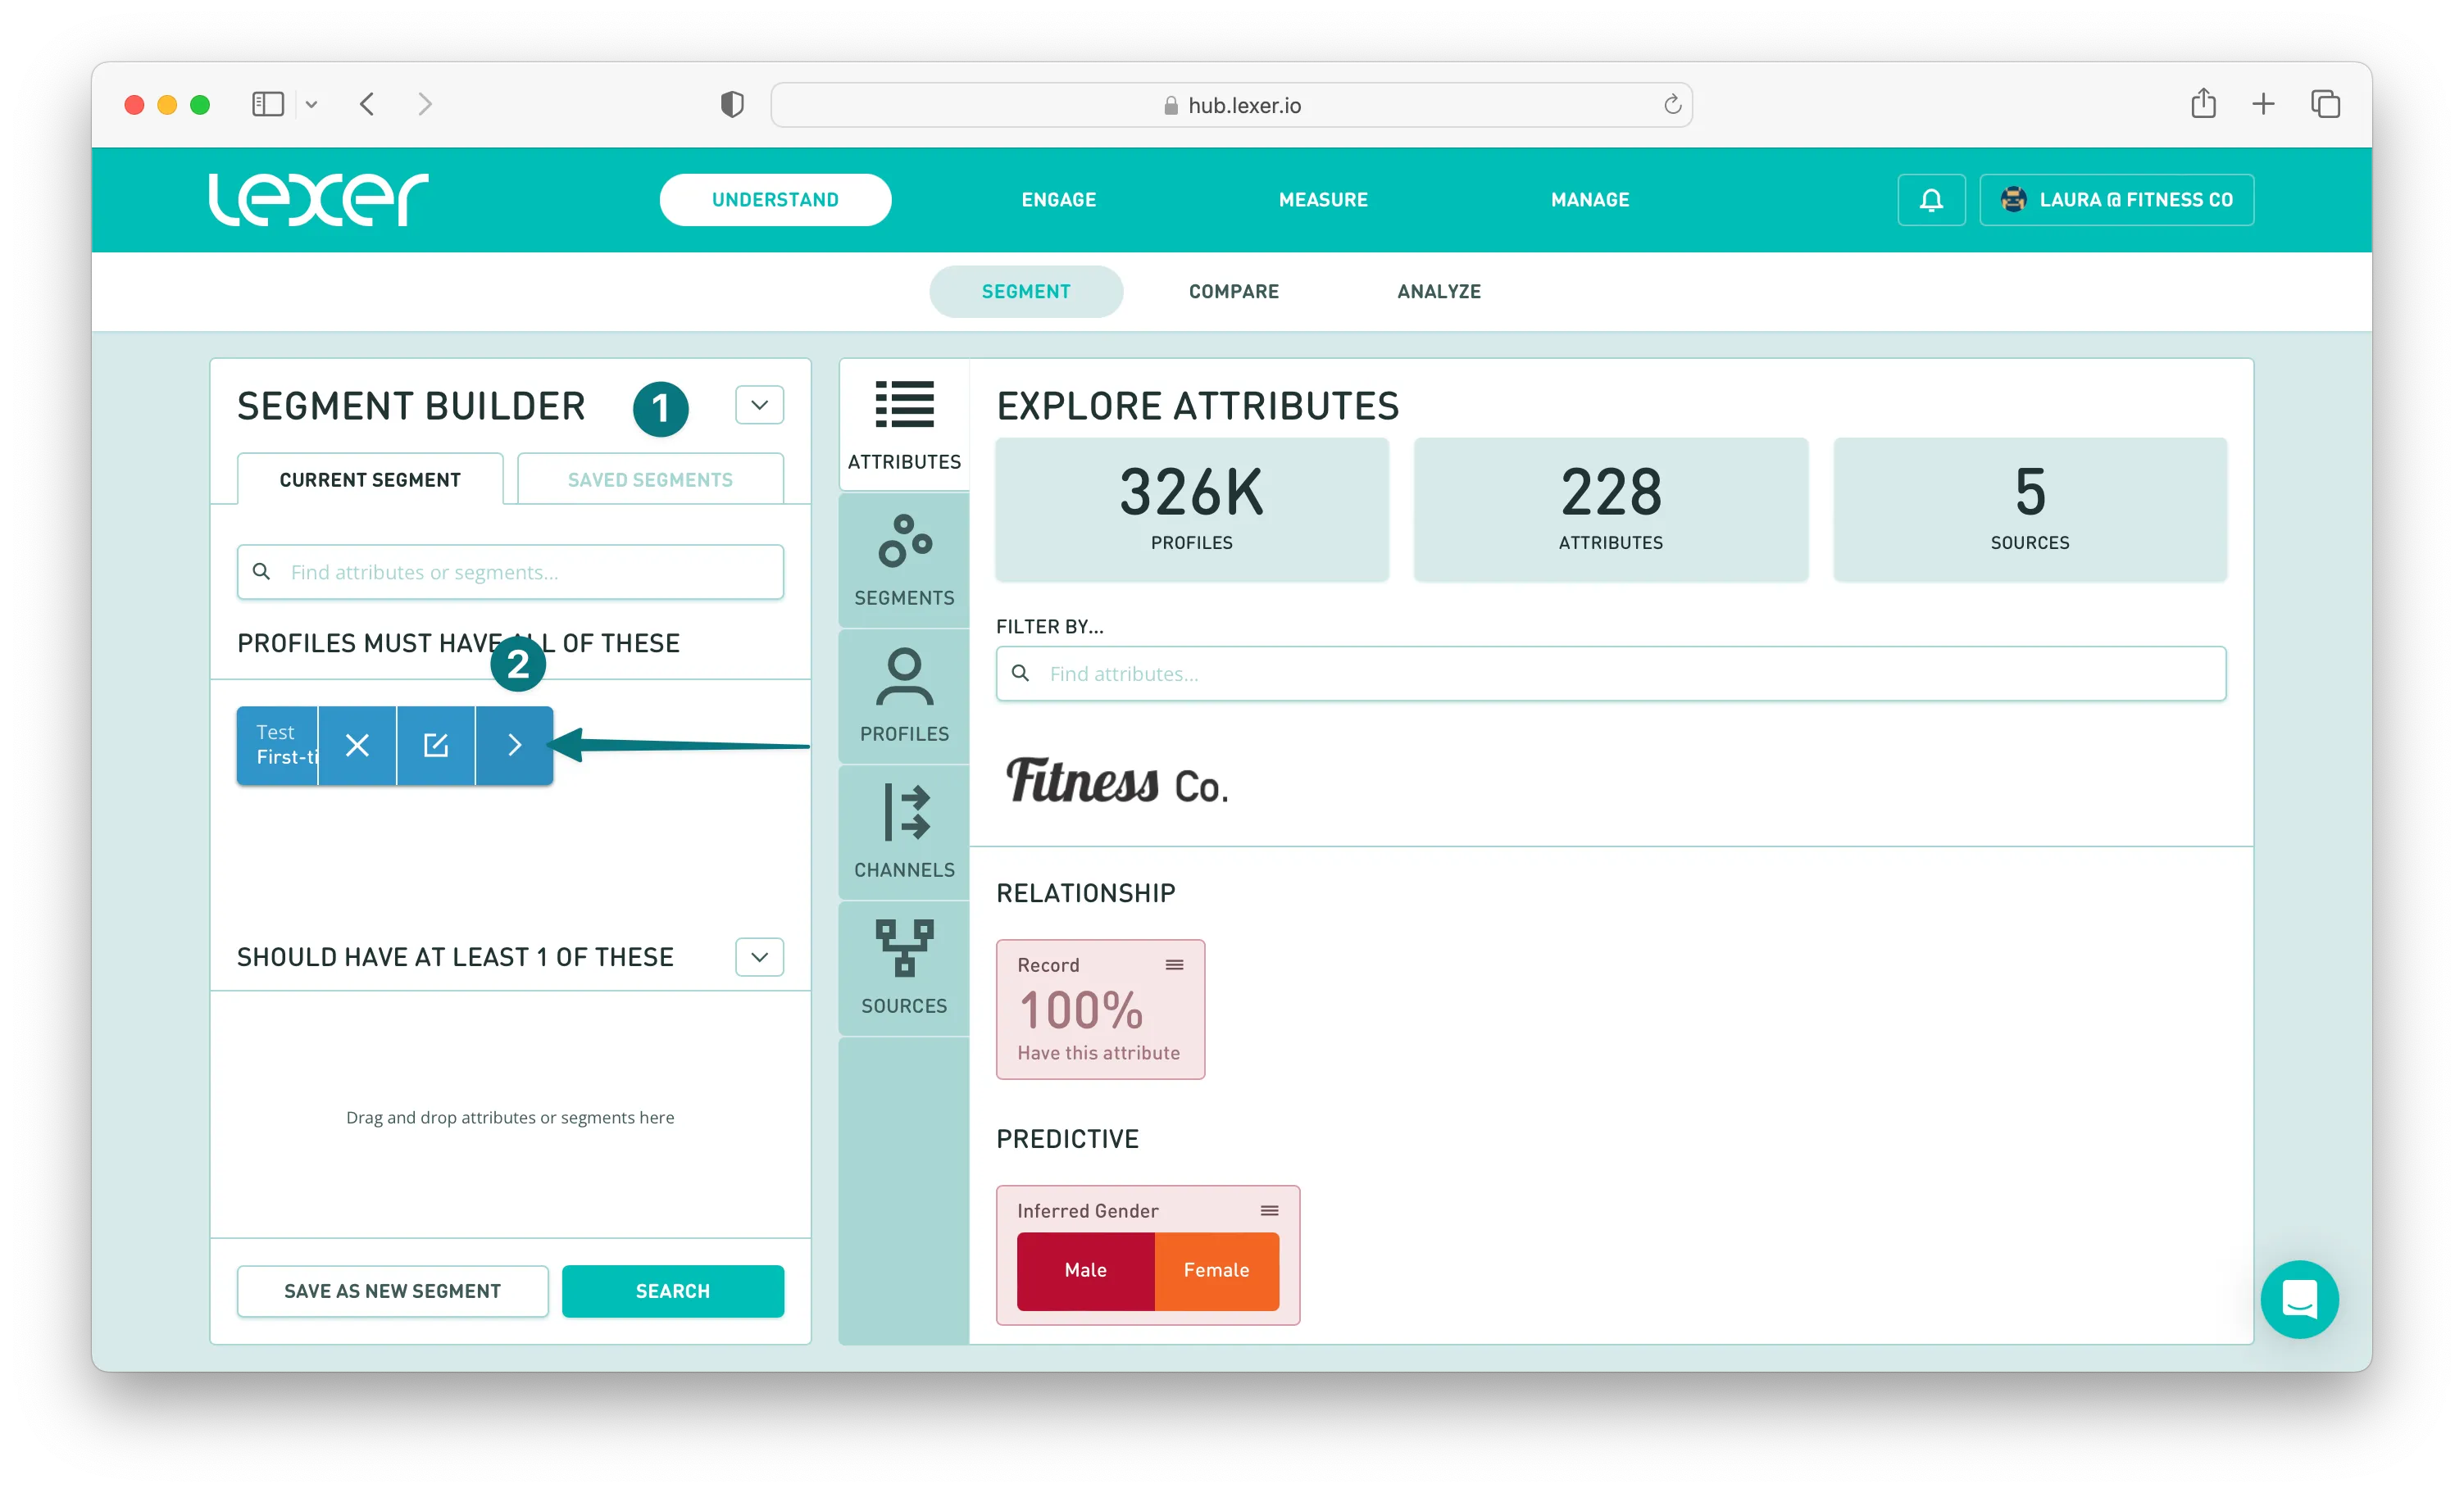
- Select the segment you wish to delete from the Saved Segments tab and add it to the Segment Builder.
- Then hover over the segment and click the Show Segment Details icon.
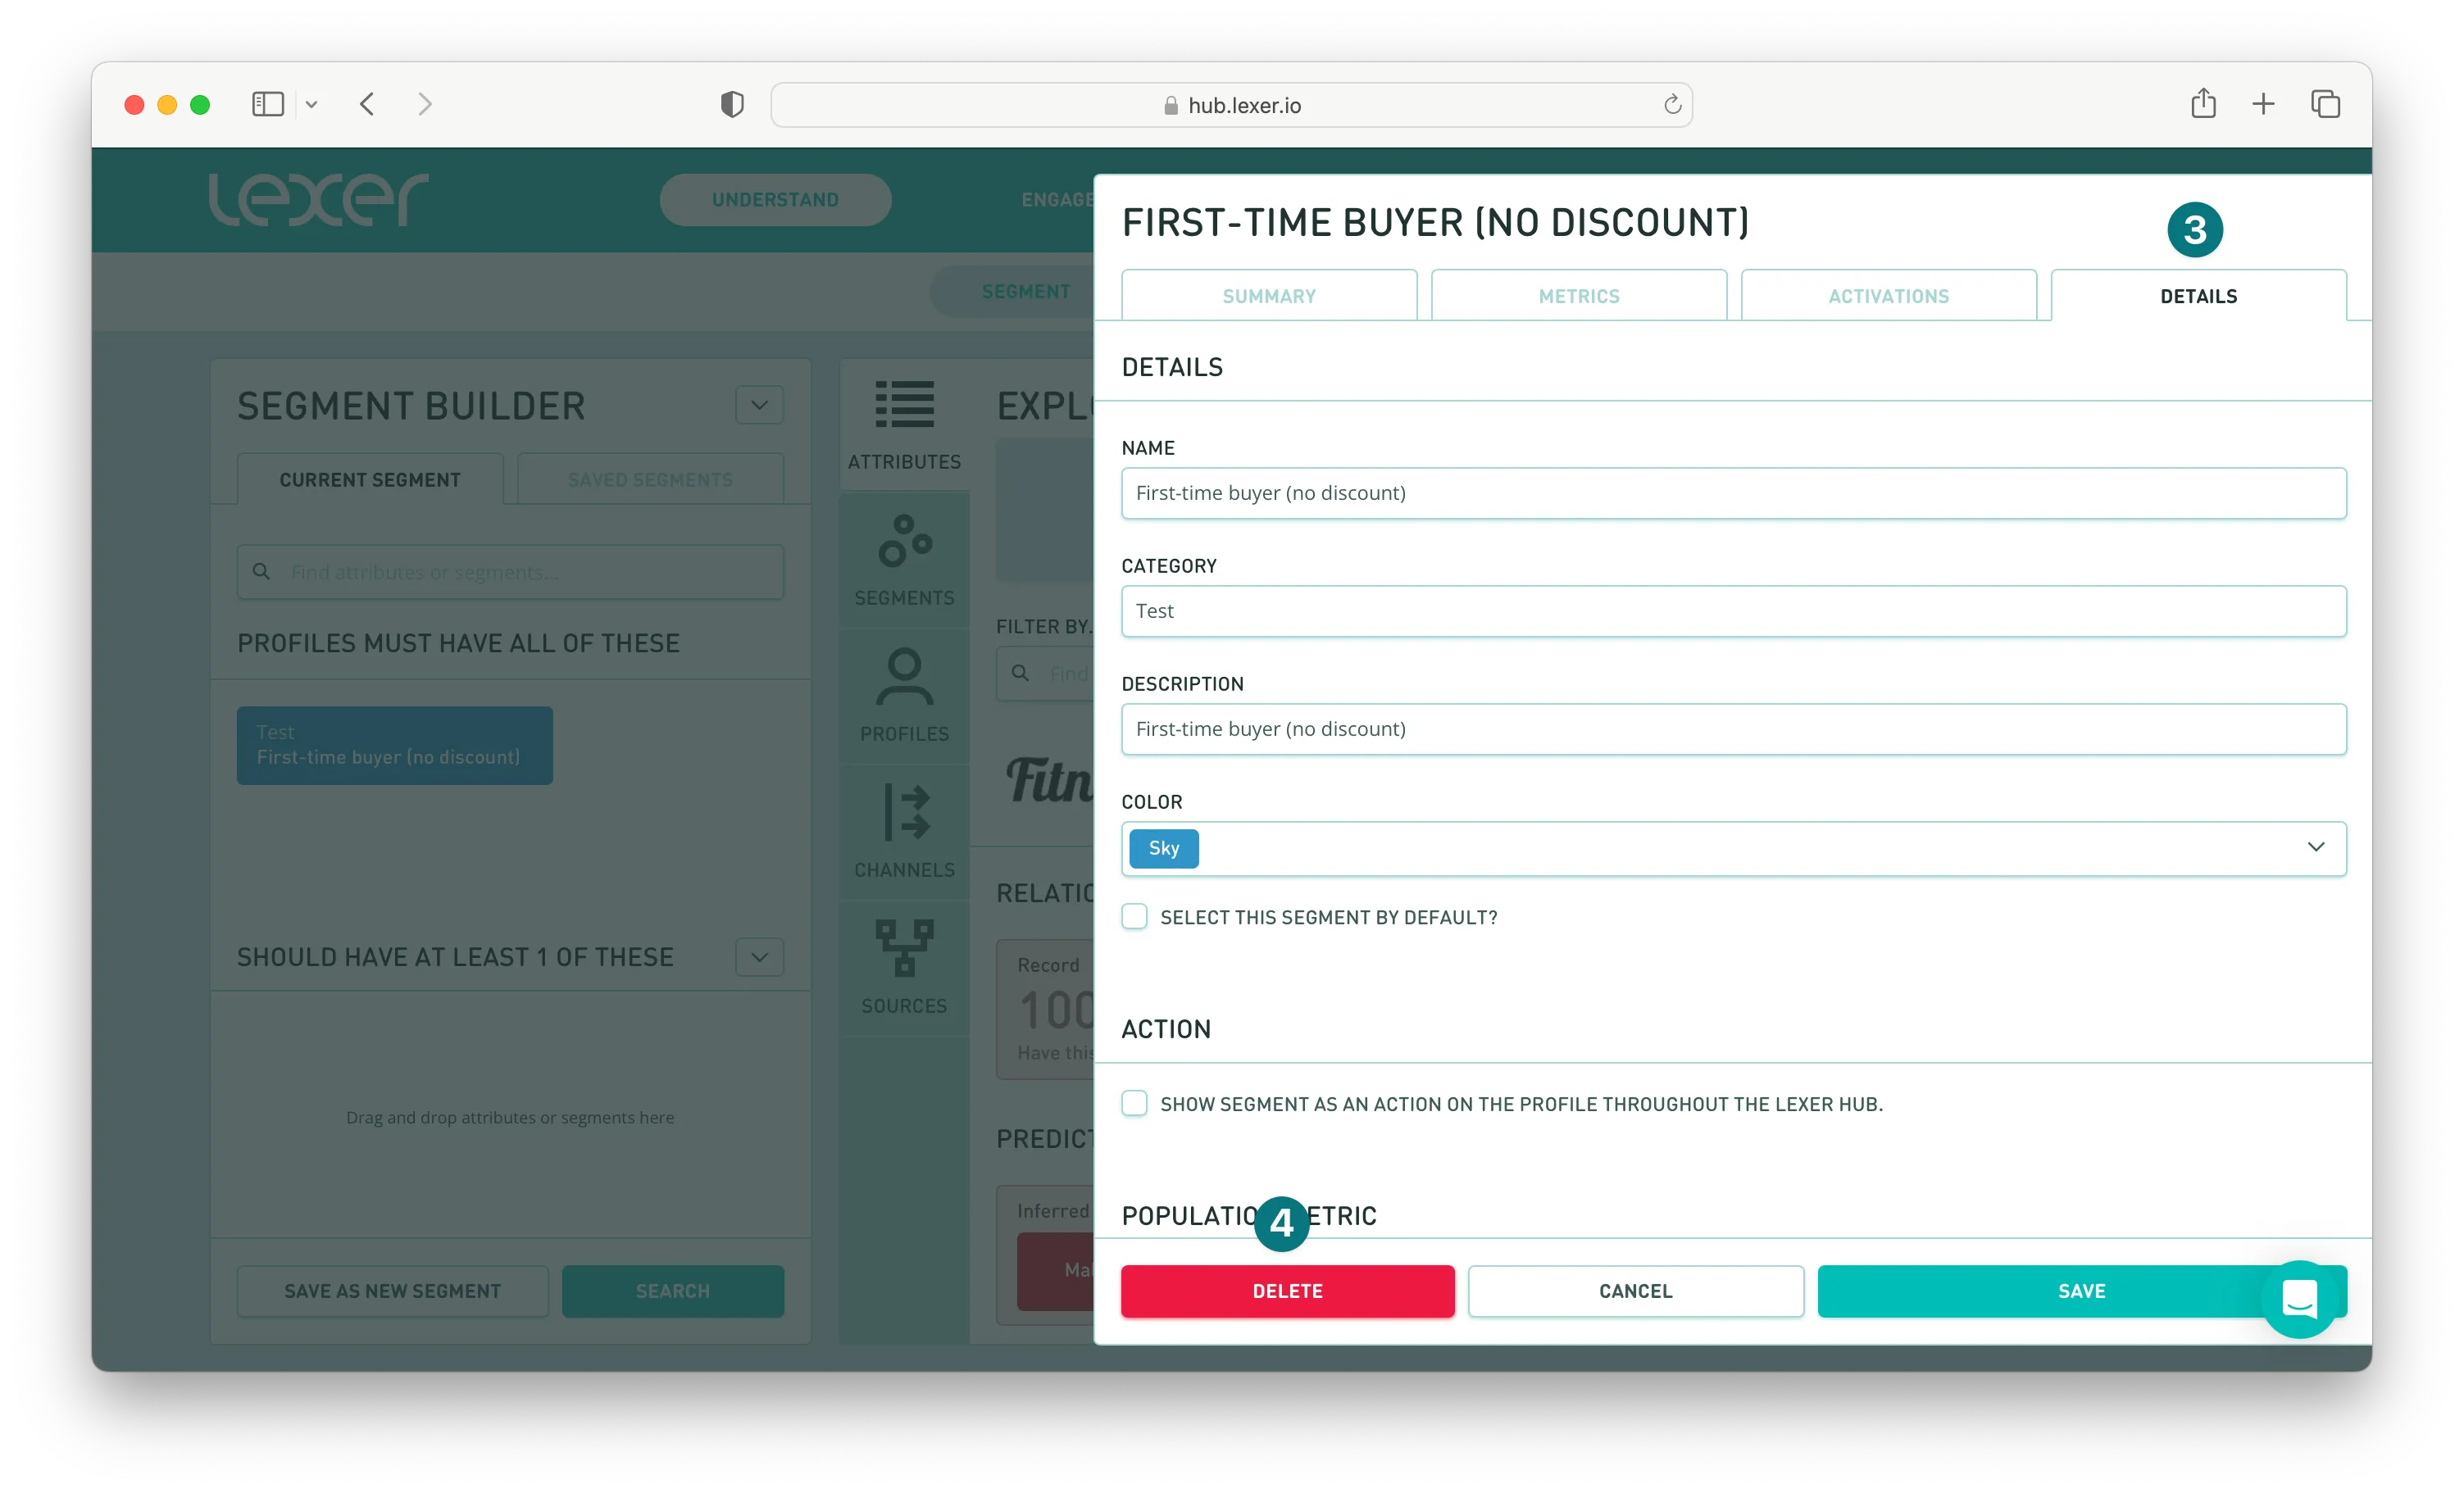
- Navigate to the Details tab.
- Scroll down and then select Delete.
Activating your segments
Segments are then used to define audiences in Lexer Activate, allowing you to target customers who match a particular segment criteria in marketing and advertising platforms.

