Nosto
This integration is in beta
As with all beta tests, not everything will be perfect. If you run into any issues, please submit a support ticket.
Why integrate with Nosto?
Nosto, the leading Commerce Experience Platform (CXP), helps brands transform the commerce experience by enriching and connecting customer, product, and content data so they can deliver personalized experiences at scale and increase online revenue. This is achieved through a set of tools rooted in AI and automation, including product recommendations, search, category merchandising, content personalization, user-generated content, and more.
Benefits of an Nosto Integration
Integrating with Nosto allows you to personalize your website experience for every single customer based on the data you have in the Hub. With Nosto you can already create targeted experiences for shoppers independent of Lexer, using onsite behavioral and transactional data. Bringing Lexer data in Nosto will enable you to further target your shoppers with granular omnichannel data and personalize recommendations, search results, merchandising, popups, content based on:
- Demographics: gender,, age, date of birth etc.
- Return data: Return percentage, return value, return product size etc.
- Email & SMS: SMS opt-in status, last 30 day email openers, email and SMS unsubscribe date etc.
- Loyalty and Reviews: Loyalty points balance, loyalty VIP tier, average review rating etc.
- Predictive: Churn risk, predicted spend, inferred gender
- Omnichannel purchasing behavior: offline/retail behaviors, channel preference ect.
Direction
What direction does the data flow?
✅ Data out: Creating attributes for Nosto segments
Type
Lexer loads these types of data
✅ Personalisation
Source method
How Lexer loads data from this source.
N/A
Destination method
How Lexer sends data to this source.
✅ API
Status
What is the status of the integration?
Full Release
Lexer product compatibility
What Lexer products is the integration compatible with?
✅ Activate
⬜️ Compare
⬜️ Segment
⬜️ Track
⬜️ Listen
⬜️ Respond
⬜️ Serve
Attributes
No attributes will be created as part of this integration.
Attributes
This integration allows for some flexibility, the output of the integration depends on your available data and what you send through to Lexer. In addition, your attributes could be named in a different way to other clients. If you would like a list of attributes related to this integration, please email your Success Manager.
Attributes
What attributes are created when integrated with Lexer?
Attributes
These are the standard attributes that Lexer can create from the data received via this integration. The exact attributes will depend on what data is made available and sent into Lexer. Keep in mind, your attribute names may vary slightly. If you have any questions or would like to explore custom options, please contact your Success Manager.
Customer attributes
Email engagement attributes
SMS event attributes
Transactional attributes
Product attributes
How do I connect my Nosto account?
There are a few things you will need to do before you can activate to Nosto. Let’s run through them step by step.
Contact Nosto to request an Authentication token via email or intercom
First things first, you will need to contact Nosto to get an Authentication token. This is a permission that their team will be able to activate for you pretty quickly.
To do this:
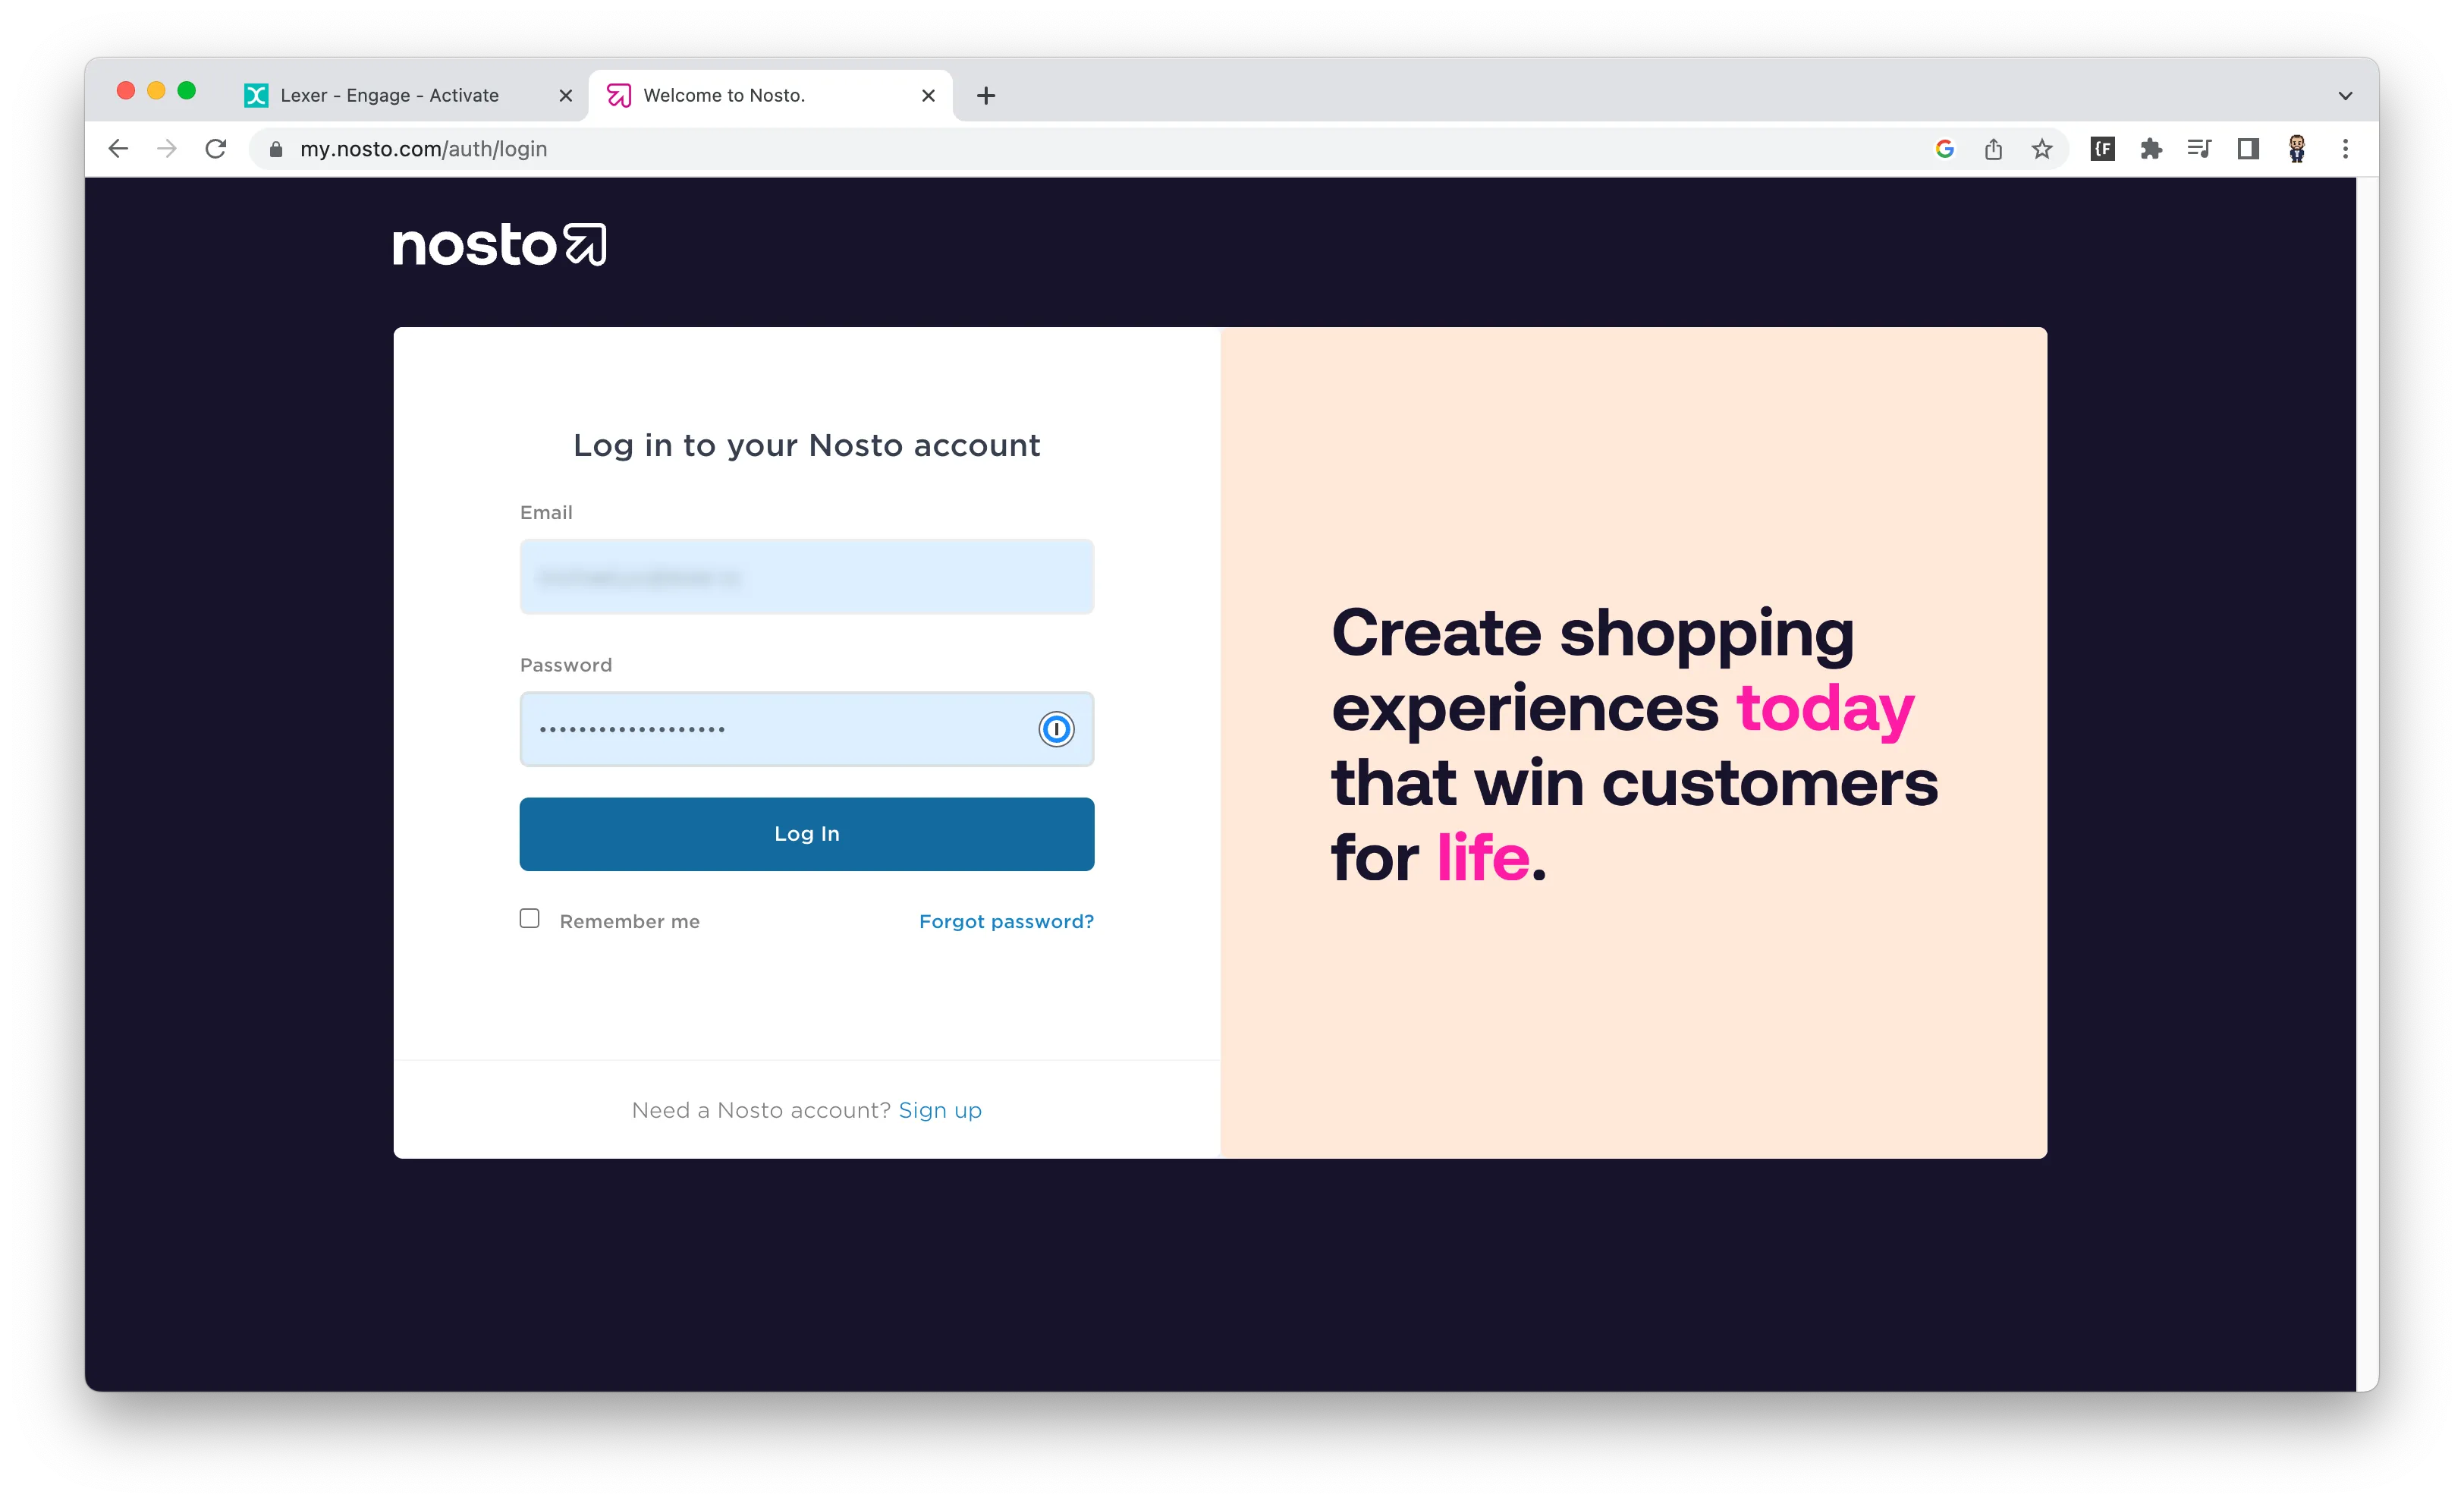
- Log into your Nosto account here.
- Open Nosto’s chatbot in the bottom right hand corner of the screen.
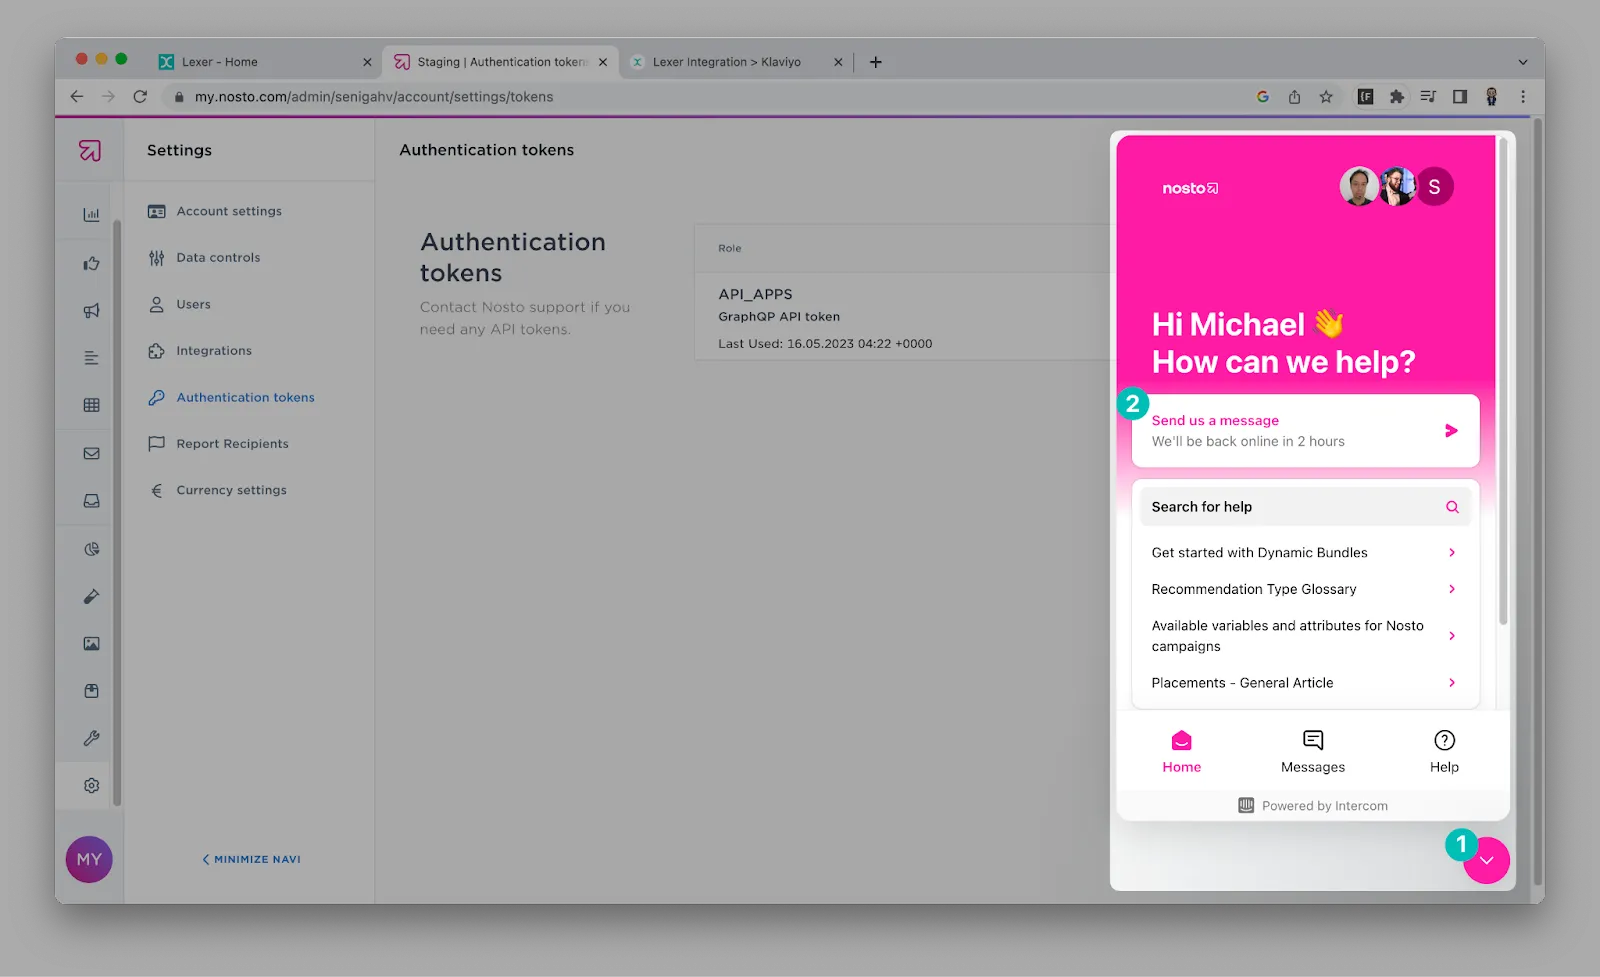
- Send them a message “requesting access to an Authentication token to integrate Nosto with Lexer”.
- Now that you have requested access, you will need to wait for this key to be provided.
I have access to my API key, now what?
Once you have been provided with access to a key we can jump back in where we left off. Let’s start by accessing your key.
Log into Nosto and complete these steps:
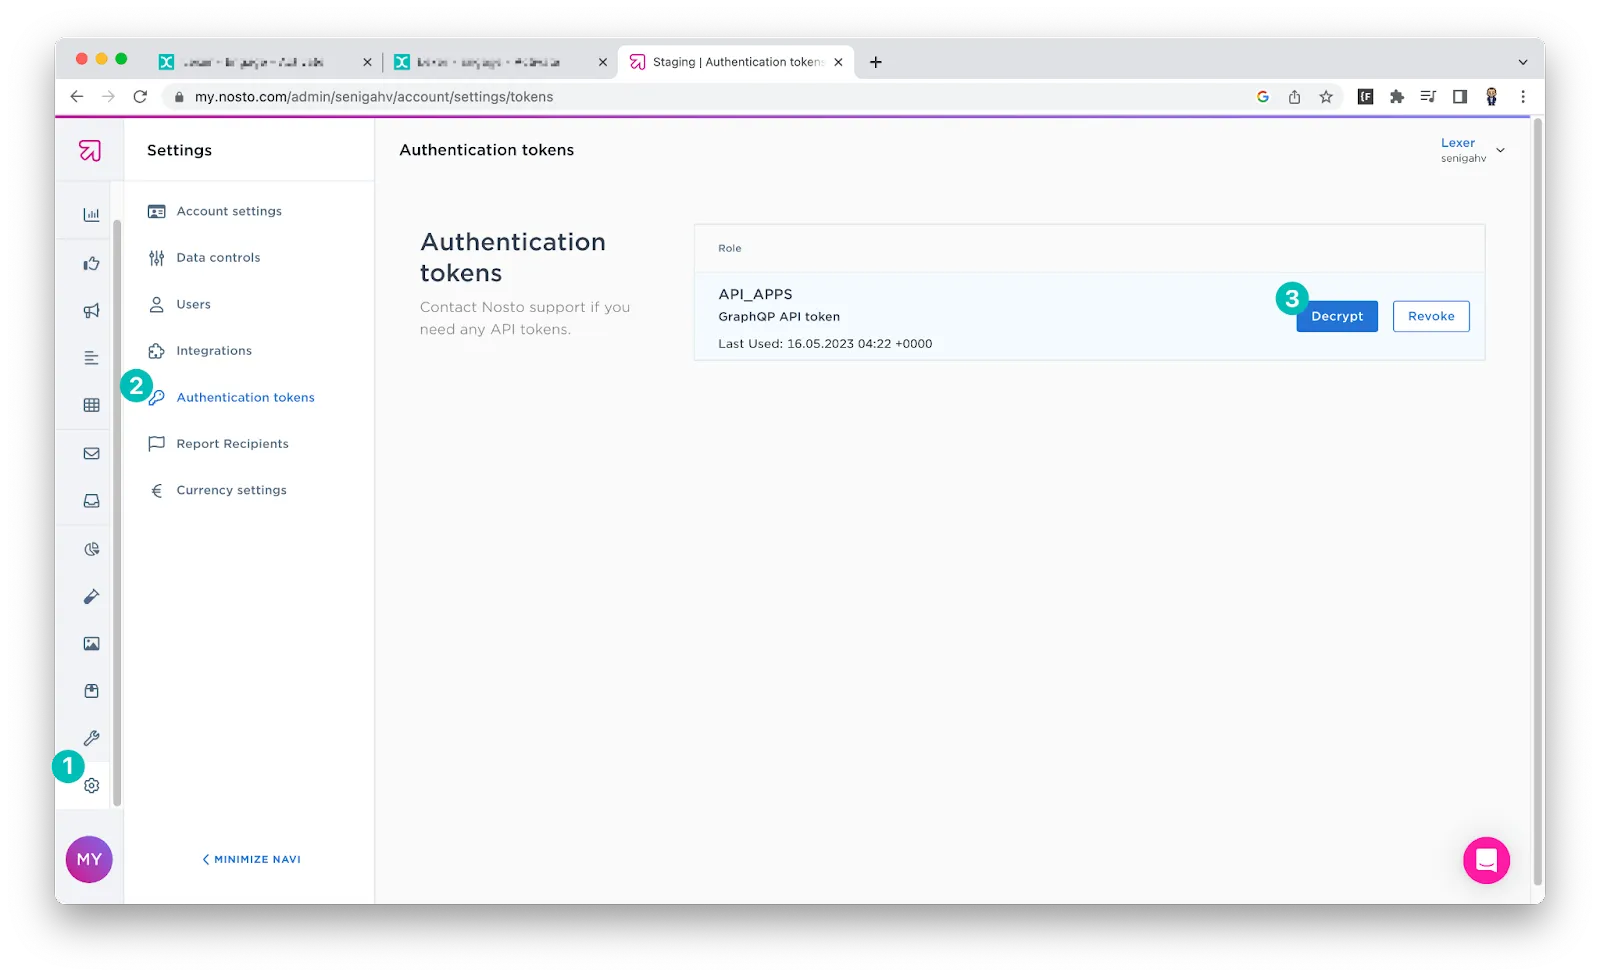
- Navigate to Settings, the small cog at the bottom of the navigation bar on the left side of the screen.
- Open up Authentication tokens.
- Click on Decrypt to gain access to the API key.
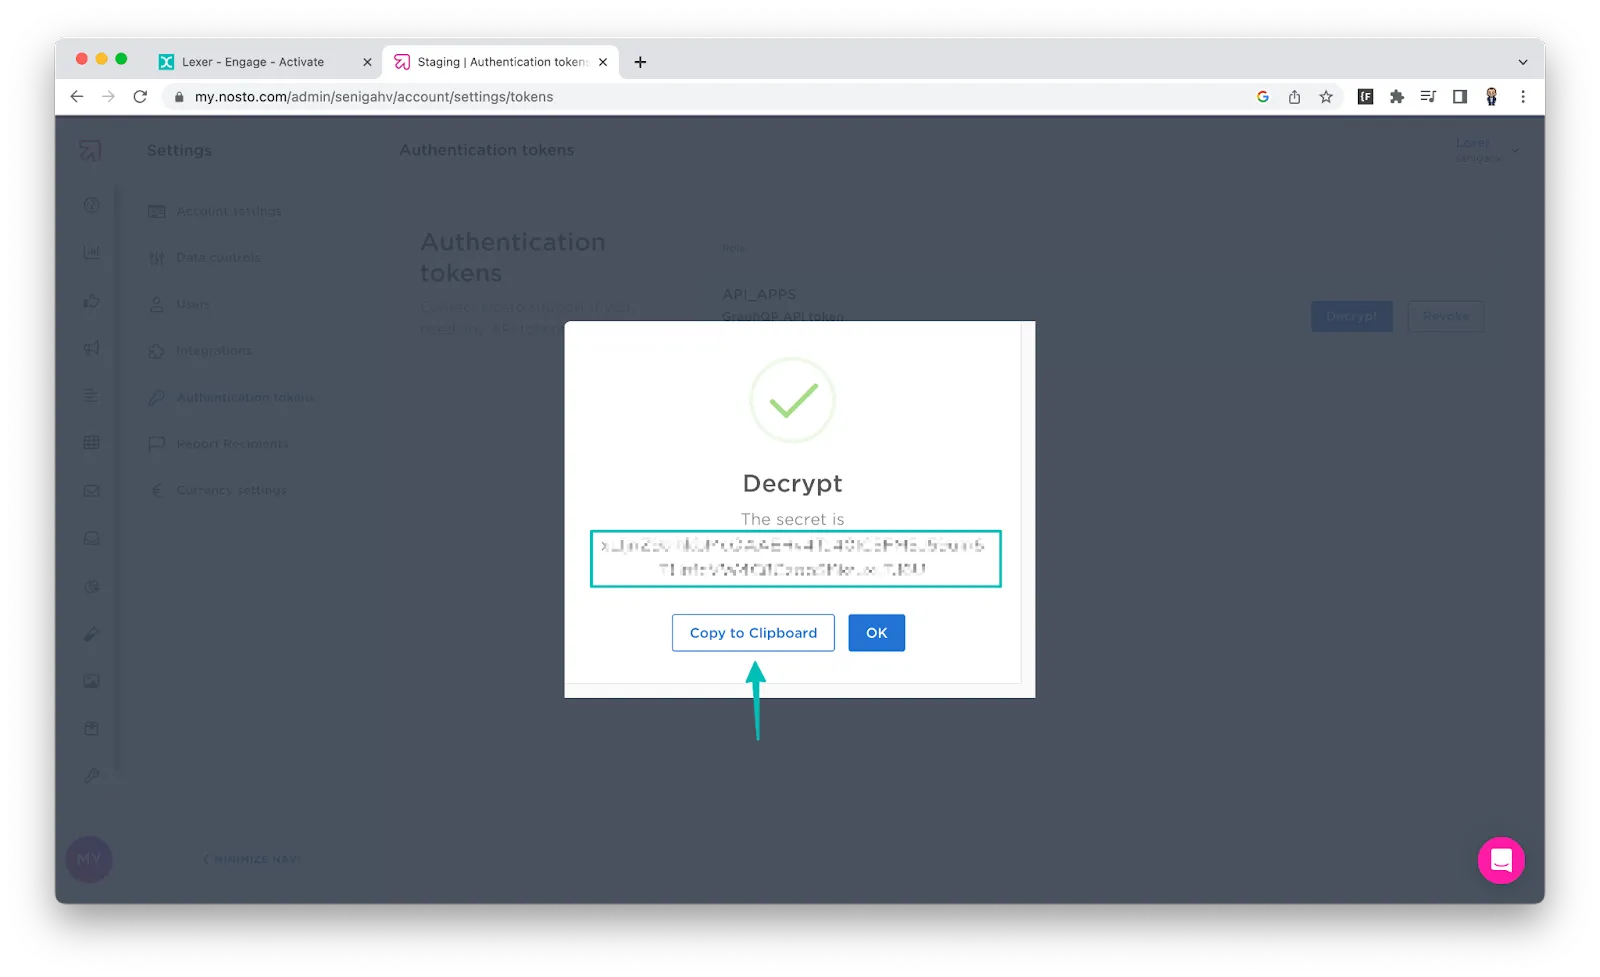
- A pop up will appear that contains your brand new API key! Click on the Copy to Clipboard button.
Now that you have your key, you have the tools to integrate with Lexer!
We’re ready to integrate!
Log into your Lexer Hub.
- Navigate to Manage > Integrations and click on the Nosto tile.
- Click Integrate Nosto.
- Add your Nosto username and paste in your API key.
- Add all groups that will need access to your Nosto integration, click Save integration.
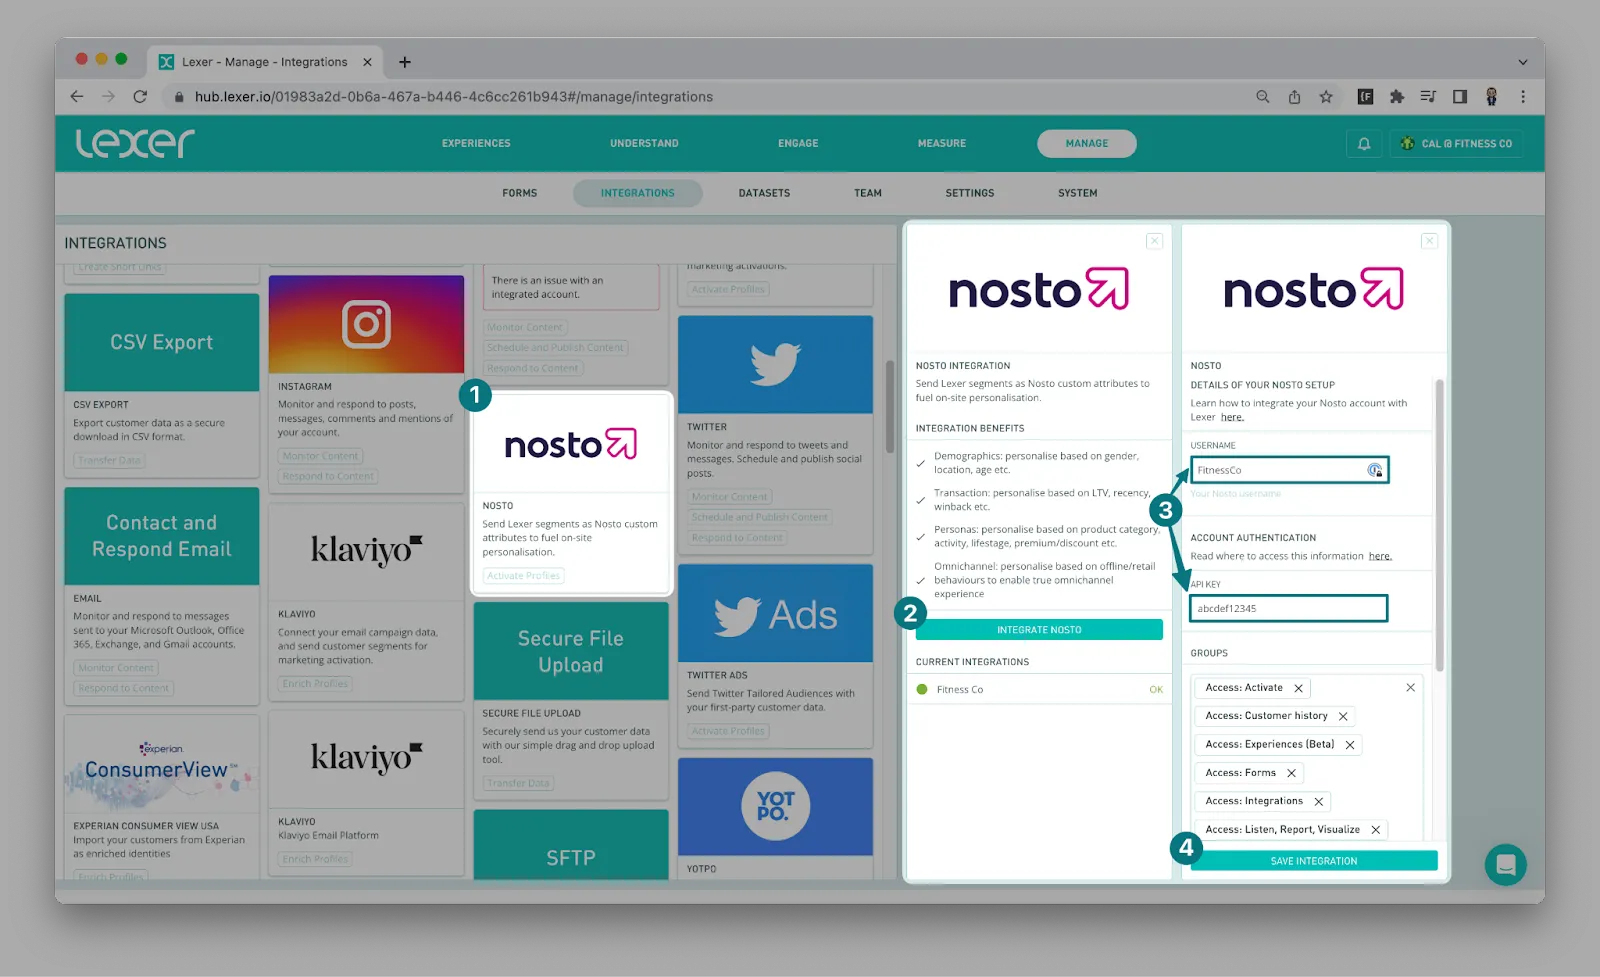
And that’s it! Nosto should now be integrated with your Hub.
Activating to Nosto
Now that you’re integrated, you can start sending audiences to Nosto. These audiences will be received in the form of “Attributes”. We’ll run through how to use these in the “Using your segments in Nosto” section.
- Navigate to Engage > Activate.
- Click on the New activation button.
- Find and click on the Nosto tile in Integrations.
- Search for the segment or segments you would like to send to Nosto.
- Fill out the required fields in the Settings.
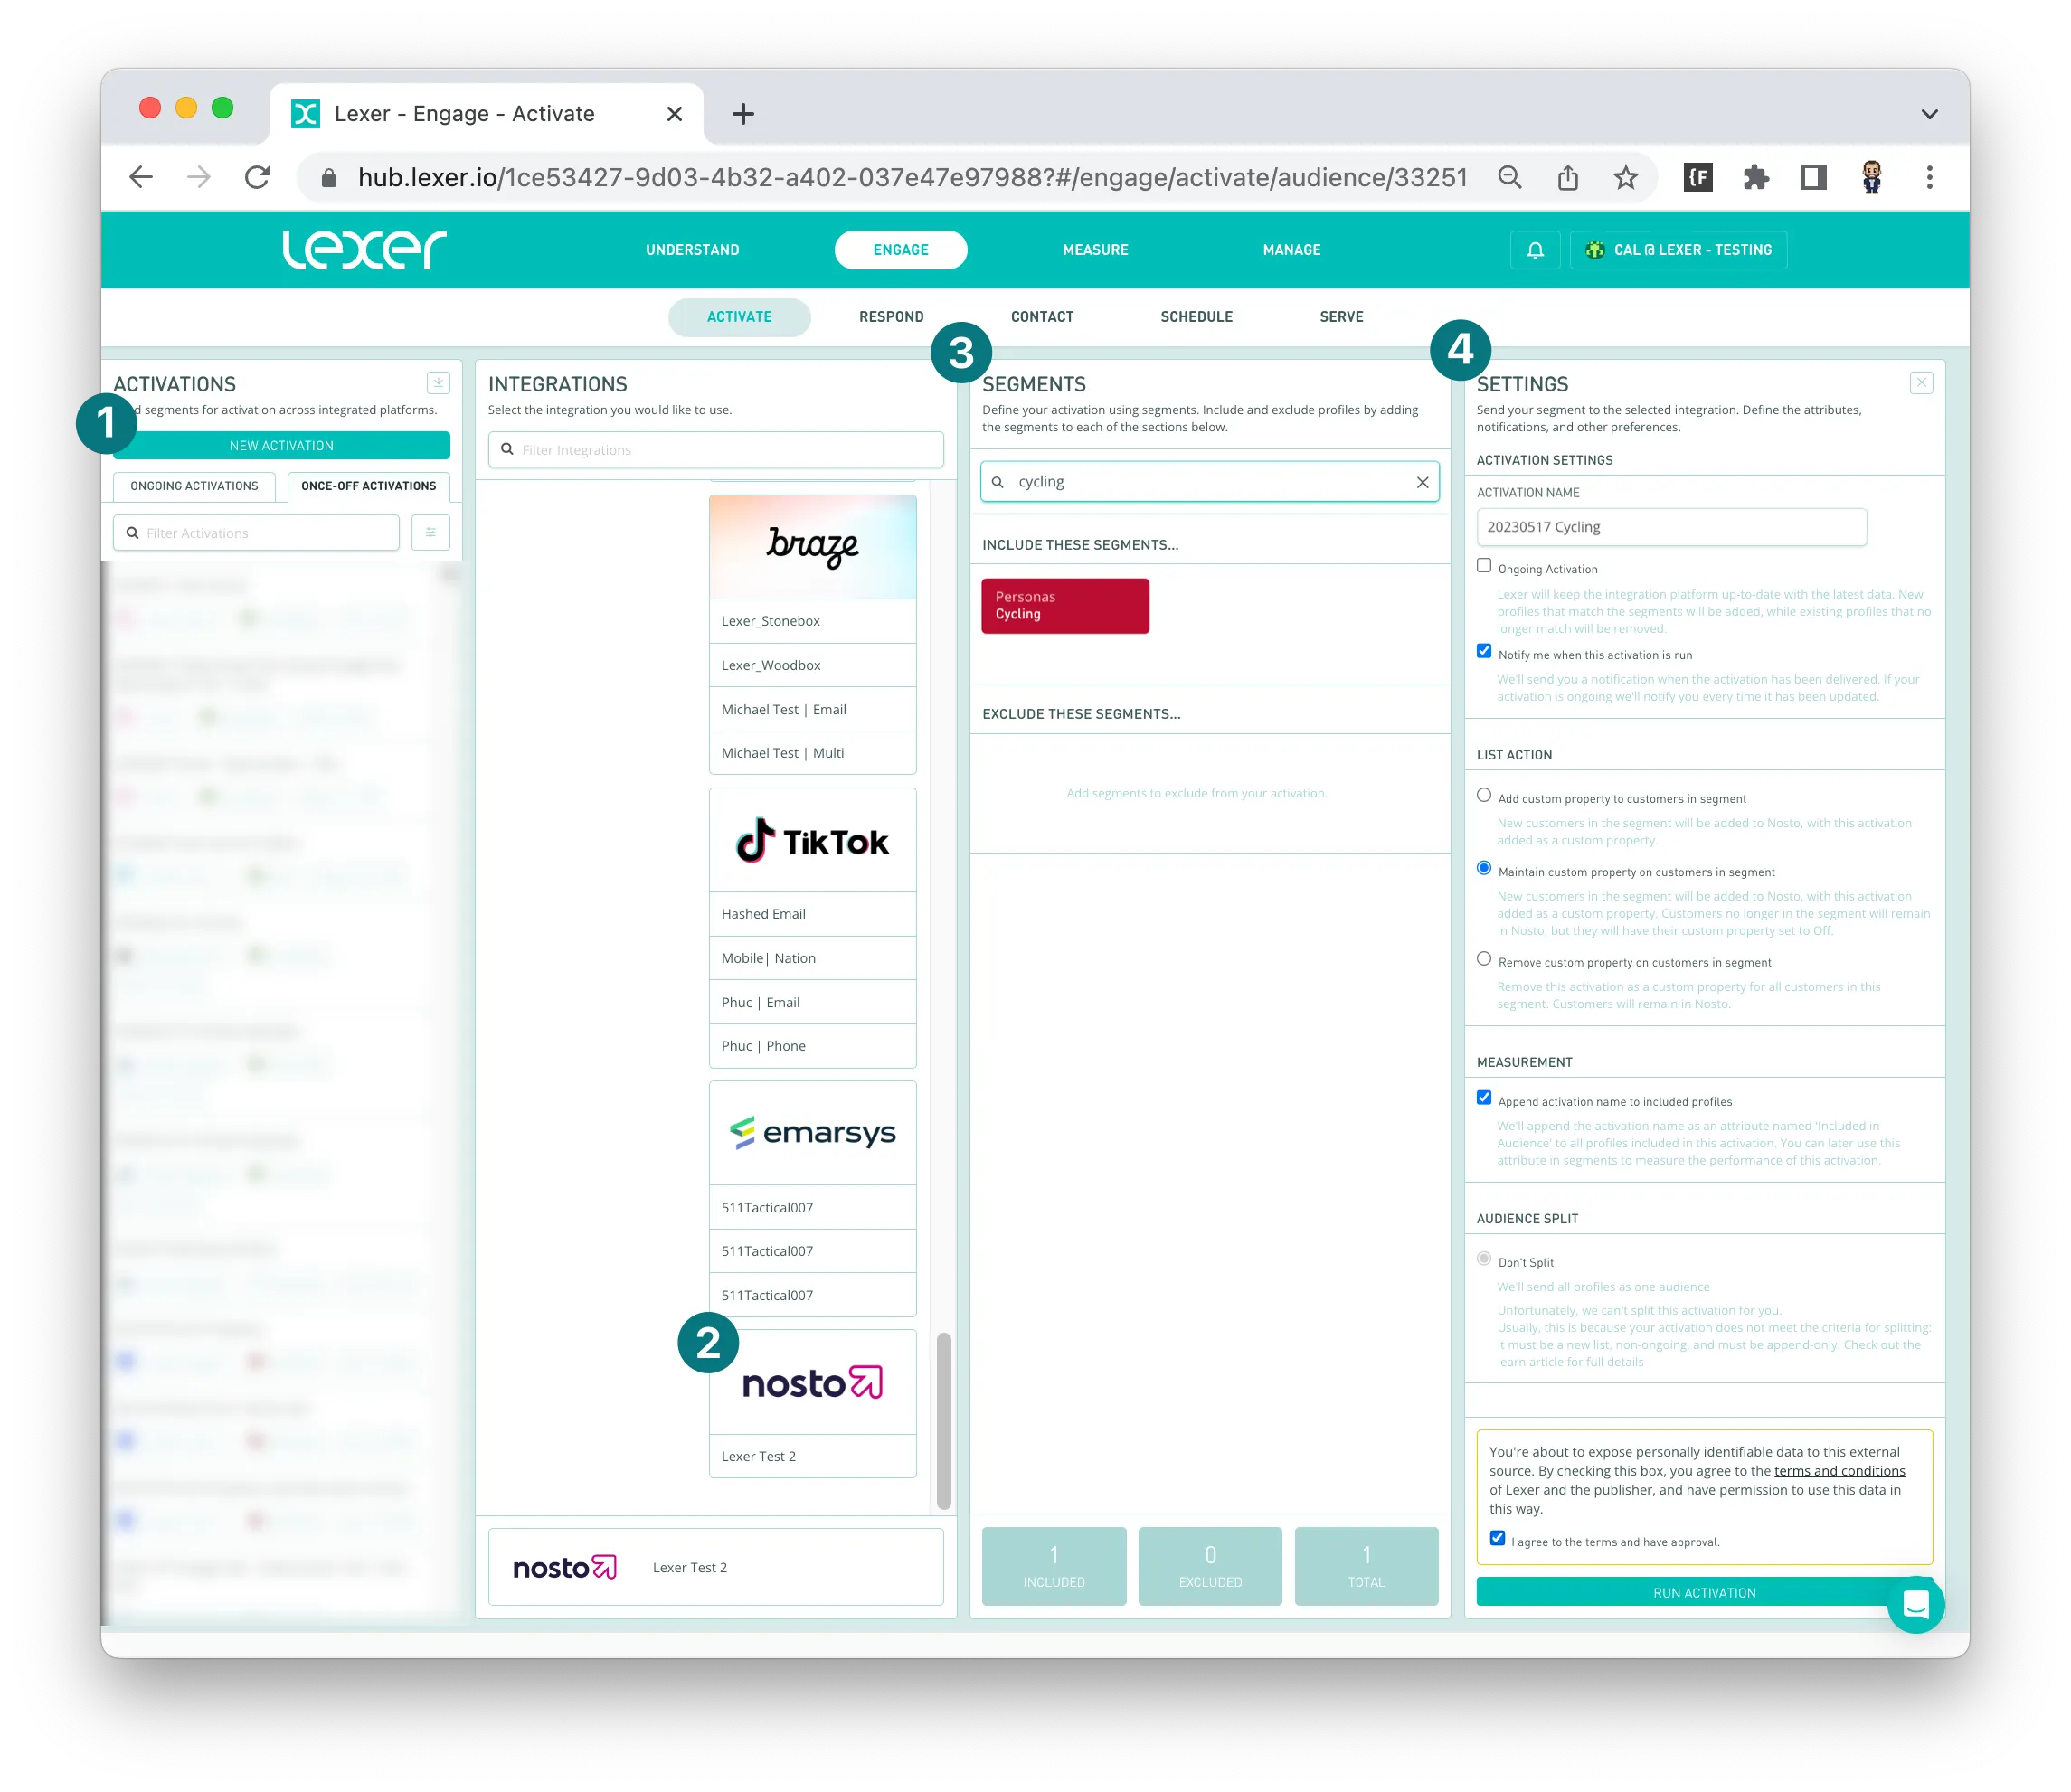
The name of the attribute you will see in Nosto will be in the following format:
For example:
List action
Consider how you want your audience to be sent. There are 3 options for your activation audience. They can be found under the List Action setting.
- Add custom property to customers in segment: New customers in the segment will be added to Nosto, with this activation added as a custom property.
- Maintain custom property on customers in segment: New customers in the segment will be added to Nosto, with this activation added as a custom property. Customers no longer in the segment will remain in Nosto, but they will have their custom property set to Off.
- Remove custom property on customers in segment: Remove this activation as a custom property for all customers in this segment. Customers will remain in Nosto.
Using your segments in Nosto
Once you’ve activated, these segments will become available in Nosto. Let’s run through how to use them.
- Click on Segmentation and Insights on the left side of your Nosto page.
- Open the Create segment tab.

1. Within Nosto’s segment builder, add a Segment name.
2. In the Targeting options, add the Customer attribute, located in the External signals category.
3. This will add Customer attributes to your segment rules. Click on the Attribute key and select the Lexer audience you want to use for this Segment. In our example above, we sent the “lexer segment 2023-05-17 Cycling” audience.
4. Make sure you switch the Attribute value > on to include the audience in this segment. If you would like to exclude an audience, you can switch this off.
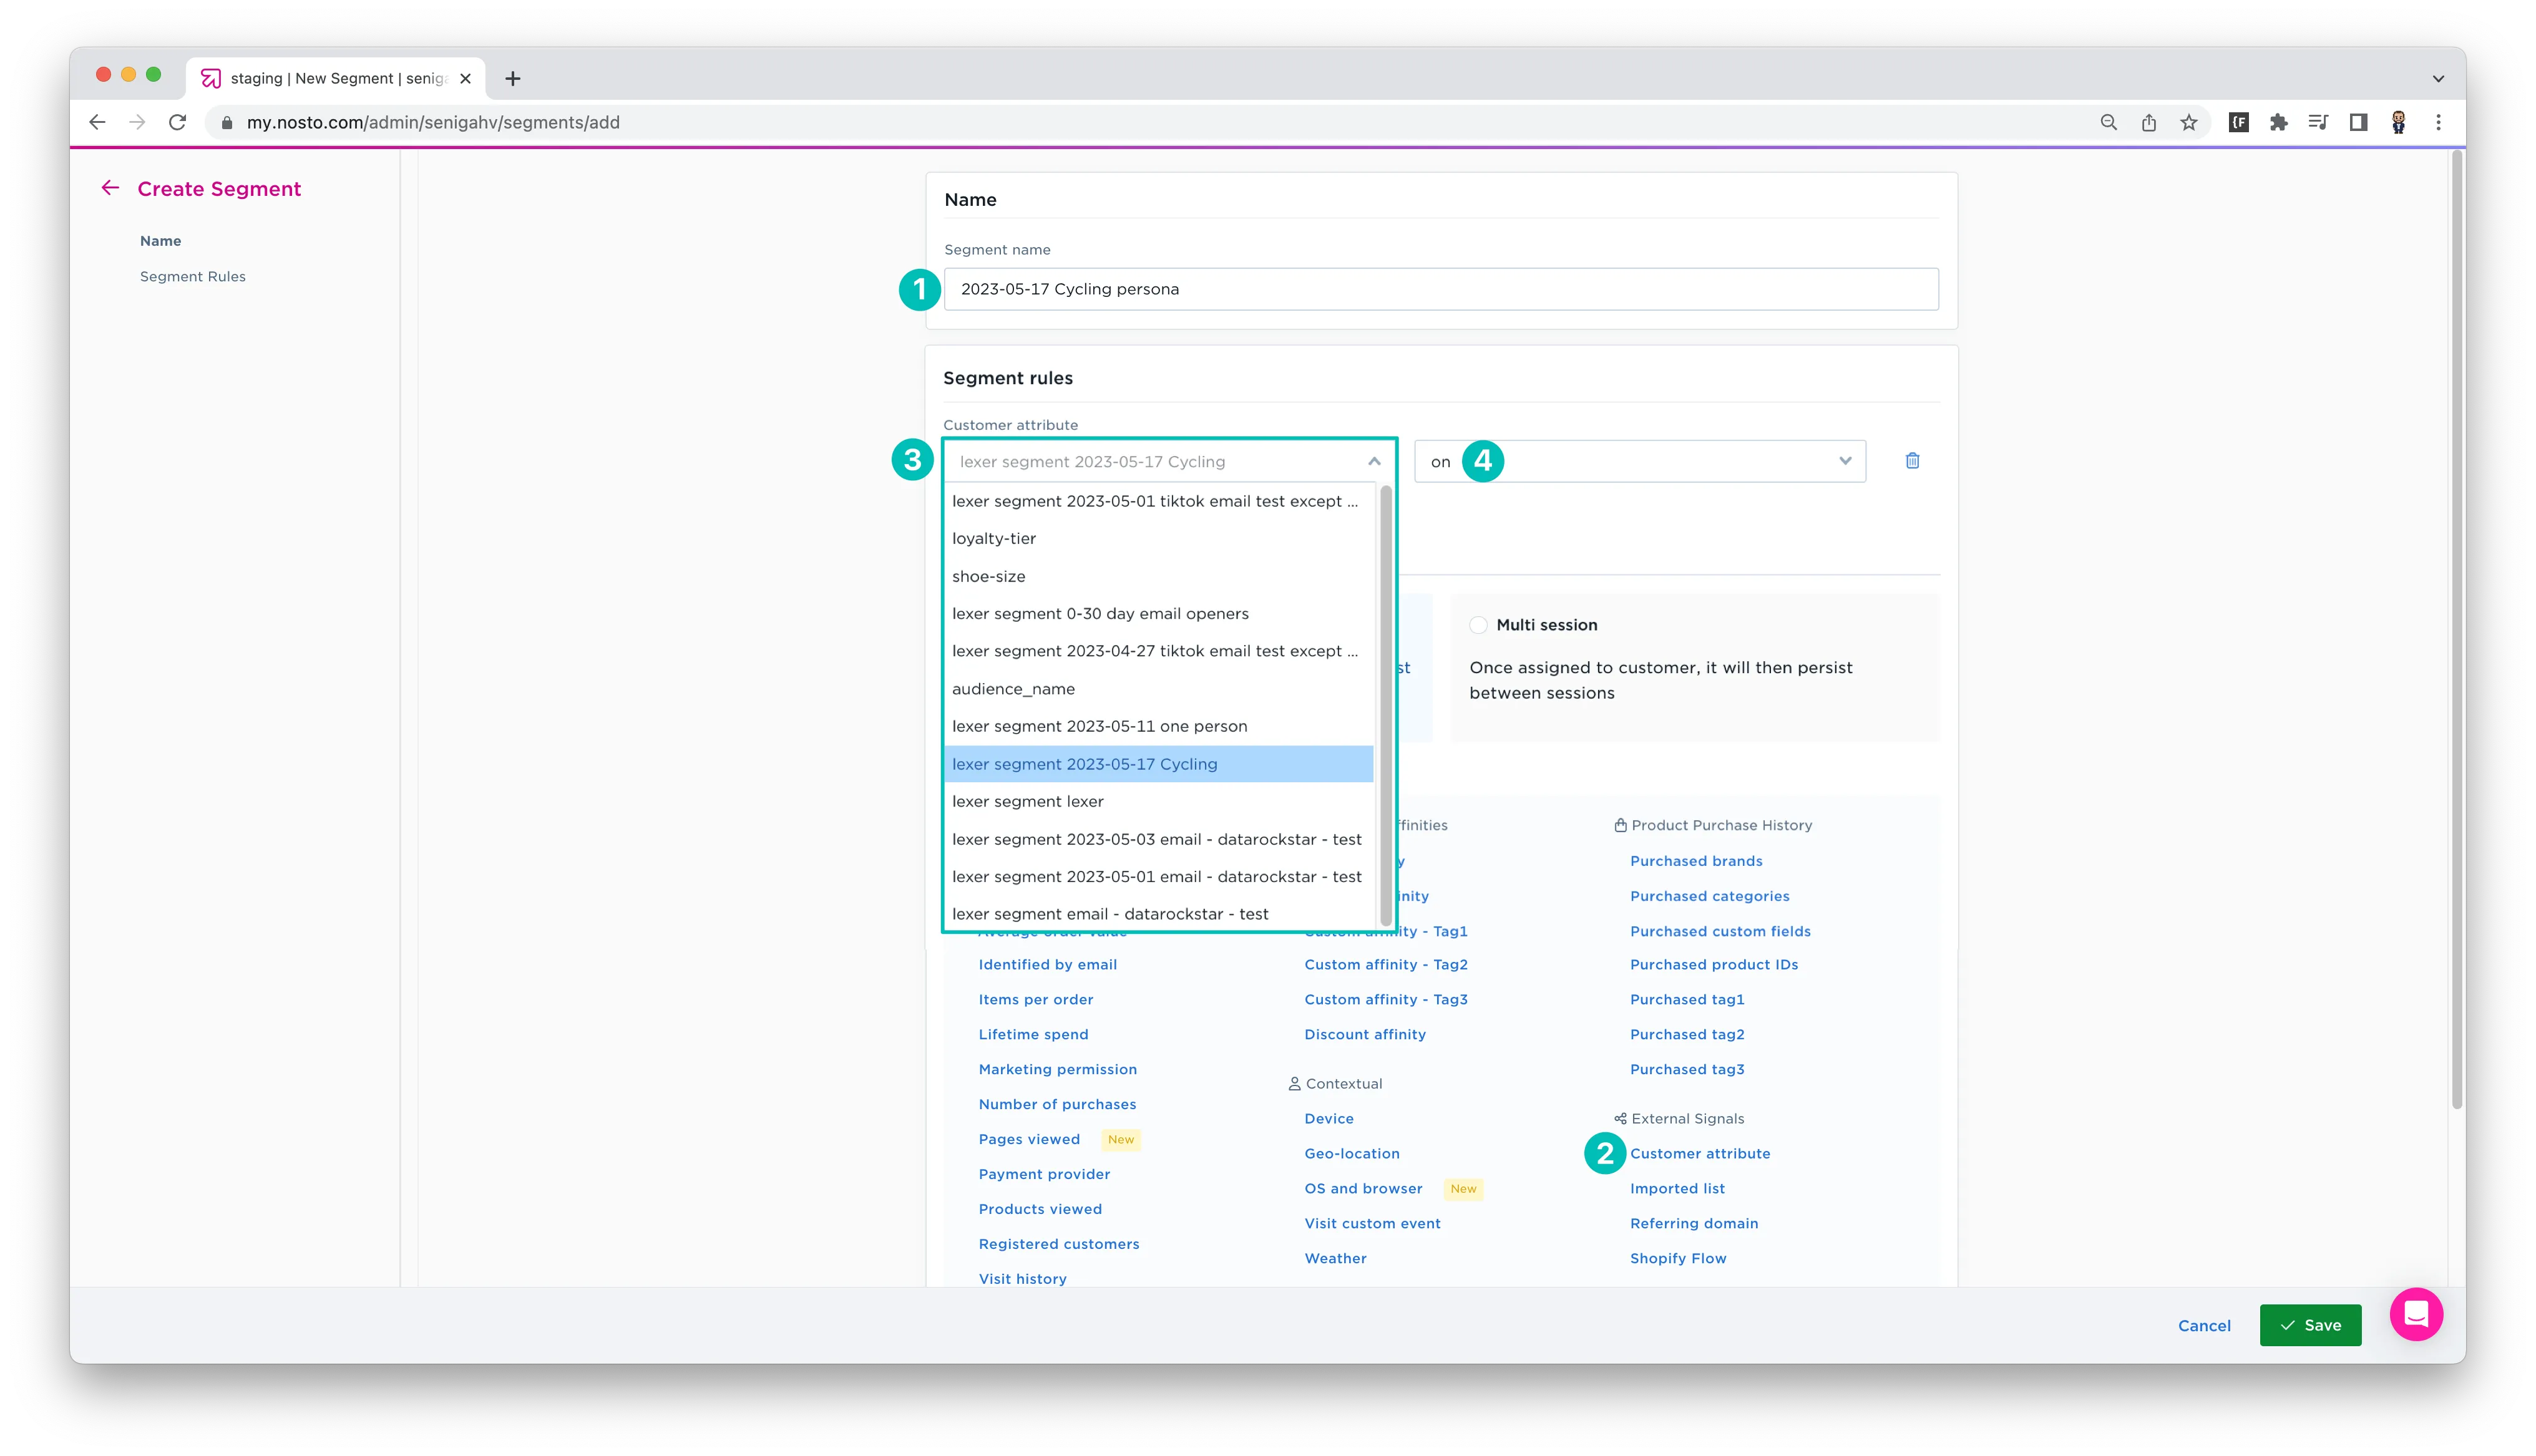
You can now activate Lexer audiences to Nosto! Once you have your segments set up in Nosto, you can deliver highly-targeted commerce experiences across the full on-site journey.
You're done!
Congratulations, your account should now be integrated and activated in Lexer. We've gone through what Nosto is, the type of integration it is, its benefits, and how to integrate and activate it. There's a lot of steps to follow here and if you feel stuck or confused please don't hesitate to reach out to Lexer Support (support@lexer.io) if you need any help.
