
Mailchimp
This integration is in beta
As with all beta tests, not everything will be perfect. If you run into any issues, please submit a support ticket.
Connect your Mailchimp account with Lexer
You can connect your Mailchimp account with Lexer, this will permit Lexer to import your contacts from Mailchimp as enriched Profiles as well as create and update contact email lists.
Benefits of a Mailchimp integration
Integrating your Mailchimp account with Lexer provides a number of benefits, such as
- Import your contacts as enriched profiles
- Send customer email lists for marketing campaigns
Integration in a nutshell
Here's a summary of how Mailchimp integrates with Lexer:
Direction
What direction does the data flow?
✅ Data in: import your contacts as enriched profiles.
✅ Data out: send customer email lists for marketing campaigns.
Type
Lexer loads these types of data
Source method
How Lexer loads data from this source.
✅ API
Destination method
How Lexer sends data to this source.
✅ API
Status
What is the status of the integration?
Full Release
Lexer product compatibility
What Lexer products is the integration compatible with?
✅ Activate
✅ Compare
✅ Segment
✅ Track
⬜️ Listen
⬜️ Respond
⬜️ Serve
Attributes
No attributes will be created as part of this integration.
Attributes
This integration allows for some flexibility, the output of the integration depends on your available data and what you send through to Lexer. In addition, your attributes could be named in a different way to other clients. If you would like a list of attributes related to this integration, please email your Success Manager.
Attributes
What attributes are created when integrated with Lexer?
Mailchimp Relationship
✅ Mailchimp Record
Mailchimp Email Engagement
✅ Number of Emails Sent
✅ Email Open Rate
✅ Email Click Rate
✅ Campaigns Sent
✅ Email Engagement Category
✅ Email Opt-In Status
✅ Last Email Open
✅ Open Date
✅ Campaigns Opened
✅ Email Subscribe Date
✅ Active in Lists
✅ Click Dates
✅ Last Email Click
✅ Campaigns Clicked
✅ Undeliverable in Lists
✅ Email Source
Attributes
These are the standard attributes that Lexer can create from the data received via this integration. The exact attributes will depend on what data is made available and sent into Lexer. Keep in mind, your attribute names may vary slightly. If you have any questions or would like to explore custom options, please contact your Success Manager.
Customer attributes
Address 1
Address 2
Avatar
Bio
Birth day
Birth month
Birth year
Communication opt in
Customer id
Date of birth
Employee flag
Engage id
First name
Full name
Gender
Generation
Identity search
Inferred gender
Last name
Mobile
Next birthday
Postcode
Provider id
Record
Username
Zip
Email engagement attributes
Email campaigns clicked
Email campaigns opened
Email campaigns sent
Email click date
Email click rate
Email email engagement category
Email emails sent
Email last click date
Email last open date
Email open date
Email open rate
Email opt in status
Email source
Email subscribe date
Email sha256
ESP record
SMS event attributes
Transactional attributes
Product attributes
How do I integrate my account?
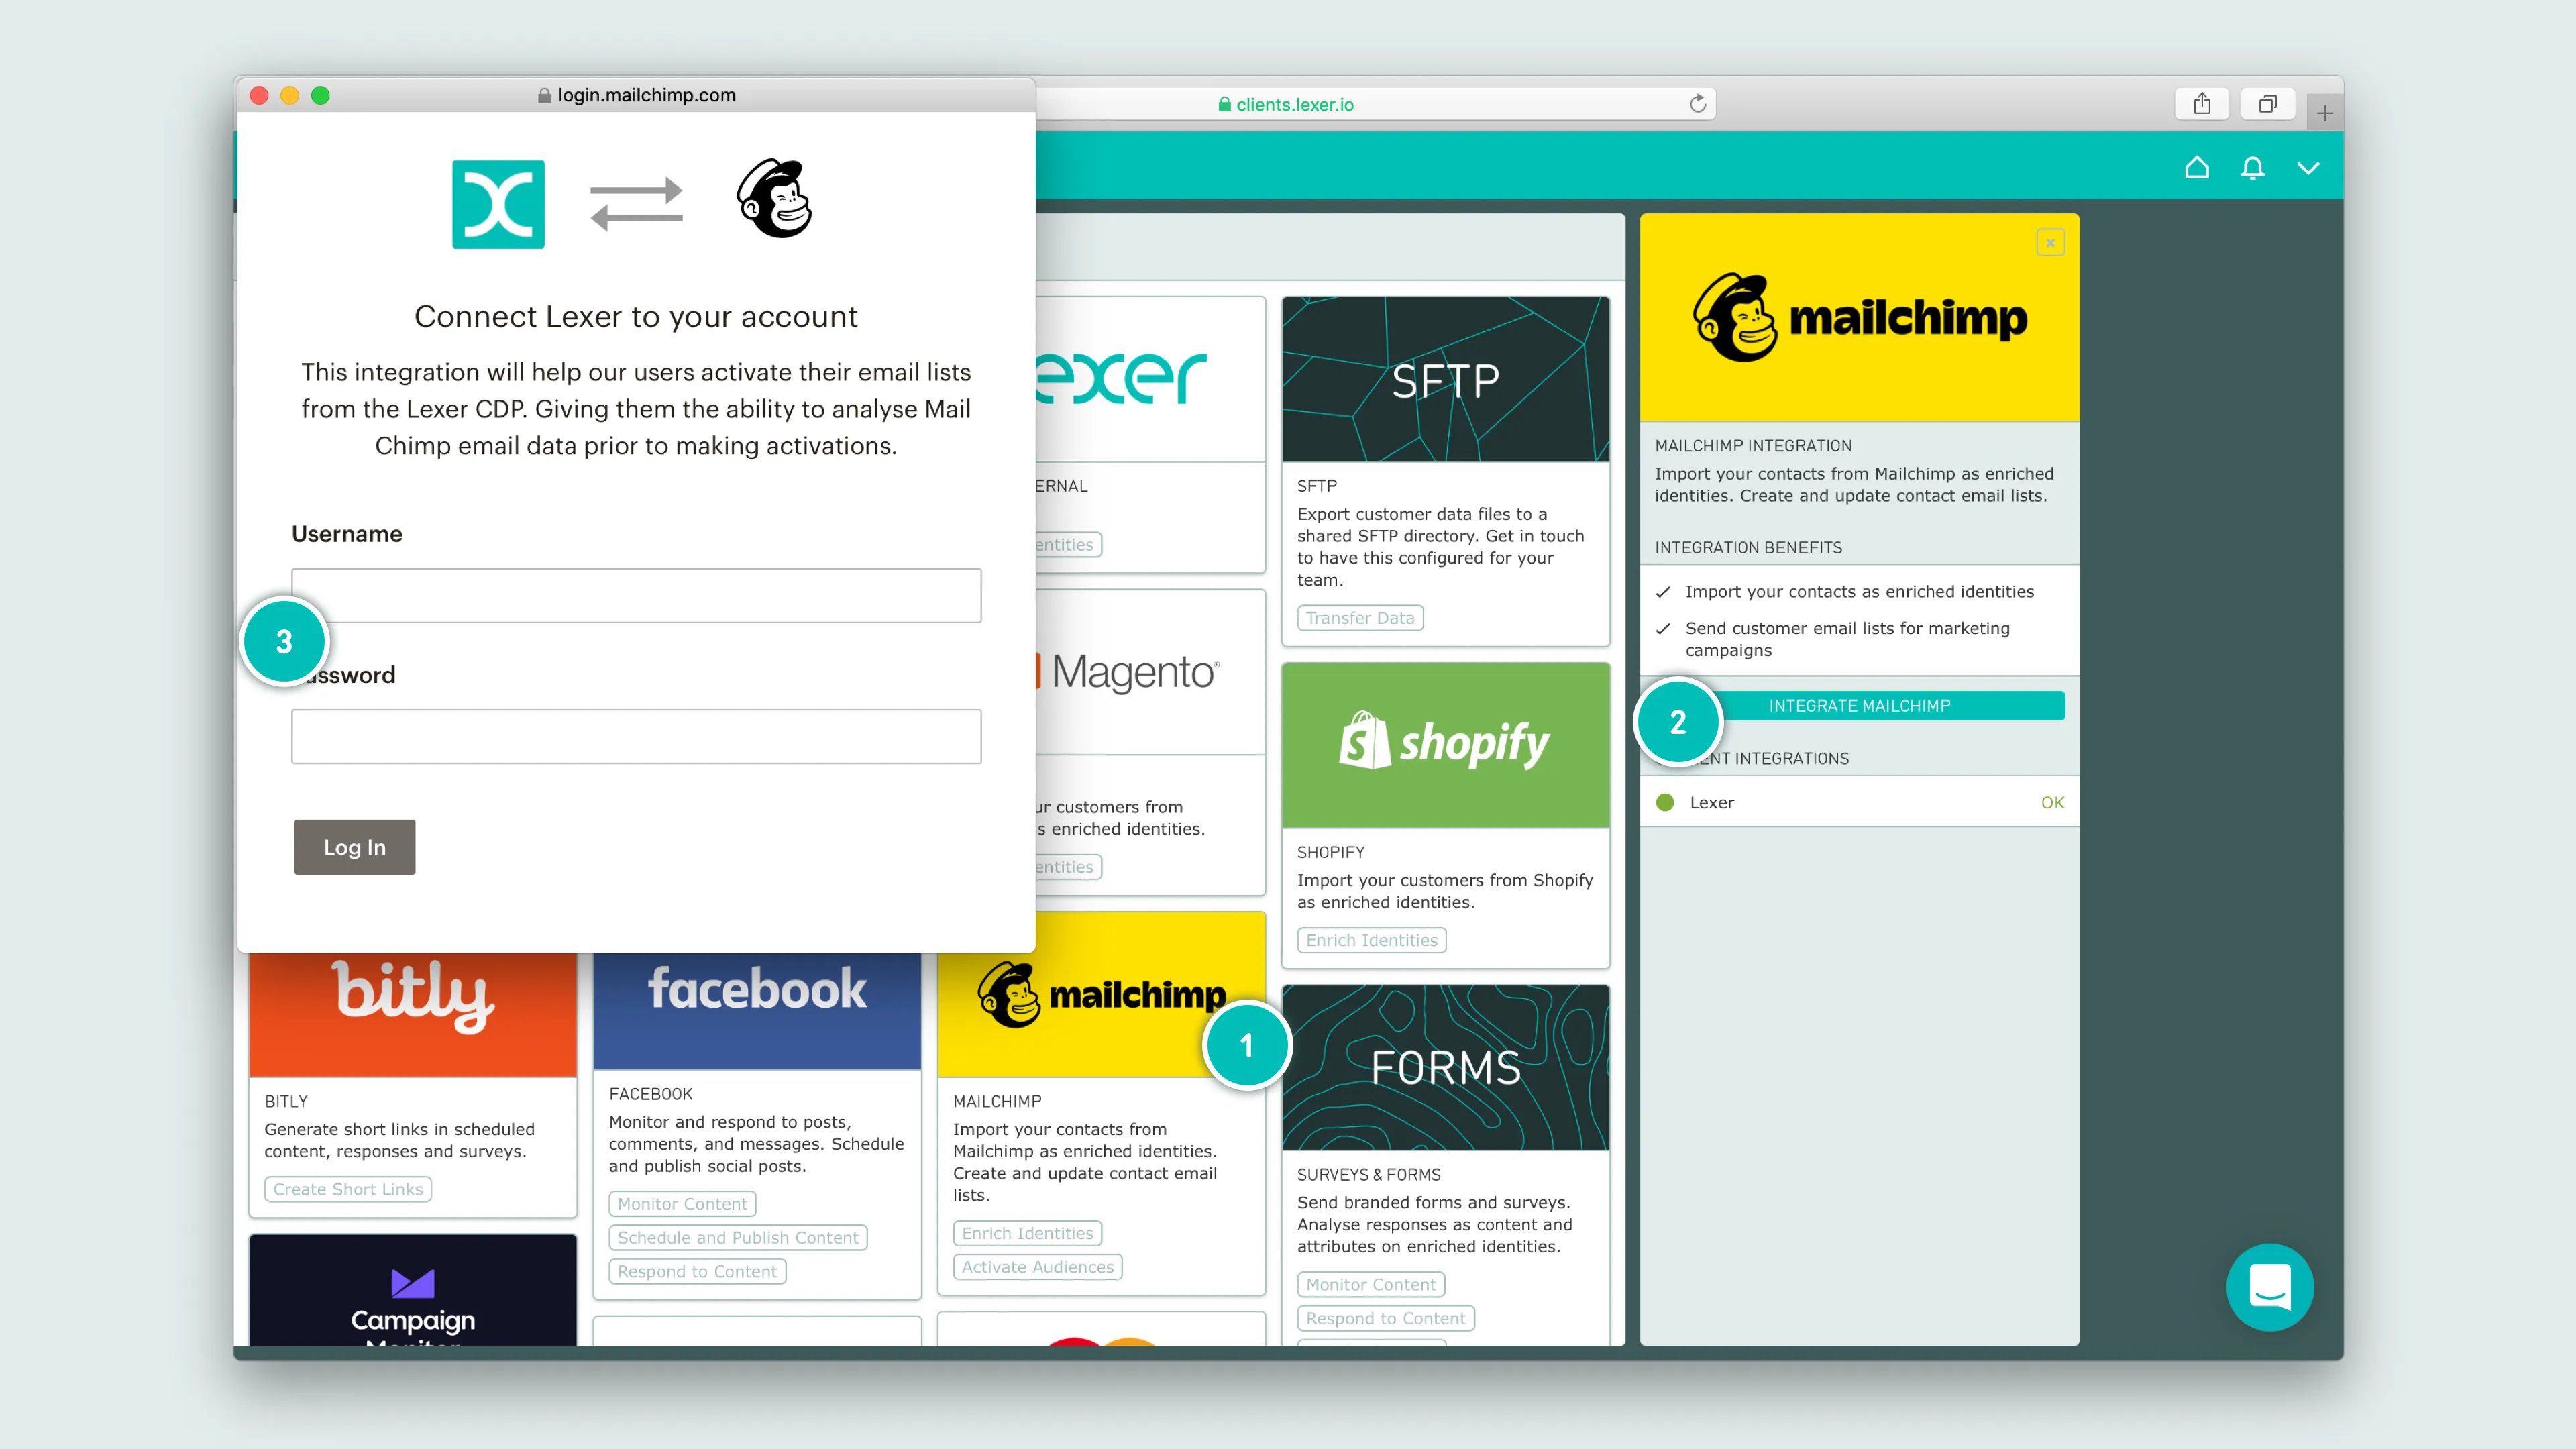
Select the Mailchimp tile, click Integrate Mailchimp, and enter your MailChimp credentials to login.
What is a Mailchimp activation?
A Mailchimp activation allows you to securely send customer data from Lexer to Mailchimp, and update existing audiences with tags for email campaigns.
The activation permits you to only update existing audiences within Mailchimp. We update these audiences by doing one or more of the following actions:
- Add a tag to a record
- Remove a tag from a record
- Add a new record to an audience
- Update existing merge fields (we can see a maximum of 50 merge fields per audience contact Lexer Support (support@lexer.io) if your audience has more)
This activation does not do any of the following:
- Create new audiences in MailChimp
- Delete audiences in MailChimp
- Remove records from audiences
- Unsubscribe users from audiences
- Unsubscribe users in any capacity
- Create new merge fields on audiences
Mailchimp terminology
- Audience (formerly lists): An audience in Mailchimp is a collection of customers and the information you have on them. Best practice would call for fewer audiences within your Mailchimp account, as you get charged for every record in every audience.
- Tag: A tag is applied to a customer record within an audience. It enables you to segment an audience, and then activate on that segment. When you activate an audience from Lexer, the audience name will become your tag.
- Merge field: A dynamic field that contains data unique to individual customers. This could be their first/last name, mobile number, loyalty ID, or loyalty balance to name a few. These are used in Mailchimp templates to allow for greater personalization in an email.
How do I activate to Mailchimp?
Before you get started, make sure you’ve done the following:
- Integrated a Mailchimp account with Lexer
- Created an activation to Mailchimp in Lexer Activate (contact Lexer Support (support@lexer.io) if not)
- Built your Segment/s in Lexer Segment
Sending your Segment to Mailchimp
When you’re ready to send your Segment to Mailchimp, navigate to Lexer Activate.
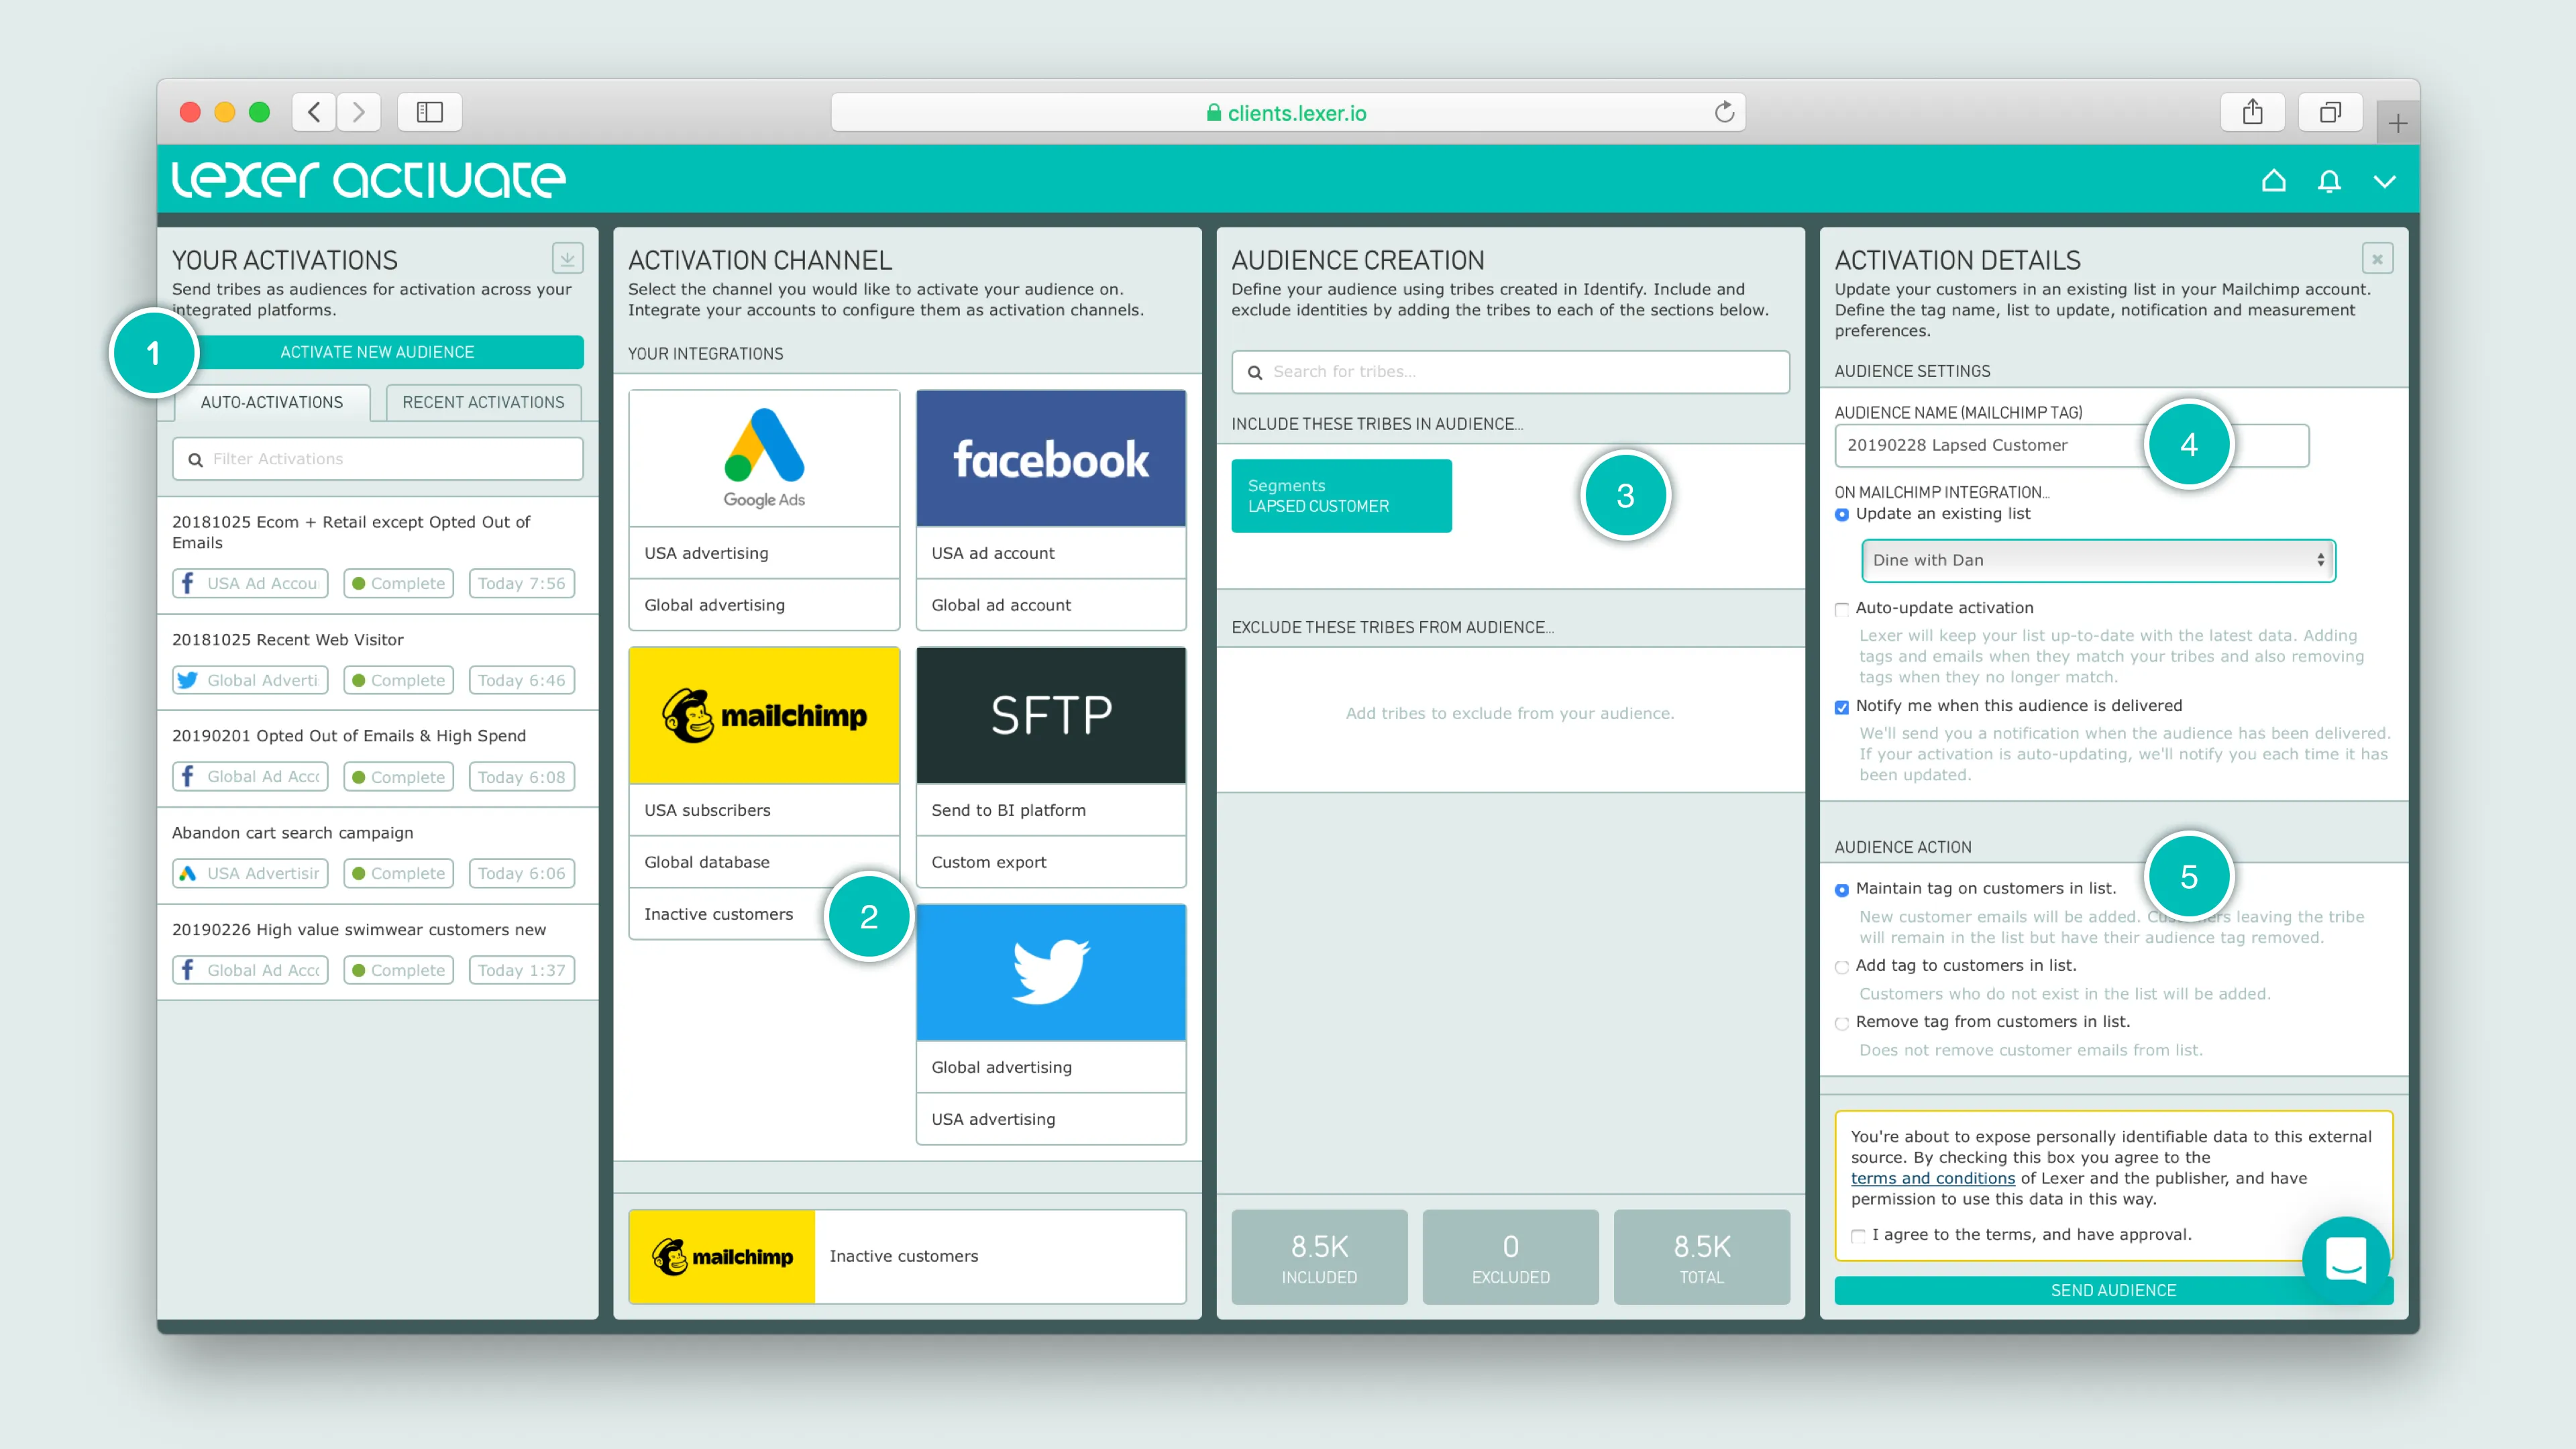
- Click Activate New Audience to get started
- Select the appropriate Mailchimp account for this activation
- Add your Segment
- Update the audience name, and select which list to update in Mailchimp
- Check the appropriate list action - in most cases you’ll just want to maintain your list
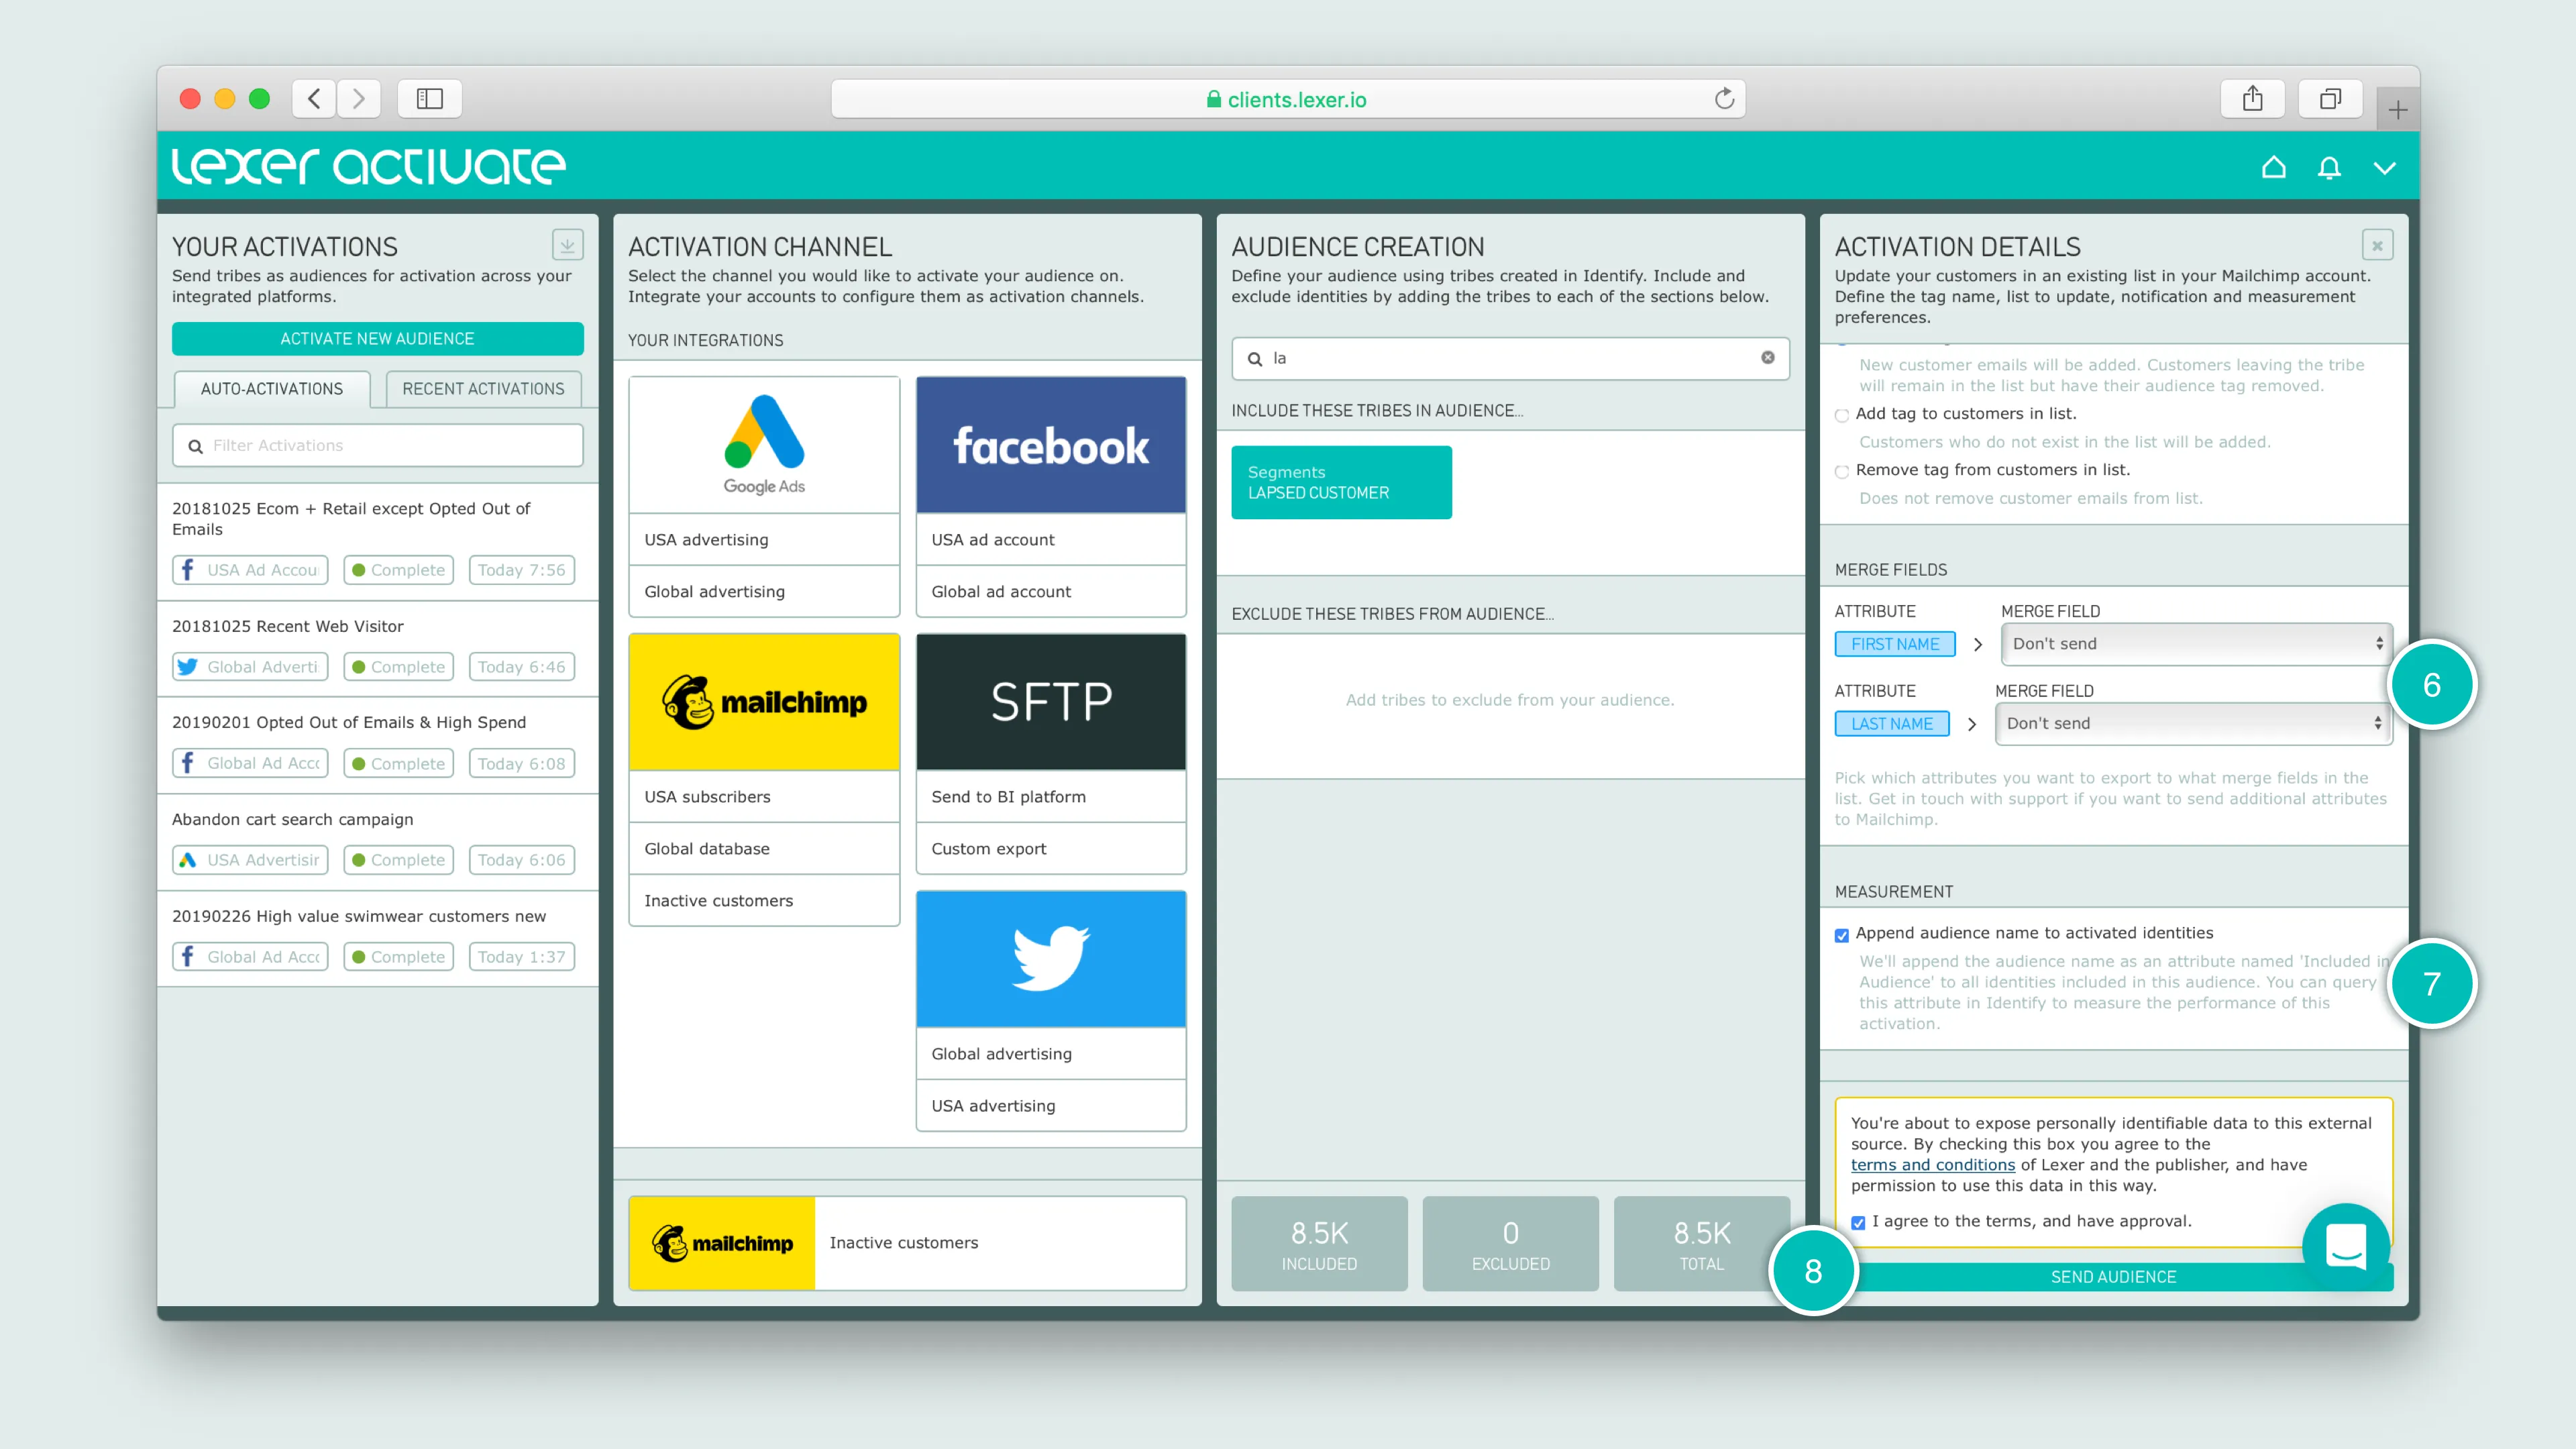
- Choose which attributes you want to send to Mailchimp
- Select to append an attribute that will allow you to query the performance of this activation in Segment
- Agree to terms, and click Send Audience
Set and forget — auto-updating audiences
Lexer Activate permits you to automatically update your lists within Mailchimp. With this selected, Lexer will add or remove tags within lists in Mailchimp, as customers enter and leave your Segment. This is best suited for customer segments that receive regular emails outside of your standard marketing materials, such as high value customers.
Okay I’ve sent my audience, what next?
The moment your activation has been confirmed as sent in Activate, you’ll see records begin to update in Mailchimp. The list won’t be fully updated until after you receive a confirmation email from Lexer, to avise the activation has completed. With Mailchimp’s current API we are able to send approximately 25,000 records across per hour, you will see these update in Mailchimp in realtime.
When everything has arrived in Mailchimp, you’ll see your audience name from Activate is now a tag on your selected list. Later on, you’ll use this tag to target your Segment.
Create your Mailchimp Campaign
When you’re ready to send an email to your Segment, you’ll need to create a Campaign in Mailchimp.

Go to Campaigns, and click Create Campaign.
This will open a dialog box, prompting you to select specifics for your campaign.
- From the dialog box, select Email
- Unless required, leave your email campaign set to Regular
- Name your campaign - make sure it’s instantly recognizable
- Now click Begin
Once you’ve created your campaign, you need to add the following:
- To: Which list, and tags are we sending this email to?
- From: Who are we saying the email is coming from?
- Subject: What will the subject line of the email be?
- Content: What will the email design be?
Selecting your list and tags
Step 1 – To

- Select the list you wish to email
- Now select the tag within that list - remember this will be the name of your activation from Lexer
- Check this box, and specify the merge fields, if you’d like to include customer personalisation, like their first name
- Click Save
Step 2 – From
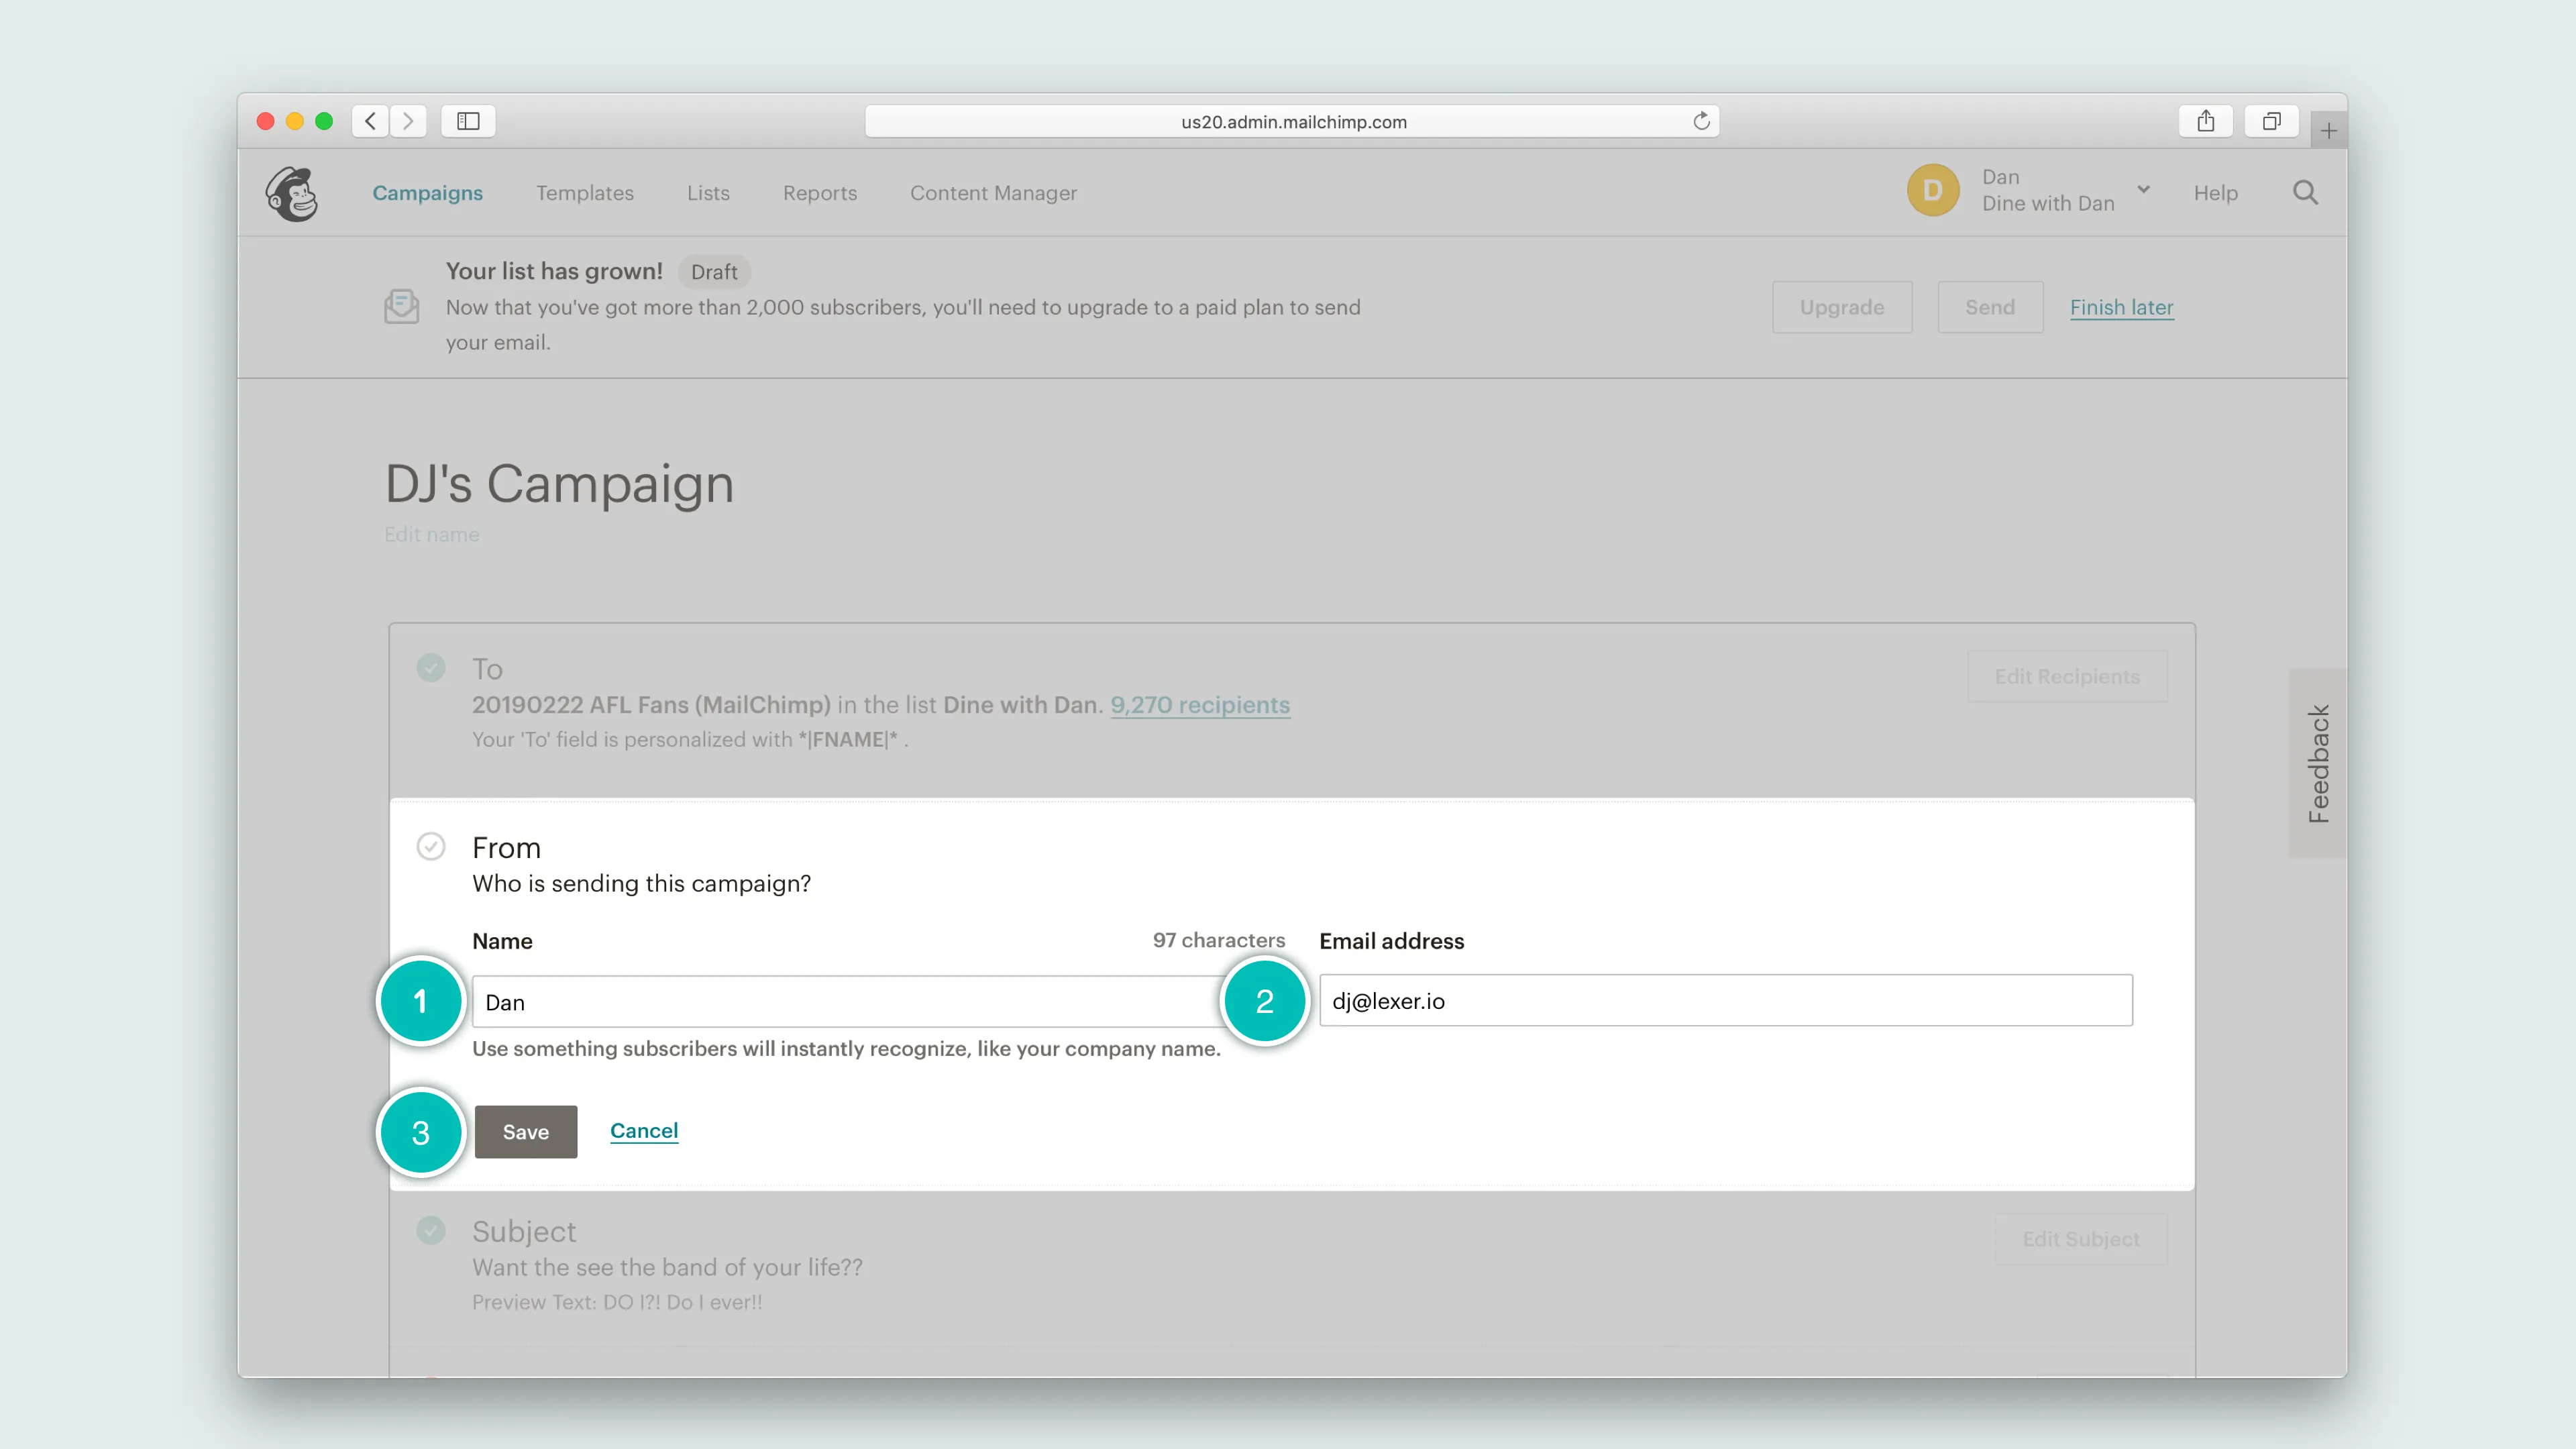
- Set the name of the person who the email is from, this could be an individual, a team, or an organization
- Set the email address this will be sent from
- Click Save
Step 3 – Subject
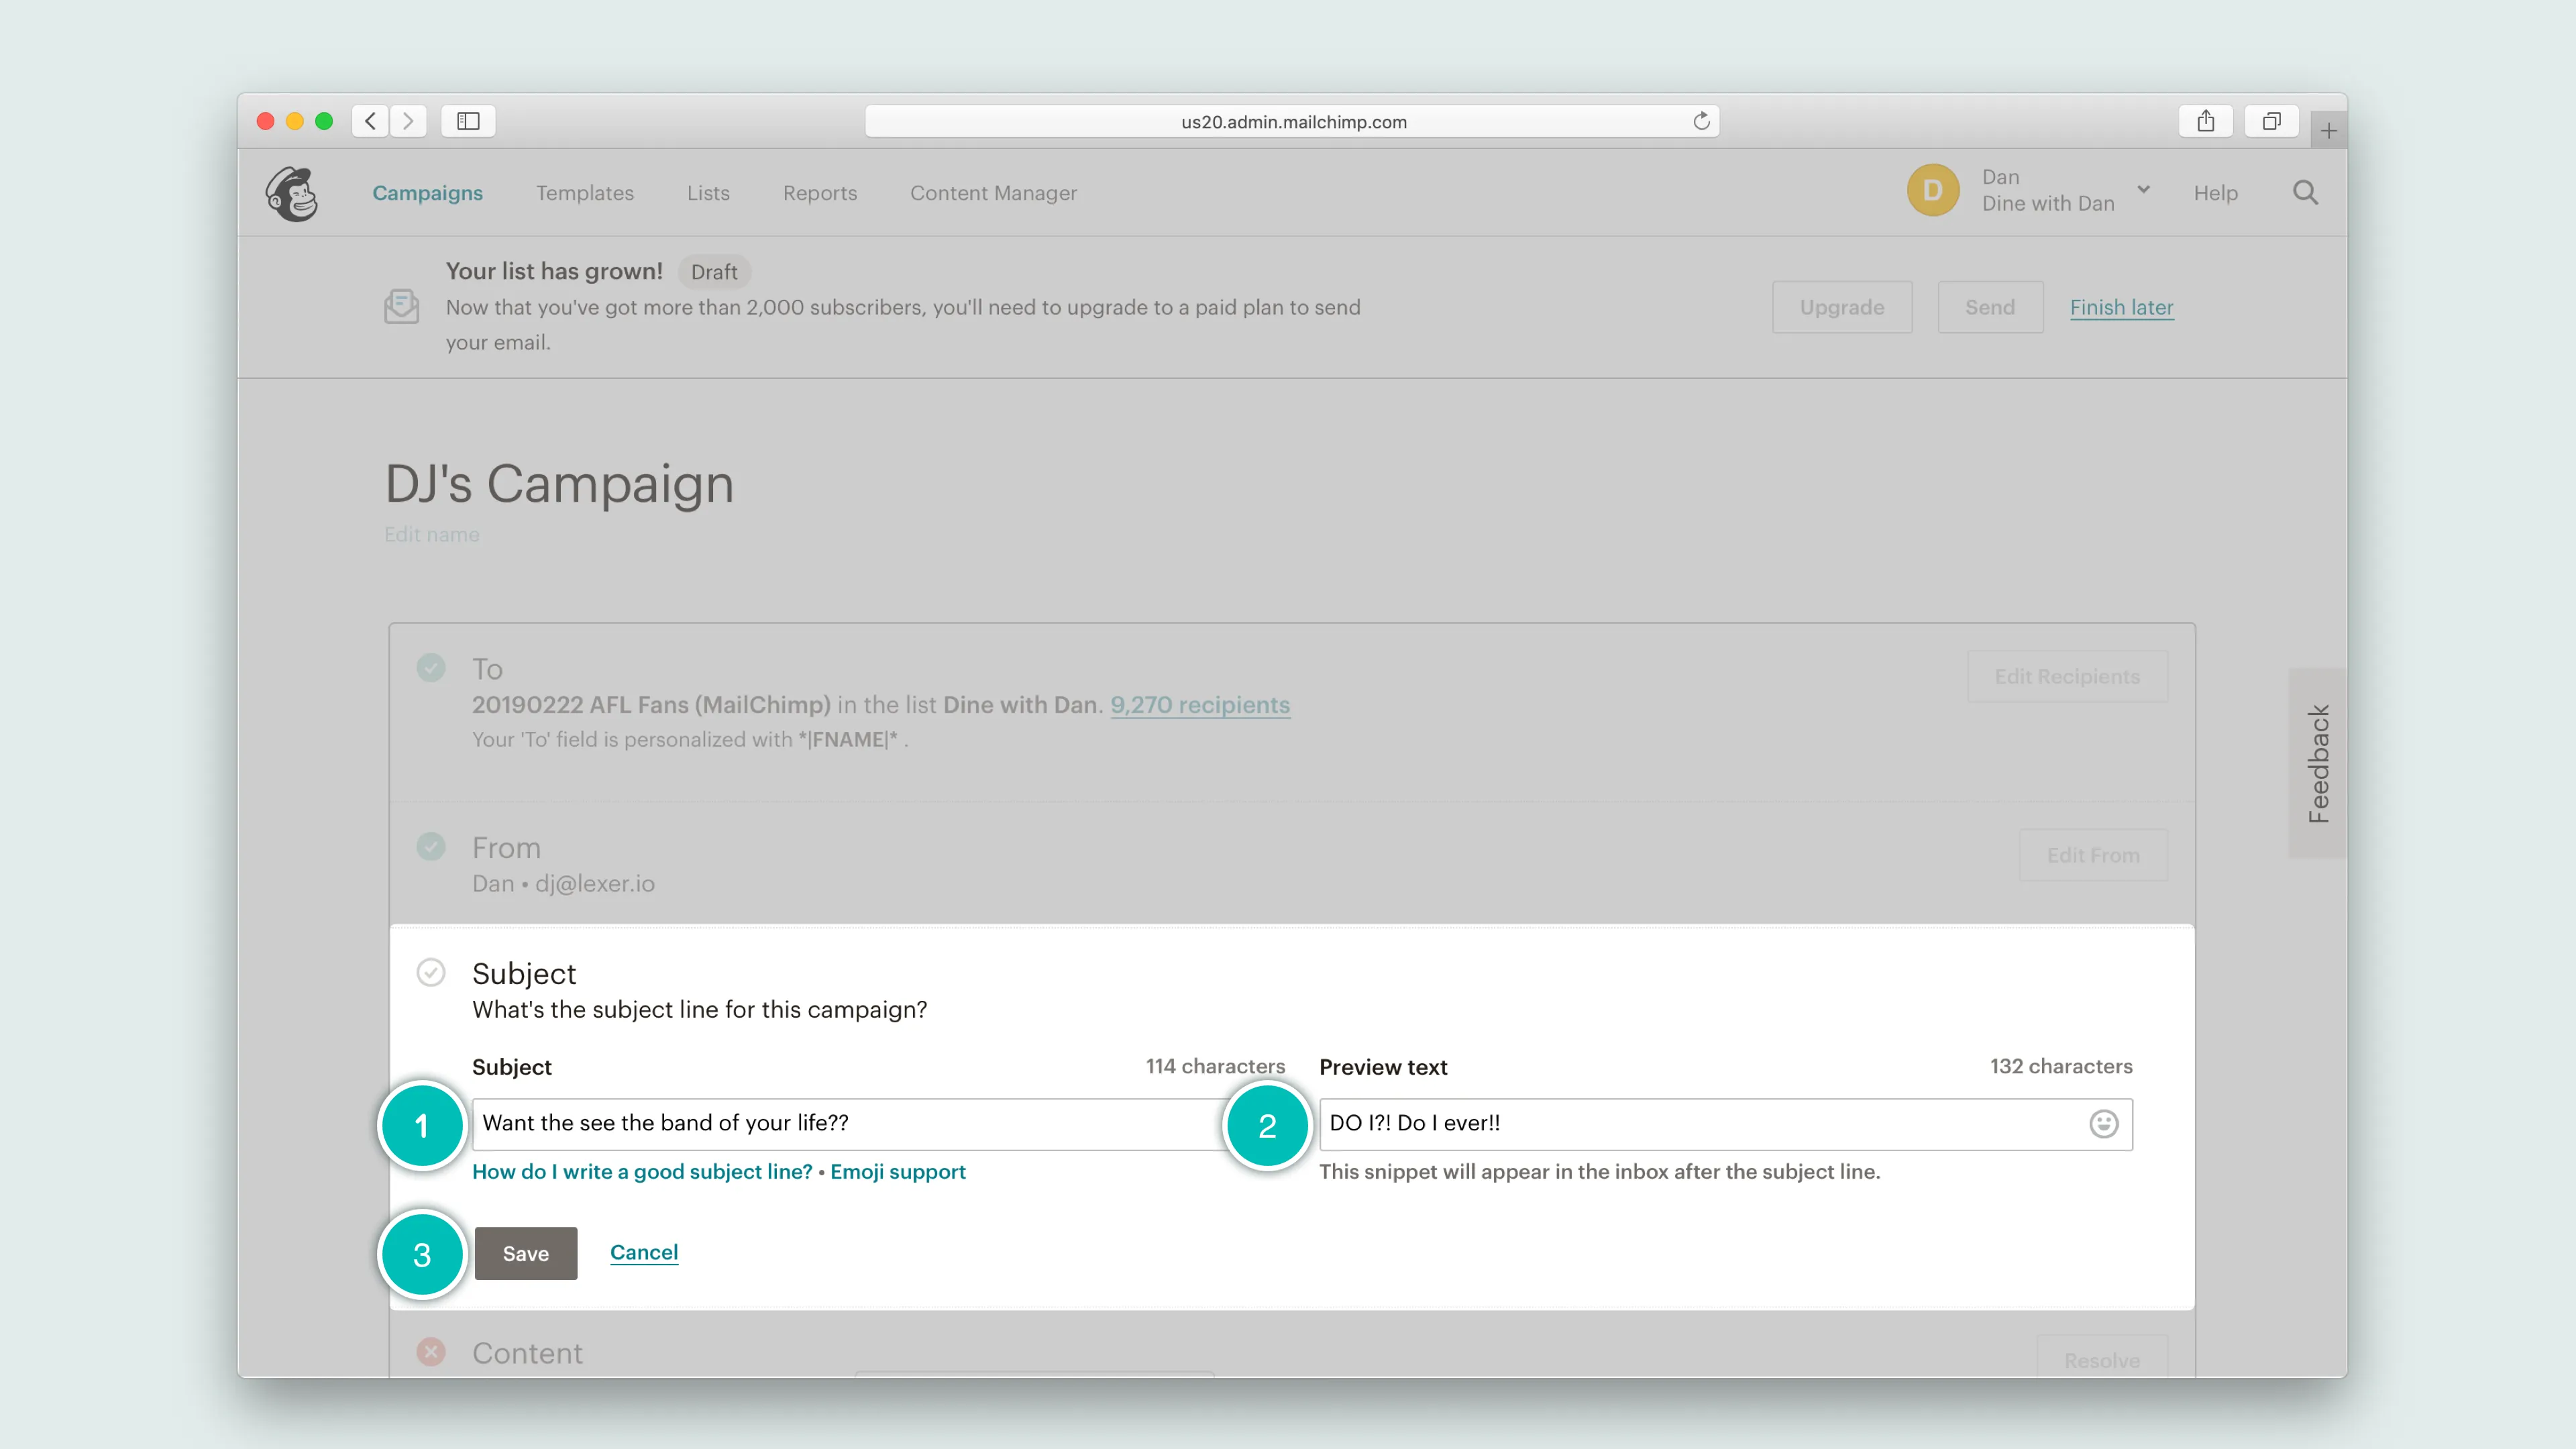
- Add a subject line for your email
- You can also include a line of preview text to accompany the subject line
- Click Save
Step 4 – Content
Choose which template makes sense for your campaign, or create a new one, and click Next. The next step is designing your email - Whatever you choose here will go out to your Segment.
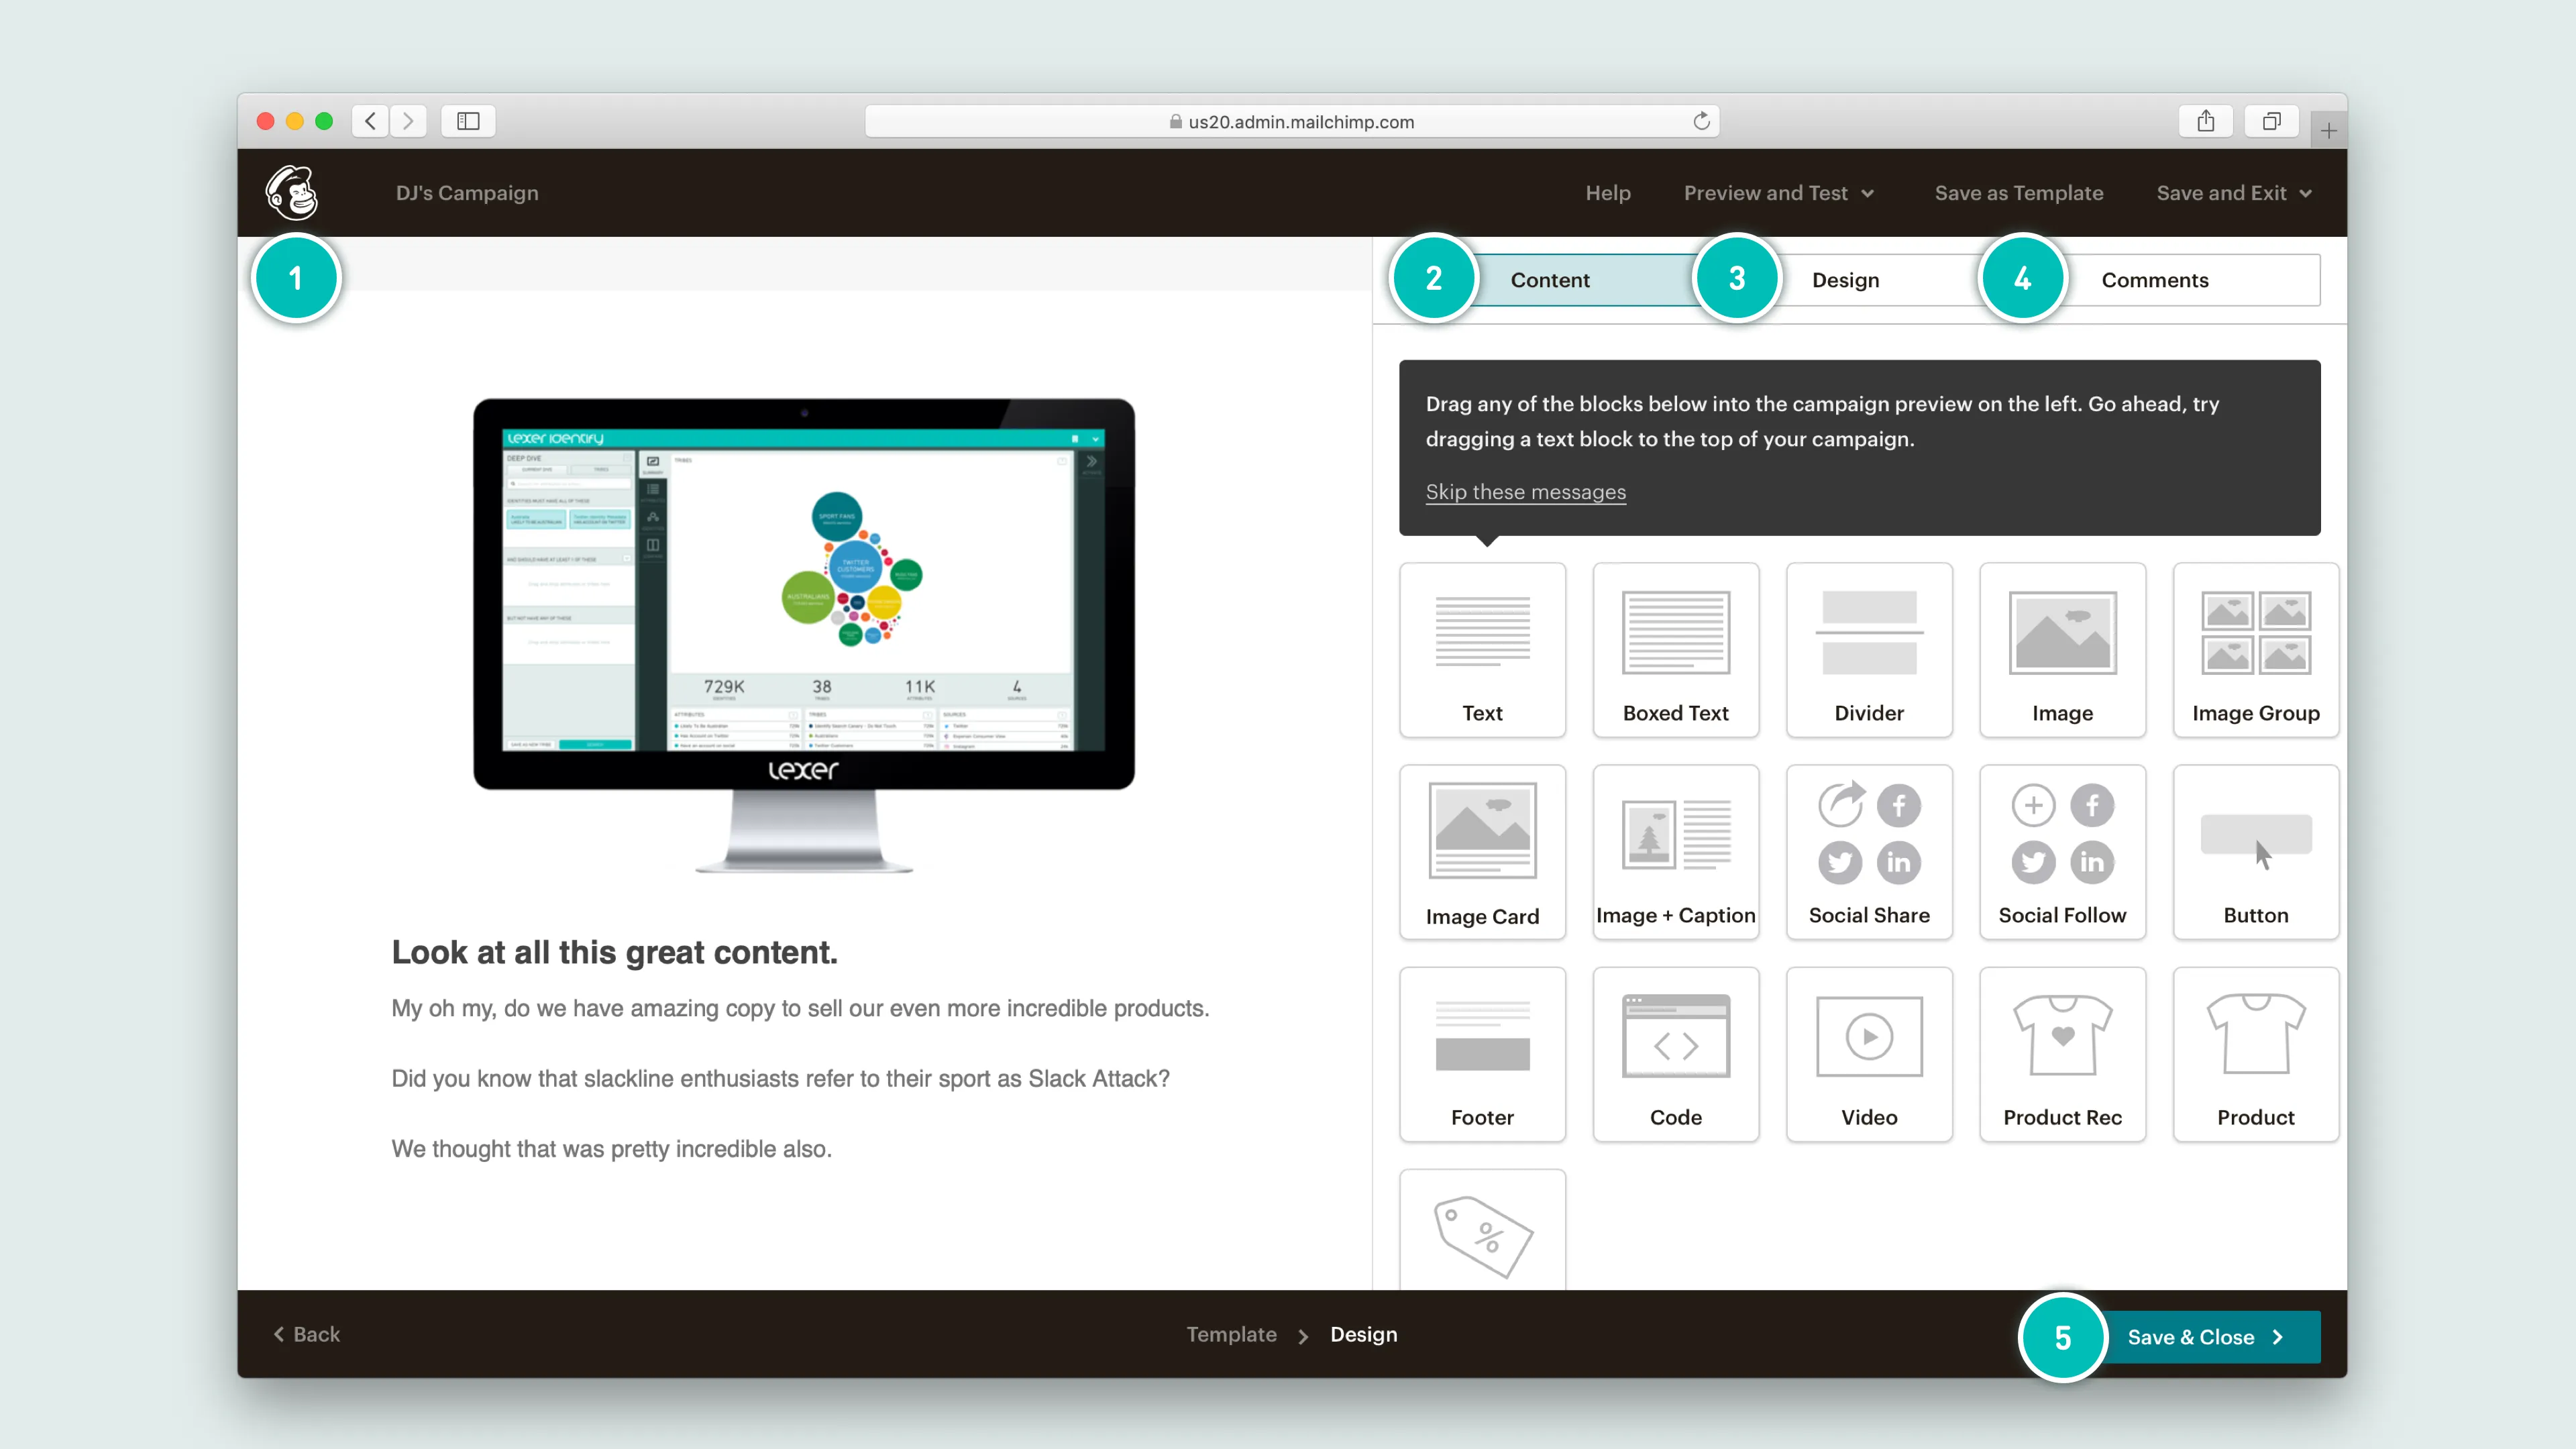
- See a preview of your email here
- Drag and drop new content modules onto your email
- Set the colors, borders, padding etc
- You can share your working design with colleagues. Their comments and feedback will appear here
- Click Save & Close (note: this won’t send your email – that comes next).
Sending your email
Once you’ve completed these steps, you’ll see a green tick displayed next to each. Now you can either choose to schedule your email for a later date, or send now. It’s important to note that most campaigns cannot be unsent.
Take a deep breath, and push that big red button.