
Criteo
This integration is in beta
As with all beta tests, not everything will be perfect. If you run into any issues, please submit a support ticket.
Connect your Criteo account with Lexer
Criteo is an ad re-targeting platform where you can maintain persistent suppression or targeted lists to deliver the right ad, at the right moment, based on your customers’ engagement.
This article will walk you through how to set up your Criteo account and explain what a Criteo activation is.
Benefits of a Criteo integration
By connecting your Criteo account with Lexer, you permit Lexer to create new Audiences, and append to existing Audiences in Criteo. You can also:
- Send customer lists using customer emails or device IDs (hashed).
- Maintain persistent suppression segments in Criteo.
Direction
What direction does the data flow?
⬜️ Data in: N/A - Lexer does not take data in from Criteo.
✅ Data out: Enriched customer segments ready for activation.
Type
Lexer loads these types of data
✅ Ad network
Source method
How Lexer loads data from this source.
N/A
Destination method
How Lexer sends data to this source.
✅ API
Status
What is the status of the integration?
Full Release
Lexer product compatibility
What Lexer products is the integration compatible with?
✅ Activate
⬜️ Compare
⬜️ Listen
⬜️ Respond
⬜️ Segment
⬜️ Serve
⬜️ Track
Attributes
No attributes will be created as part of this integration.
Attributes
This integration allows for some flexibility, the output of the integration depends on your available data and what you send through to Lexer. In addition, your attributes could be named in a different way to other clients. If you would like a list of attributes related to this integration, please email your Success Manager.
Attributes
What attributes are created when integrated with Lexer?
Attributes
These are the standard attributes that Lexer can create from the data received via this integration. The exact attributes will depend on what data is made available and sent into Lexer. Keep in mind, your attribute names may vary slightly. If you have any questions or would like to explore custom options, please contact your Success Manager.
Customer attributes
Email engagement attributes
SMS event attributes
Transactional attributes
Product attributes
How do I integrate my Criteo account?
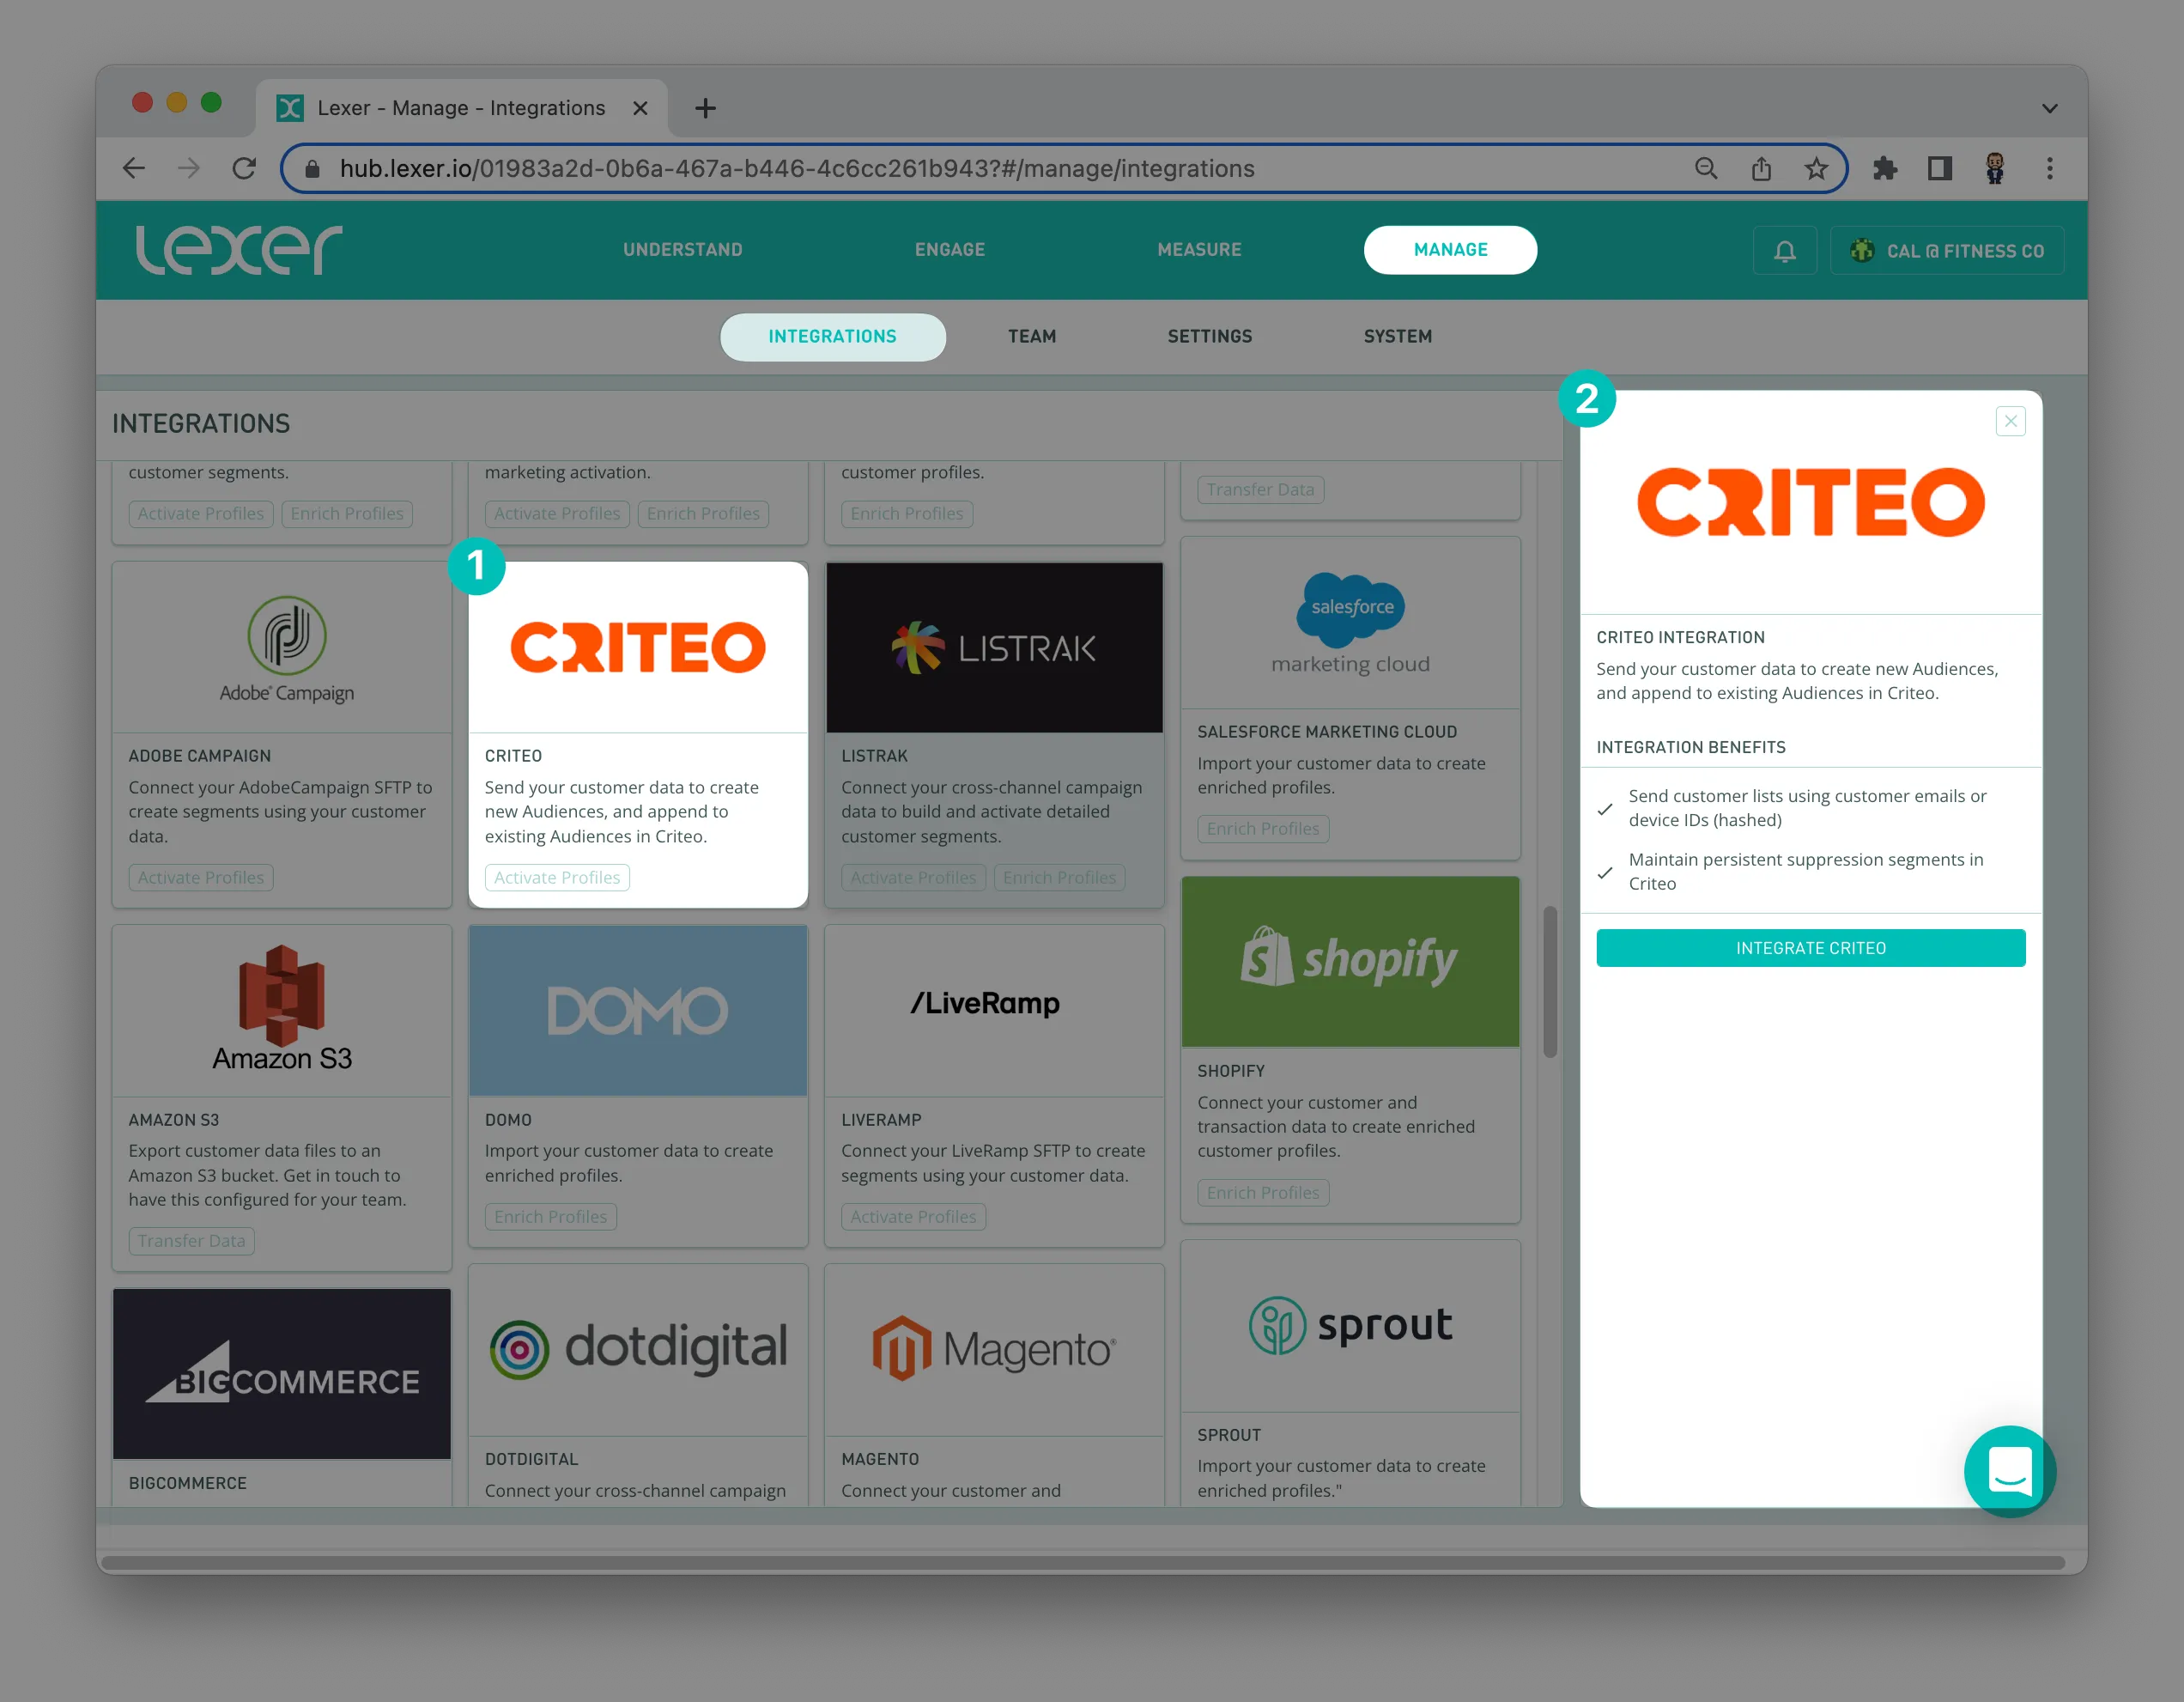
To add this new integration to your hub, navigate to Manage > Integrations.
- Scroll down through the integration tiles until you find the Criteo tile. Click on the Criteo tile.
- Then click Integrate Criteo.
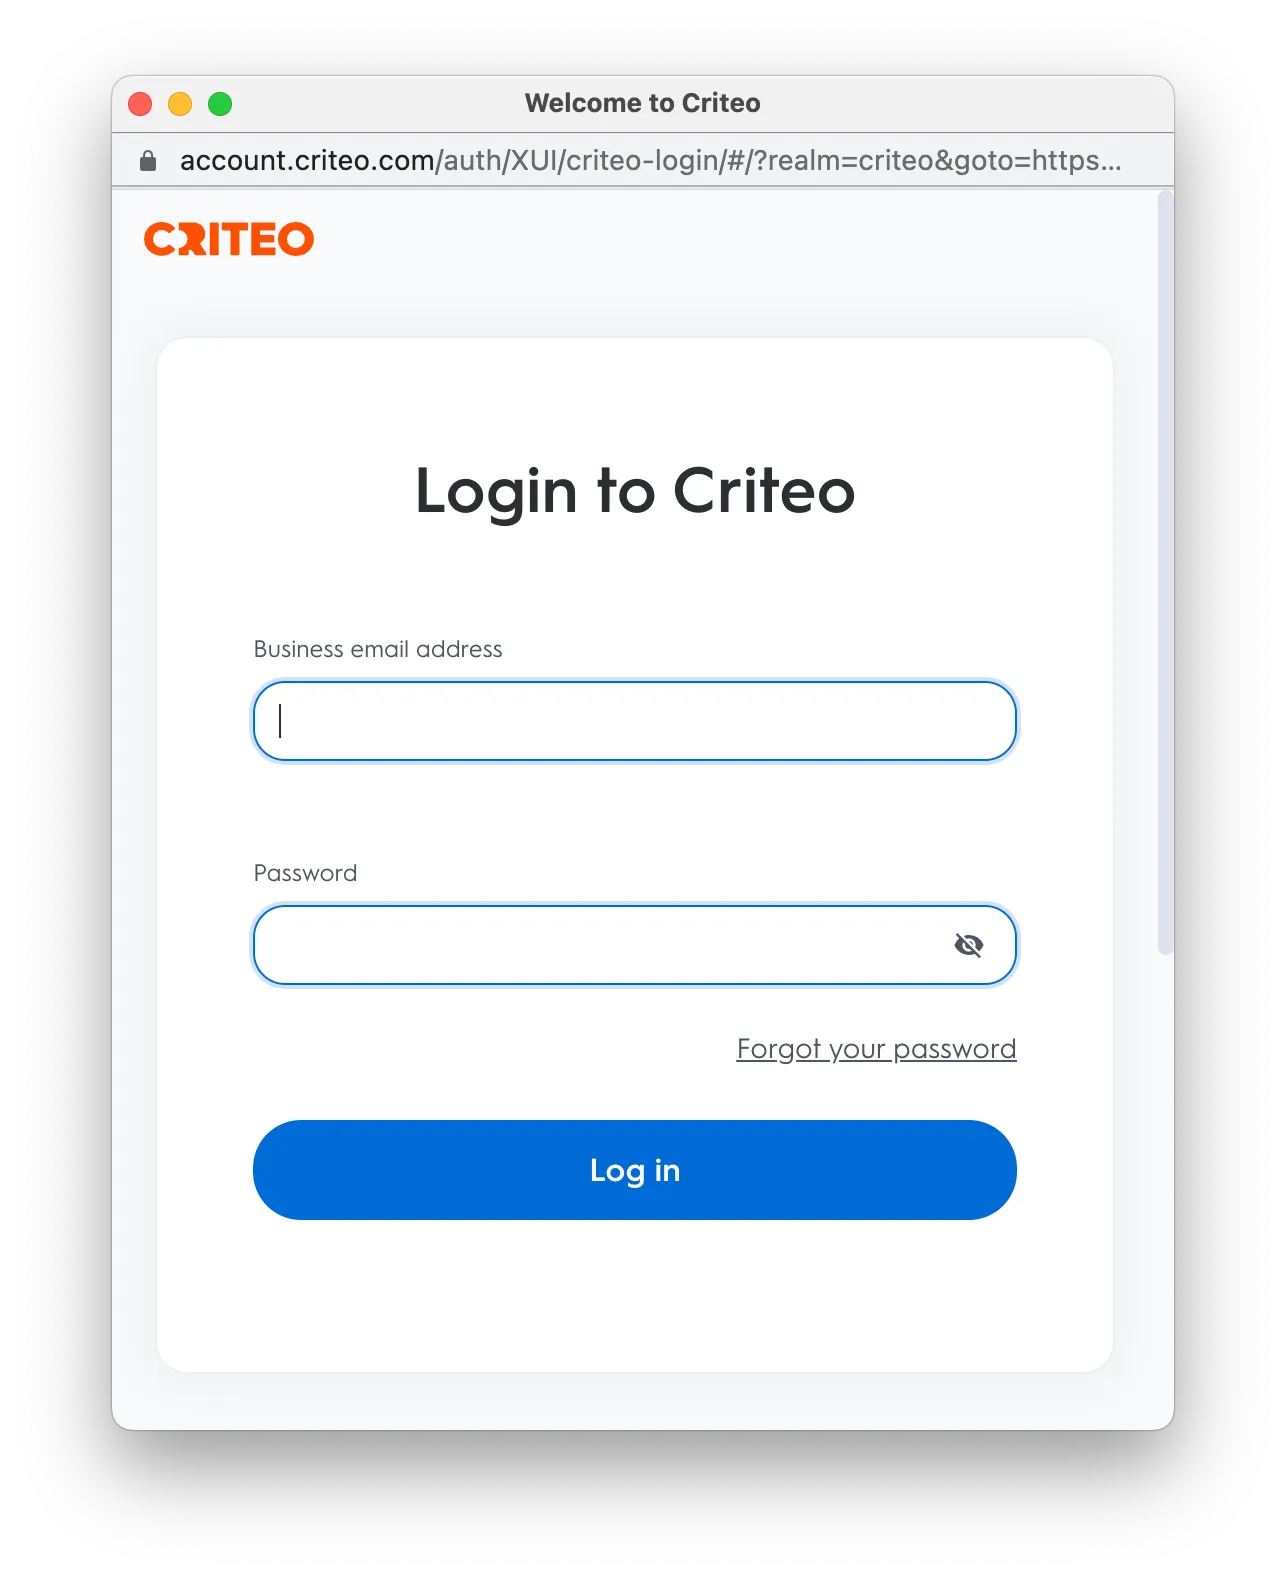
A separate screen will appear asking you for your Criteo account credentials. Enter your Criteo login username and password and click Log in.
From here you will need to set the permissions for the Lexer app. You need only give us MANAGE permissions for the AUDIENCE parameter. Once completed it should look something like this.
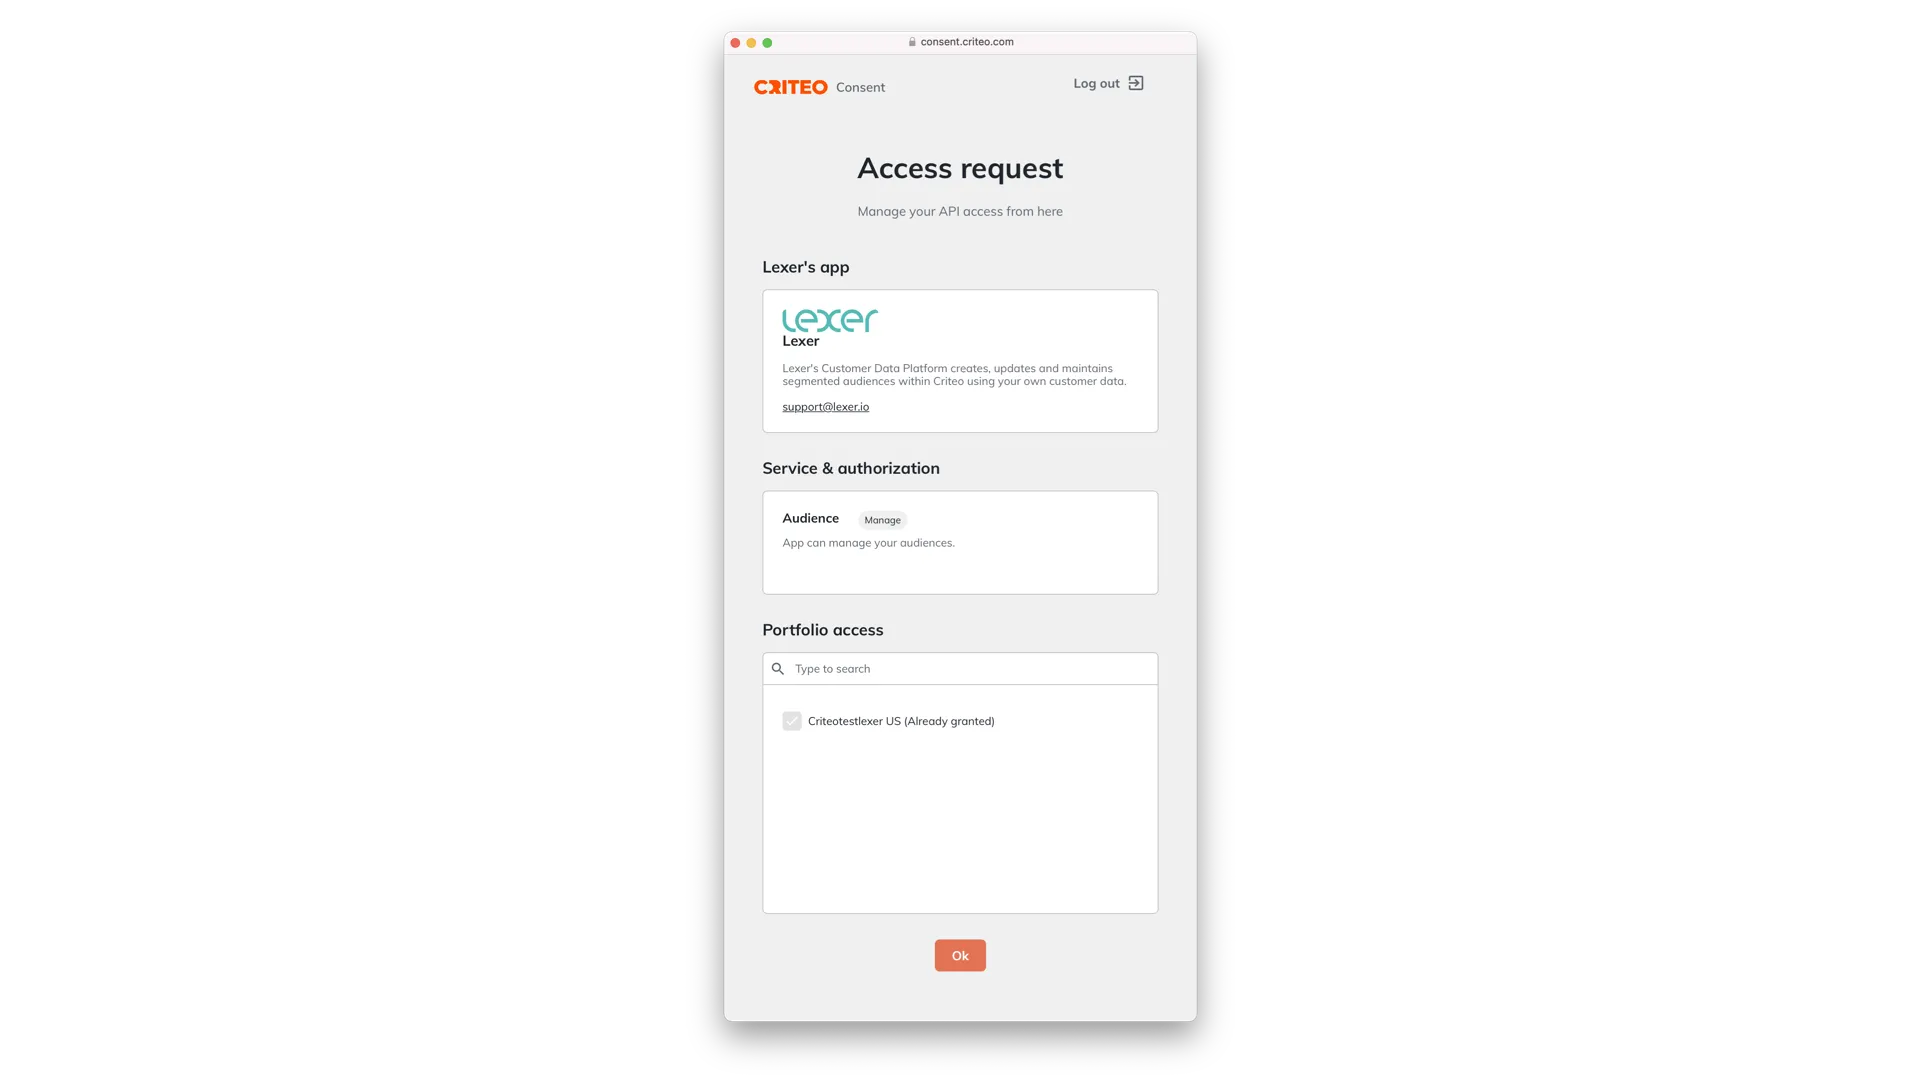
Click OK and you will be redirected back to Lexer Integrate.
What is a Criteo activation?
The Criteo activation in Lexer allows you to securely send and update hashed email records, or Device IDs (both MD5, and SHA256) from Lexer to Criteo, and store them as audiences in Criteo as a secure PII to Cookie match table. Criteo then targets those cookies across the internet.
Every time an audience (Segment) in Lexer matches cookies stored in Criteo, you’re now given the power to target the corresponding emails or device IDs captured through Criteo. The beauty of this is that Lexer gives you the ability to create audiences that auto-update, so your lists will be updated as customers enter and leave your Segment.
For example, if someone were to browse your site on their smartphone, the device ID could be captured, and stored in Criteo. This same device ID could be captured in Lexer, and be automatically included/excluded in such audiences as “returning visitor”, “cart abandoner”, or “one time purchaser”, as their device ID is tracked throughout their online journey. Once the Lexer audience is received and matched in Criteo, you could then use this to target these audiences with relevant ads and opportunities, such as “upcoming sale”.
Criteo terminology
- List: A collection of users, and the information you have on them. A user can belong to many lists, and these will be your primary tool in segmentation within Criteo. For example, your “High Value” user list contains those with a spend value over X.
- Device ID: Used to identify devices for users who use multiple devices to navigate across various websites.
- PII & Cookies: Read more about this here.
How do I activate to Criteo?
First, head over to Lexer Segment and build your Segment. Once your Segment is ready, and your activation has been created, head to Lexer Activate.

Navigate to Engage > Activate.
Set and forget – auto-updating audiences
Lexer Activate permits you to automatically update your audiences within Criteo. With this selected, Lexer will add or remove customers from your audience as customers enter and leave your Segment.
Reintegrating a Criteo account
- Navigate to Manage > Integrations in the hub.
- Find, and click on, the Criteo tile.
- Identify, and click on, the current integration channel you need to reconnect.
- Click on Disconnect, click disconnect again when prompted.
- Navigate, and login, to your Criteo account.
- Click Revoke access, next to your Lexer account on the consent dashboard. Click Revoke again when prompted.
- Navigate back to the hub. From here you can integrate your account again.
What next?
That's all for your Criteo set up! The moment your activation has been confirmed as sent in Activate, you’ll see records begin to update in Criteo. We’ll send you an email to let you know once an audience has been sent — the time this takes will vary, depending on the size of the audience. If you have a trouble setting up, please don't hesitate to reach out to support at support@lexer.io.