Tier filters
Understanding your search structure
Tier Filters are the foundation of any search in Lexer Listen and Lexer Respond. In this article, we’re going to walk you through their setup.
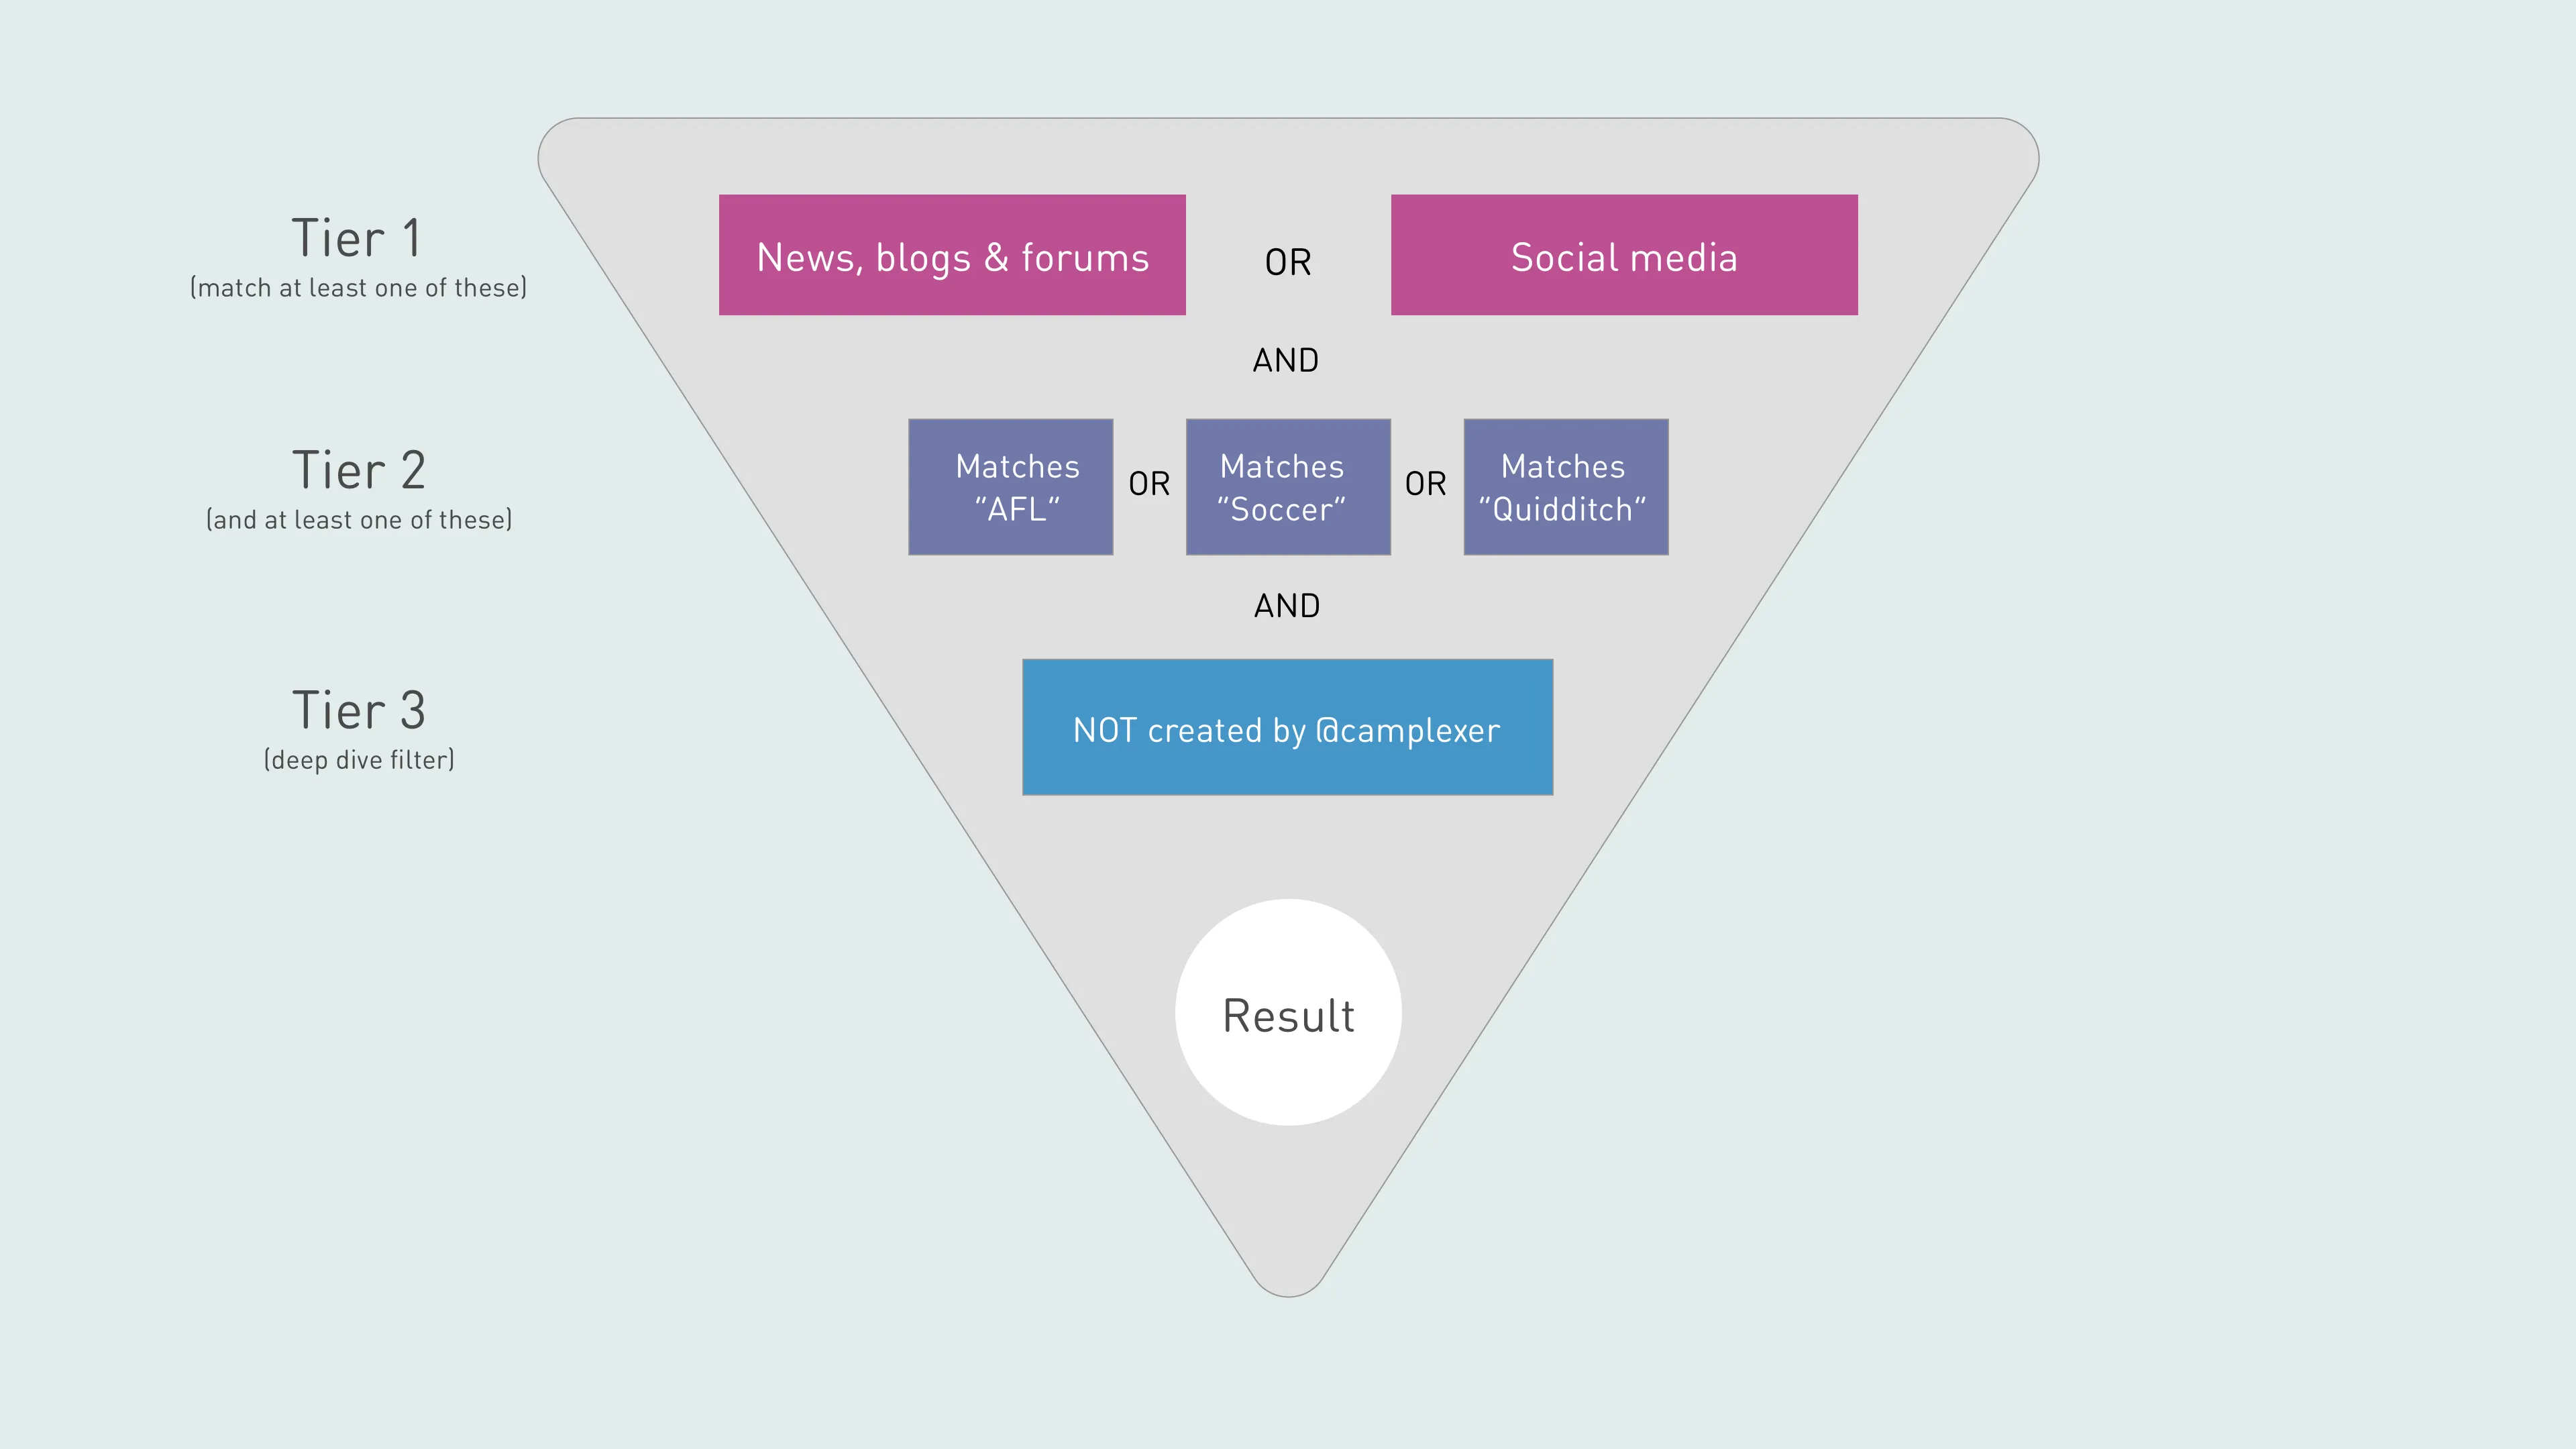
We believe that a search hierarchy is the most efficient way to find what you’re looking for, so we created an easy to use search engine (the Deep Dive) that allows you to choose pre-made filters that gradually hone in on content, layer by layer.
Why Tiers?
Lexer consumes millions of pieces of content every day, and trawling through these to find your topics of interest could prove challenging, if there wasn’t a structured way to do so.
We separate out searches into 3 distinct tiers:
- Tier 1: This is the first step in your search, and helps you manage your searches in later tiers. You are defining the sandbox in which you’re playing. This is where you filter by source, industry, geography, or key terms.
- Tier 2: This is where you put the results from your Tier 1 search into manageable filter sets that produce dives on particular topics, brand, campaigns, events, etc.
- Tier 3: Generated by you on the fly from within the interface.
The hierarchy of their use is important, because in the the background they generate a boolean search. If you’re not familiar with boolean, this is basically asking the search to look for ‘one thing AND another’, or ‘this thing OR that thing’.

Tier 1 - where?
This is the first step in your search, so the first question you want to ask is “where?”. Are you looking for messages sent to your company’s Facebook page? Or perhaps you only want to view news articles? Some examples of best practice Tier 1 filters our clients use are:
- All social: Content across Facebook, Instagram, and Twitter.
- All published: Content across all news, blogs, and forums.
- yourcompanyname Facebook content: All content posted to your company’s Facebook Page (generally excluding content posted by your Page).
- yourcompanyname Twitter content: All content posted to your company’s Twitter account (generally excluding content posted by your account).
- Survey responses: Pulls in all survey/form replies.
- Email: yourcompanynameEmails sent to your integrated mailbox.
There are many more you could opt to use at Tier 1, depending on the type of content you’re looking for. Use the above as a guide, and reach out to Lexer Support (support@lexer.io) if you’d like some help with this.
Tier 2 - what?
Adding a Tier 2 filter is also a required step when building your search. With this, we’re asking the question “what?”. What is it you’re looking for from within your Tier 1 filter?
This will generally a person, campaign, topic of interest, or workflow State.
Some examples might be:
- Open objects: Objects currently sitting in an open State - for customer service agents to to find new messages.
- Everything: An open filter that allows you to look for everything within you Tier 1 filter
- Melbourne and Sydney: Mentions of the terms “Melbourne” or “Sydney”.
- Metallica: Mentions of the account @Metallica or hashtag #metallica.
Tier 3
These are added to your Deep Dive as you go, to help reduce noise, and narrow down your search to exactly what you’re looking for.
Tier 3 filters cannot be pre-configured, but can be added permanently to a Saved Dive. This differs to Tier 1 and 2 filters, in that you can save a Tier 3 to a particular Dive, and it doesn’t affect any other searches. When you save a Tier 1 or 2 filter, the settings in this reflect across all searches it’s used in.
How to make a Tier Filter

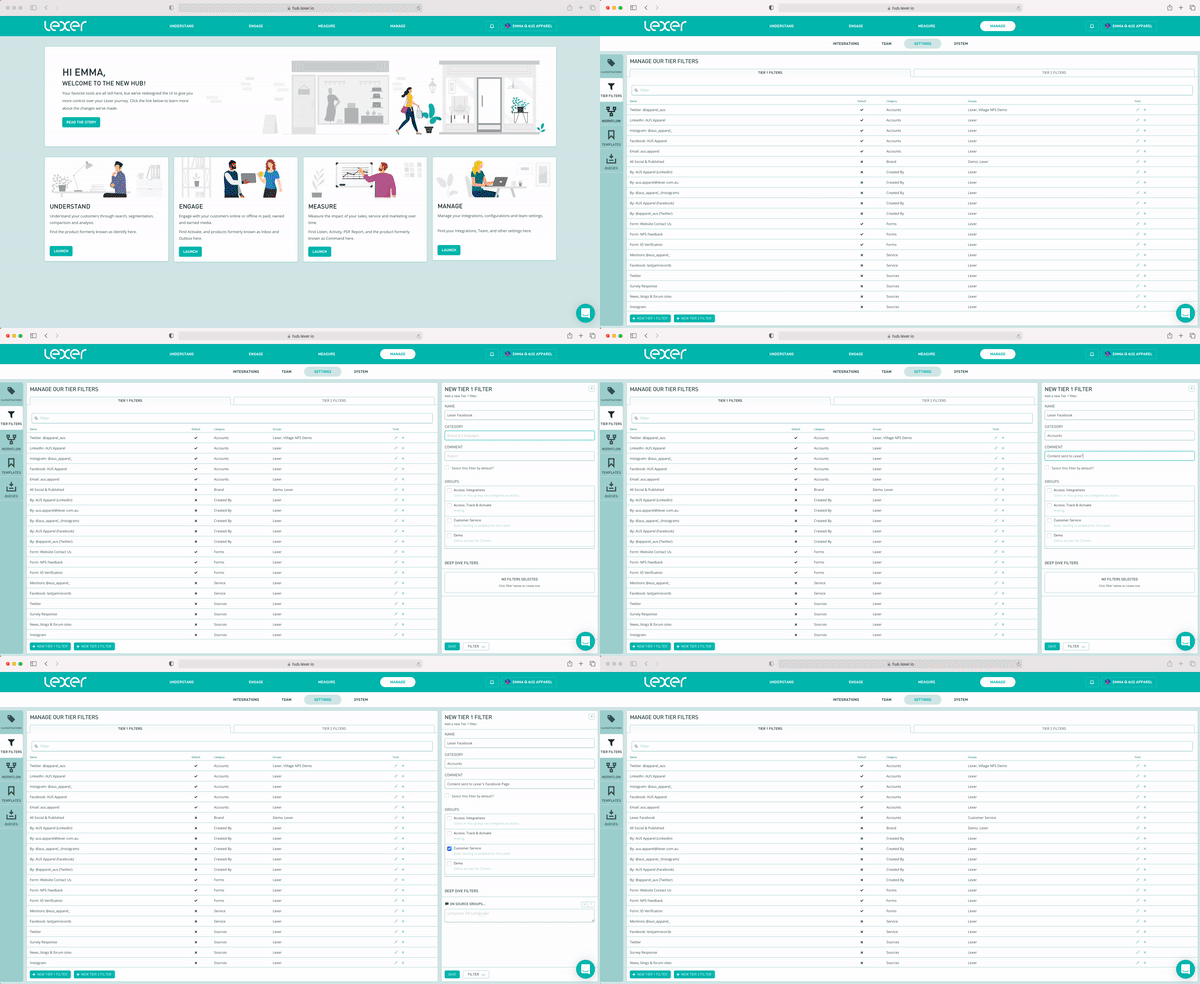
- Head to Manage > Settings > Tier Filters, then click on either New Tier 1 Filter or New Tier 2 Filter to get started.
- Give your filter a Name, Category (this could be things like “brand”, “sources”, “topics” etc.), and a Comment (optional, but helpful for the rest of your team - use this field to tell them a bit more about the purpose of the filter).
- Next, confirm the Groups you'd like this filter to be visible to.
- Then select Filter, and add as many filters as required to your Tier Filter. Once you're done, click Save.
How to edit a Tier Filter
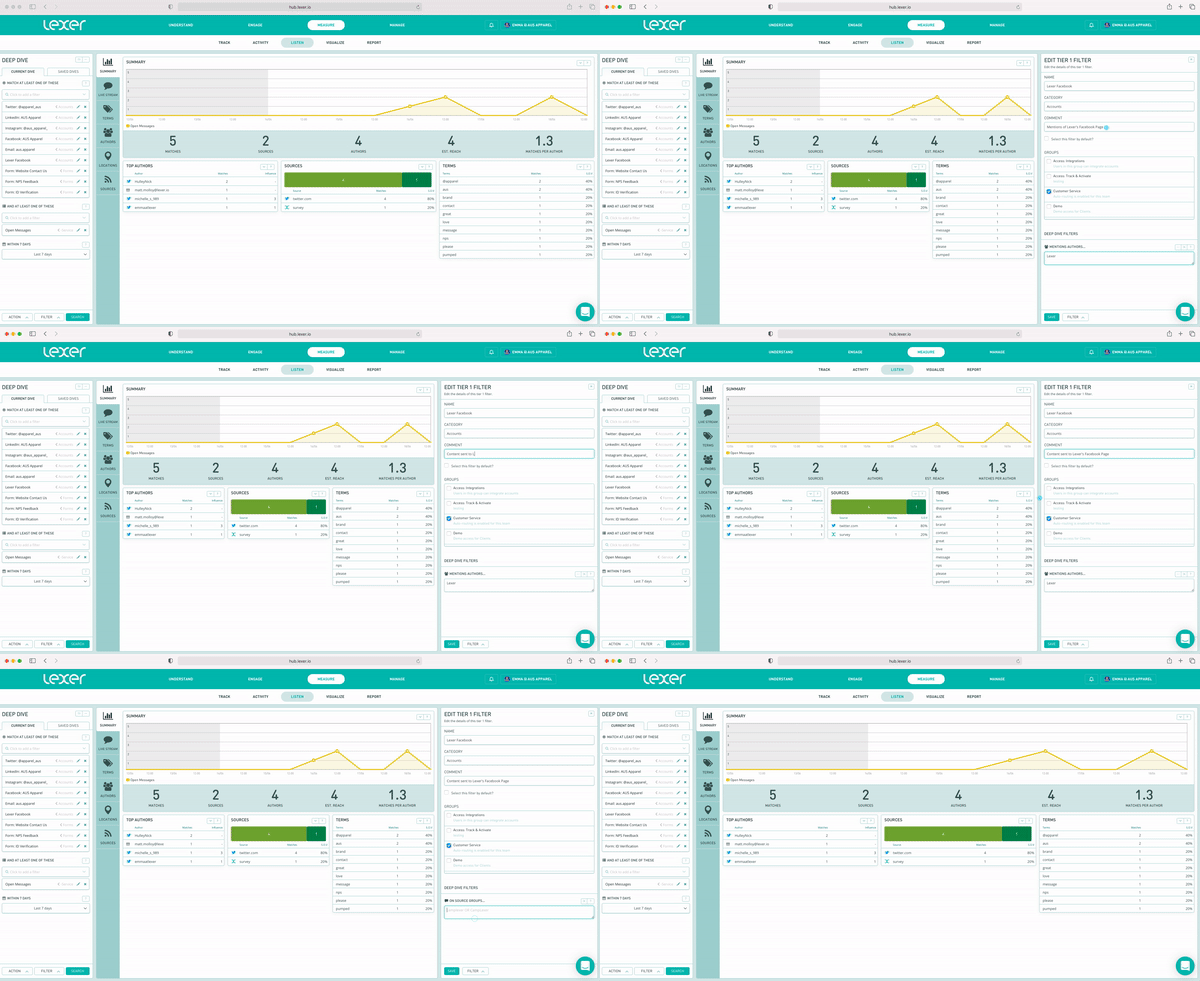
There are two ways to do this.The first is to head back into Manage > Settings > Tier Filters, and select the one you'd like to update from either the Tier 1 Filters or Tier 2 Filters tabs. Update the filters within the Tier Filter, the same way as you did in the initial setup, and click Save.
The second (recommended) method:

Click on the pencil icon of the Tier filter within your Deep Dive in Listen or Respond to open up a window on the right, then edit your filters and/or any other info on the Tier Filter, and click Save.
The benefit of this second method, is that there’s no need to divert to Settings, and interrupt your search process.
Types of Tier Filters
Now we'll show you how to refine the content you’re looking for, by gradually sifting through anything relevant, tier by tier - to hone in on exactly what you want.
Auto-add filters to your Deep Dive
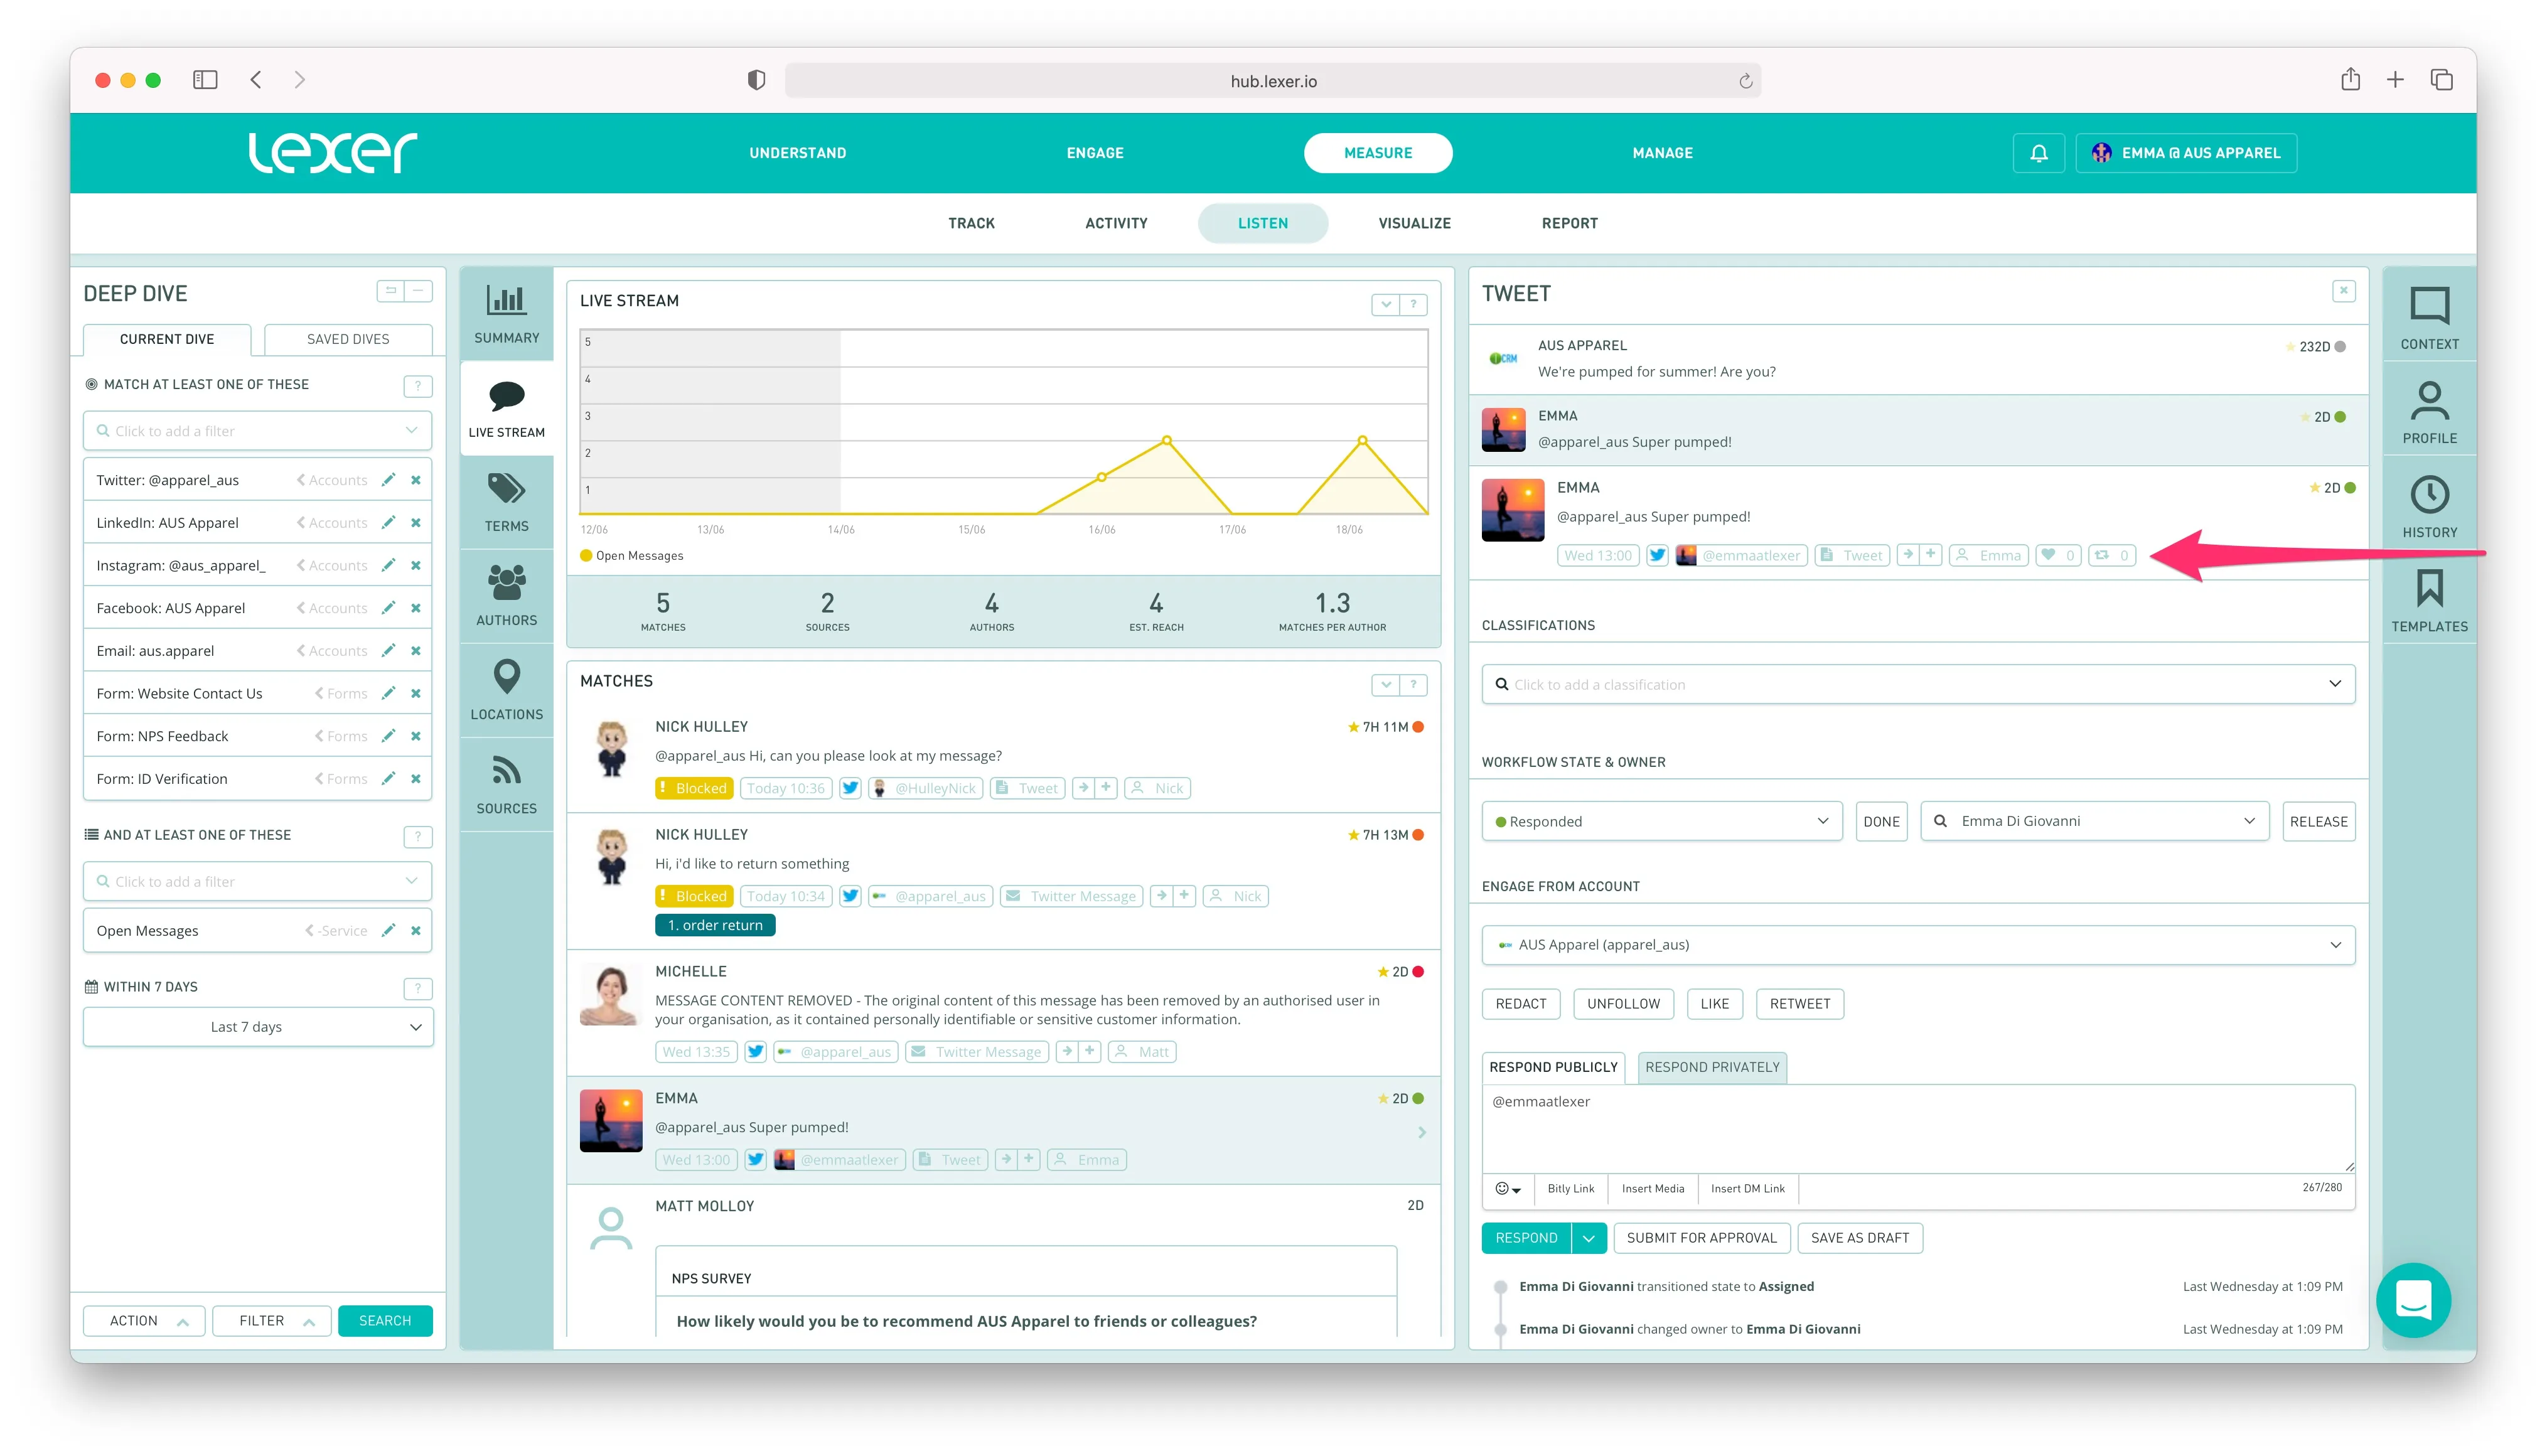
When you’ve run a search, and have been presented with results, you’ll notice a set of tiles on each object that give you information on things like the time it was created, where it came from, who the author was etc.
By clicking on these, you’ll instantly add new pre-filled filters to your Deep Dive.

Under each object you'll find:
- Time content was published
- Source the content was published on
- Page (Source Group) it was published to
- Author of object
- Source Type
- Status of object (what stage of your workflow it’s reached)
- Number of likes this object has received (note: not interactive)
Once you’ve added these filters to your Deep Dive, rerun the search, and you’ll be presented with results the same as those on the current object.
Using one at a time will give you objects that match each of those criteria. Using them together will require that the objects match all of the criteria you’ve selected per individual object.
You’ll also see two other tiles:
- Arrow: Clicking this button will take you directly to the native post. Note that you’ll have access to all public content, but objects such as Private Messages will require you to have login access to the account it lives in.
- Plus (+): This adds the object itself to your Deep Dive, to look for any “related objects”. What this means, is that you search for the thread of comments on a parent post, which is handy for tracking mentions on a campaign, for example.
From almost all charts and tables in Listen and Respond, you can also add filters to your Deep Dive, and the same logic applies as above - this will add that exact criteria to your search.
For example, by clicking on an entry in the Terms table, you’ll add a new Matching Terms filter to your Deep Dive with that word or phrase. You can continue to click through entries on the table to create an “OR” query that looks for all of those terms.

