Included in Audience
Definition:
Included in Audience
Keep track of your customer audiences
Keeping track of the customers you’ve included in audiences can be difficult, particularly if you’re running multiple campaigns at once. Activate helps you understand who you’ve sent to each audience by appending Attributes to each customer. You can use these Attributes to query these customers in Segment, and understand their behaviors post campaign.
Why measure my audiences?
Appending audience Attributes to your customers allows you to query these Profiles in Segment and learn from their behavior. You can create a Segment of customers sent to your most recent campaign in Facebook, and find out what makes this conversion segment interesting.
For example, you can search for customers included in an audience, and also include an Attribute for ‘recently purchased’ to understand the conversion rate from within Segment.
How does it work?
Sending an audience, with this option enabled, will populate four different Attributes for each customer included in your audience:
Each of these Attributes will appear on the Profile for the customers included in your audience, and can be added to your Segment Builder in Segment when creating Segments. To find them quickly in Segment, type audience into the attribute picker.
Using the Included in Audience attribute
The Included In Audience attribute is handy to use when you want to create an audience of customers who have been sent a campaign, and then track the success of that campaign over time. This is so valuable because you can see how successful your campaigns are over time, and it’s a great way to visualize and report on ROI, or key KPIs related to your campaign.
So, let’s jump into the Hub and show you how it's done!
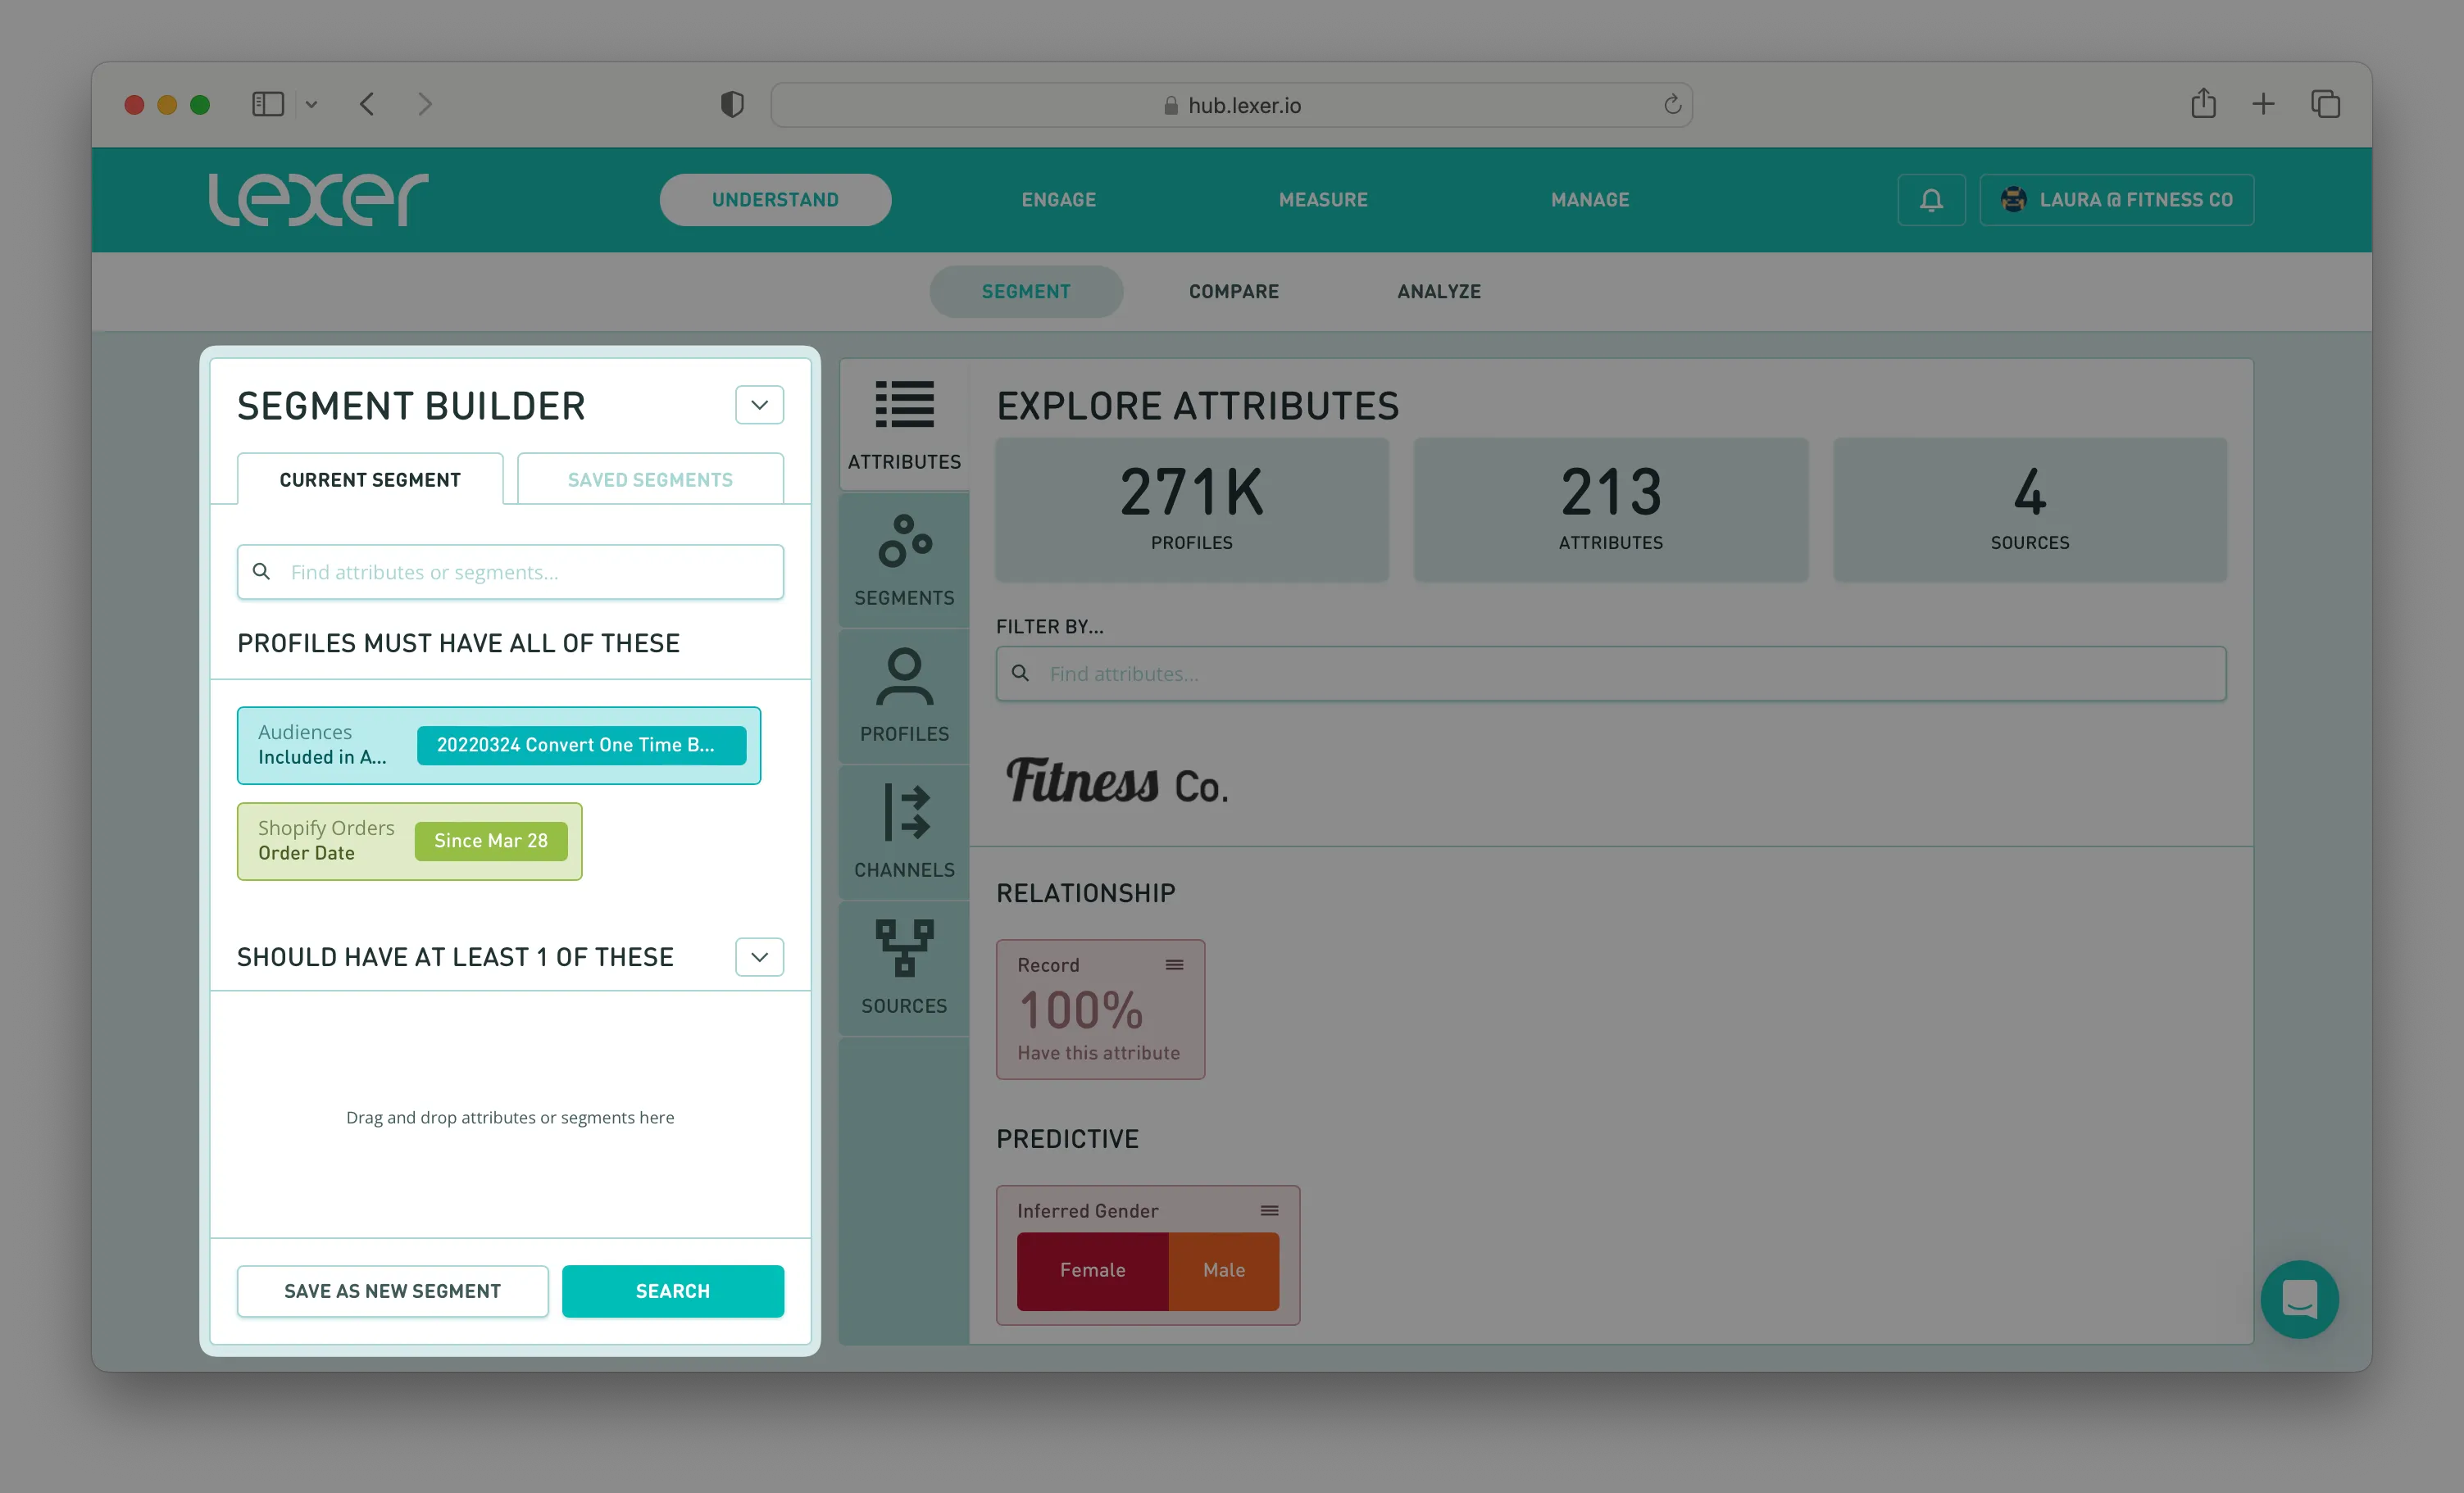
Firstly, navigate to Understand > Segment, and then to the PROFILES MUST HAVE ALL OF THESE section of the builder you want to add the Included in Audience attribute, which will surface profiles that have been included in an audience created in Activate.
You can then filter for the activation name you used for the campaign you want to track. In this example we’re going to choose our CONVERT 1x BUYERS activation.
The next attribute you want to add is Order Date > Since > Select the date your campaign will run from.
What this segment is looking for is customers who have been sent your 1x to 2x buyers campaign and have since made a purchase.

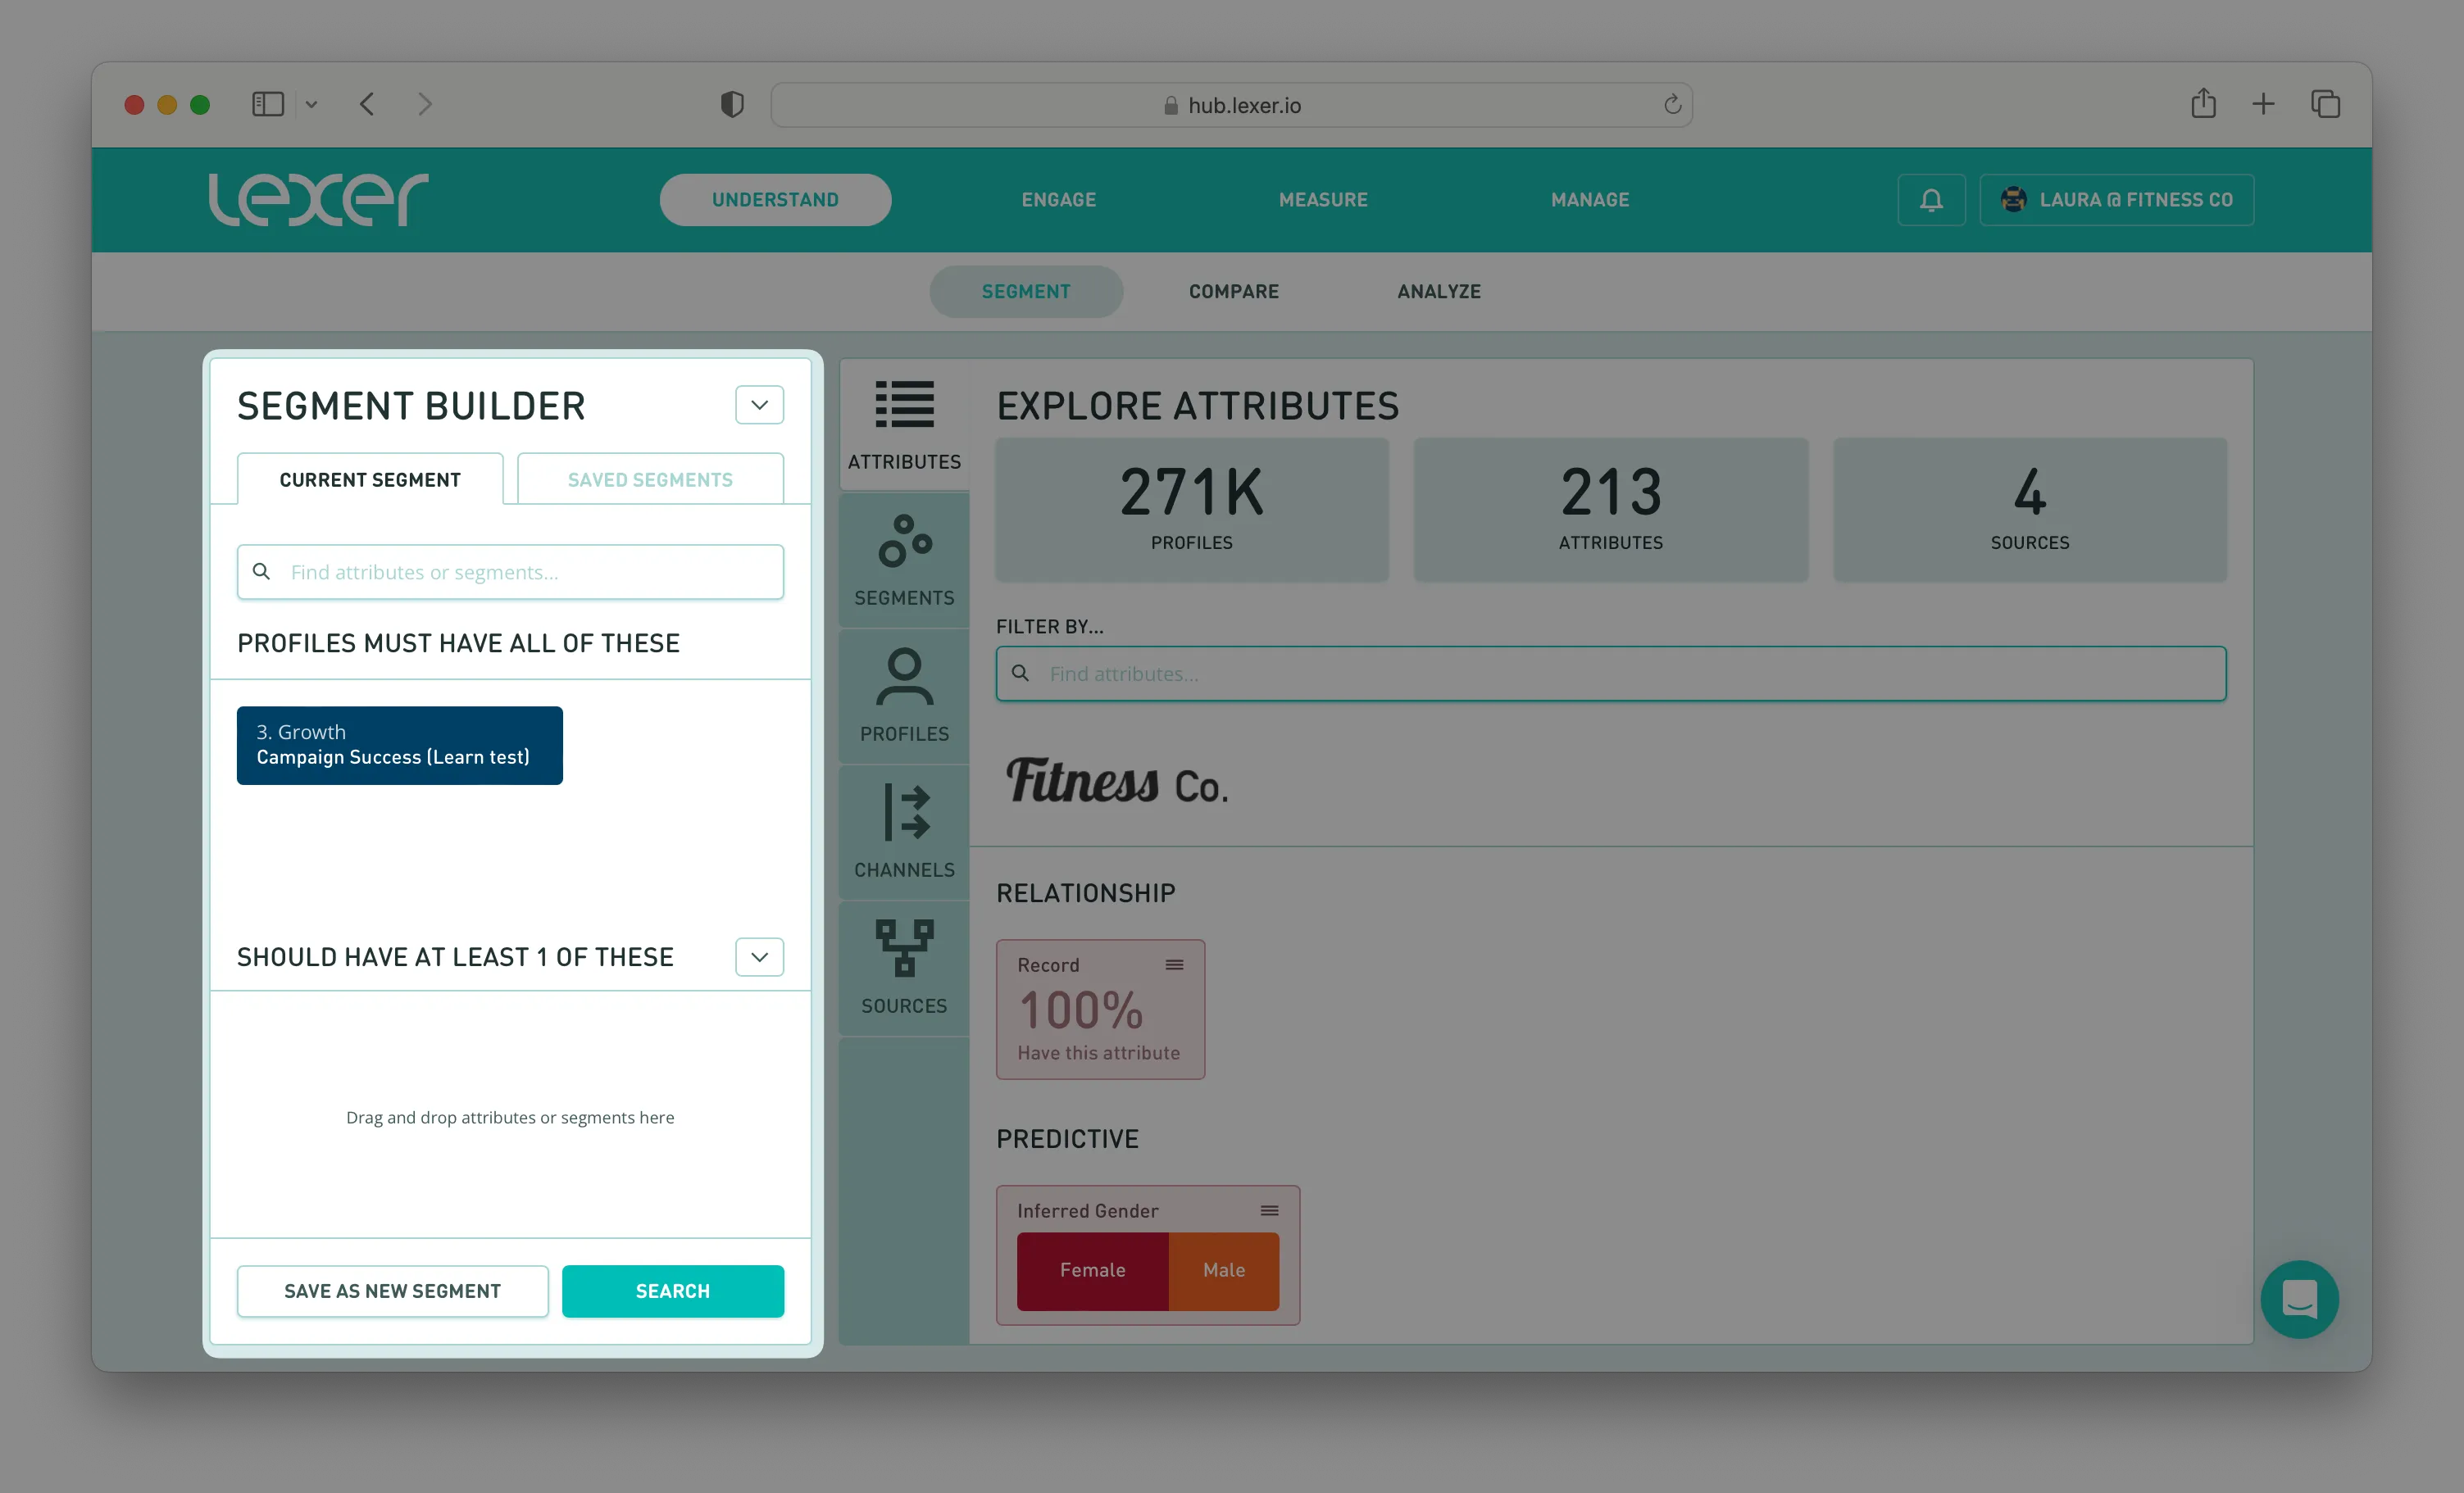
Once this segment has been created, you can Save it and then start to create your campaign metrics.
In the Segment Builder search for, and select, the segment you just set up.

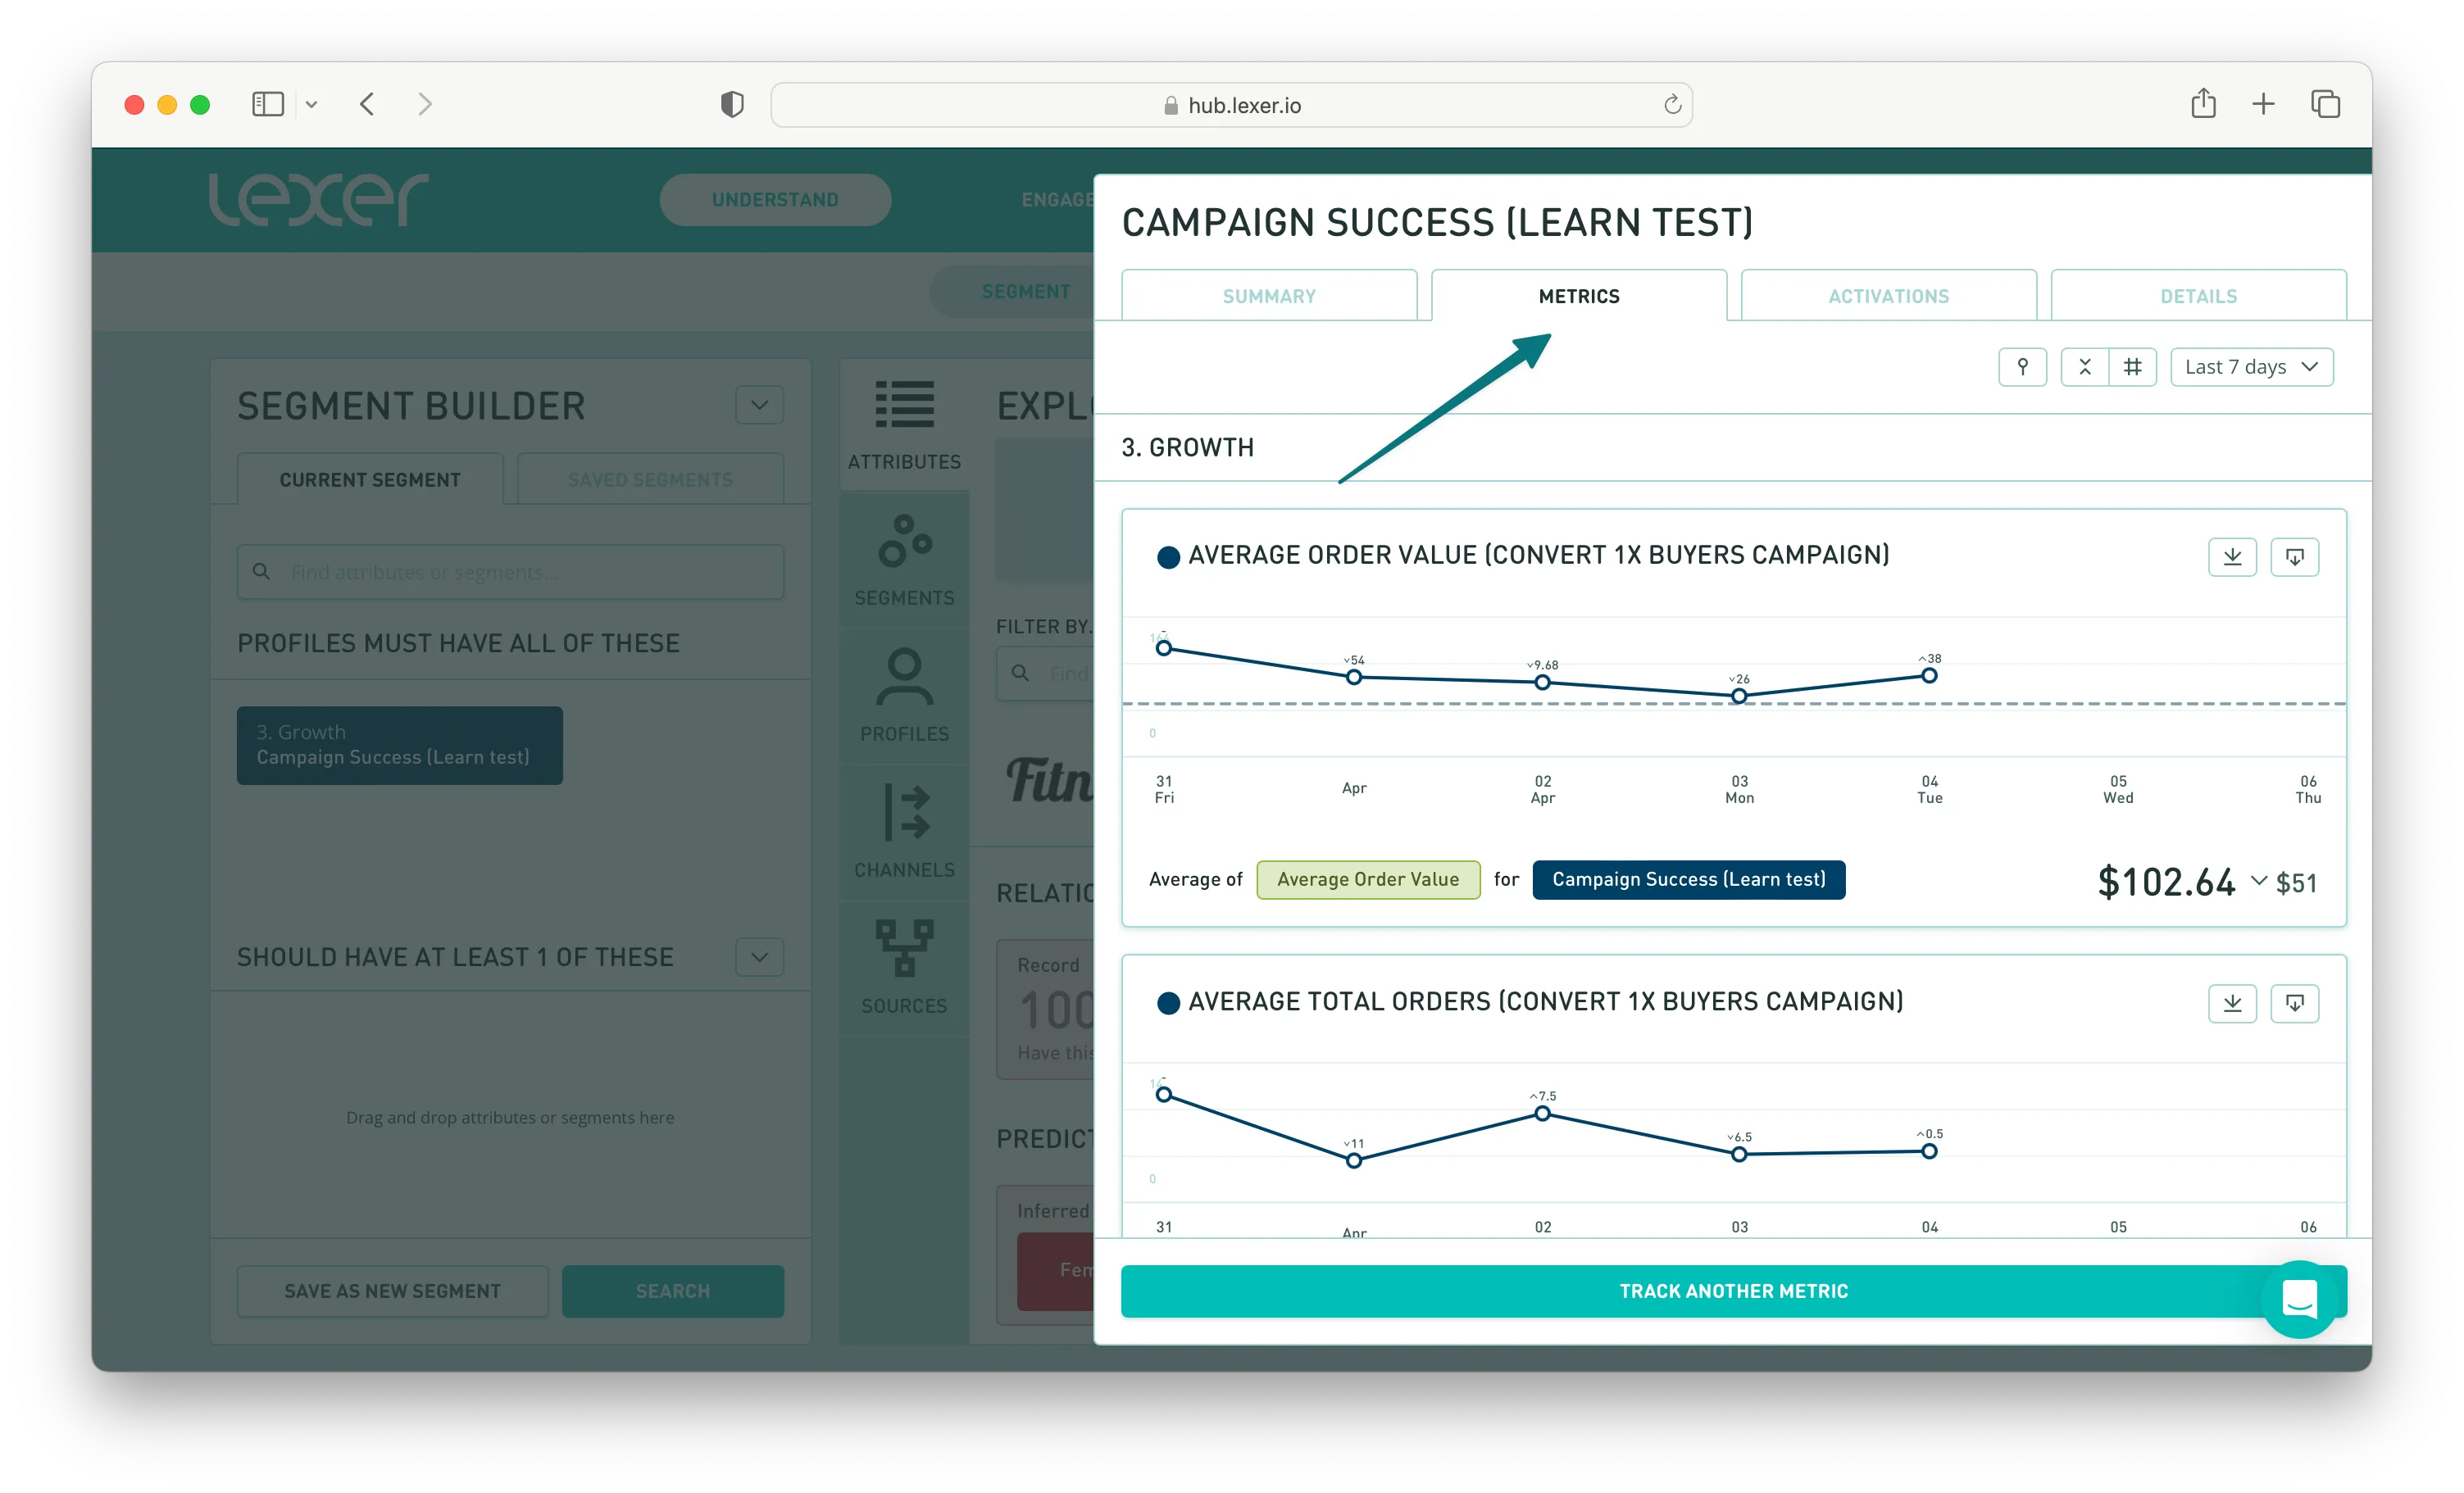
Hover over the segment and click the > symbol to open up the segment details. Then navigate to the Metrics tab.

You can now select TRACK ANOTHER METRIC at the bottom of the pop up to create your campaign metrics. We have a video walk through of how this is done here.
We suggest setting up the following metrics:
- Total population
- Average order value
- Average total orders
- Average total spend
Once these metrics have been created you can then navigate to Track and set up your dashboard. We have some handy info on how this is done here.
And, that’s it!
If you want more information on how to create segments, we have articles here.
And for more information on Track, see our comprehensive course here.
