
Persona building: Personalize your messaging for maximum return on your campaign investments
One great advantage to using Lexer is that you’re able to bring together multiple data sources into one Hub to achieve a single view of your customer.
Gone are the days of trawling through disparate data sources to try and create segments and personas to target for your growth strategies. Now you can simply log into the Hub, create a segment using your chosen attributes, and away you go!
In this article, we’ll walk through how you can build detailed personas in the Hub, based on a range of attributes that represent behaviors. The advantage to creating personas is that you can personalize your messaging to these groups, and choose the right products and content to send to them. You’re really tailoring your segmentation process and getting maximum return on your campaign investments.
Let’s get into it!
Understanding your data sources
In your Hub you have access to a variety of different data sources that have been transformed to create attributes.
To see which data sources are available to you in your Hub, navigate to Understand > Segment, which will bring you to the Segment Builder.
Then, click into the Attribute Picker, and to the right, you’ll see FILTER BY SOURCES. Here’s a list of all your data sources and their associated attributes.
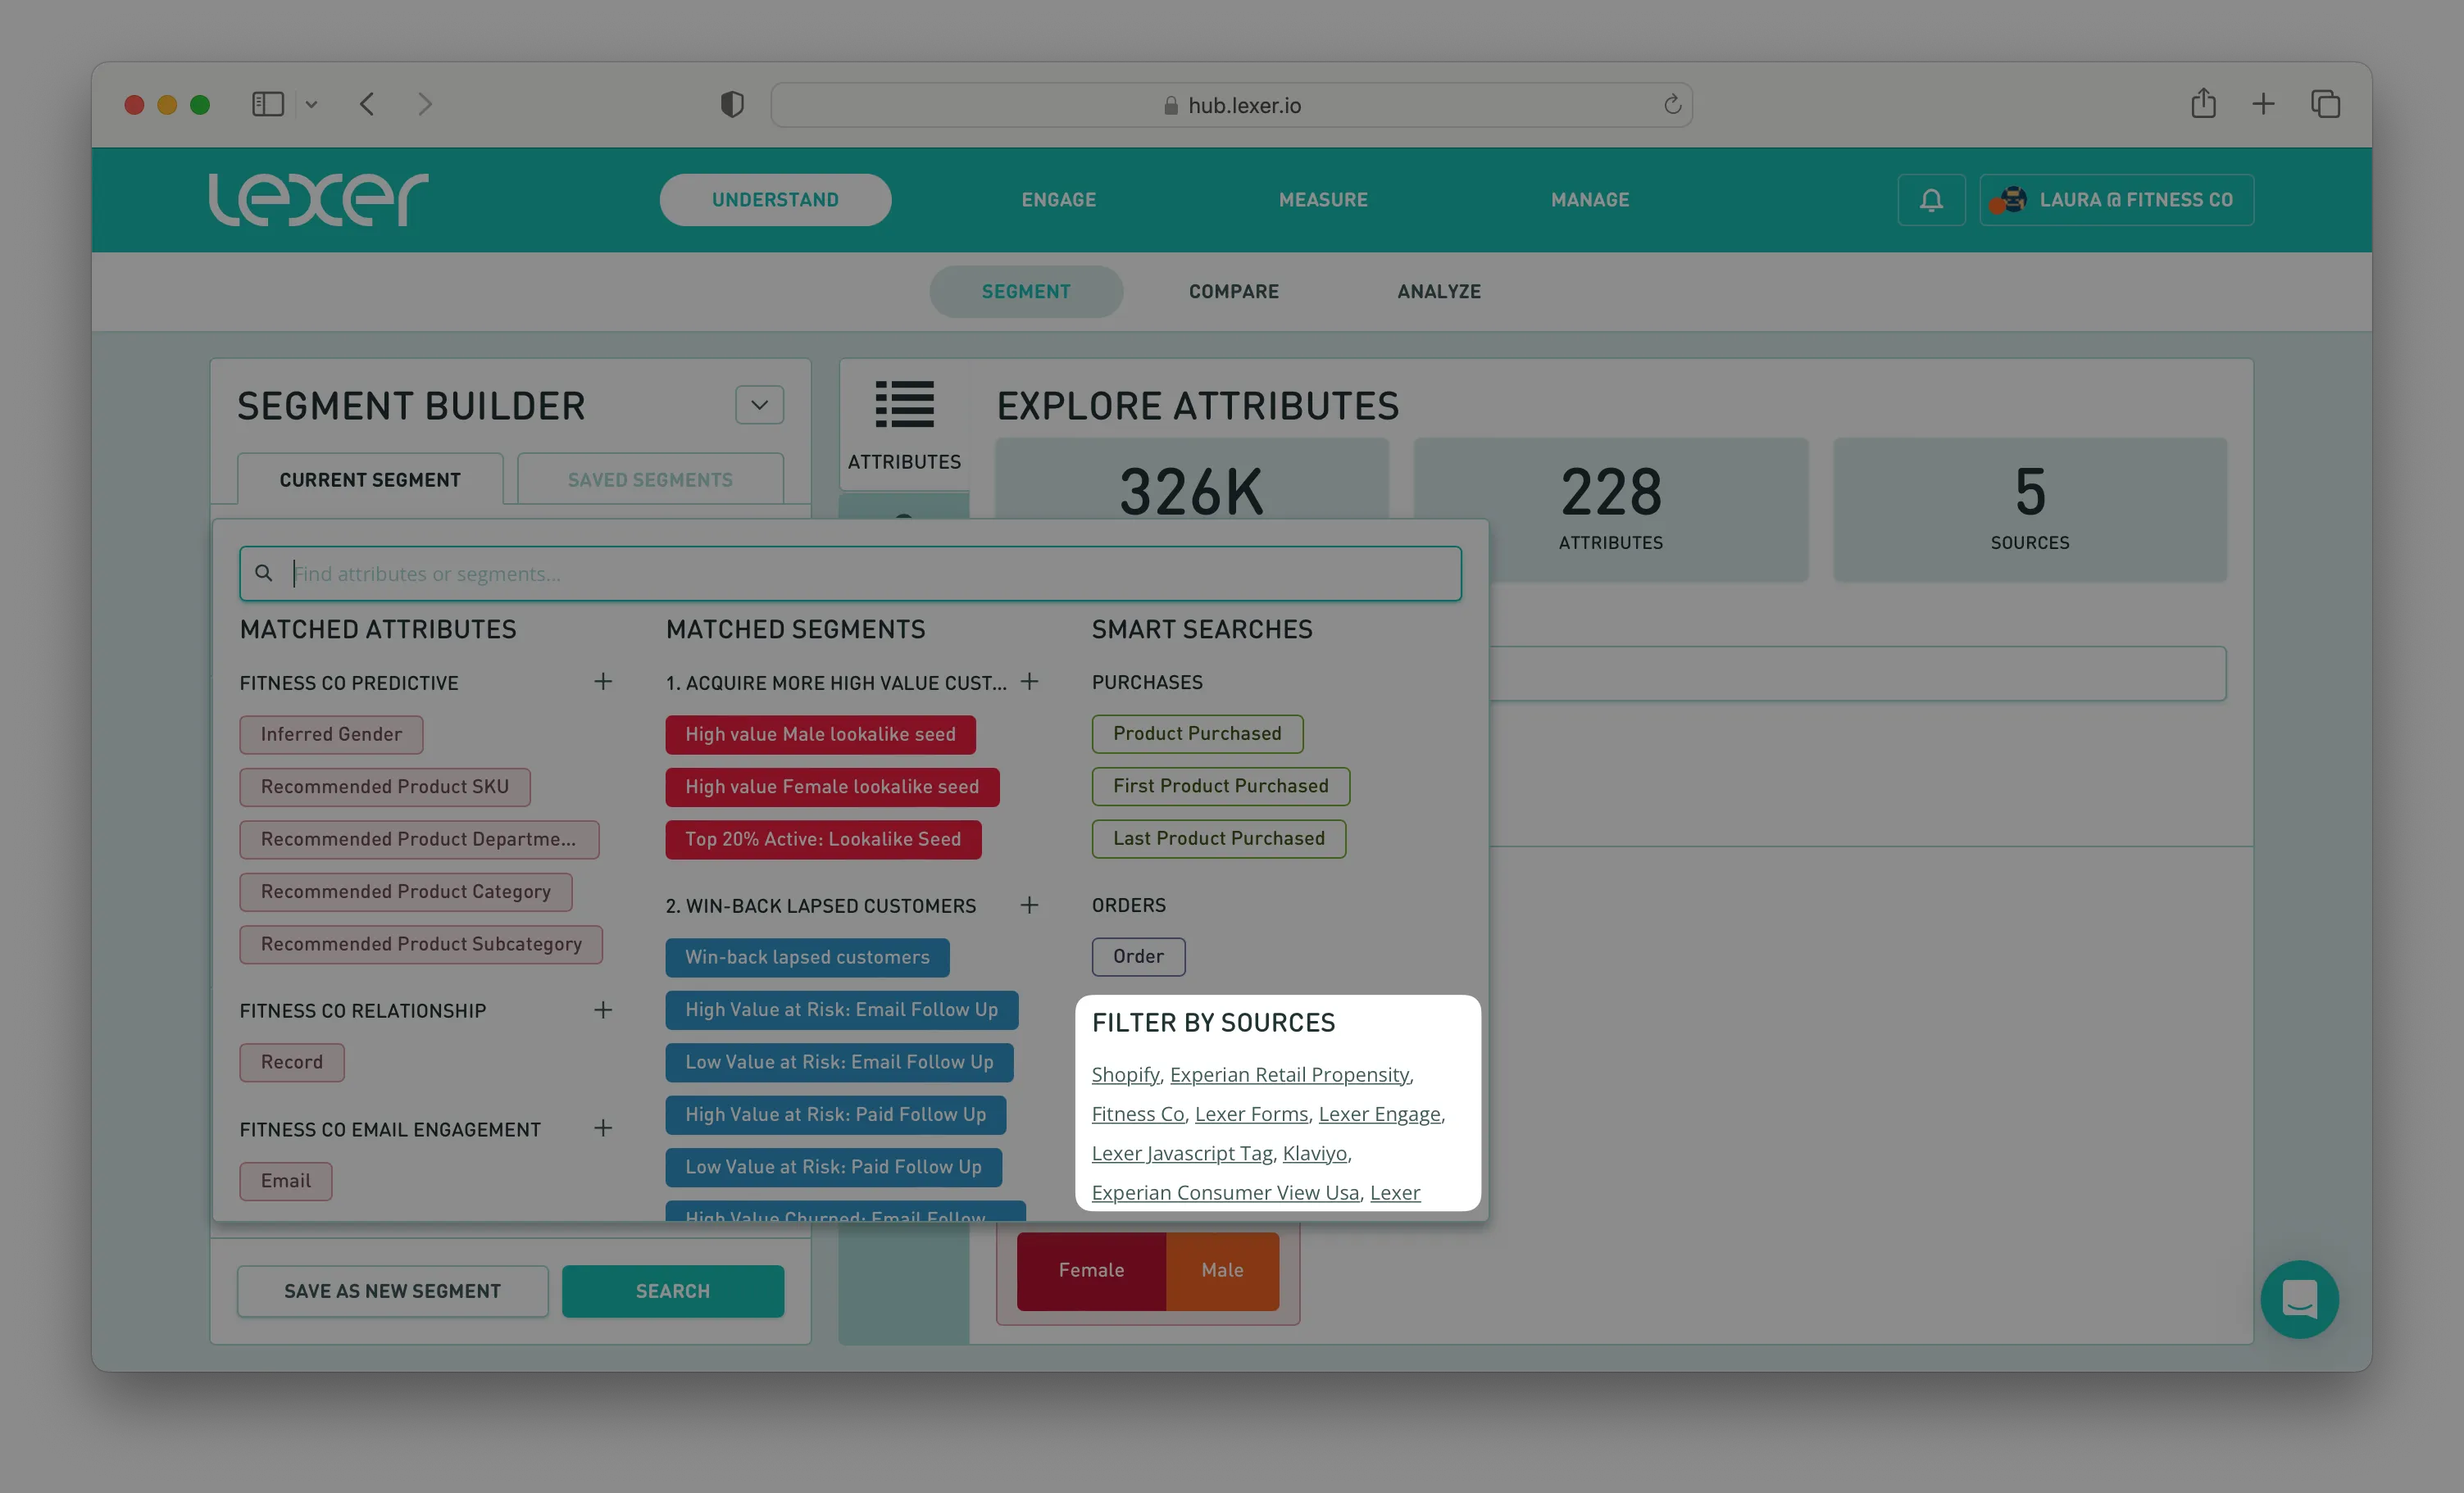
In our demo Hub, Fitness Co., you can see that we have data coming in from Shopify, Klaviyo, forms, Javascript Tag, and more. But remember, no two hubs are quite alike, so your data sources may differ to what you see in the screenshot.
These data sources represent certain customer behaviors. For example, Shopify data will give you attributes that speak to a profile’s product and order history, whereas Klaviyo data will give you attributes that speak to a profile’s email engagement history and preferences.
Using a combination of these behaviors in the SHOULD HAVE section of the Segment Builder means that you can create personas to use in paid and email campaigns to drive growth, using specific creative based on the behaviors you’ve identified in your personas.
Building your personas
A persona can be based on any number of things, for example, profiles who have purchased a specific item (product data), or spent over a certain amount of money with your brand (transaction data), or clicked on a specific email (email engagement data), or viewed a specific category on your website (Lexer Javascript Tag data). These parameters can be expanded to give you a multitude of options.
But, let’s get building and walk through some examples that showcase how you can create personas. We’ll be using our demo Hub, Fitness Co., but you can apply these same principles to your own Hub, even if your personas will be different.
Persona #1: Loves leisure wear
Our demo company, Fitness Co., is an activewear brand that specializes in stylish but practical workout gear. We also know that many of our customers wear Fitness Co. products outside of the gym or their exercise sessions, and they like our growing range of athleisure wear products.
With this in mind, we want to build a persona that embodies those who wear Fitness Co. products as leisure wear, rather than gym wear.
Firstly, we need to ask ourselves, what are the key behaviours of this persona?
- Someone who wears their Fitness Co. products outside of the gym (form data).
- Someone who has purchased from our athleisure wear range (product data).
- Someone who has purchased recently, say, in the last 12 months (transaction data).
- Someone who has spent > $300 over their lifetime as a customer (transaction data).
- Someone who has clicked on our athleisure wear email campaign (email engagement data).
Now, let’s jump into the Segment Builder and start putting together our attributes for this persona.
Each attribute will be added to the SHOULD HAVE area of the Segment Builder, and then using the dropdown you can specify how many of these attributes a profile in this persona should have.

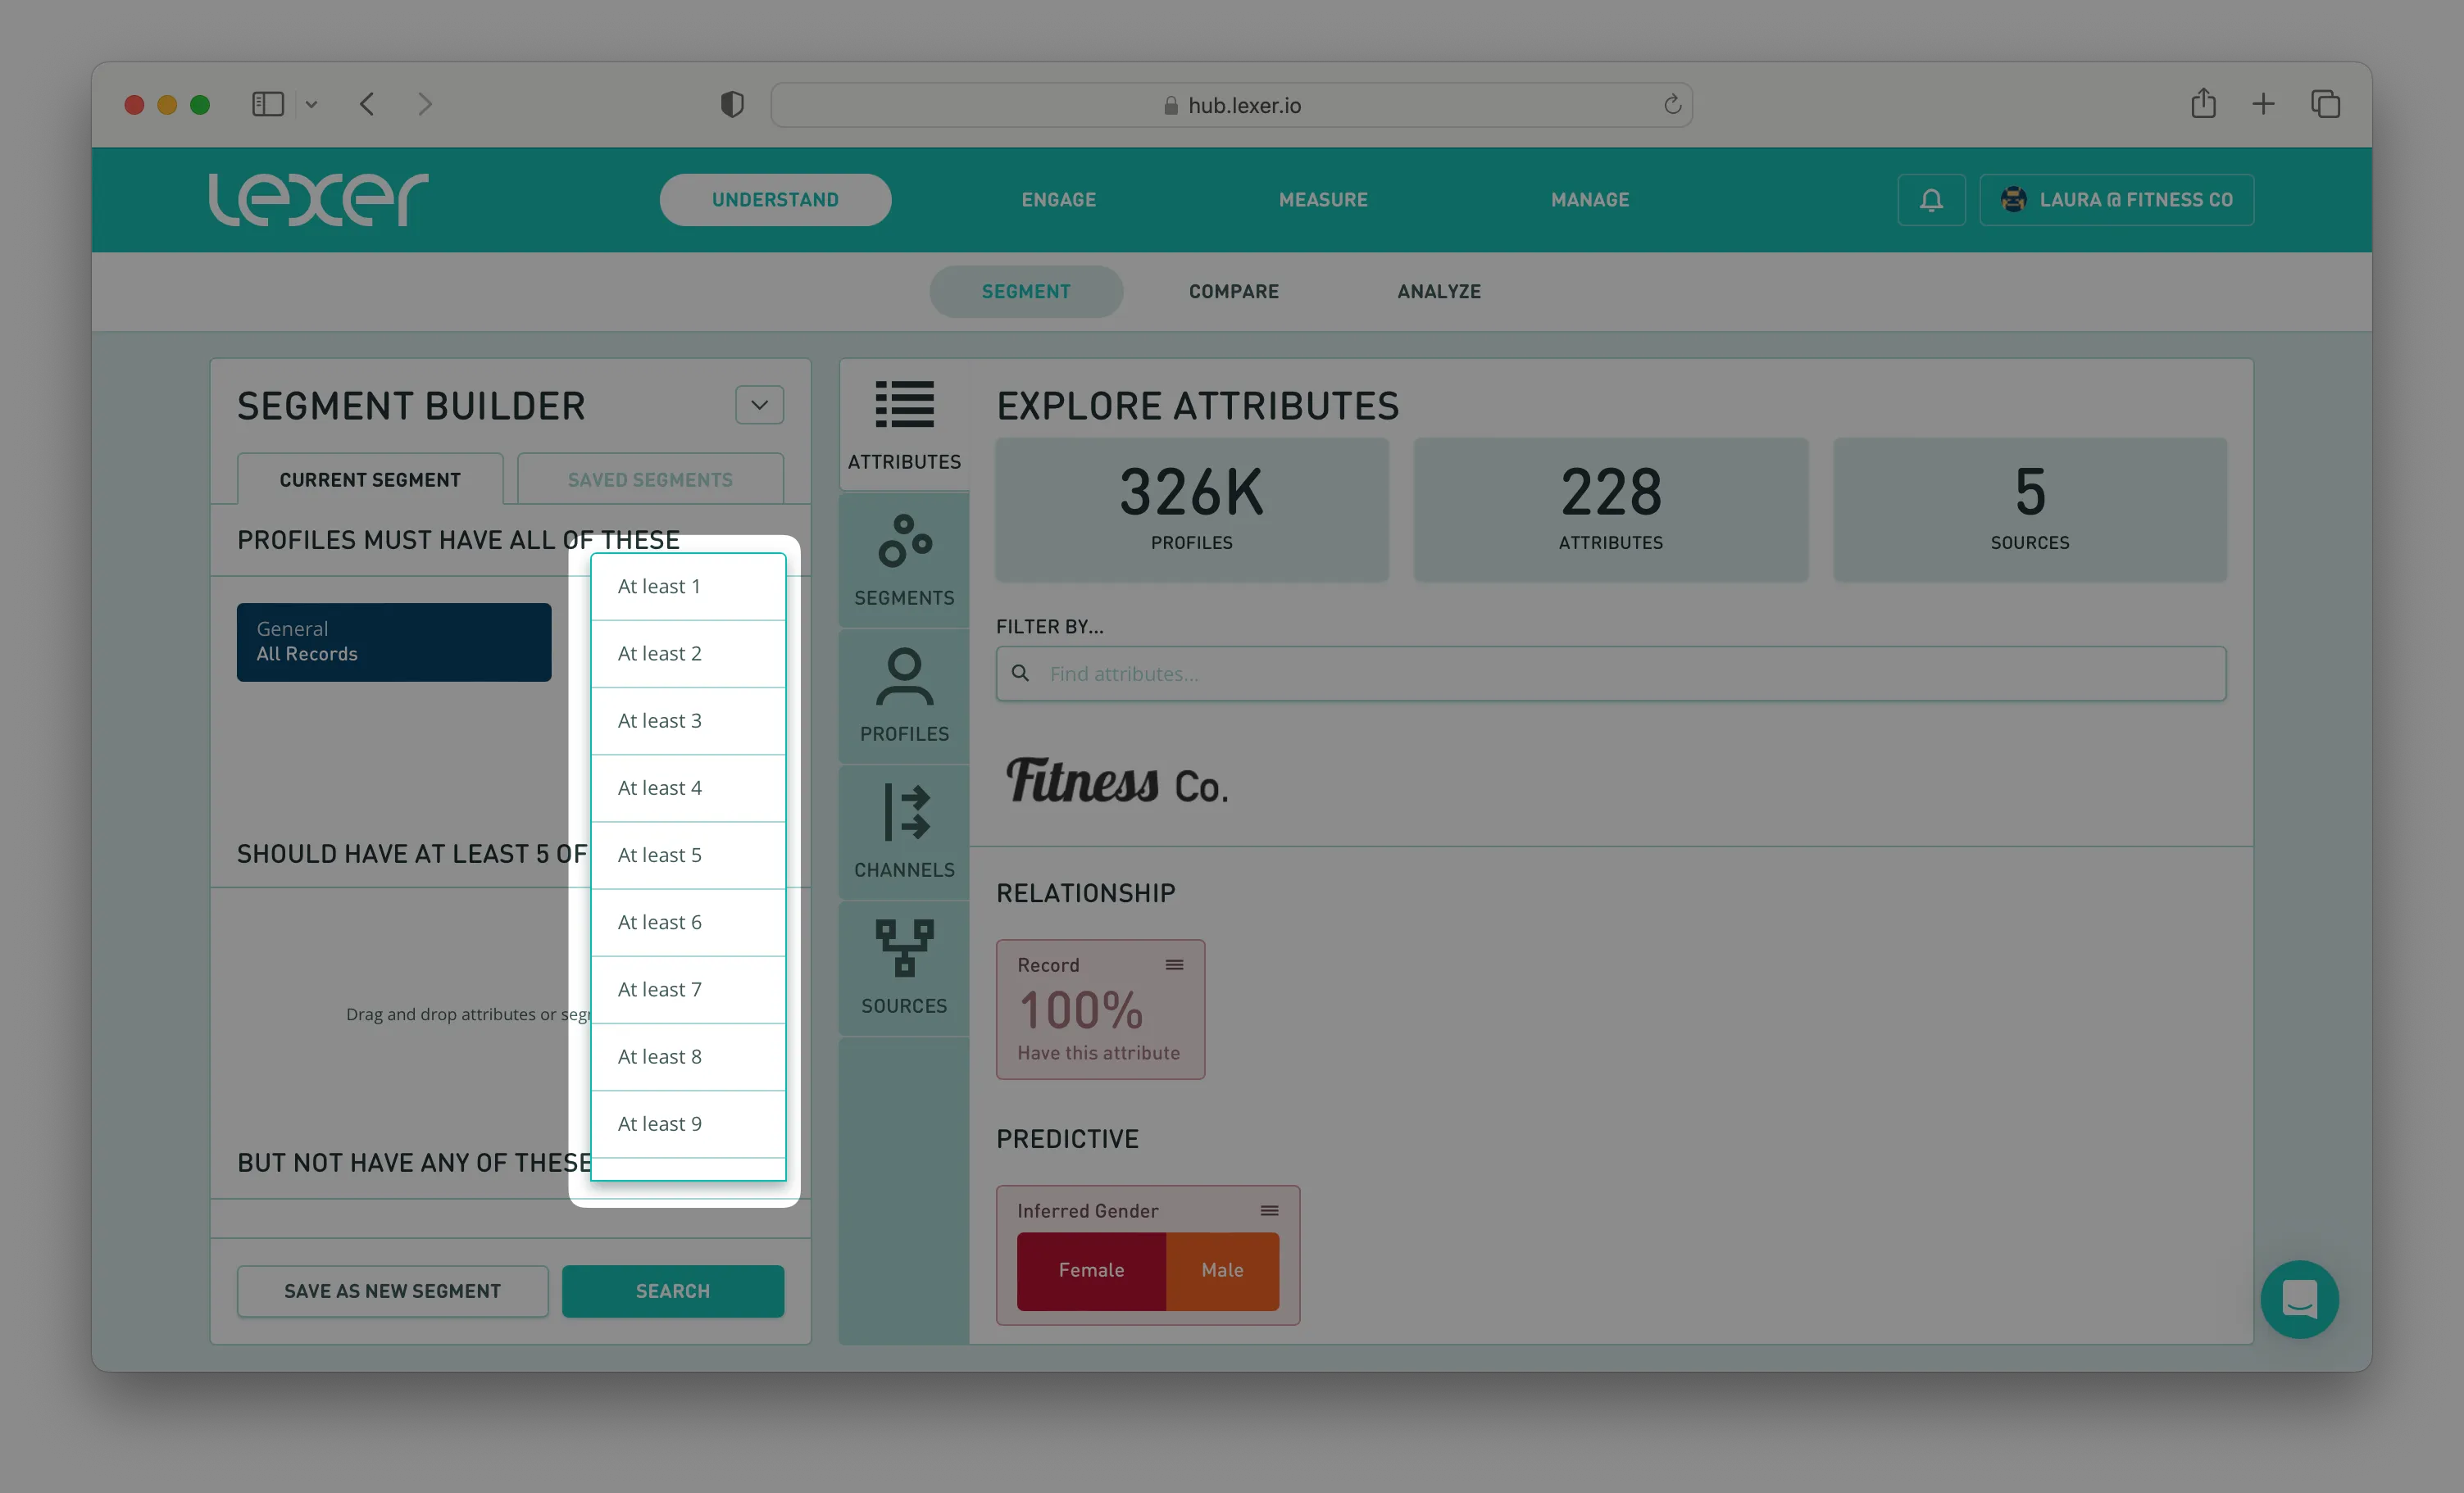
You can adjust this however you want, but for the purposes of this example we’ll say that the profiles in this persona should have at least two (2) of the attributes we’re including.

You can then save this persona by selecting SAVE AS NEW SEGMENT, and it’s ready to use in your activations!
You can activate them to your social or email accounts as an ongoing activation, so as a profile displays at least 2 of these behaviors they are entered into a persona-based journey for more specific content based on what they have purchased and interacted with.
Find out more about activations here.
Persona #2: The run club
For our next example, we’re going to get even more specific with our persona.
Fitness Co. is bringing out a new range of high-performance running gear, and we want this persona to embody committed and regular runners.
Again, we need to ask ourselves, what are the key behaviours of this persona?
- Someone who runs 3-4 times per week (form data).
- Someone who runs > 30 km per week (form data).
- Someone who has purchased Fitness Co. running gear in the past (product data).
- Someone who has clicked on the Fitness Co. “Runners Club” emails (email engagement data).
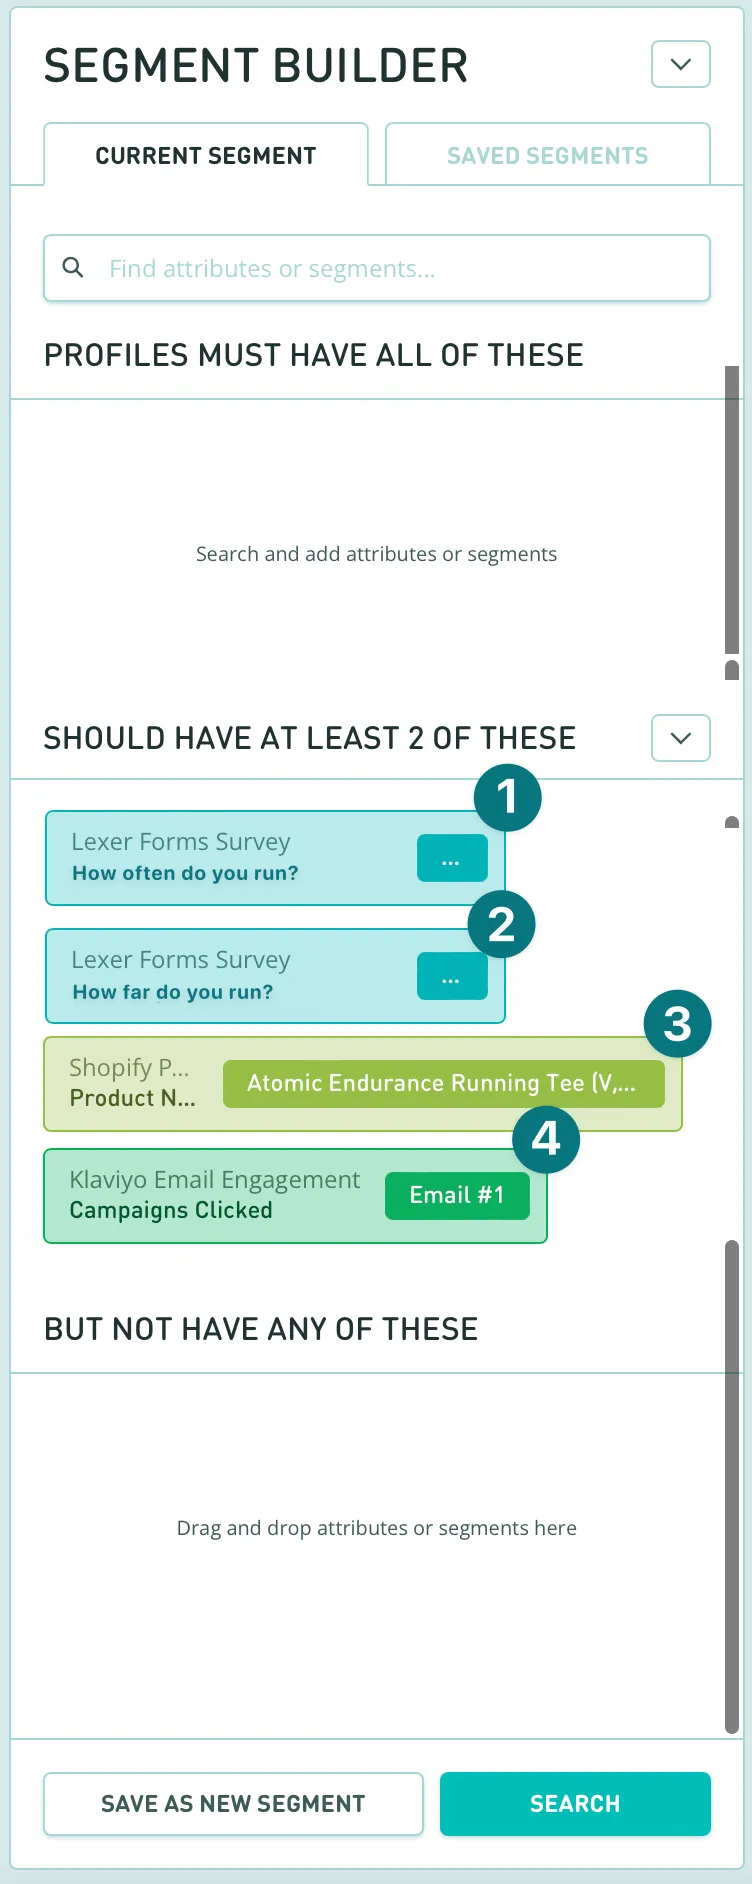
Now we can put together this persona in the Segment Builder. As with our first persona, we add our selected attributes to the SHOULD HAVE section of the builder, and then select how many of these attributes a profile “should have”. As with our first example, we’ll keep this at two.
You can then save this persona, and it’s ready to use in your activations!
Find out more here.
Determining crossover
Once you have saved your personas, you have the ability to check the percentage crossover with your other saved personas. This is really handy because you want to make sure you don’t have too much overlap, and too many profiles in more than one persona. If you find that you do have a lot of overlap, then you can adjust your personas to make them more specific.
Let’s walk through how to check crossover.
- Add one of your saved personas to the Segment Builder.
- Hit Search.
- Then select Segments from the pivots down the side of the screen.
- Scroll down to your personas, and then analyze the percentage overlap.
You’ll see in the screenshot below, using our example personas, we have around a 75% overlap between persona #1 and persona #2. This means we’ll have to go back and adjust one of them to make them more specific. For example, maybe our Run Club persona isn’t specific enough and we have to add a few more behaviors to the persona to really target the customers that we want.

For more information on how to edit and save a persona, we have an article here.
Leveraging your attributes to build personas
And that’s it! This is how you can build personas in the Hub. While the examples we used today might be specific to our demo Hub, the theory is the same when it comes to building out your own personas in your own Hubs: Identify your key behaviours and then add the relevant attributes to match these.
Happy building! And if you have any questions, feel free to reach out to your Success Manager, or Lexer Support.
