
Campaign Monitor
This integration is in beta
As with all beta tests, not everything will be perfect. If you run into any issues, please submit a support ticket.
Connect your Campaign Monitor account with Lexer
Campaign Monitor is an email marketing platform that belongs to CM Group’s family of brands. In this article, we'll show you how to connect your Campaign Monitor account with Lexer, which will permit Lexer to import your contacts from Campaign Monitor as enriched Profiles.
Benefits of a Campaign Monitor integration
Integrating your Campaign Monitor account with Lexer provides a number of benefits, such as:
- Importing your contacts as enriched Profiles.
- Syncing your Lexer Segments with Campaign Monitor.
- Providing enriched data back to Campaign Monitor.
Integration in a nutshell
Here's a summary of how Campaign Monitor integrates with Lexer:
Direction
What direction does the data flow?
✅ Data in: import your contacts as enriched Profiles
✅ Data out: provide enriched data back to Campaign Monitor
Type
Lexer loads these types of data
⬜️ SMS
Source method
How Lexer loads data from this source.
✅ API
Destination method
How Lexer sends data to this source.
✅ API
Status
What is the status of the integration?
Full Release
Lexer product compatibility
What Lexer products is the integration compatible with?
✅ Activate
✅ Compare
✅ Segment
✅ Track
⬜️ Listen
⬜️ Respond
⬜️ Serve
Attributes
No attributes will be created as part of this integration.
Attributes
This integration allows for some flexibility, the output of the integration depends on your available data and what you send through to Lexer. In addition, your attributes could be named in a different way to other clients. If you would like a list of attributes related to this integration, please email your Success Manager.
Attributes
What attributes are created when integrated with Lexer?
Campaign Monitor Personal Information
✅ Name
Campaign Monitor Email Engagement
✅ Email Engagement Category
✅ List Name
✅ Client Name
✅ Subscribe Date
✅ Campaign Name
✅ Email Click Rate
✅ Number of Emails Sent
✅ Email Open Rate
✅ Active in Lists
✅ Undeliverable in Lists
✅ Date of Last Open
✅ Open Date
✅ Click Date
✅ Date of Last Click
✅ Last Email Click
✅ Last Email Open
✅ Email Opt-In Status
✅ Email Source
✅ Campaigns Clicked
Attributes
These are the standard attributes that Lexer can create from the data received via this integration. The exact attributes will depend on what data is made available and sent into Lexer. Keep in mind, your attribute names may vary slightly. If you have any questions or would like to explore custom options, please contact your Success Manager.
Customer attributes
Address 1
Address 2
Avatar
Bio
Birth day
Birth month
Birth year
City
Communication opt in
Country
Customer id
Date of birth
Employee flag
Engage id
First name
Full name
Gender
Generation
Identity search
Inferred gender
Last name
Mobile
Next birthday
Postcode
Provider id
Record
State
Username
Zip
Email engagement attributes
Email campaigns clicked
Email campaigns opened
Email campaigns sent
Email click date
Email click rate
Email deliverability status
Email engagement category
Email last click date
Email last open date
Email open date
Email open rate
Email opt in status
Email sent
Email subscribe date
ESP record
SMS event attributes
Transactional attributes
Product attributes
How do I integrate Campaign Monitor?

- Select the Campaign Monitor tile.
- Click INTEGRATE CAMPAIGN MONITOR.
- Enter your Campaign Monitor credentials and click Continue.
What is a Campaign Monitor activation?
The Campaign Monitor activation allows you to securely send customer data from Lexer to your connected Campaign Monitor accounts. You can:
- Create new Subscriber lists.
- Update existing lists.
- Update Custom Fields.
- Create new Segments.
The activation is configured with two options, CDP Sync, and Create Segment. When activating to Campaign Monitor, you only ever need to select “Create Segment” which will push across your Lexer audience, create a Segment, and allow you to build your campaign. Once the Segment is created in Campaign Monitor, the CDP Sync will twice daily “sync” your contact data and populate the Segments within Campaign Monitor.
Configuring Campaign Monitor
You will need to make two custom fields on each List in Campaign Monitor you plan on sending data to.
When creating the Multiple Options field, be sure to populate it with at least one option otherwise Campaign Monitor will give you an error. Whatever option you add now, you can always remove it once you've started syncing your Lexer Segments.
The below GIF steps you through creating a new list and adding the necessary custom fields.
- Navigate to Lists and Subscribers.
- Select Create a new list.
- Give your list a name, leave it as single opt-in and click create list.
- Select Custom Fields.
- Add your two fields (Lexer Segments = Multi select, and Latest Lexer Audience = Text).
- You’re done!
Segments, Custom Fields, and Lists
Within Campaign Monitor, your contacts (known as subscribers) exist within Lists. Each List has its own unique Custom Fields, which in turn can influence customer Segments created within your List.
When delivering email campaigns, you select a List to send to, target a Segment within the List, and then personalize your email copy using Custom Fields to include your customers name, birthday, loyalty status, and so on.
Campaign Monitor terminology
How do I activate to Campaign Monitor?
Before you get started, make sure you’ve done the following:
- Integrated your Campaign Monitor account with Lexer.
- Configured your Campaign Monitor List.
- Created an activation to Campaign Monitor (reach out to Lexer Support(support@lexer.io) if not).
- Built your Segments in Lexer Segment.
Activate and create a Segment in Campaign Monitor
To create a Segment within Campaign Monitor, you need to first navigate to Lexer Activate.
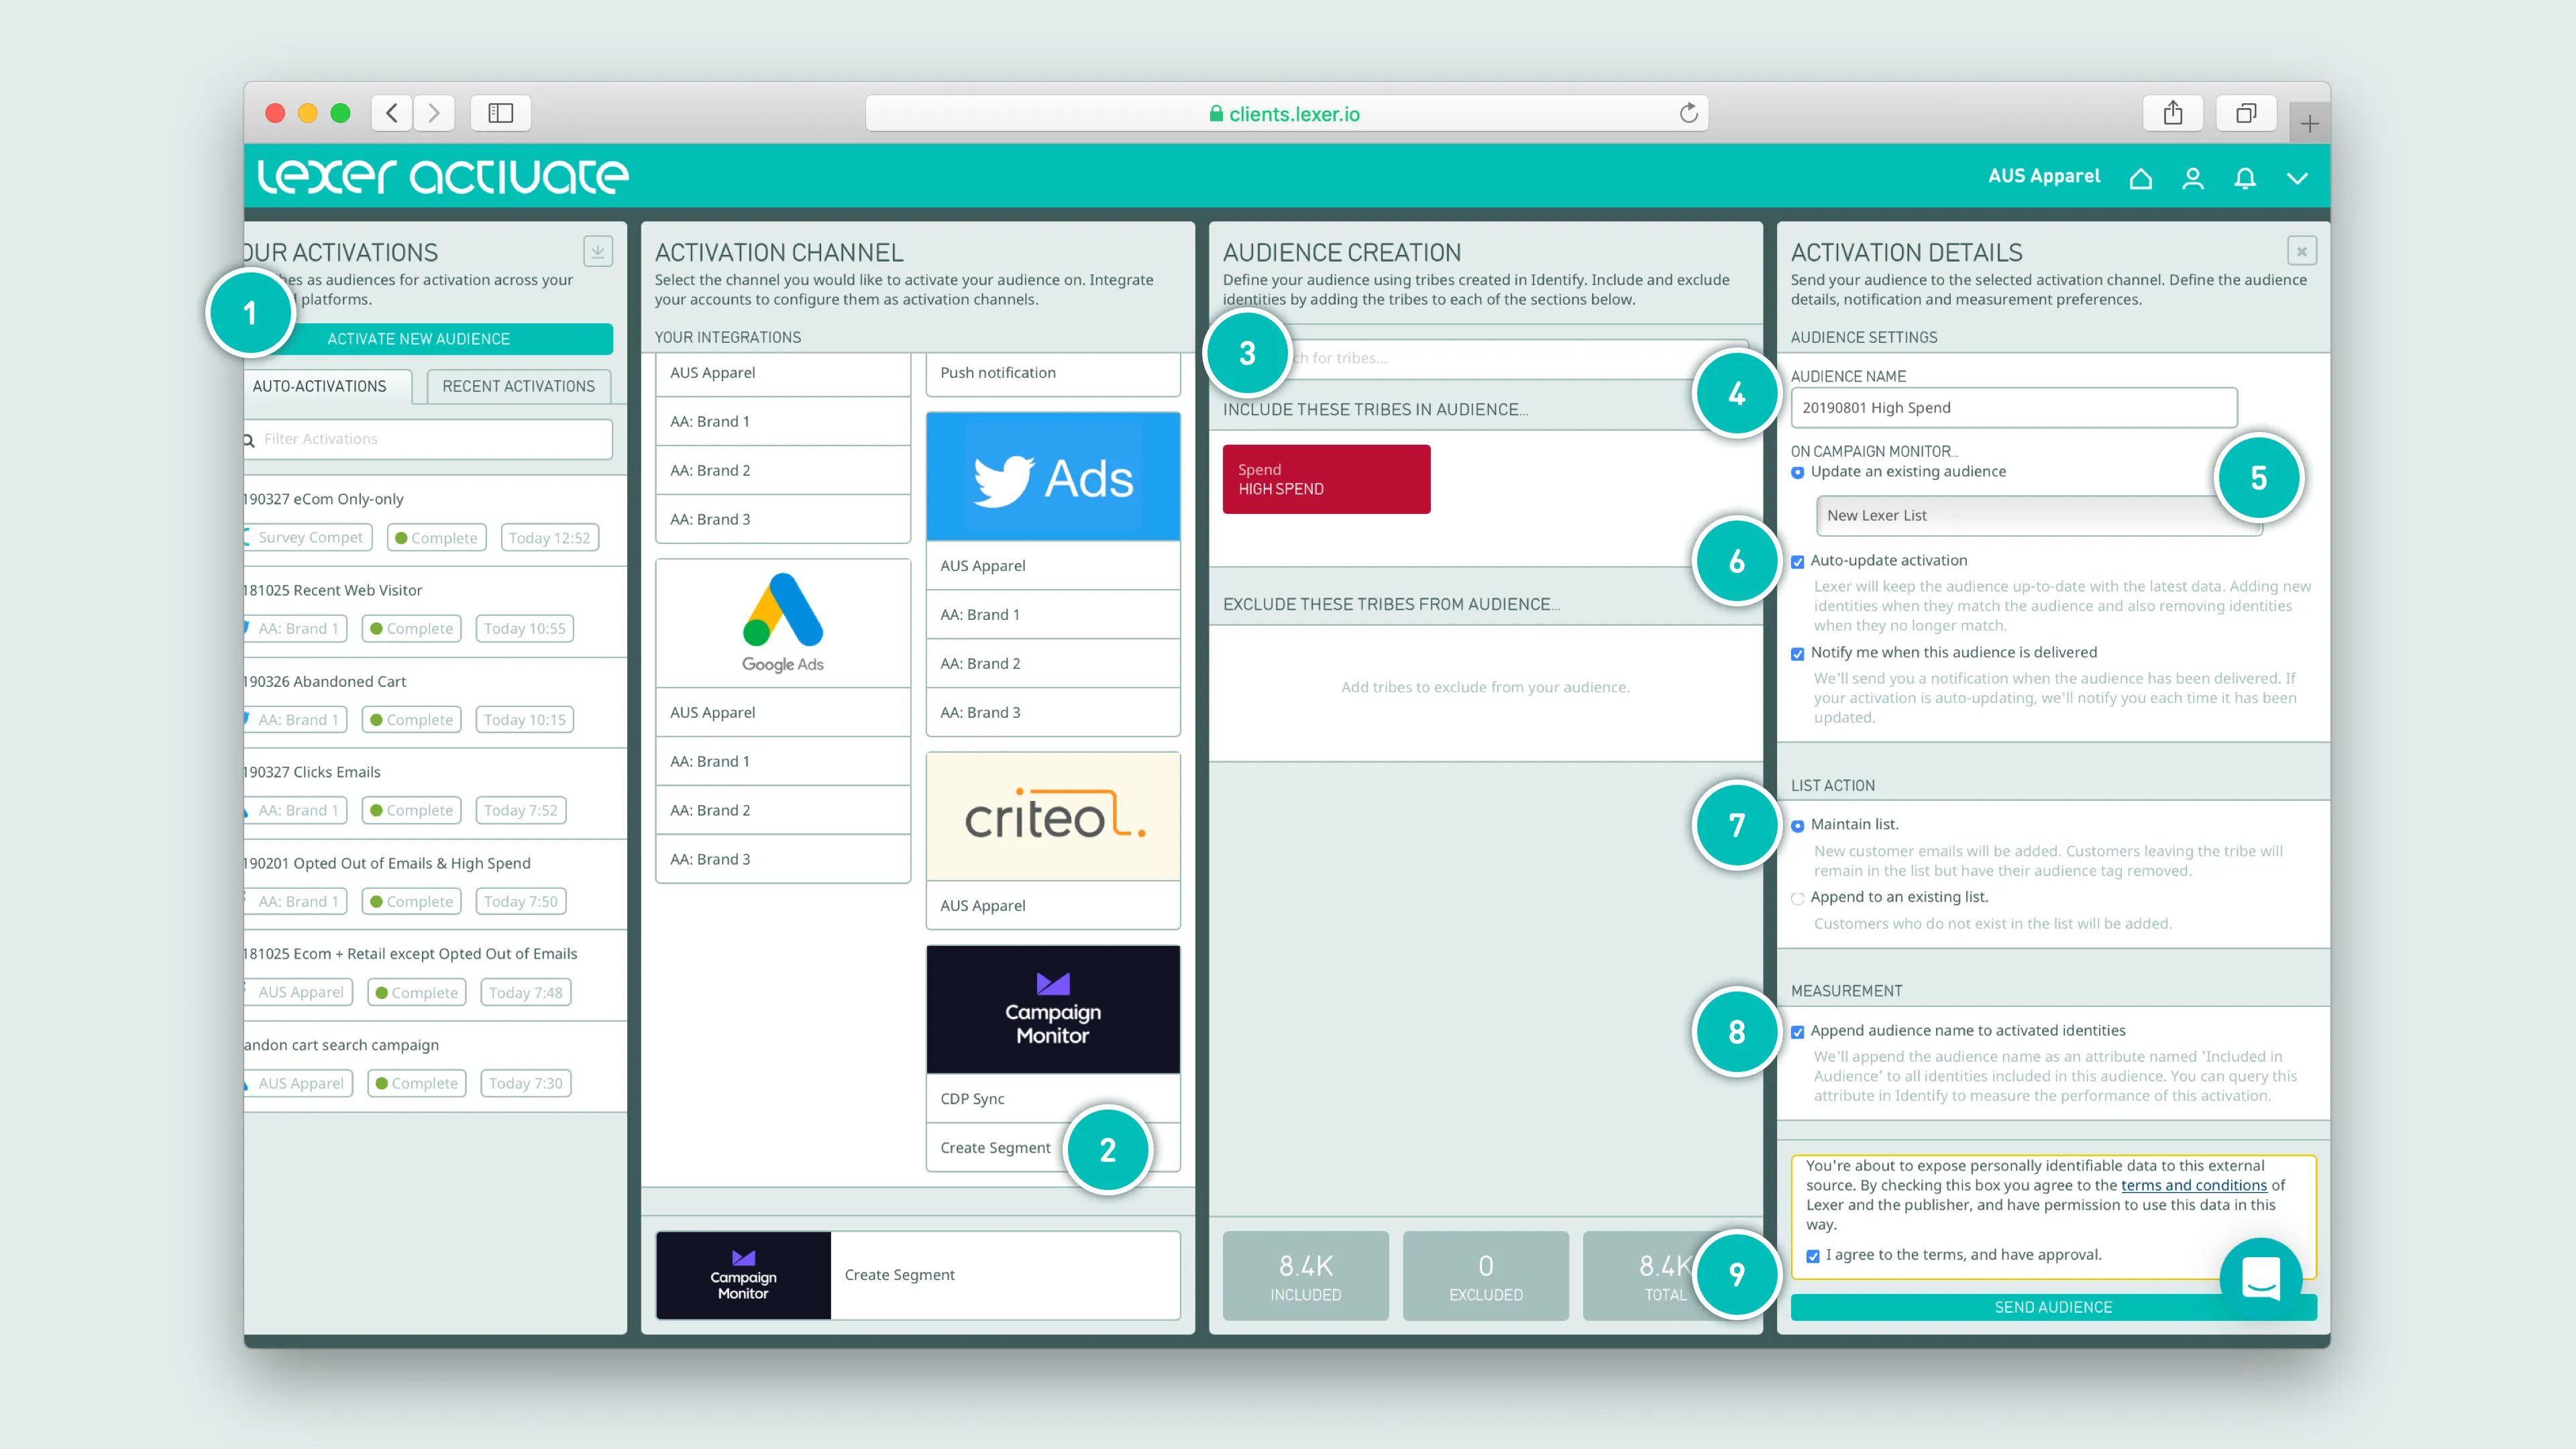
- Click ACTIVATE NEW AUDIENCE to get started.
- Select the Create Segment activation option.
- Add your Segment.
- Update the audience name (this will become your Segment name).
- Pick your Campaign Monitor List to update.
- If you want to keep this audience updated, check “auto-update activation”.
- Set the audience action to Append to an existing list.
- Feel free to uncheck Audience measurement attributes, only for your CDP Sync.
- Agree to terms, and click SEND AUDIENCE.
Activate and sync your data with Campaign Monitor
We also support a CDP Sync, which will twice daily push across specific data points chosen by you to enrich your Campaign Monitor database.
This is intended to be set up once, and let run automatically “in the background”. Below we step you the process the first time you need to set this up for a list.
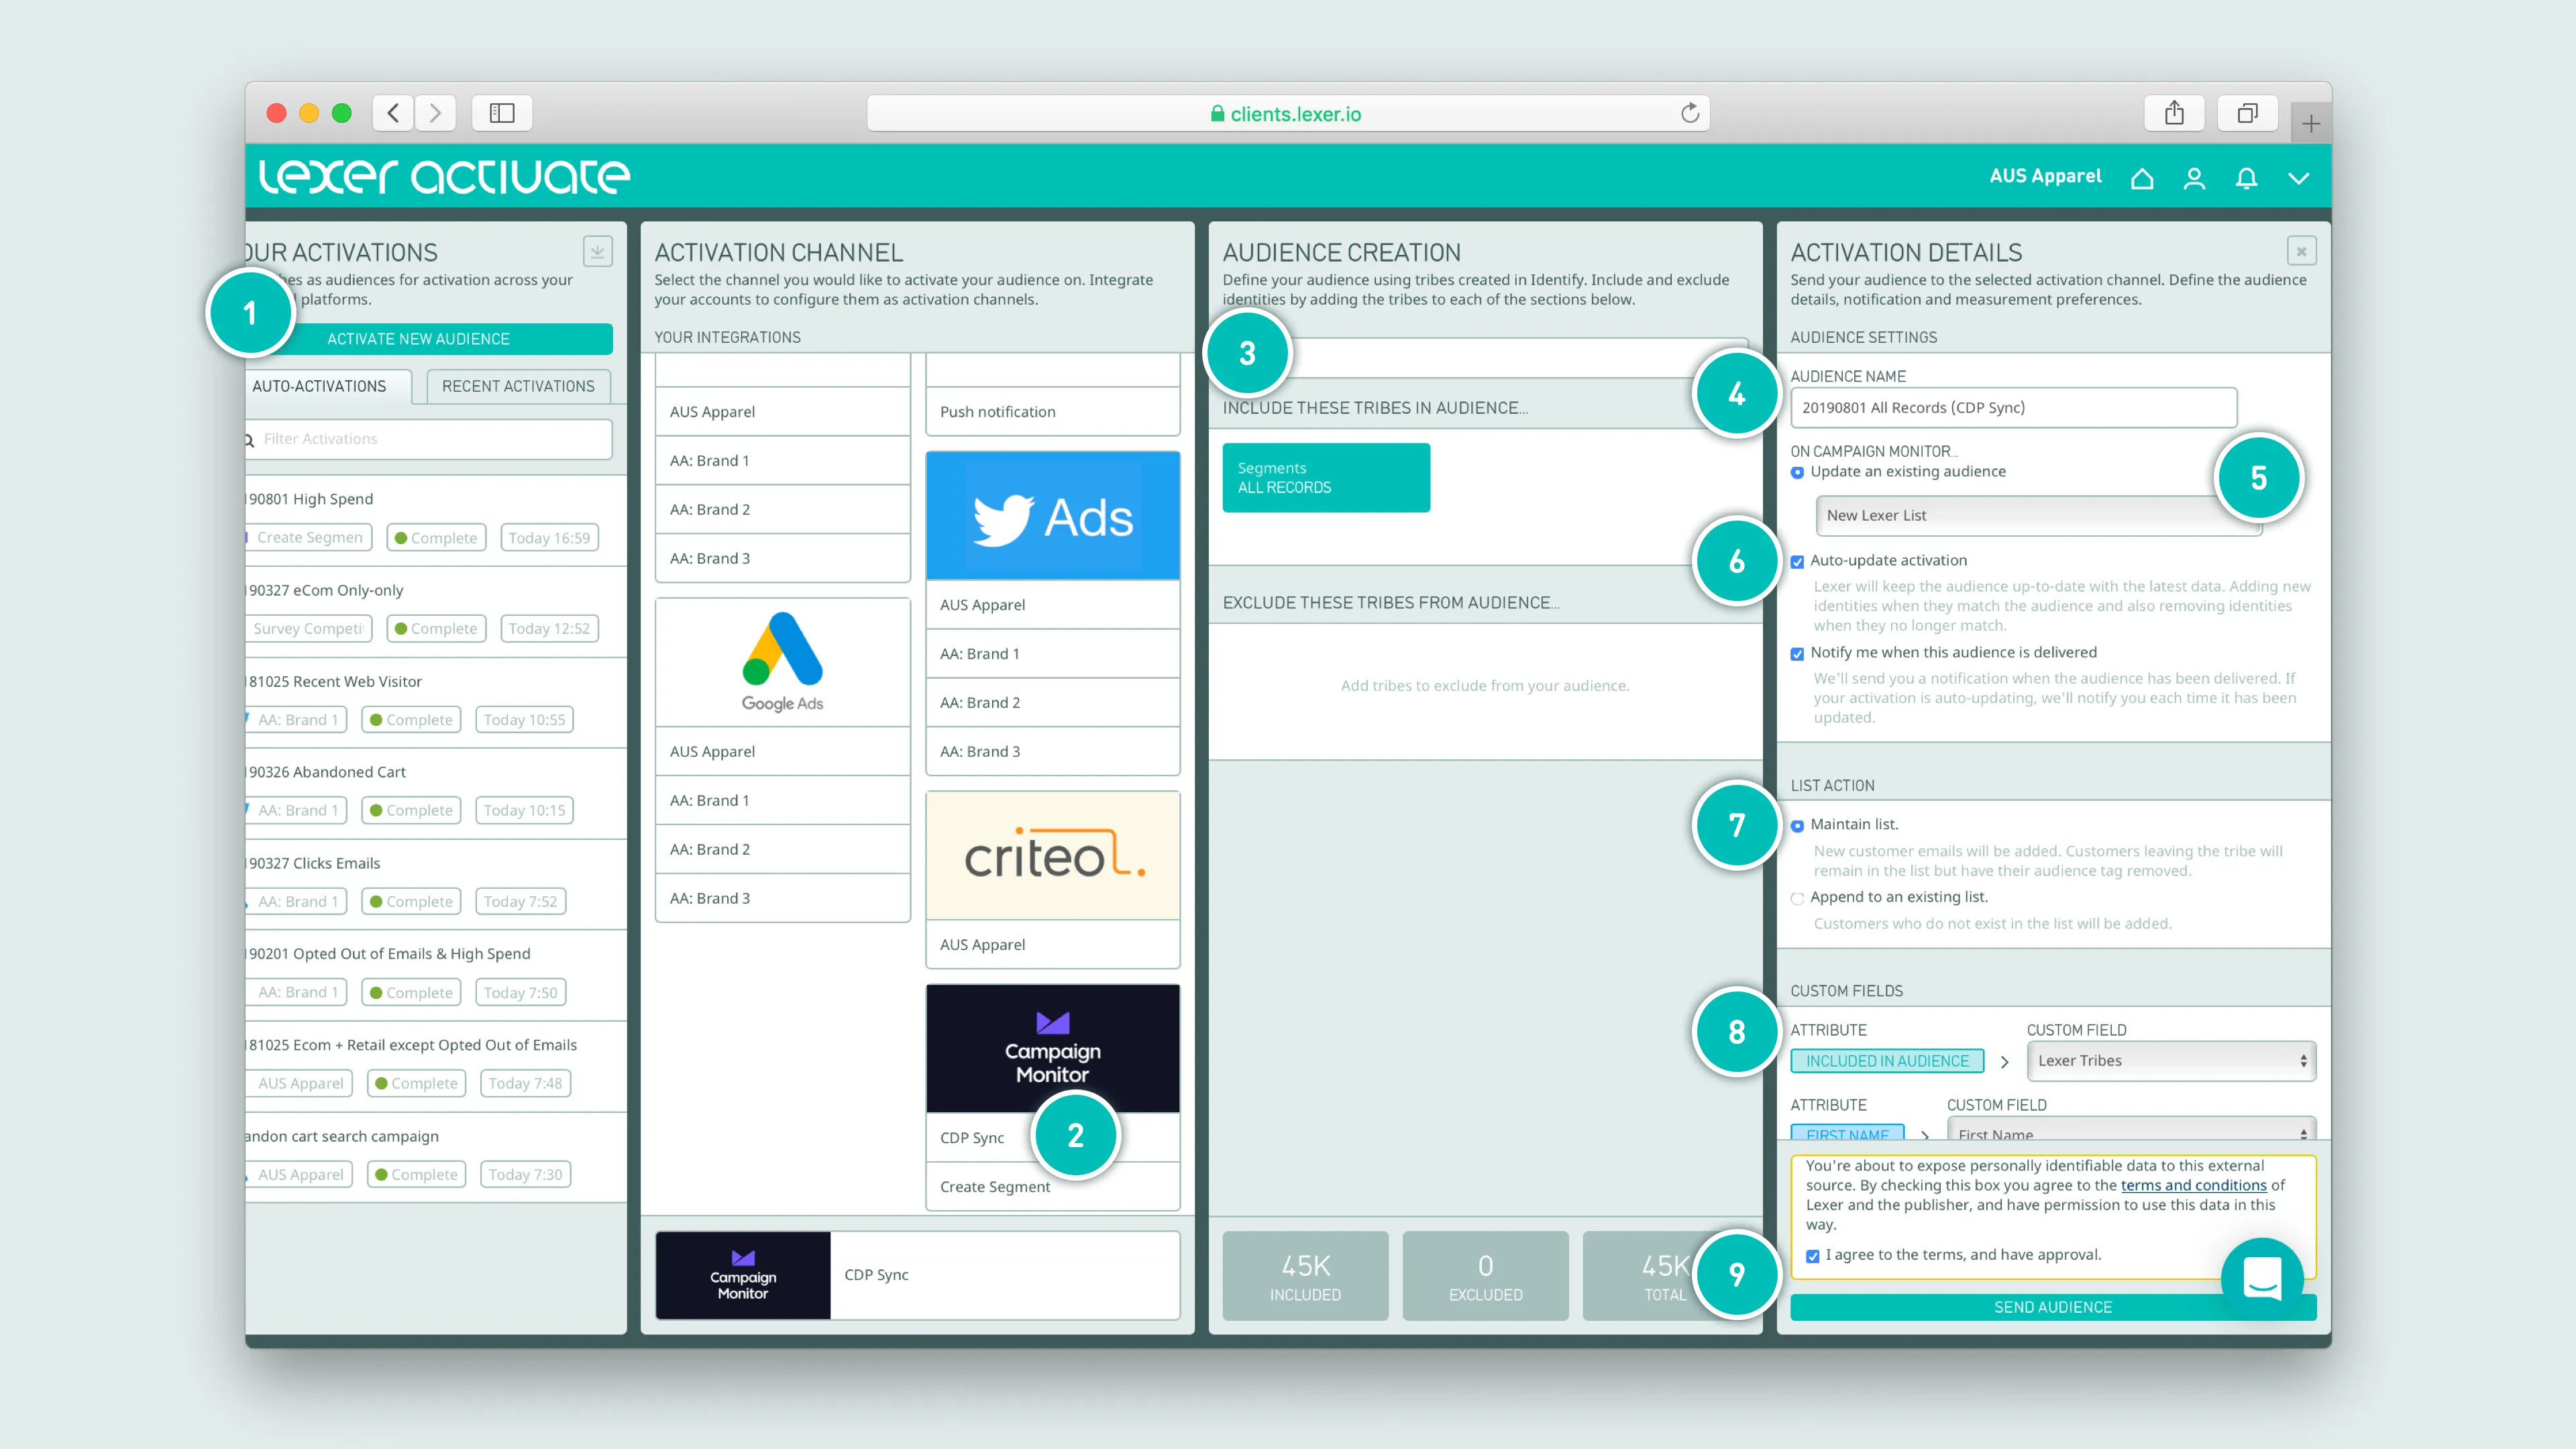
- Click ACTIVATE NEW AUDIENCE to get started.
- Select the CDP Sync activation option.
- Add your “Customer Universe” Segment (containing all your customer records).
- Update the audience name (we suggest adding CDP Sync).
- Pick your Campaign Monitor List to update.
- Check “auto-update activation”.
- Leave this set to Maintain list.
- Map each ATTRIBUTE to it’s correct CUSTOM FIELD (ensure Include in audience is pointing at the Lexer 9. Segments custom field).
- Agree to terms, and click SEND AUDIENCE.
The GIF below will also show you this process.
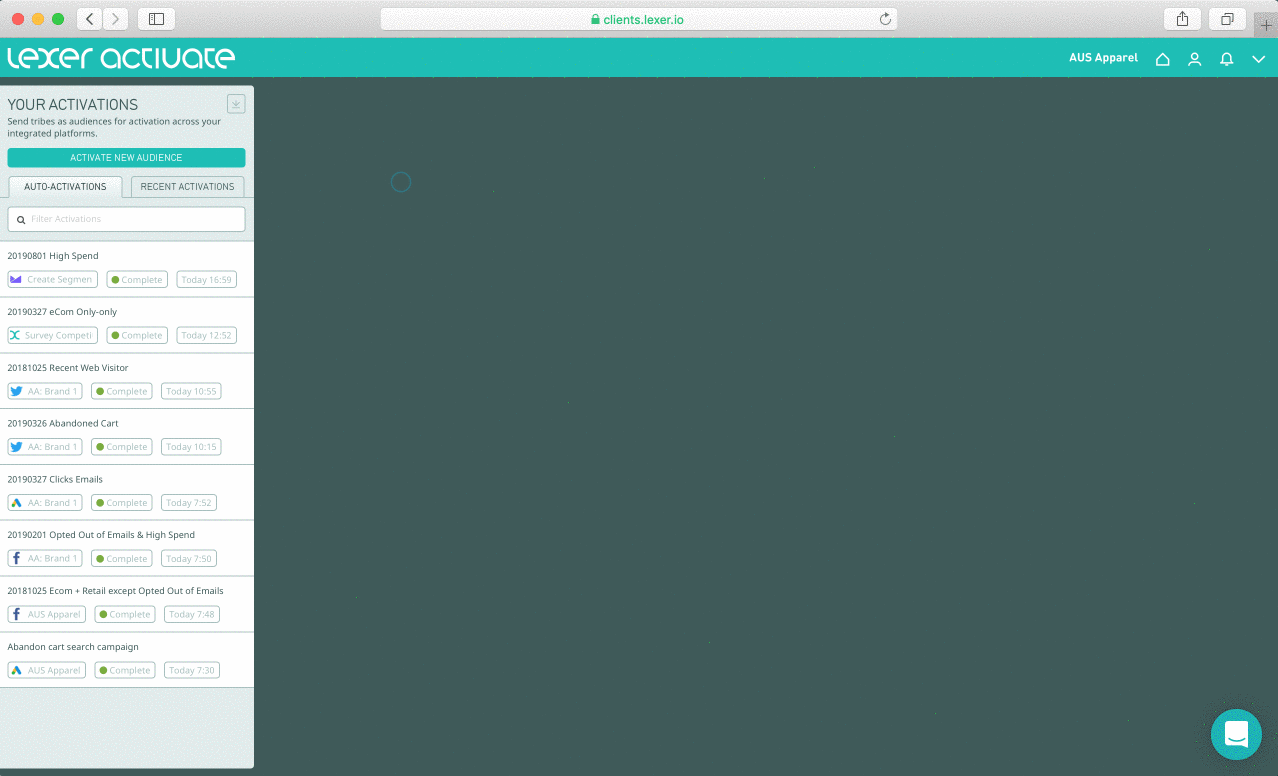
Set and forget — auto-updating audiences
Lexer Activate permits you to automatically update your lists and contacts within Campaign Monitor. With this selected, Lexer will add or remove customers from your list, as customers enter and leave your Segment.
Okay I’ve sent my audience, what next?
The moment your activation has been confirmed as sent in Activate, you’ll see records begin to update in Campaign Monitor. We’ll send you an email to let you know once an audience has been sent — the time this takes will vary, depending on the size of the audience.
Congratulations! Your Campaign Monitor should now be integrated and activated in Lexer. We've gone through what Campaign Monitor is, the type of integration it is, its benefits, and how to integrate and activate it. There's a lot of steps to follow here and if you feel stuck or confused please don't hesitate to reach out to Lexer Support (support@lexer.io) if you need any help.